Loading ...
Loading ...
Loading ...
35
• Broil one side until the food is browned; turn and
cook the second side. Season and serve.
• Always pull the rack out to the “stop” position
before turning or removing food (see “Regular
rack”).
Convection Roast function tips
• Convection roast combines a cook cycle with the
convection fan and heating element to rapidly
roast meats and poultry. Heated air circulates
around the meat from all sides, sealing in juices
and flavors. Meats cooked with this function are
crispy brown on the outside while staying moist
on the inside. In addition, there is no need to
reduce the oven temperature when using con-
vection roast.
• The Convection Roast function is optimized for
multiple oven rack cooking.
• Place an oven rack in position 2 (next up from
bottom).
• Please refer to the “Convection Roast function
cooking table” for temperature and time instruc-
tions when cooking with this function.
• Do not cover foods when dry roasting - this will
prevent the meat from browning properly.
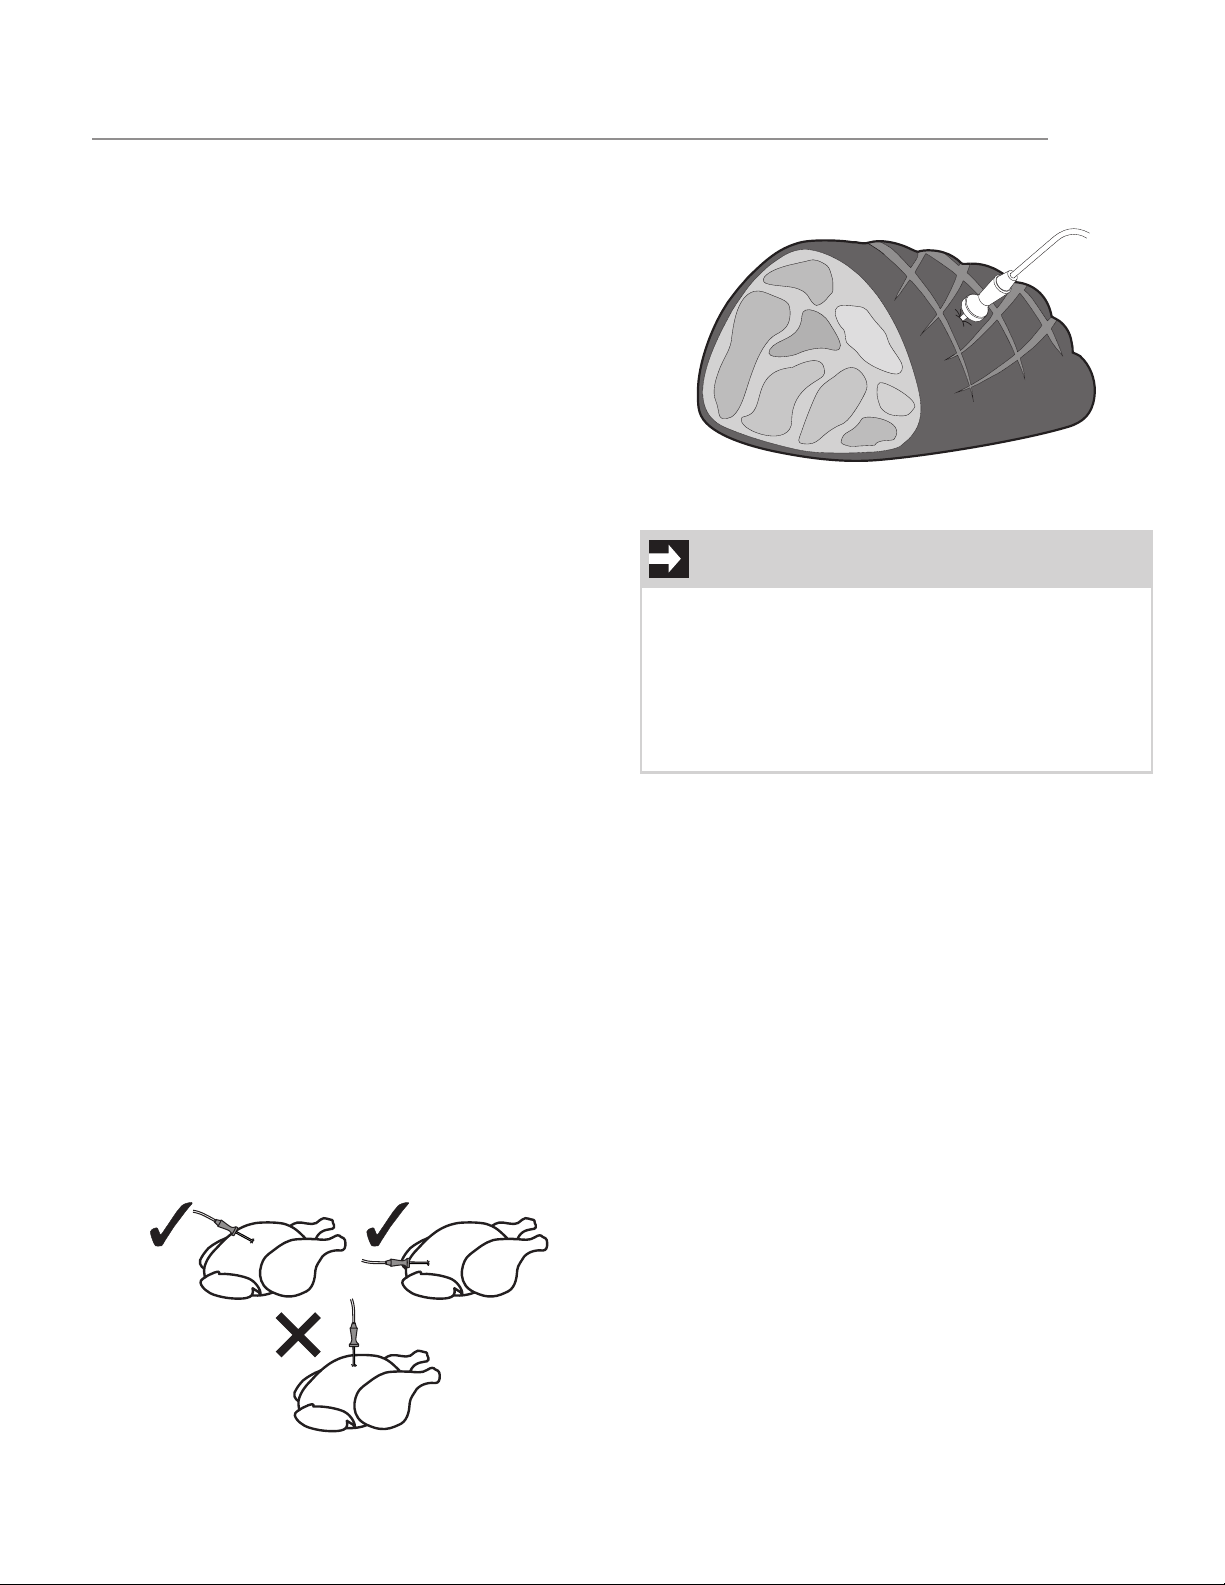
Meat probe cooking tips
• For some foods, especially poultry and roasts,
testing the internal temperature is the most effec-
tive way of insuring that your food has been
properly cooked.
• For bone-in ham or lamb, insert the probe into
the center of the lowest large muscle or joint. For
dishes such as meat loaf or casseroles, insert the
probe into the center of the food. When cooking
fish, insert the probe just above the gill.
• For whole poultry or turkey, insert the probe into
the thickest part of the inner thigh, below the leg.
• In general, place the temperature probe trans-
versely in the thickest part of the food and for
least 3/4 of its length.
• For very thick pieces of meat, take care to insert
the entire length of the probe to ensure correct
temperature detection.
User settings menu
The user settings menu allows you to set the following
parameters (displayed in this order):
1. Child lock mode:
The child lock mode allows you to lock the oven con-
trols to prevent the appliance being activated uninten-
tionally.
2. Demo mode:
This mode deactivates all the heating elements of the
appliance, keeping the controls active. It is designed
to simulate the operation of the appliance and is
intended for exhibitors.
3. Temperature units:
This feature allows you to set the unit of measurement
of temperature, degrees Celsius (°C) or degrees Fahr-
enheit (°F).
4. Time format:
This feature gives you the option to display the time in
12h format with AM/PM indication or 24h format.
IMPORTANT
• To access the settings menu, you must first
have to turn on the oven light and then press
and hold the oven temperature knob for a few
seconds.
• To exit from the settings menu, press and hold
the temperature knob until the display goes
into standby mode.
USING THE OVEN
Loading ...
Loading ...
Loading ...