Loading ...
Loading ...
Loading ...
Westinghouse Outdoor Power Equipment, LLC | 23
MAINTENANCE
DRAINING THE FUEL TANK
If storing the generator for longer than six months, drain
the fuel tank to prevent fuel separation, deterioration, and
deposits in the fuel system.
1. Unscrew the fuel tank cap. Remove the fuel screen lter
by slightly compressing it while removing it from the
tank.
2. Using a commercially available gasoline hand pump
(not included), siphon the gasoline from the fuel tank
into an approved gasoline container. DO NOT use an
electric pump.
3. Reinstall the fuel screen lter and the fuel tank cap.
4. Start the generator and allow it to run until the generator
engine stops.
5. Push the battery switch to the OFF position.
6. Disconnect the battery quick-connect plugs.
7. Remove the spark plug.
8. Put a teaspoon of engine oil into the cylinder and pull the
recoil handle until resistance is felt. At this position the
piston is coming up on its compression stroke and both
valves are closed. Storing the engine in this position will
help prevent internal corrosion. Return the recoil handle
gently.
9. Reinstall the spark plug. Leave the spark plug boot
disconnected to prevent accidental starting.
VALVE CLEARANCE
NOTICE
Checking and adjusting valve clearance must be done
when the engine is cold.
1. Remove the rocker arm cover and carefully remove
the gasket. If the gasket is torn or damaged, it must be
replaced.
2. Remove the spark plug so the engine can be rotated
more easily.
3. Rotate the engine to top dead center (TDC) by pulling
the recoil handle slowly. Looking through the spark plug
hole, the piston should be at the top (both valves are
closed).
4. Both the rocker arms should be loose at TDC on the
compression stroke. If they are not, rotate the engine
360°.
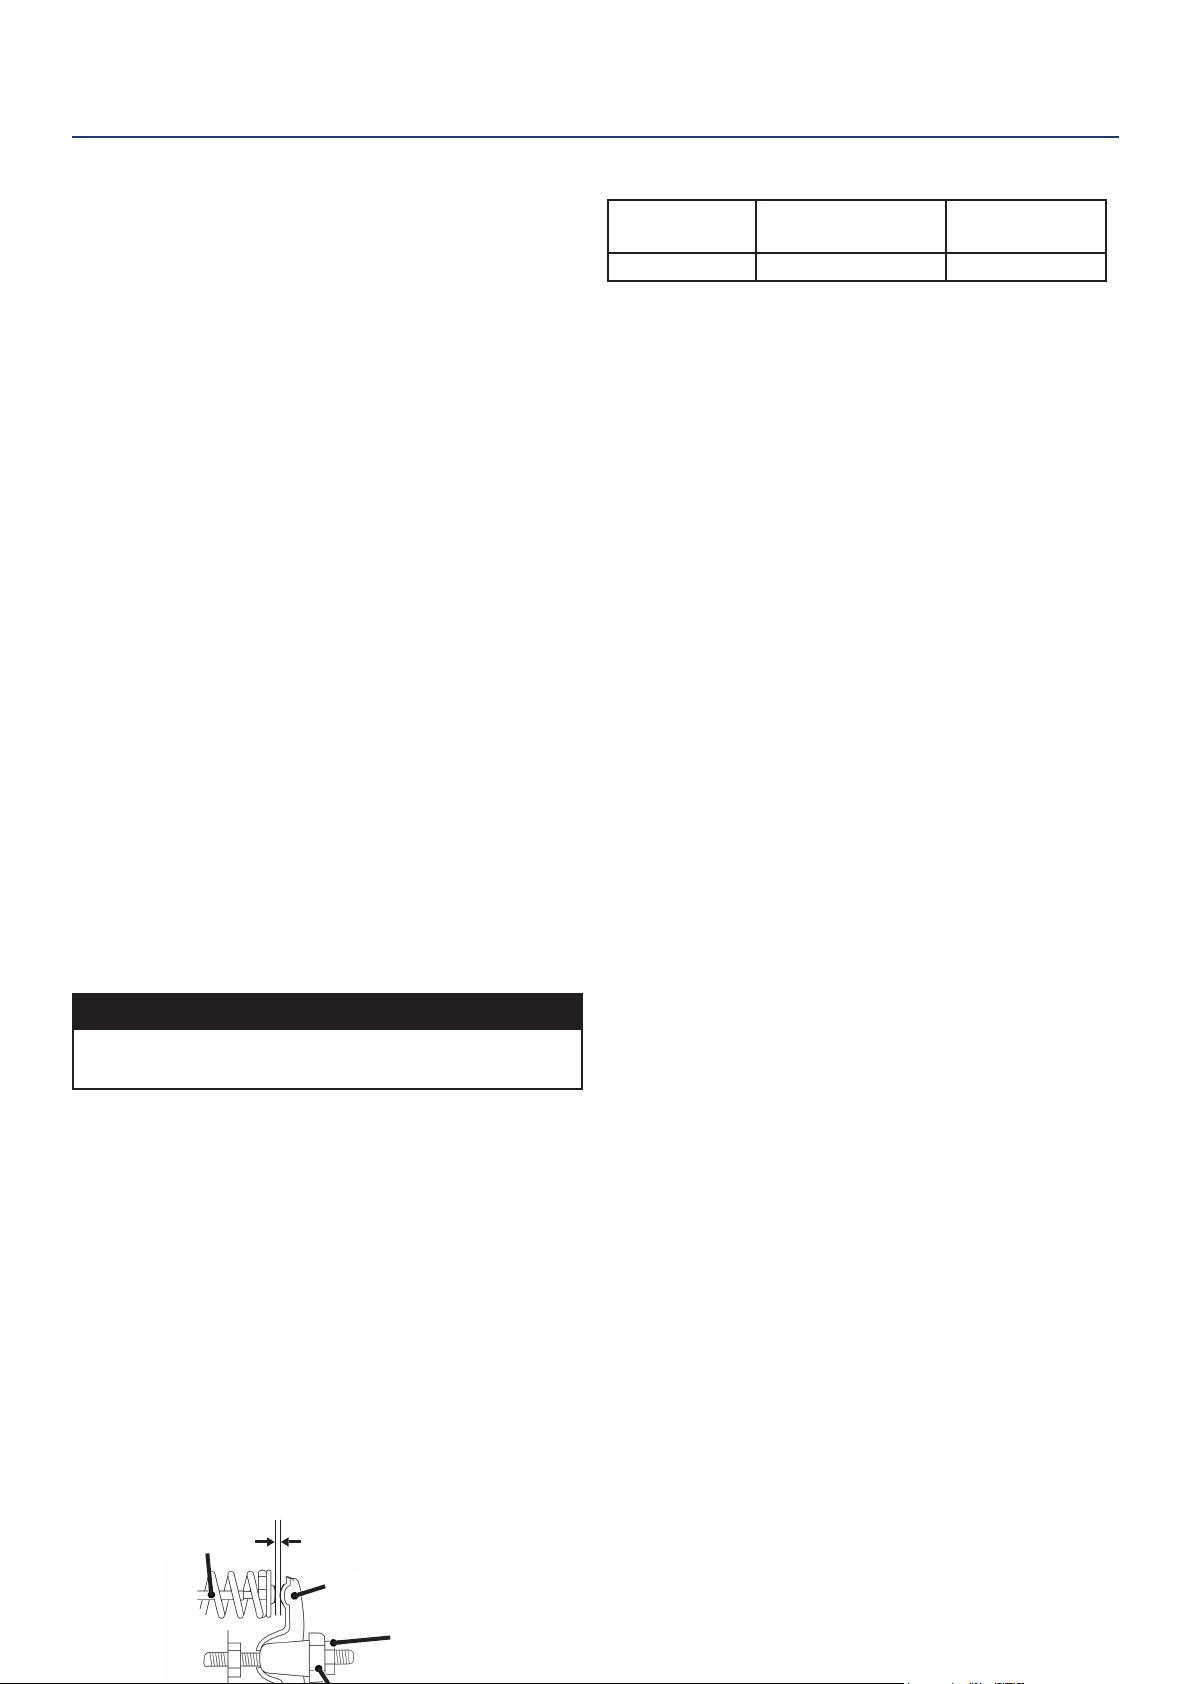
5. Insert a feeler gauge between the rocker arm and the
valve stem to measure valve clearance.
Pivot
Adjusting Nut
Valve Stem
Rocker Arm
Rocker Arm Pivot
Intake Valve Exhaust Valve
Valve Clearance
0.0031 – 0.0047 in
(0.08 – 0.12 mm)
0.0051 – 0.0067 in
(0.13 – 0.17 mm)
Torque 8-12 N•m 8-12 N•m
6. If an adjustment is necessary, hold the rocker arm pivot
and loosen the pivot adjusting nut.
7. Turn the rocker arm pivot to obtain the specied
clearance. Hold the rocker arm pivot and re-tighten the
pivot adjusting nut to the specied torque.
Torque: 106 inch-pound (12 N•m)
8. Perform this procedure for the other valve.
9. Install the gasket, rocker arm cover, and spark plug.
Loading ...
Loading ...
Loading ...