Loading ...
Loading ...
Loading ...
Westinghouse Outdoor Power Equipment, LLC | 21
MAINTENANCE
5. Install the oil drain bolt and tighten securely.
Note: A new oil drain plug crush washer is recommended
at each oil change.
6. Slowly pour oil into the oil ller neck until oil the level
is between the L and H marks on the dipstick. Stop
frequently to check the oil level. DO NOT overll.
Maximum oil capacity: 1.16 Quart (1.1 Liter)
7. Install the oil dipstick and hand-tighten.
NOTICE
Do not pollute. Follow the guidelines of the EPA or other
governmental agencies for proper disposal of hazardous
materials. Consult local authorities or reclamation facility.
SPARK PLUG MAINTENANCE
Inspect and clean the spark plug after every 100 hours of
use or six months. Replace the spark plug after 300 hours
of use or every year.
1. Place the generator on a level surface and allow the
engine to cool.
2. Remove the spark plug boot by rmly pulling the spark
boot directly away from the engine.
3. Clean the area around the spark plug.
4. Remove the spark plug with the included spark plug
socket wrench.
NOTICE
Never apply any side load or move the spark plug
laterally when removing the spark plug.
5. Inspect the spark plug. Replace if electrodes are
pitted, burned, or the insulator is cracked. Only use a
recommended replacement plug.
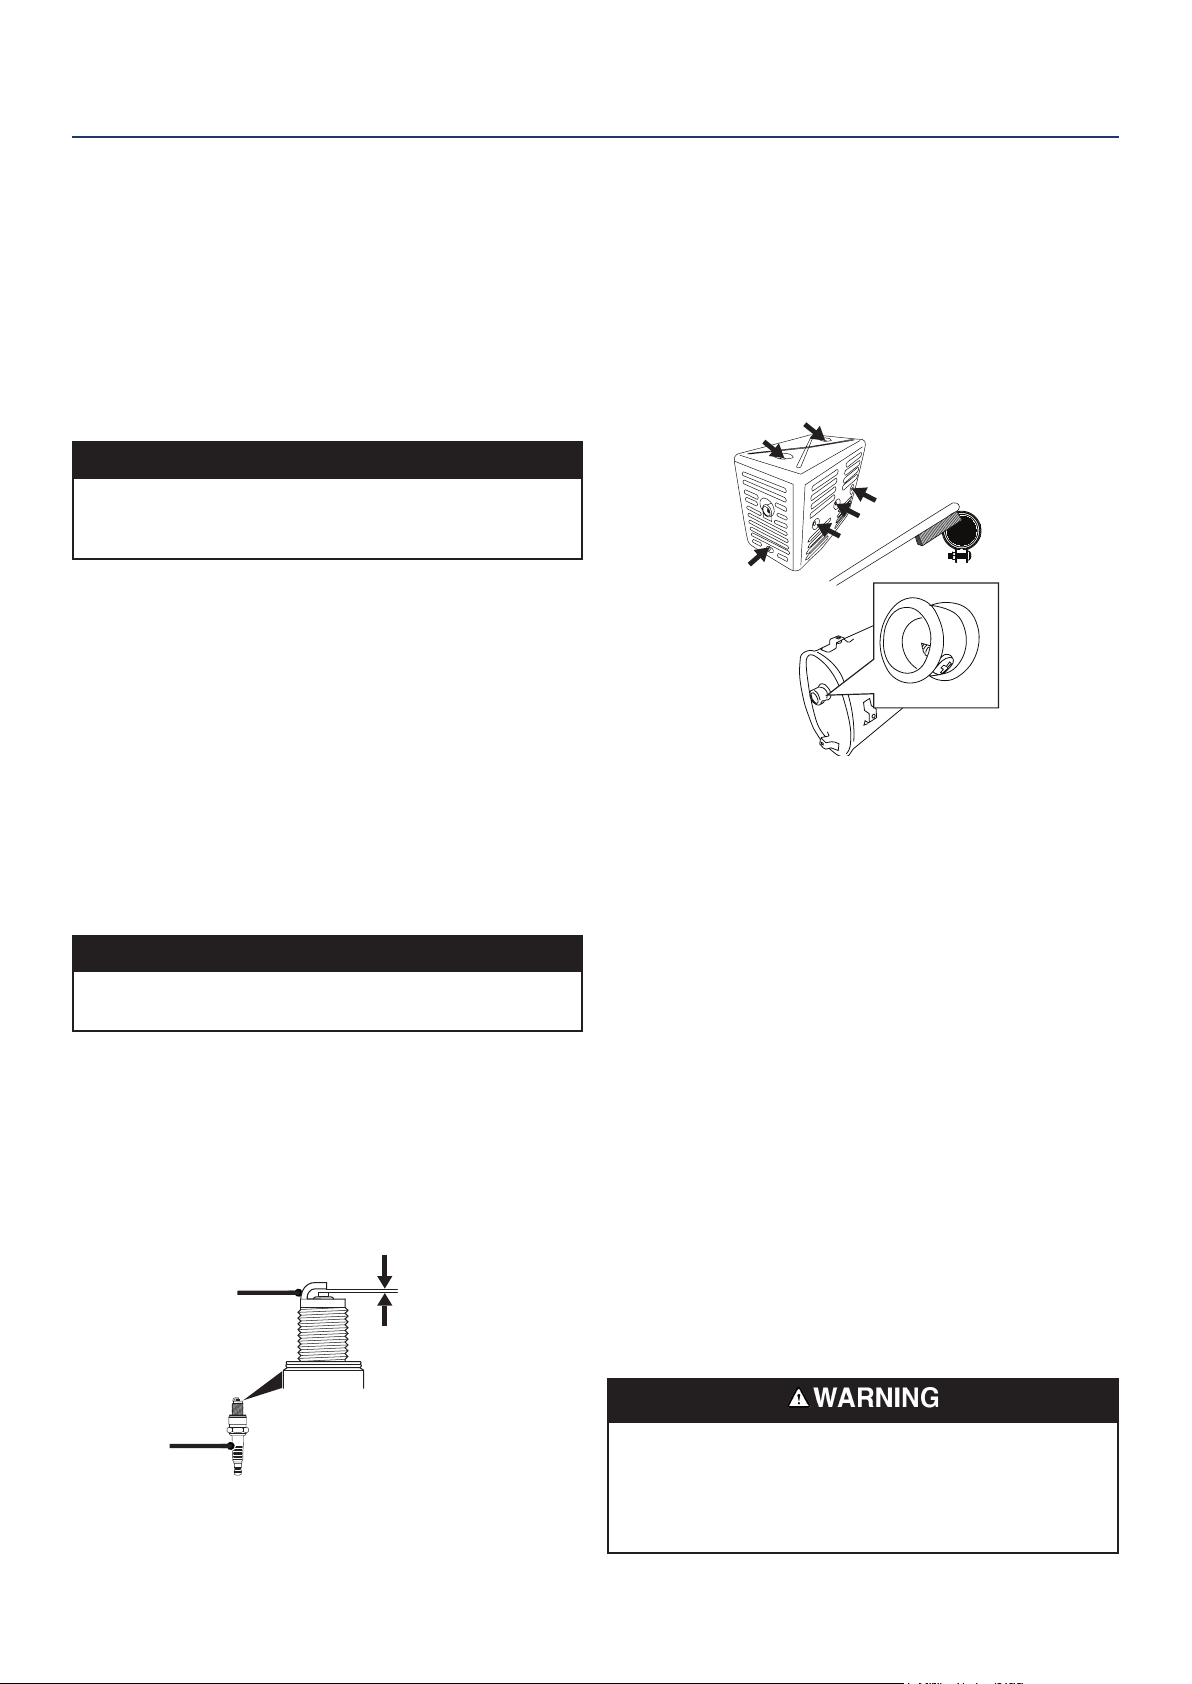
6. Measure the spark plug electrode gap with a wire-type
feeler gauge. If necessary, correct the gap by carefully
bending the side electrode.
Spark plug gap: 0.024 – 0.032 in. (0.60 – 0.80 mm)
0.024 - 0.032 in.
(0.60 - 0.80 mm)
Insulator
Side
Electrode
7. Carefully install the spark plug nger tight, then tighten
as additional 3/8 to 1/2 turn with the spark plug wrench.
8. Attach the spark plug boot.
SPARK ARRESTOR SERVICE
Allow the mufer to cool completely before servicing the
spark arrestor. Check and clean the spark arrestor after
every 100 hours of use or six months. Failure to clean the
spark arrestor will result in degraded engine performance.
1. Place the generator on a level surface.
2. Remove the cover screws and the mufer cover. Use a
screw driver to remove the spark arrestor.
3. Carefully remove the carbon deposits from the spark
arrestor screen with a wire brush. The spark arrestor
must be free of breaks and tears. Replace the spark
arrestor if damaged.
4. Reinstall the spark arrestor and mufer cover.
BATTERY MAINTENANCE
The battery shipped with the generator has been fully
charged. A battery may lose some charge when not in use
for prolonged periods of time.
Note: Once started, the generator will charge the battery
after 30–60 minutes of use.
Charge the battery for 6-8 hours. A red light on the charger
indicates charging in progress. A green light indicates
charging complete. Charge in a dry location.
1. Plug the charger into the battery charging port on the
control panel.
2. Plug the wall receptacle end of the battery charger into
a 120 Volt AC wall outlet.
BATTERY REPLACEMENT
Burn hazard. The battery contains sulfuric acid
(electrolyte) which is highly corrosive and poisonous.
Wear protective clothing and eye protection when
working near the battery. Keep children away from the
battery.
Loading ...
Loading ...
Loading ...