Loading ...
Loading ...
Loading ...
en Time-setting options
16
After every steam operation
:Warning – Risk of scalding!
When you open the appliance door, hot steam can
escape. Steam may not be visible, depending on its
temperature. When opening, do not stand too close to
the appliance. Open the appliance door carefully. Keep
children away.
:Warning – Risk of burns!
The appliance becomes hot during operation. Allow the
appliance to cool down before cleaning.
:Warning – Risk of scalding!
The water tank may heat up while the appliance is in
operation. Allow the water tank to cool down before
emptying it.
Caution!
Enamel damage: Do not start any operations when
there is water on the cooking compartment floor. Before
operation, wipe away the water from the cooking
compartment floor.
The remaining water is pumped back into the water
tank after every operation with steam. Then empty and
dry the water tank. Moisture remains in the cooking
compartment. Dry the cooking compartment.
Note: Remove limescale marks with a cloth soaked in
vinegar, then rinse with clean water and dry with a soft
cloth.
Emptying the water tank
Caution!
■ Do not dry the water tank in the hot cooking
compartment. This will damage the water tank.
■ Do not clean the water tank in the dishwasher. This
will damage the water tank.
1. Press on the water tank.
2. Pull out the water tank.
3. Unscrew the lid on the water tank.
4. Empty the water tank, clean it with detergent and
then rinse it thoroughly with clean water.
5. Dry all parts with a soft cloth.
6. Rub the seal on the lid until dry.
7. Leave the water tank to dry with the lid off.
8. Place the lid on the water tank and screw it on.
9. Put the water tank in.
Cleaning the drip trough
1. Allow the appliance to cool down.
2. Open the appliance door.
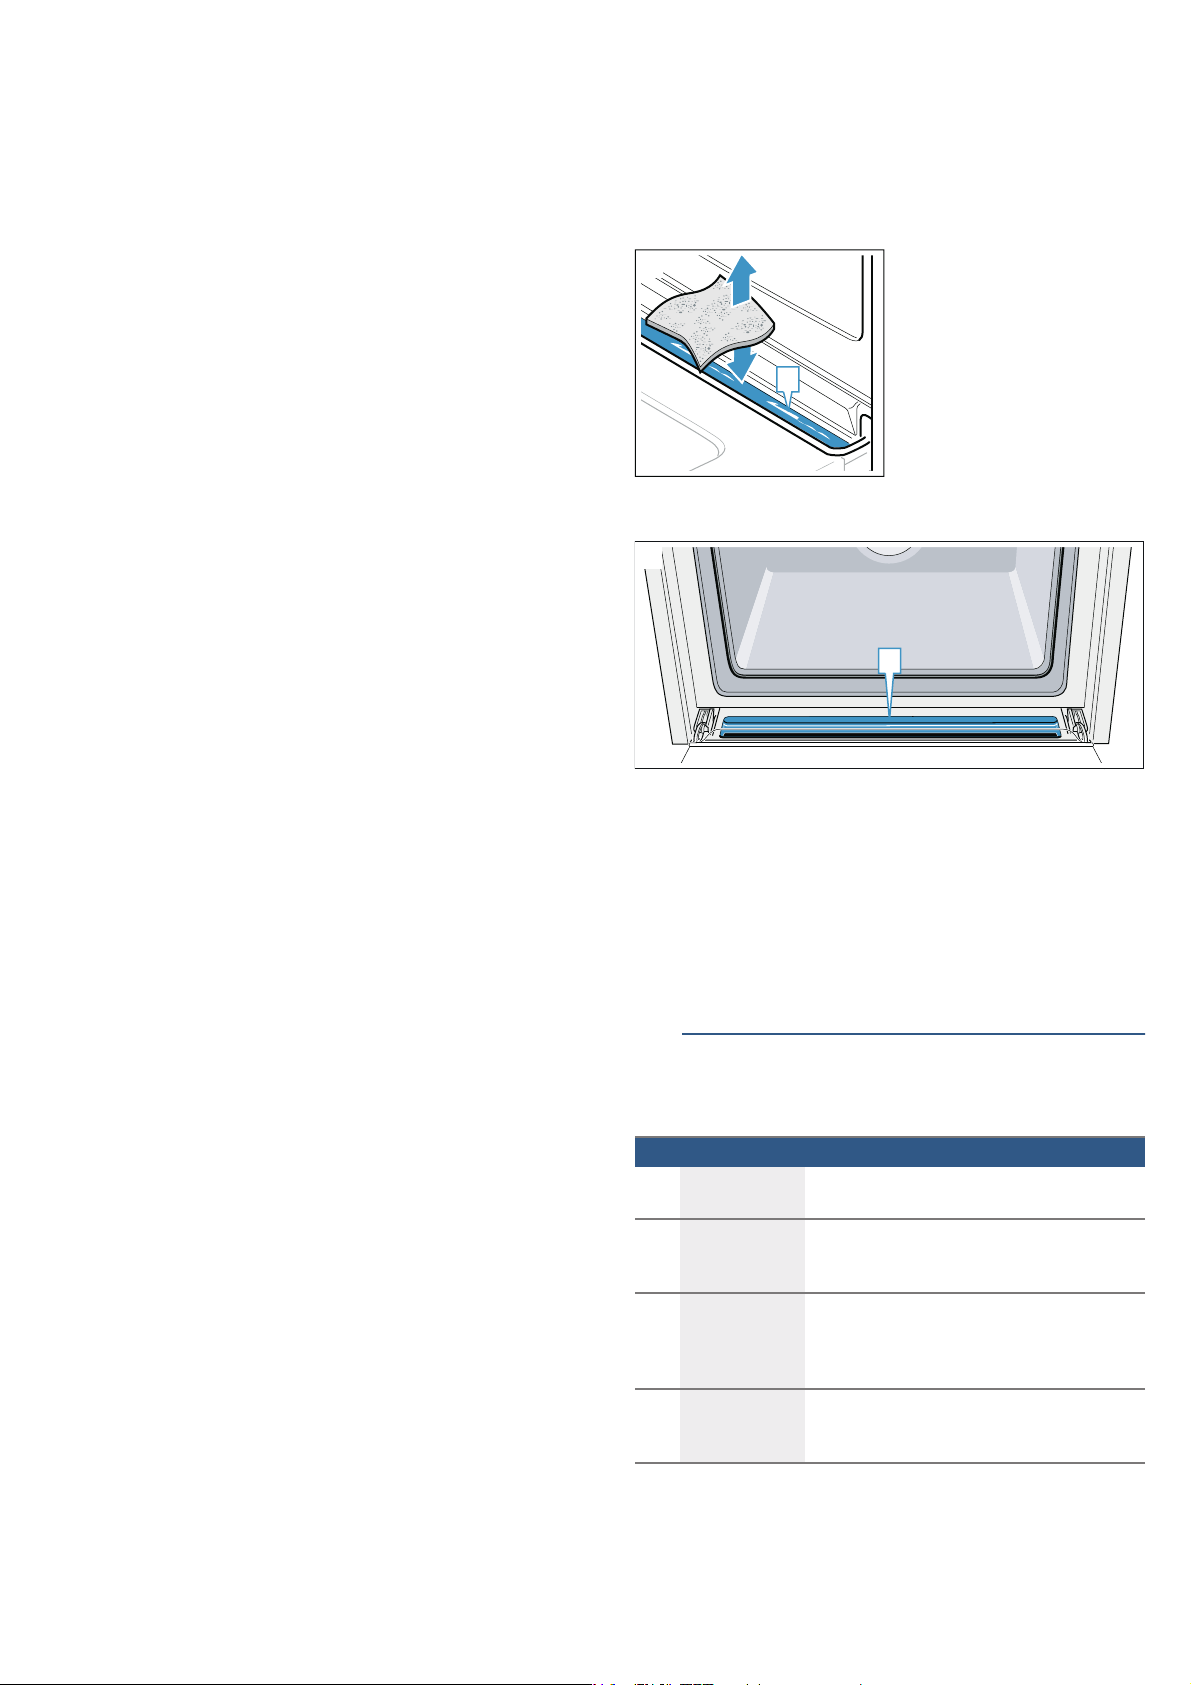
3. Soak up the water in the drip trough ‚ with a sponge
cloth and wipe it carefully (figure !).
The drip trough ‚ is located below the cooking
compartment (figure ").
Drying the cooking compartment by hand
1. Allow the appliance to cool down.
2. Remove any food remnants from the walls of the
cooking compartment.
3. Dry the cooking compartment with a sponge.
4. Leave the appliance door open for 1 hour so that the
cooking compartment dries completely.
OTime-setting options
Ti me- s et t i ng opt i ons
Your appliance has different time-setting options.
Before you can call up the cooking time using the
v button, you will need to set a heating function.Once
you have set a cooking time, the end time can be called
up. The timer can be set at any time.
Time-setting option Use
y
Cooking time Once the set cooking time has elapsed, the
appliance will automatically stop heating.
{
End time Enter a cooking time and the required end
time. The appliance will start up automatically
so that it finishes cooking at the required time.
t
Timer The timer functions like an egg timer. It runs
independently of the appliance when it is
heating and of other time-setting options and
does not affect the appliance.
v
Time When no other function is running in the fore-
ground, the appliance will show you the time
of day on the display.
D
1
D
2
Loading ...
Loading ...
Loading ...