Loading ...
Loading ...
Loading ...
31
31-1000169 Rev. 4
Installation Instructions
INSTALLATION INSTRUCTIONS FOR MULTIPLE UNITS (cont.)
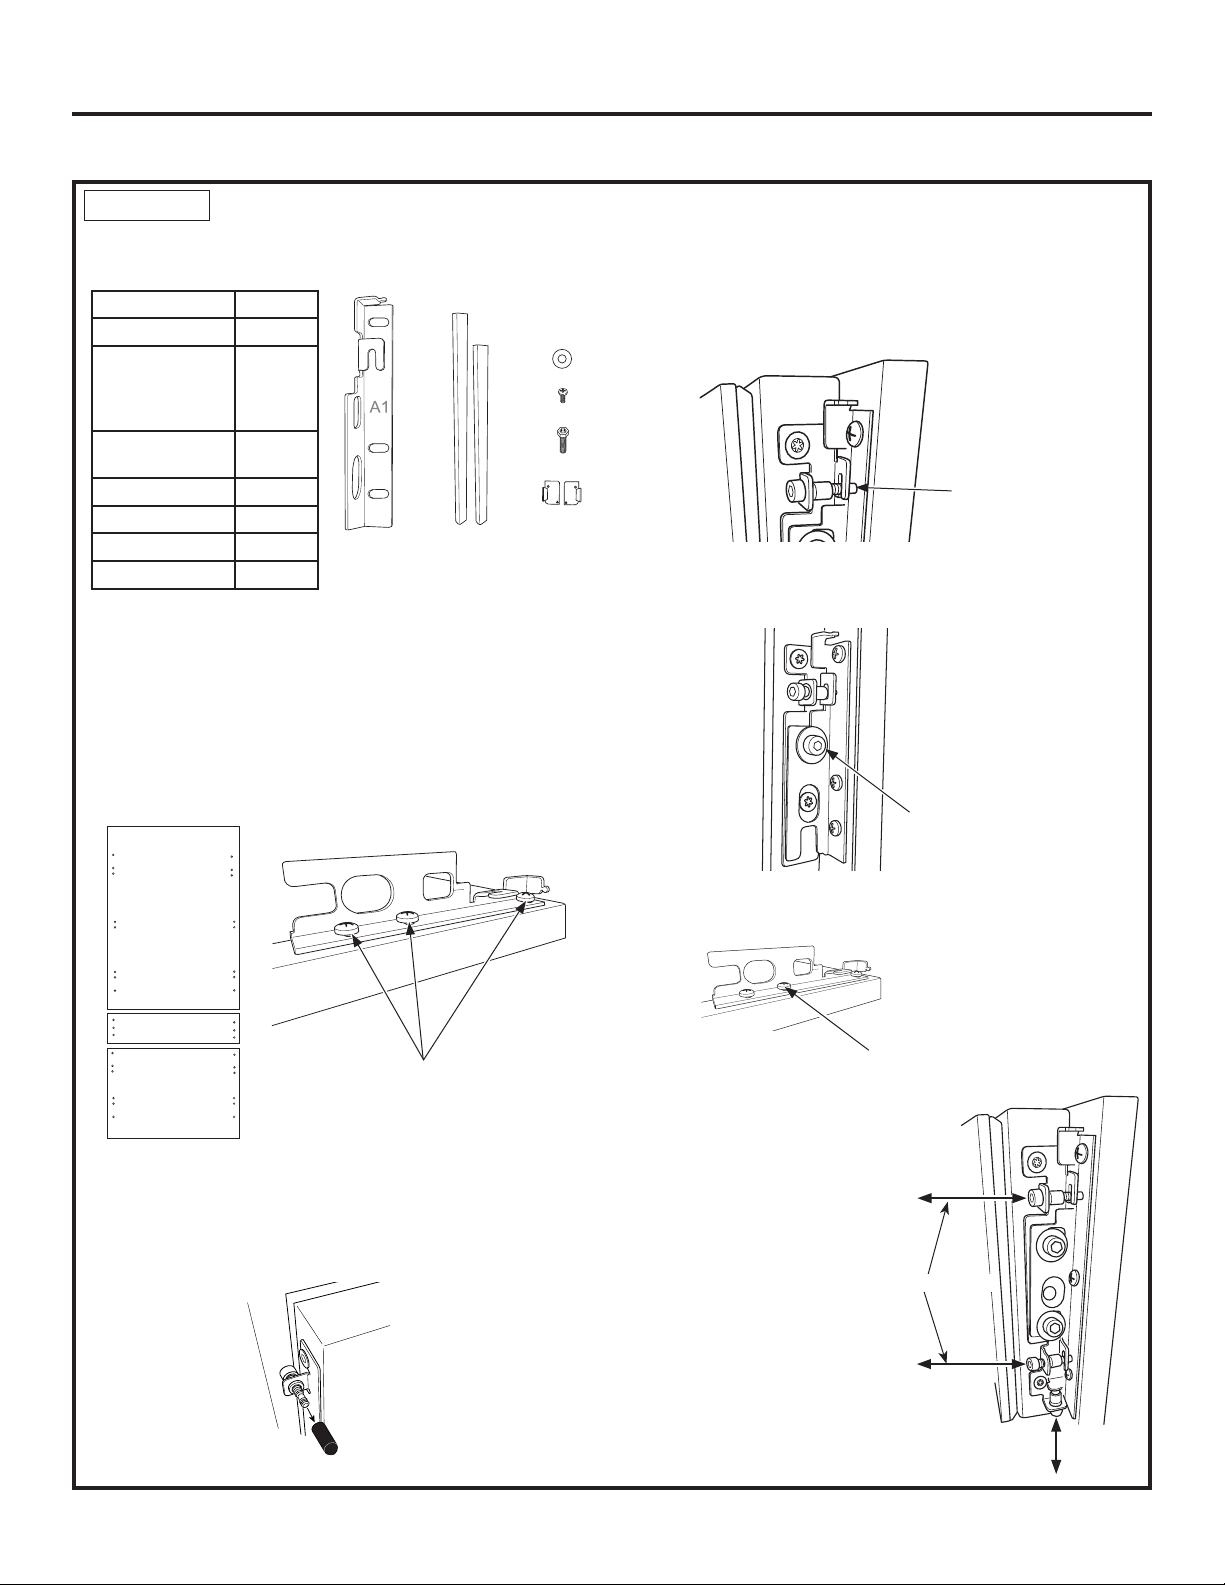
STEP 17 INSTALL DOOR AND DRAWER PANELS
1. Remove all door and drawer panel hardware and trim
from the unit.
2. Attach A1 - F1 brackets to the door panels in the
locations identified below. Custom panels must have
pre-drilled holes as shown in Door Panel Templates:
31-1000149, 31-1000150, 31-1000151, 31-1000152.
If you purchased an SS Panel Accessory, use the
Phillips machine screws to attach the brackets to the
SS door panels. For custom panels, use an appropriate
wood screw.
3. If you had custom handles made and they are not
currently attached to your panels, do so now.
4. Remove the screw caps from the adjustment pins on
the doors.
5. Open the refrigerator door to attach the refrigerator
panel.
6. Rest the refrigerator panel on the refrigerator door
by aligning the hooks on the panel brackets with the
adjustment pins on the door.
7. Fasten the panel to the refrigerator door in four
locations using the hardware shown below. Do not
tighten the screws. Screws will be tightened after panel
alignment.
8. Shift the panel side to side to ensure even gaps with
the adjacent cabinetry
on both sides.
9. Use an allen wrench to
adjust the refrigerator
door panel depth
and height to align
with the adjacent
cabinetry. There must
be a minimum 1/8” gap
between the panel and
the adjacent cabinetry.
Item Quantity
Panel Brackets 12
Phillips Machine
Screws (for use
with SS Panel
Accessory)
34
Allen Hex Socket
Head Screws
12
Washers 12
Door Trim 6
Trim Caps 12
Allen Wrench 2
D1
D1
A1
A1
E1
E1
F1
B1
B1
C1
G1
G1
Refrigerator
Panel
Customizable
Panel
Back View of Panels
Freezer
Panel
Do not tighten the screws, you will
do that after assembly process
and left to right alignment.
Align at top
and bottom
Screw and
Washer
Depth Adjustment
Vertical
Adjustment
Tighten one screw per bracket.
The other screws will be
tightened at the end of the
alignment process.
Loading ...
Loading ...
Loading ...