Loading ...
Loading ...
Loading ...
17
31-1000169 Rev. 4
Installation Instructions
Screws
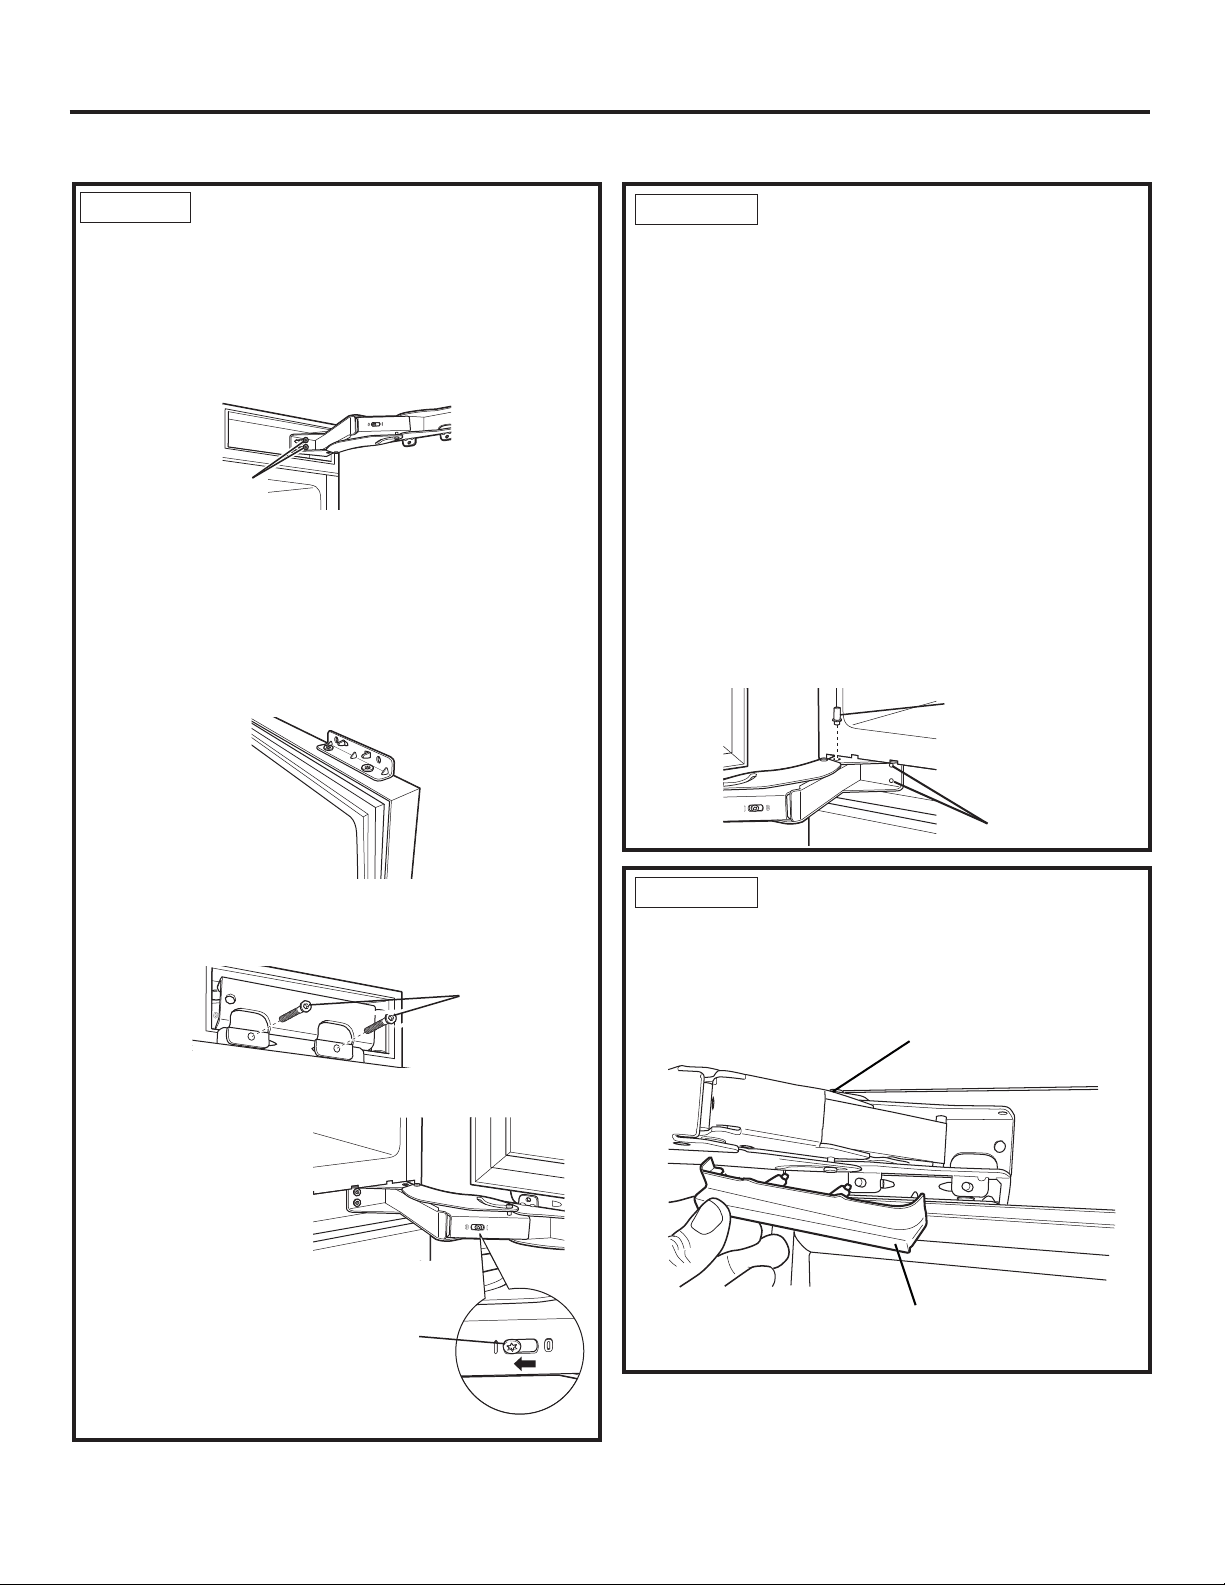
STEP 9 REVERSE DOOR SWING
(cont).
10. To install the top hinge, turn the hinge in the proper
direction—the section of the bracket that will be
attached to the door should be at the bottom of the
hinge. Slide the hinge over the screws and seat the
tabs into the hinge pocket. Tighten the screws.
11. To install the bottom hinge, turn the hinge in the
proper direction—the section of the bracket that will
attach to the door should be at the top of the hinge.
Slide the hinge over the screws and seat the tabs
into the hinge pocket. Tighten the screws. Close the
hinge.
12. Remove the hinge brackets from the door and rein-
stall them on the opposite end, top and bottom.
13. With another person holding the door in place, align
the holes in the door hinge bracket with the holes in
the hinge. Install the screws to the top hinge first.
14. Install screws on the bottom hinge next.
15. Using a Torx T-20
wrench, tighten the
tension on the hinge
springs by turning
the screws from 0
to |.
STEP 10 ADJUST DOOR SWING
(if needed)
NOTE: This unit has a 2-position door stop. When
space does not allow the door to swing to 115°, you
may limit the door swing to a 90°
Skip this step if door opening is satisfactory for your
installation situation.
Ŷ2SHQWKHUHIULJHUDWRUGRRUWRDFFHVVWKHWRSDQG
bottom hinges.
Ŷ/RRVHQWKHERWWRPKLQJHVFUHZVWKDWDWWDFKHGWRWKH
unit
Ŷ3XOOKLQJHIRUZDUGVOLJKWO\LQVHUWKLQJHSLQLQWRWKH
hole nearest the unit.
Ŷ<RXPD\QHHGWRXVHDVPDOOKDPPHUWRIXOO\VHDW
them in place.
Ŷ5HWLJKWHQKLQJHVFUHZV
ŶRepeat for top hinge.
STEP 11 INSTALL DOOR BRACKET
COVERS
Install covers to hide the brackets near the hinges on
the top and bottom of the door. The covers snap in
place.
Door
Screws
Use Torx
T-20 Wrench
Install 1 pin,
per hinge for 90°
door stop.
Hinge screws
Door Bracket
Cover
Hinge
INSTALLATION INSTRUCTIONS FOR SINGLE UNIT (cont.)
Loading ...
Loading ...
Loading ...