Loading ...
Loading ...
Loading ...
26
31-1000169 Rev. 4
STEP 4 ADJUST DOOR SWING
(if needed)
NOTE: This unit has a 2-position door stop. When
space does not allow the door to swing to 115°,
you may limit the door swing to 90°. A 90° setting is
recommended for any installation where a unit has
another unit on both sides.
Skip this step if door opening is satisfactory for your
installation situation.
Ŷ2SHQWKHUHIULJHUDWRUGRRUWRDFFHVVWKHWRSDQG
bottom hinges.
Ŷ
Loosen the bottom hinge screws that attached to the unit
Ŷ3XOOKLQJHIRUZDUGVOLJKWO\LQVHUWKLQJHSLQLQWRWKH
hole nearest the unit.
Ŷ<RXPD\QHHGWRXVHDVPDOOKDPPHUWRIXOO\VHDW
them in place.
Ŷ5HWLJKWHQKLQJHVFUHZV
ŶRepeat for top hinge.
STEP 5 INSTALL DOOR BRACKET
COVERS (UNIT 1)
Install covers to hide the brackets near the hinges on the
top and bottom of the door. The covers snap in place.
Replace tape at the lower edge of the refrigerator door.
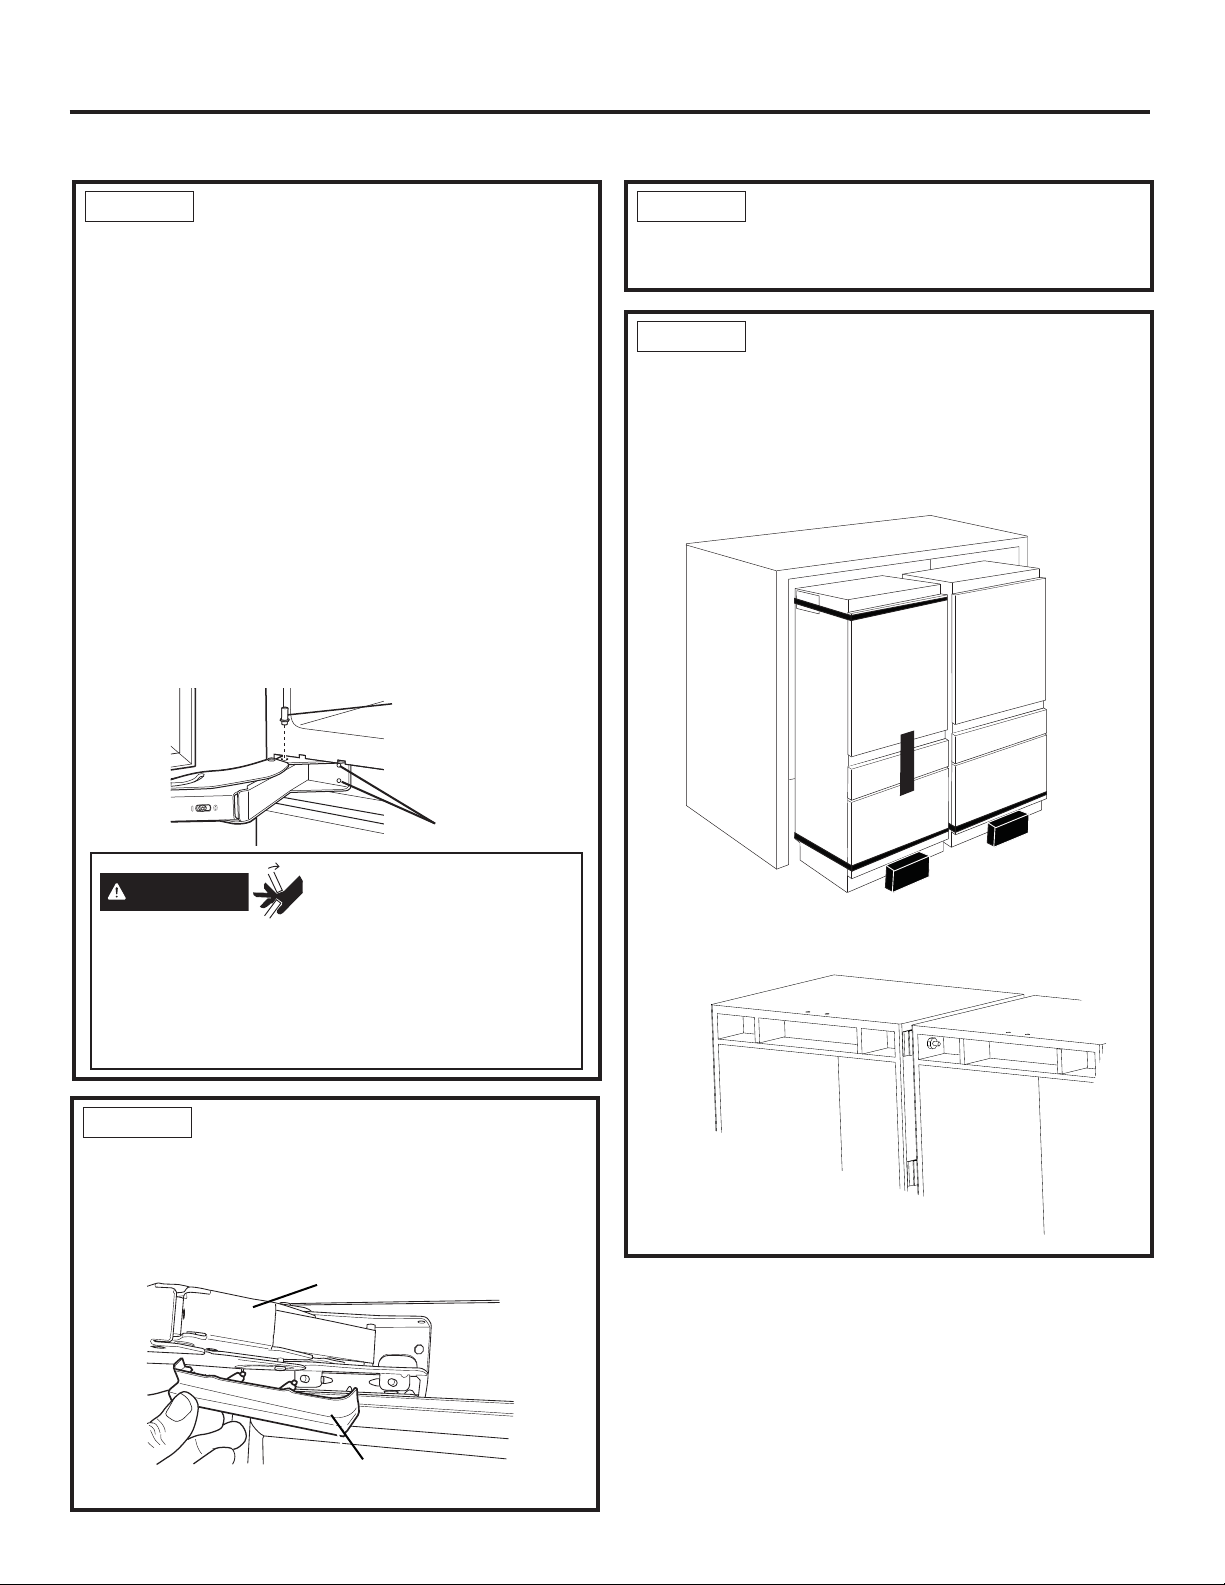
STEP 7 JOIN UNITS
1. Move units in front of cabinet enclosure next to each
other, with top holes lined up. Using bolts, washers
DQGQXWVIURP+HDWHU8QL¿FDWLRQ.LWMRLQWKHWZRXQLWV
together at the front - top and center. Tighten bolts
until spacer clips touch between units.
STEP 6 INSTALLING OTHER UNITS
Complete Steps 2 through 5 on any other units being
installed.
Install 1 pin,
per hinge for 90°
door stop.
Hinge screws
Door Bracket
Cover
Hinge
Installation Instructions
INSTALLATION INSTRUCTIONS FOR MULTIPLE UNITS (cont.)
WARNING
Door Trim Pinch Point
Hazard
Improper installation can lead to a finger pinch point
hazard between the side door trim and the cabinets
when operating the door, especially with children.
To minimize this risk you must follow the installation
instructions for cabinet dimensions, trim assembly,
and door stop angle.
Loading ...
Loading ...
Loading ...