Loading ...
Loading ...
Loading ...
11
INSTALLATION INSTRUCTIONS
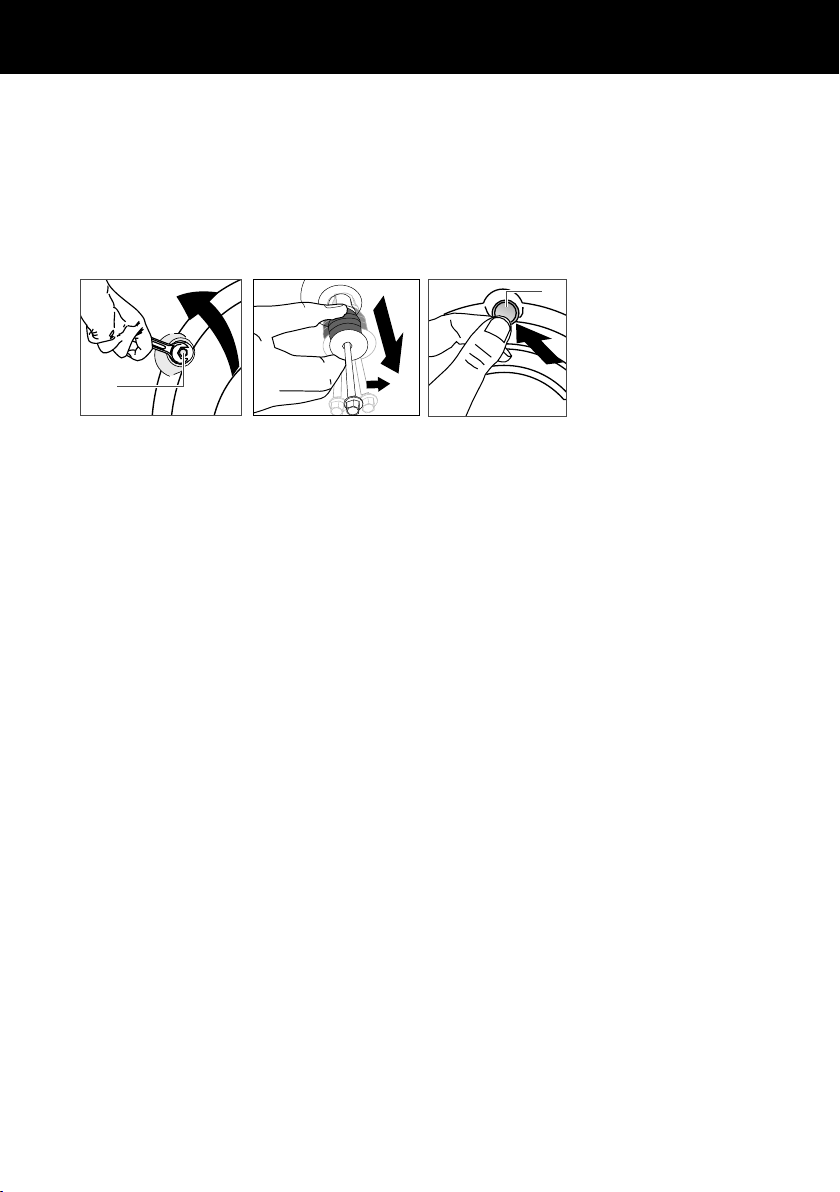
To remove the bolts:
1 Use a wrench or socket to unscrew and remove all four transit bolts at the back of the
washer (A).
2 Pull the black rubber grommets to remove the bolt, grommet and black plastic spacers
from the machine. Keep the transit bolts in case they are required for future transit of the
machine. Never transport the machine without the transit bolts properly fixed in place.
3 Cover the bolt holes with the white plastic covers which are attached to the machine
and located near each hole (B). Push to clip into place.
A
B
Removing the transit safety bolts
Location
IMPORTANT!
Install the machine on a solid and level floor surface ensuring it has at least 3/4”
(20mm) clearance on each side. The washer must not be installed on any textured
floor coverings (eg carpet, rugs).
DO NOT install the washer:
1
In an area exposed to dripping water or outside weather conditions. The ambient
temperature should never be below 60°F (15.6°C) for proper washer operation.
2
In an area where it will come in contact with curtains or drapes.
3
On carpet. The floor MUST be a hard surface with a maximum slope of 1/2” per foot
(1.27cm per 30cm). To make sure the washer does not vibrate or move, you may have to
reinforce the floor.
Note: if floor is in poor condition, use 3/4” (20mm) impregnated plywood sheet solidly
attached to existing floor covering.
IMPORTANT!
Minimum installation clearances
●
When installed in alcove: Sides, Rear, Top = 1” (2.54cm)
●
When installed in closet: Sides, Rear, Top = 1” (2.54cm), Front = 1” (2.54cm)
●
Consideration must be given to provide adequate clearance for installation and service.
●
Closet doors must be louvered or otherwise ventilated and have at least 60 square
inches (387.1 cm
2
) of open area. If the closet contains both a washer and a dryer, doors
must contain a minimum of 120 square inches (774.2cm
2
) of open area.
Note: this machine must not be installed and operated on a plinth.
Loading ...
Loading ...
Loading ...