Loading ...
Loading ...
Loading ...
11
Removing the hob plate
1. Remove the pan support, the handles and burner parts.
2. Loosen the hob plate burner connection screws.
3. For models with electric hotplate (optional): After loosening
the burner screws, turn the hob over and remove the
connection nut for the electric hotplate.
4. Grip the hop plate at the sides with both hands and lift it
carefully.
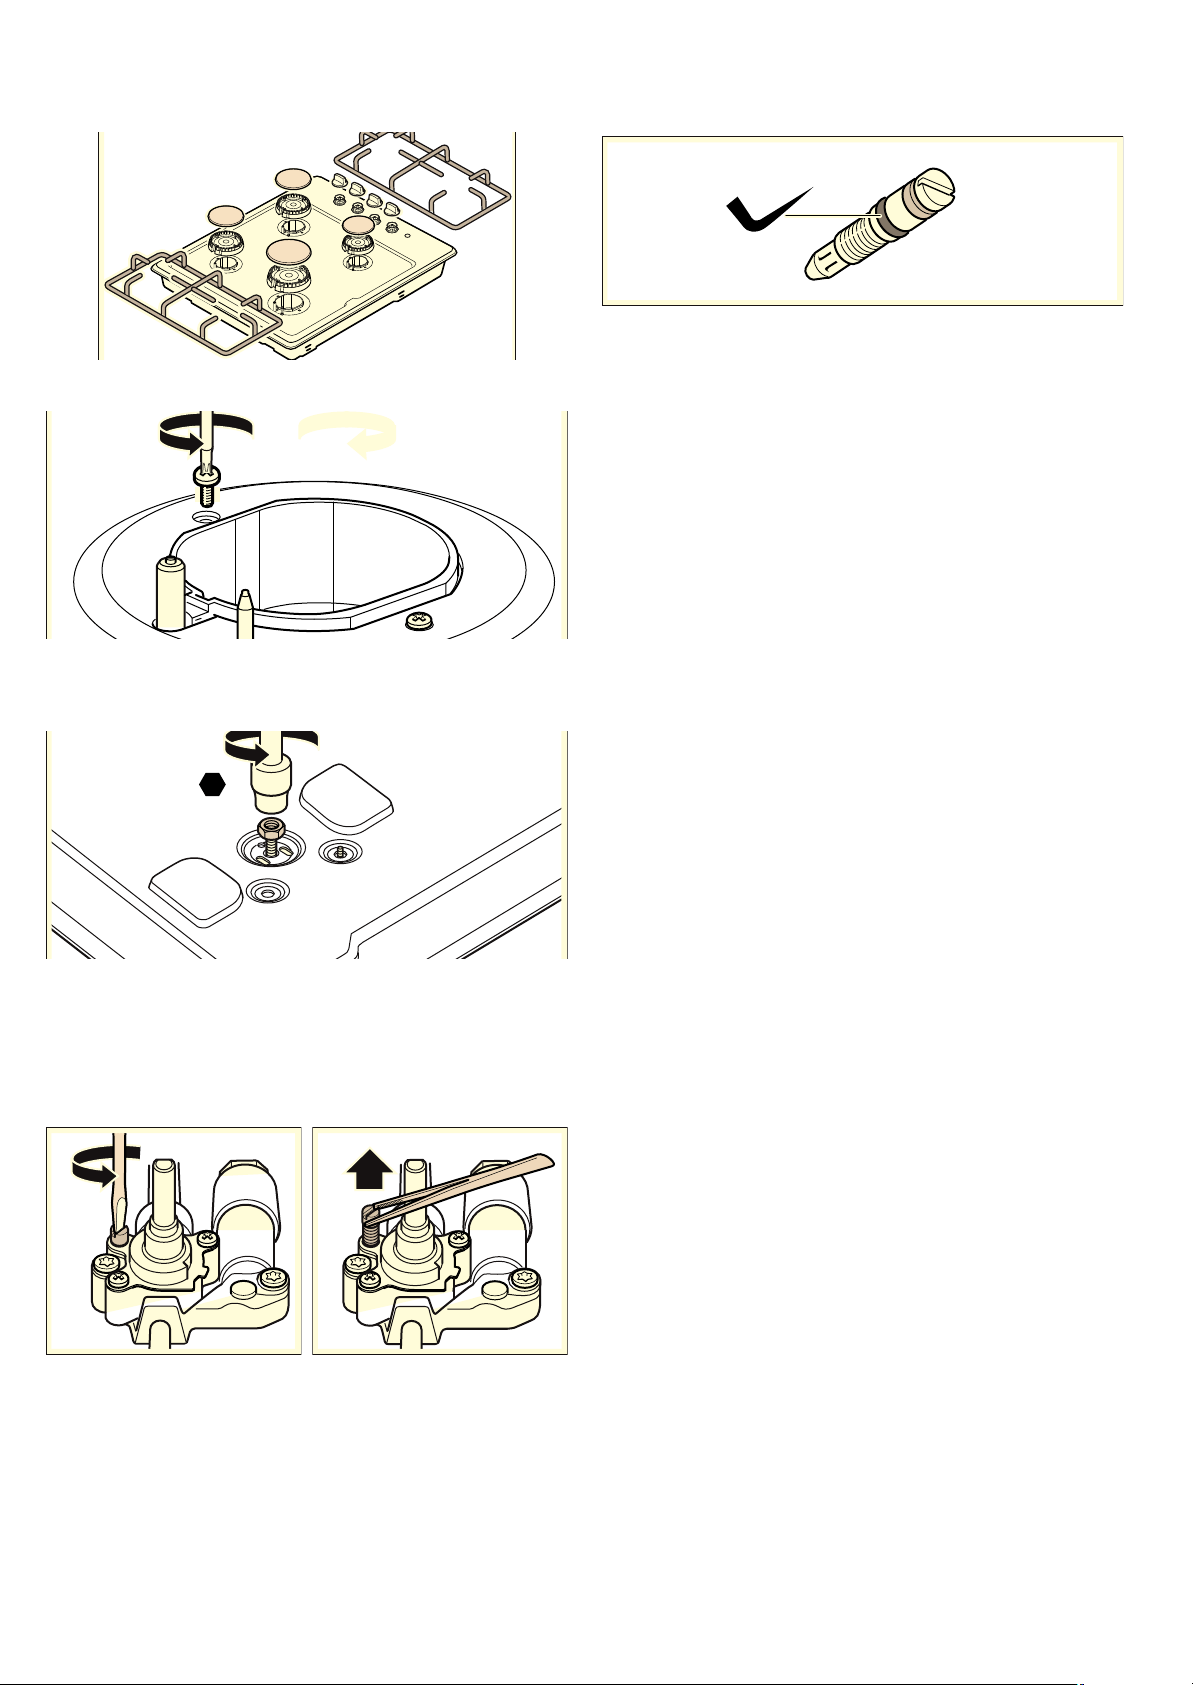
Replacing the bypass nozzles
1. Loosen the bypass nozzles with a flat head screwdriver (no.
2). Unscrew the bypass nozzles.
2. You can use the table to determine the new bypass nozzles
that you will need after the gas conversion. See the section
entitled "Technical properties - gas".
3. Check whether the seals on the bypass nozzles are correctly
seated and work precisely. Only use bypass nozzles with
intact seals.
4. Insert the new bypass nozzles and tighten them. Make sure
that all bypass nozzles are connected to the correct shut-off
valves.
5. At this point, it is essential to carry out a leak test. See the
section entitled "Leak test".
Installing the hob plate
Carry out installation in the reverse order.
1. Make sure that the cables are not damaged and the
connections are not detached.
For models with one-hand spark ignition (optional): Carefully
install the ignition group.
2. Carefully replace the hob plate. Screw in the hob plate burner
screws again.
Caution!
Ensure that the connections are not damaged by the
thermocouple and ignition plug.
3. For models with electric hotplate (optional): After fixing the
burner screws, turn the hob over and install the connection
nut for the electric hotplate.
After adjusting or replacing the bypass nozzles
1. Refit the burner cups according to their size, making sure that
the ignition plug catches precisely in the opening at the edge
of the burner cup. Place the enamel burner caps (paying
attention to their size) precisely on the burner cups.
2. Replace the pan supports. When doing so, make sure that
the pan support with the 80 mm span width is placed on the
auxiliary burner.
3. Carefully replace the control knob.
4. At this point, it is important to check the burner flame
behaviour. See the section entitled "Correct flame behaviour".
5. Also check that the appliance functions operate correctly.
Loading ...
Loading ...
Loading ...