Loading ...
Loading ...
Loading ...
! When this unit is connected to a power
amp with an LPF, turn this LPF off before
performing auto TA and EQ. Also set the
cut-off frequency for the built-in LPF of an
active subwoofer to the highest frequency.
! The time alignment value resulting from
auto TA and EQ has been calculated by a
computer and is the optimum delay time
that will give accurate results. Be sure to
use the resulting value although it may dif-
fer from the actual distance when:
— The reflected sound within the car is
strong and delays occur.
— The LPF on active subwoofers or exter-
nal amps delay the lower sounds.
! Auto TA and EQ changes the audio settings
as follows:
— The fader/balance settings return to the
center position. (Refer to Using fader/
balance adjustment on page 22.)
— The graphic equalizer curve switches to
Flat. (Refer to page 27.)
— When a subwoofer is connected to this
unit, it will be adjusted automatically to
both subwoofer output and high pass fil-
ter setting for rear speaker.
! Previous settings for auto TA and EQ will be
overwritten.
! When connecting tweeters, please confirm
the tweeter’s usable frequency range.
When you set the cut-off frequency, set
higher than the lowest usable frequency of
the tweeter.
! Auto TA uses higher range than 10 kHz for
measurement. Therefore, using the tweeter
that cannot reproduce 10 kHz frequency
range may damage the tweeter. When auto
TA and EQ is operated, be sure to set the
appropriate cut-off frequency. Also, use the
tweeter that can reproduce 10 kHz at the
lowest usable frequency.
Performing auto TA and EQ
1 Stop the car in a place that is quiet,
close all the doors, windows and sun roof,
and then turn the engine off.
# If the engine is left running, the noise from
the engine may cause incorrect auto TA and EQ.
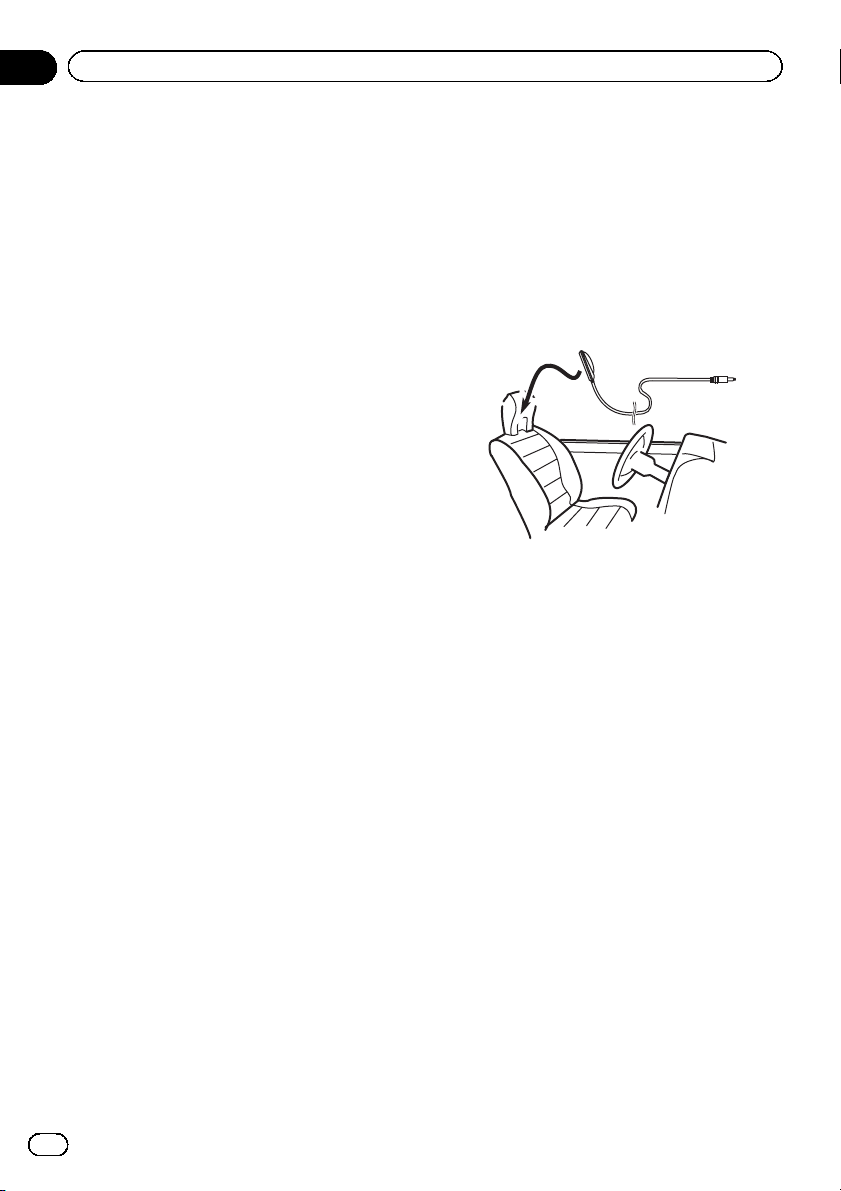
2 Fix the supplied microphone in the cen-
ter of the headrest of the driver’s seat, fa-
cing forward.
# The auto TA and EQ may differ depending on
where you place the microphone. If desired, place
the microphone on the front passenger seat to
perform auto TA and EQ.
3 Turn the ignition switch to ON or ACC.
# If the air conditioner or heater is turned on,
turn it off. The noise from the fan may cause in-
correct auto TA and EQ.
# Press SRC/OFF to turn the source on if this
unit is turned off.
4 Select the position for the seat on
which the microphone is placed.
Refer to Using the position selector on page
21.
# If no position is selected before auto TA and
EQ is started, Front Left is automatically se-
lected.
5 Press SRC/OFF and hold until the unit
turns off.
6 Press and hold EQ/DISP OFF to enter
the auto TA and EQ measurement mode.
The front panel opens automatically.
En
30
Section
02
Operating this unit
Loading ...
Loading ...
Loading ...