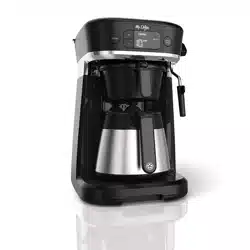
Loading ...
Loading ...
Loading ...

QUICK START GUIDE
5. Turn the knob to the “brew” position.
6. “10 cup” will illuminate on the display.
7. Press the clean button.
NOTE: The ready indicator light will turn off and the clean indicator
light will illuminate.
8. When the coffeemaker beeps and the clean indicator light turns off,
turn the knob to the “standby” position.
9. Discard the water in the coffee pot. Your Mr. Coffee® Occasions™
coffeemaker is ready to use!
WARNING: This Quick Start Guide is not intended to be a substitute for the
rest of the user manual, and you should read and understand the warnings
and instructions in the user manual before using this appliance.
Brief Guide to Brewing on the Mr. Coffee
®
Occasions™ Coffeemaker:
1. Clean & prime the coffeemaker before brewing coffee for the first time.
2. Fill the water tank to the “MAX” marking with clean, filtered water.
3. Turn the coffeemaker ON by using the power switch on the side.
NOTE: The ready indicator light will pulse while the coffeemaker
heats up and will turn solid when the coffeemaker is ready to use.
4. Insert the desired attachment filled with coffee, espresso, or a K-Cup®
Pod into the coffeemaker.
5. Place the coffee pot or mug on the drip tray or height adjustment tray.
6. Turn the knob to the “brew” position.
7.
Use the brew size selector to select the desired brew size.
8. Press the “brew now” button.
9. When the coffeemaker beeps and the brew now indicator light turns
off, turn the knob to the “standby” position.
NOTE: When the knob is turned to the “standby” position, the
coffeemaker will enter an automatic cool-down cycle and the ready
indicator light will pulse. When the ready indicator light turns solid, the
coffeemaker has cooled down and is ready to use.
10. Enjoy!
USER MANUAL
Getting Started
1. Unpack your coffeemaker and remove plastic bags, cartons and any
tape on the coffeemaker.
2. Position the coffeemaker on a dry, stable, horizontal counter top.
IMPORTANT: KEEP PLASTIC BAGS AWAY FROM CHILDREN.
Clean & Prime Coffeemaker Before Use
Just follow these simple steps:
1. Wash all of the removable parts in warm water with mild liquid soap.
2. Fill the water tank to the “MAX” marking with clean, filtered water.
3. Turn the coffeemaker ON by using the power switch on the side.
NOTE: The ready indicator light will pulse while the coffeemaker
heats up and will turn solid when the coffeemaker is ready to use.
4. Lock the brew basket lid onto the brew basket and slide it into the
coffeemaker. Then, lock the coffee pot lid onto the coffee pot and
place the coffee pot on the drip tray cover.
HOW TO MAKE YOUR FIRST
POT OF COFFEE
1. Fill the water tank to the “MAX” marking with clean, filtered water.
2. Turn the coffeemaker ON by using the power switch on the side.
NOTE: The ready indicator light will pulse while the coffeemaker
heats up and will turn solid when the coffeemaker is ready to use.
3. Remove the brew basket lid from the brew basket by twisting it to
the right.
4. Place a coffee filter into the brew basket and pour the desired amount
of coffee into the filter.
5.
Lock the brew basket lid onto the brew basket by twisting it to the left.
6. Slide the brew basket into the coffeemaker.
7. Place the coffee pot on the drip tray cover.
8. Turn knob to the “brew” position.
9. Use the brew size selector to select the desired brew size.
10. Press the brew now button.
NOTE: The ready indicator light will turn off and the brew now
indicator light will illuminate.
11. When the coffeemaker beeps and the brew now indicator light turns
off, turn the knob to the “standby” position.
NOTE: When the knob is turned to the “standby” position, the
coffeemaker will enter an automatic cool-down cycle and the ready
indicator light will pulse. When the ready indicator light turns solid,
the coffeemaker has cooled down and is ready to use.
12. Enjoy!
NOTE: Some models have a blooming feature which pauses the
brewing cycle for 30 seconds after all of the coffee grounds have been
pre-soaked with water. This allows the coffee grounds to then release
the richest coffee flavors during the remaining brew cycle. During this
blooming phase, the pump will cycle on and off every few seconds,
then return to full brewing mode after 30 seconds.
8.
7.
Loading ...
Loading ...
Loading ...
