Loading ...
Loading ...
Loading ...

9
English
Getting Started
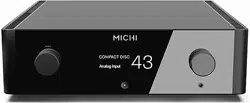
Thank you for purchasing the Michi P5 Stereo Control amplifier. When used
in a high-quality music audio system, your Michi product will provide years
of musical enjoyment.
The P5 is a full featured, high performance component. All aspects of the design
have been optimized to retain the full dynamic range and subtle nuances of
your music. The P5 has a highly regulated power supply incorporating a Michi
custom-designed toroidal power transformer and patented high effeciency slit
foil capacitors. This low impedance power supply has ample power reserves,
which enables the P5 to easily reproduce the most demanding audio signals.
The printed circuit boards (PCB) are designed with Symmetrical Circuit
Traces. This ensures that the precise timing of the music is maintained and
faithfully recreated. The P5 circuitry uses metal film resistors and polystyrene
or polypropylene capacitors in important signal paths. All aspects of this
design have been examined to ensure the most accurate music reproduction.
The main functions of the P5 are easy to install and use. If you have experience
with other stereo systems, you shouldn’t find anything perplexing. Simply plug
in the associated components and enjoy.
A Few Precautions
WARNING: To avoid potential damage to your system, turn off ALL
the components in the system when connecting or disconnecting the
loudspeakers or any associated components. Do not turn the system
components back on until you are sure all the connections are correct
and secure. Pay particular attention to the speaker wires. There must
be no loose strands that could contact the other speaker wires, or the
chassis of the control amplifier.
Please read this manual carefully. In addition to basic installation and operating
instructions, it provides valuable information on various P5 system configurations
as well as general information that will help you get optimum performance
from your system. Please contact your authorized Michi dealer for answers
to any questions you might have. In addition, all of us at Michi welcome your
questions and comments.
Save the P5 shipping carton and all enclosed packing material for future use.
Shipping or moving the P5 in anything other than the original packing material
may result in severe damage to your audio components.
If included in the box please complete the owner’s registration card or register
online. Also be sure to keep the original sales receipt. It is your best record
of the date of purchase, which you will need in the event warranty service
is ever required.
Placement
Like all audio components that handle low-level signals, the P5 can be affected
by its environment. Avoid placing the P5 on top of other components. Also
avoid routing audio signal cables near power cords. This will minimize the
chance it will pick up hum or interference.
The P5 is supplied with an RR-RH6 remote control and must be placed where
the infrared signal from the remote can reach the front panel Remote Sensor.
Contents
Important Safety Instructions ...................................2
Figure 1: Controls and Connections 3
Figure 2: RR-RH6 Remote Control 4
Figure 3: Analog Input and Output Connections 5
Figure 4: Balanced (XLR) Input and Output Connections 6
Figure 5: Digital Inputs and 12V Trigger Output 7
Important Notes 8
Getting Started ................................................9
A Few Precautions 9
Placement 9
Cables 10
The RR-RH6 Remote Control ...................................10
Remote Control Batteries 10
AC Power and Control .........................................10
AC Power Input
a
10
Master Power Switch
s
10
12V TRIGGER Connection
p
10
Input Signal Connections ......................................10
Phono Input
8
and Ground Connection (GND)
r
10
Line Level Inputs
90-
10
Balanced (XLR) Inputs
7
11
Digital Inputs
t
11
Output Connections ..........................................11
Line Output
=
11
MONO SUB Output
q
11
Preamp Output
w
11
Balanced (XLR) Output
e
11
Digital output
y
11
Headphone Output
6
11
Bluetooth Connection
\
......................................11
Rear USB Power Port
[
........................................11
EXT REM IN Jack
o
............................................11
RS232
]
.....................................................11
PC-USB Input
i
..............................................12
Network Connection
u
........................................12
Setup Menu ..................................................12
Front Panel Overview ..........................................12
Remote Sensor
4
12
Display
2
12
Overview of Buttons and Conrtrols .............................12
Main Menu ...................................................13
Source Configuration 13
Network Configuration 14
Audio Configuration 15
Display Configuration 15
System Configuration 16
Troubleshooting ..............................................16
Power Indicator Is Not Illuminated 16
Fuse Replacement 16
No Sound 16
Playable Audio Format 16
Specifications ................................................17
Loading ...
Loading ...
Loading ...
