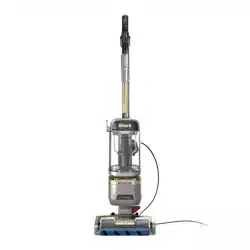
Owner's Guide Vacuum Cleaner
ASSEMBLY
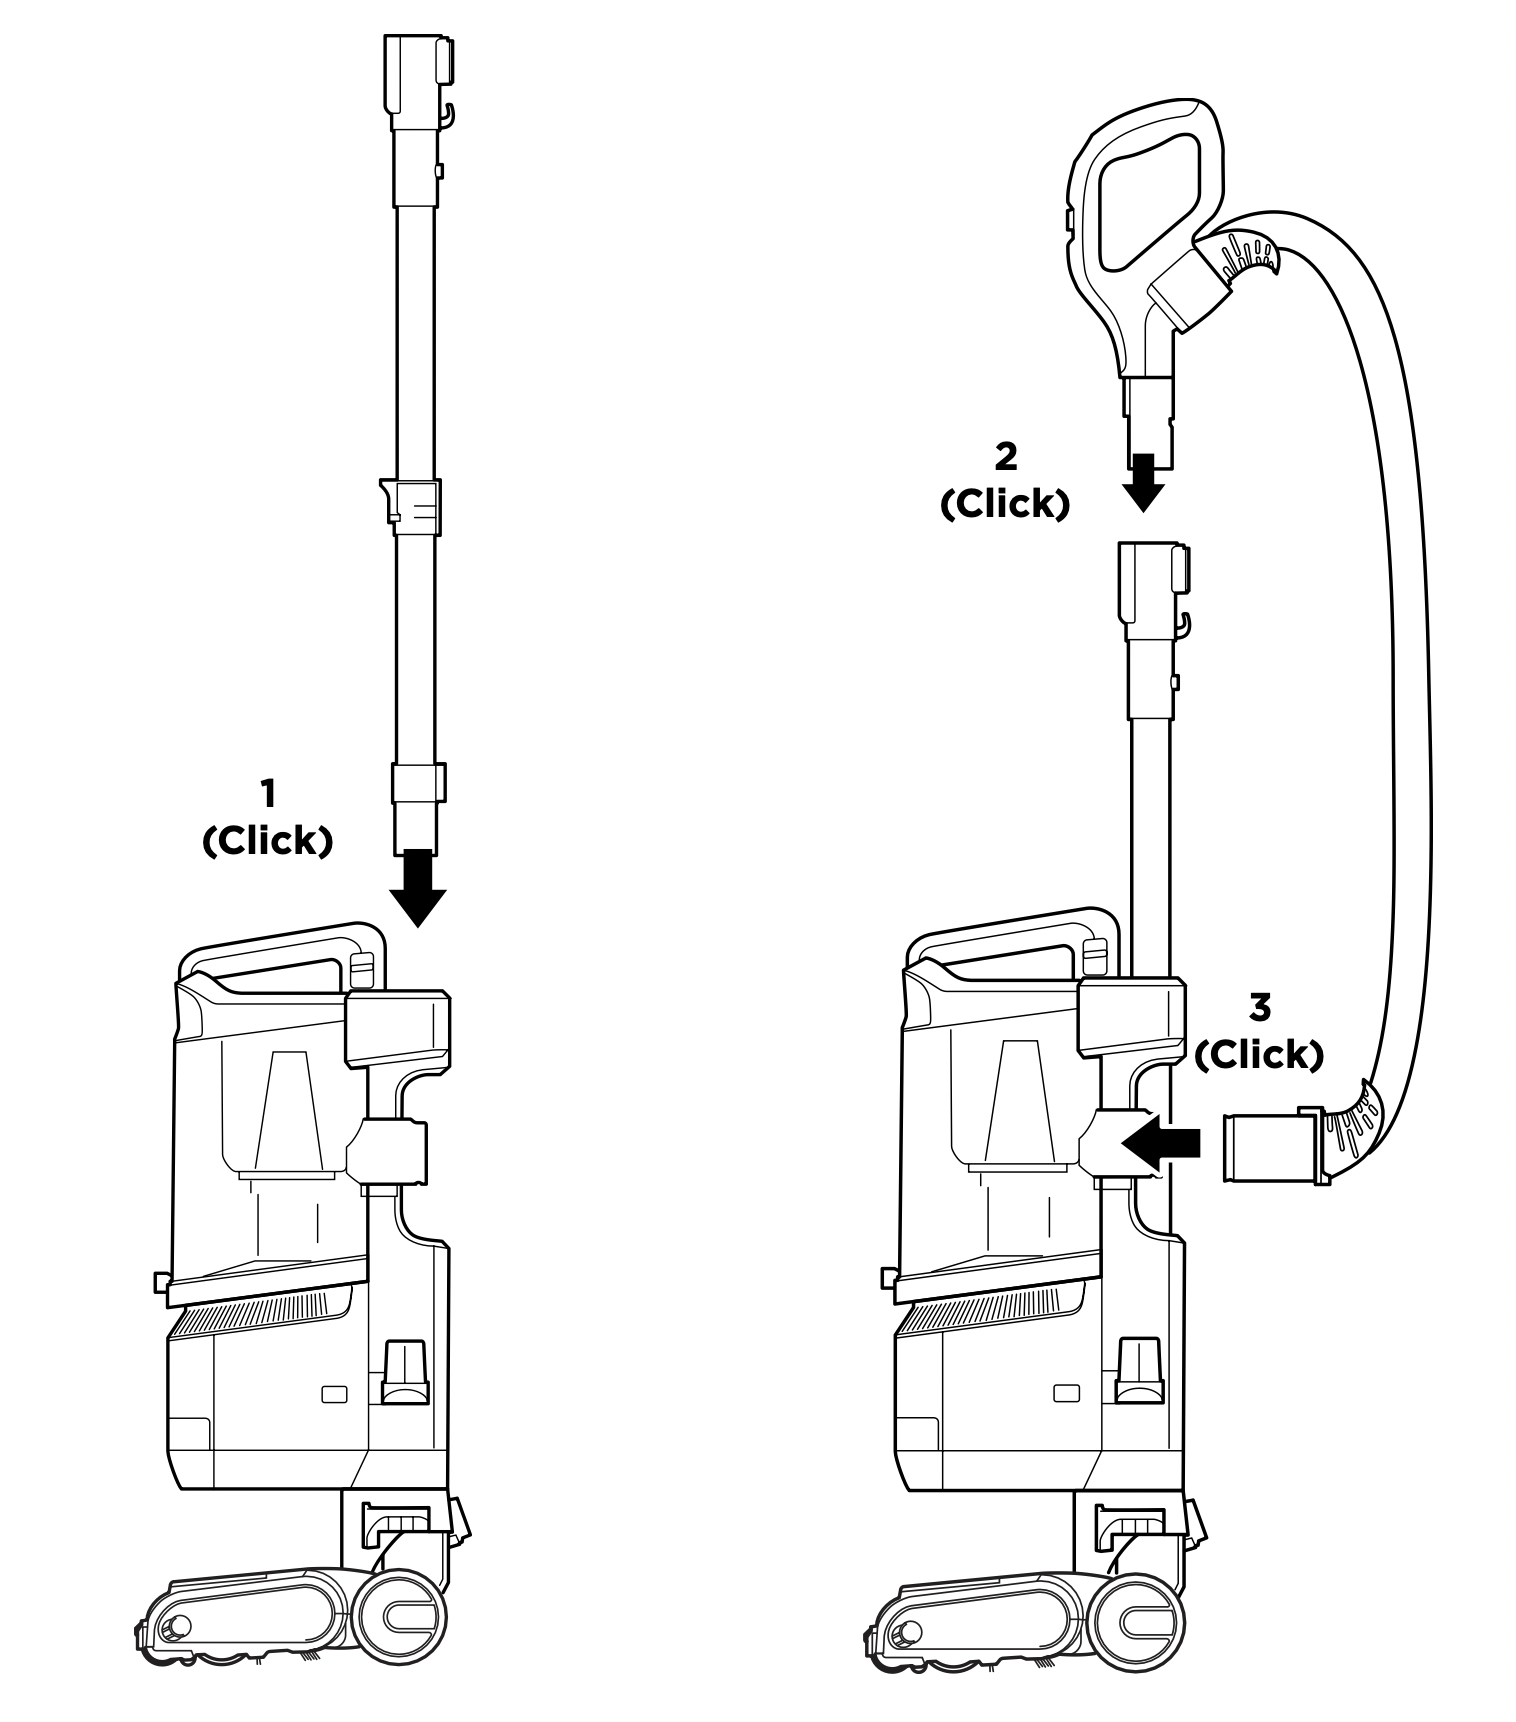
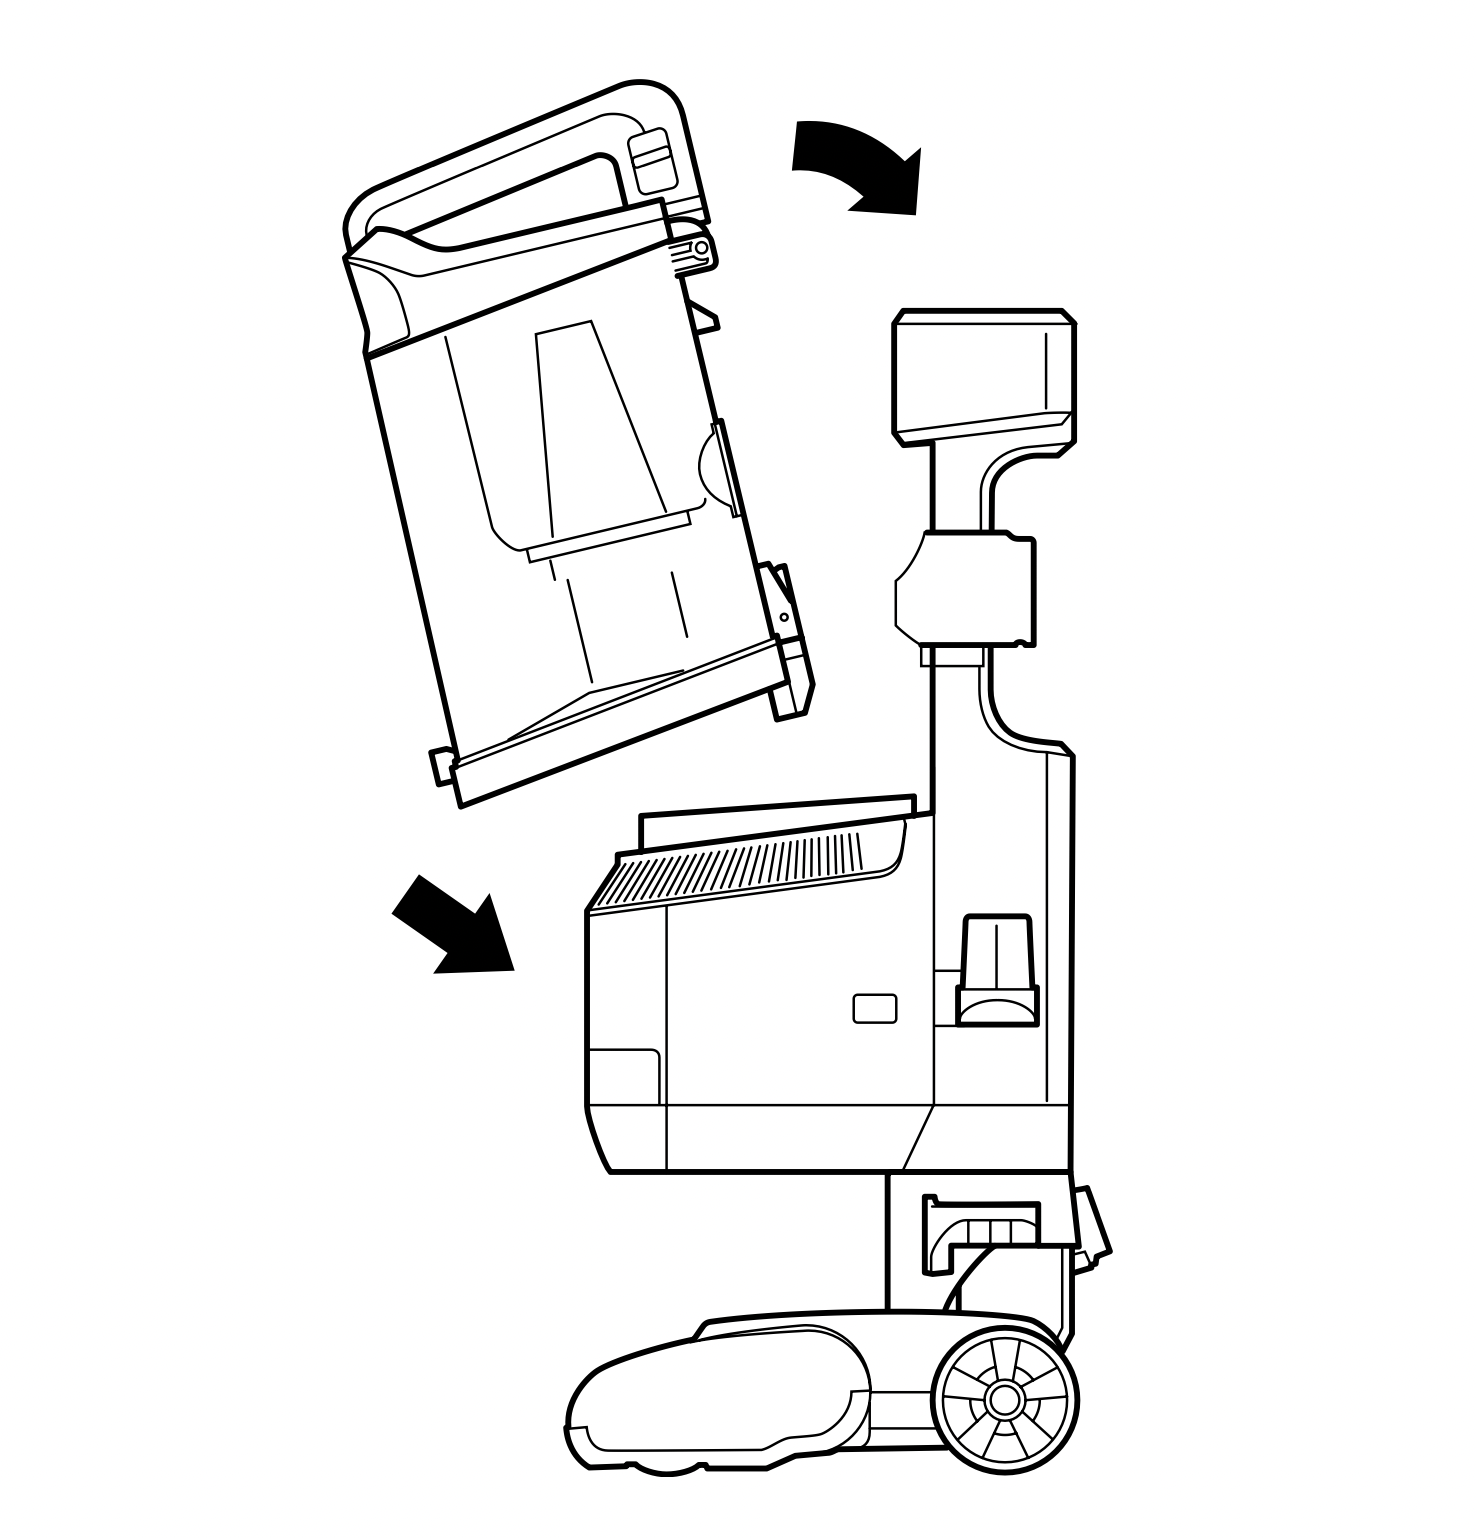
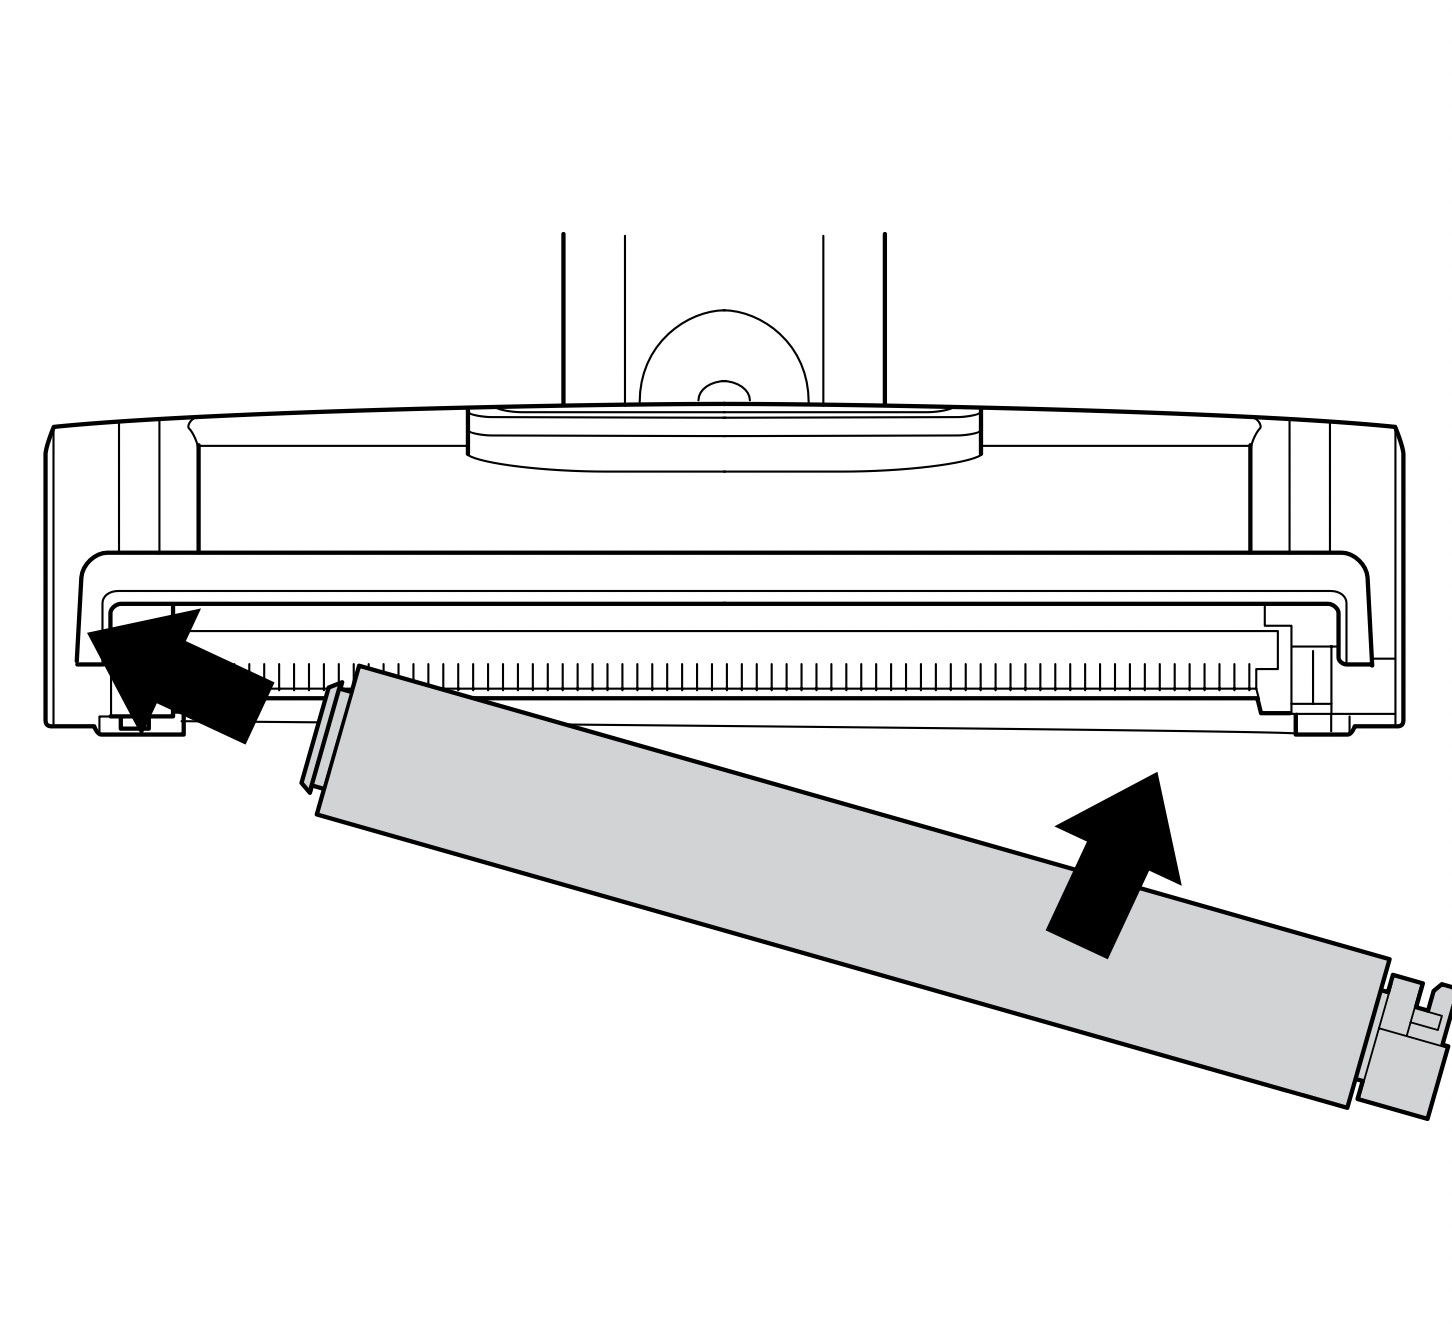
- Insert Wand into pod
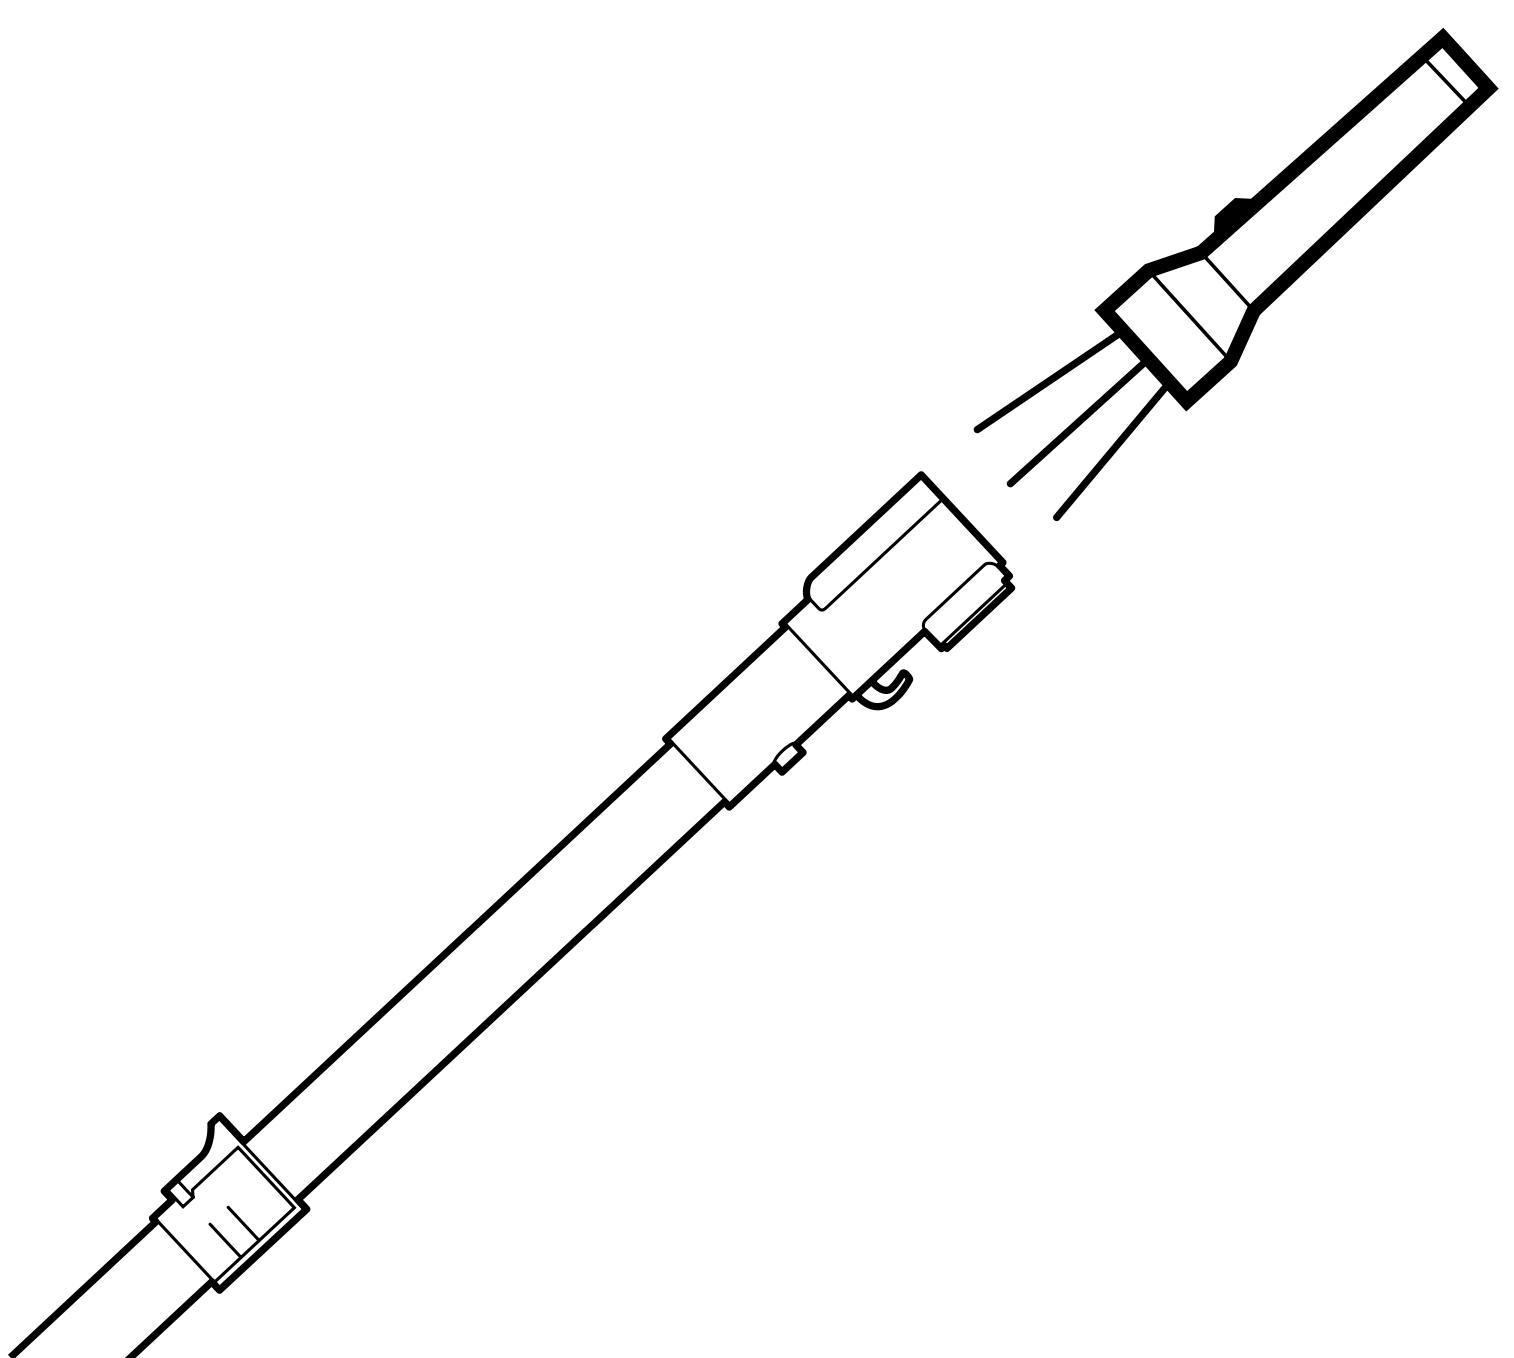
- Insert Handle into wand.
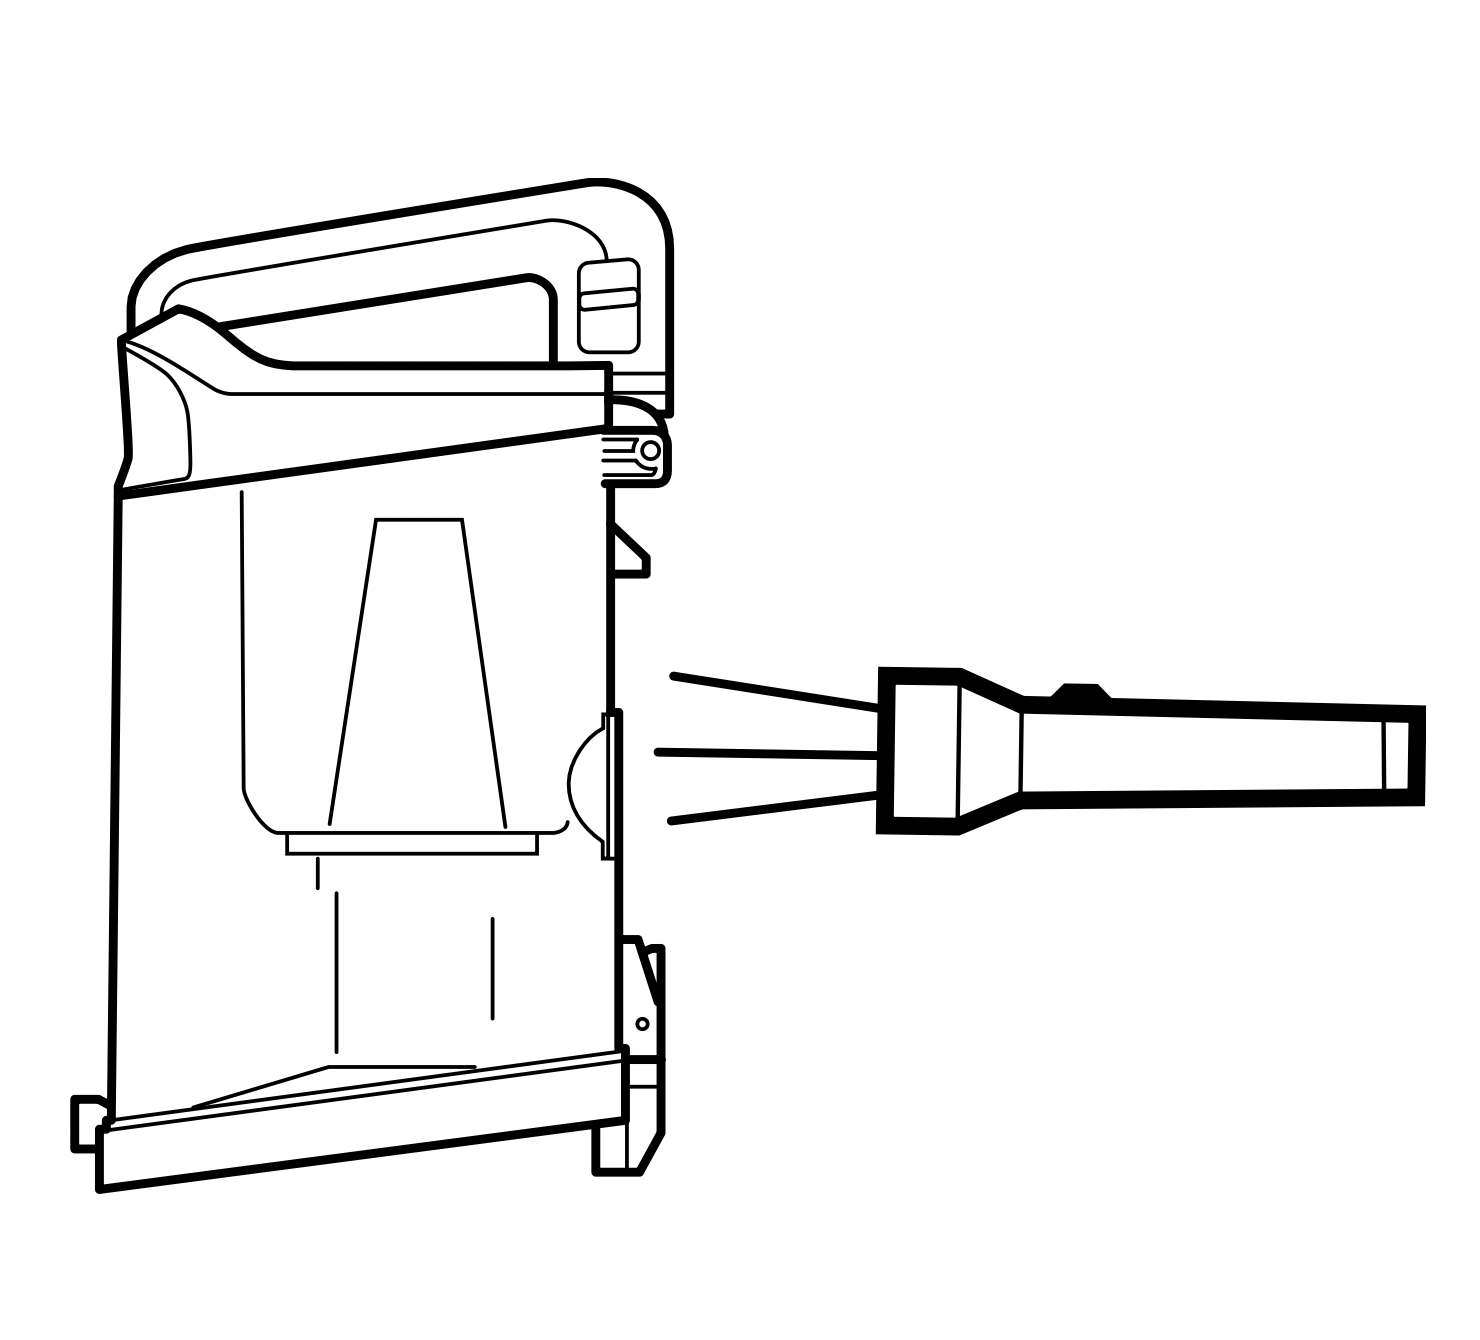
- Attach Hose to back of vacuum pod.
For proper operation, ensure all parts are firmly clicked into place.

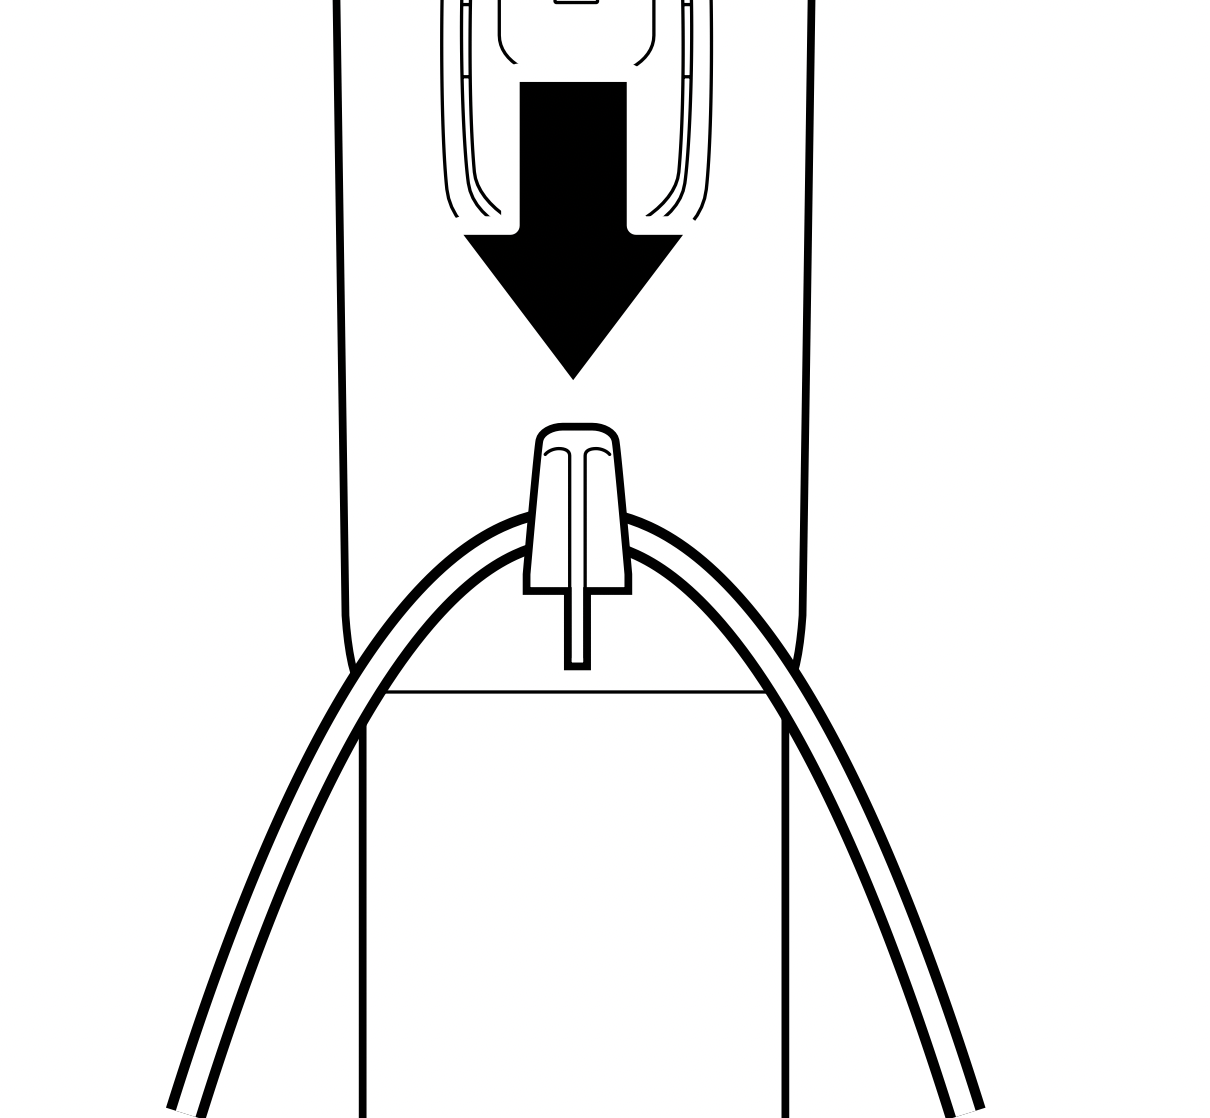
POWER CORD
UPPER CORD HOOK
For cord access, rotate upper hook down and remove cord.
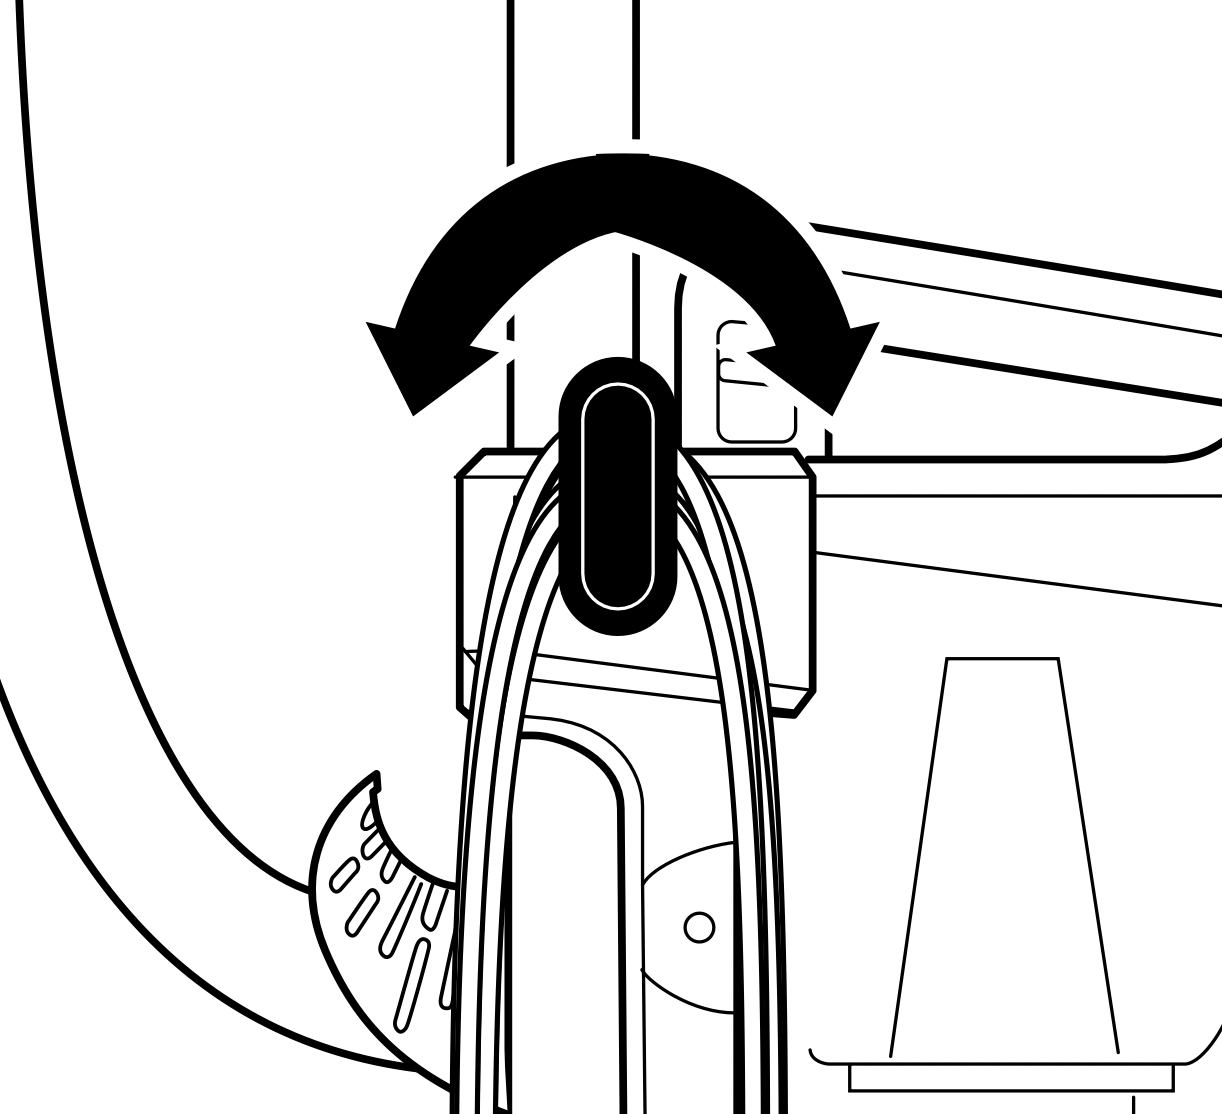
CORD HOLDER
Use cord holder on the side of wand to hold cord in place while vacuuming.
WHOLE-HOME CLEANING
SETTINGS
POWER/SURFACE SWITCH
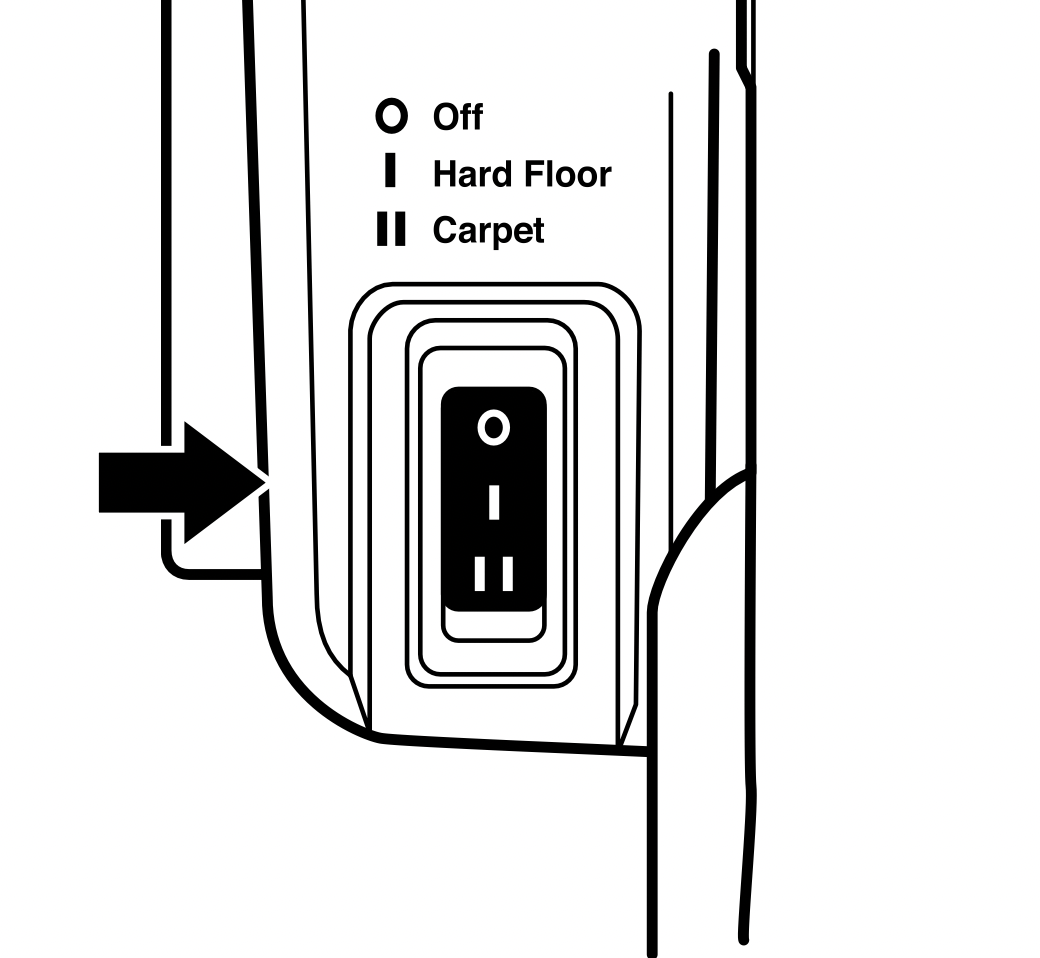
Select surface setting:
O Power Off
I Hard Floor
For hard floors and small area rugs.
II Carpet
For carpets.
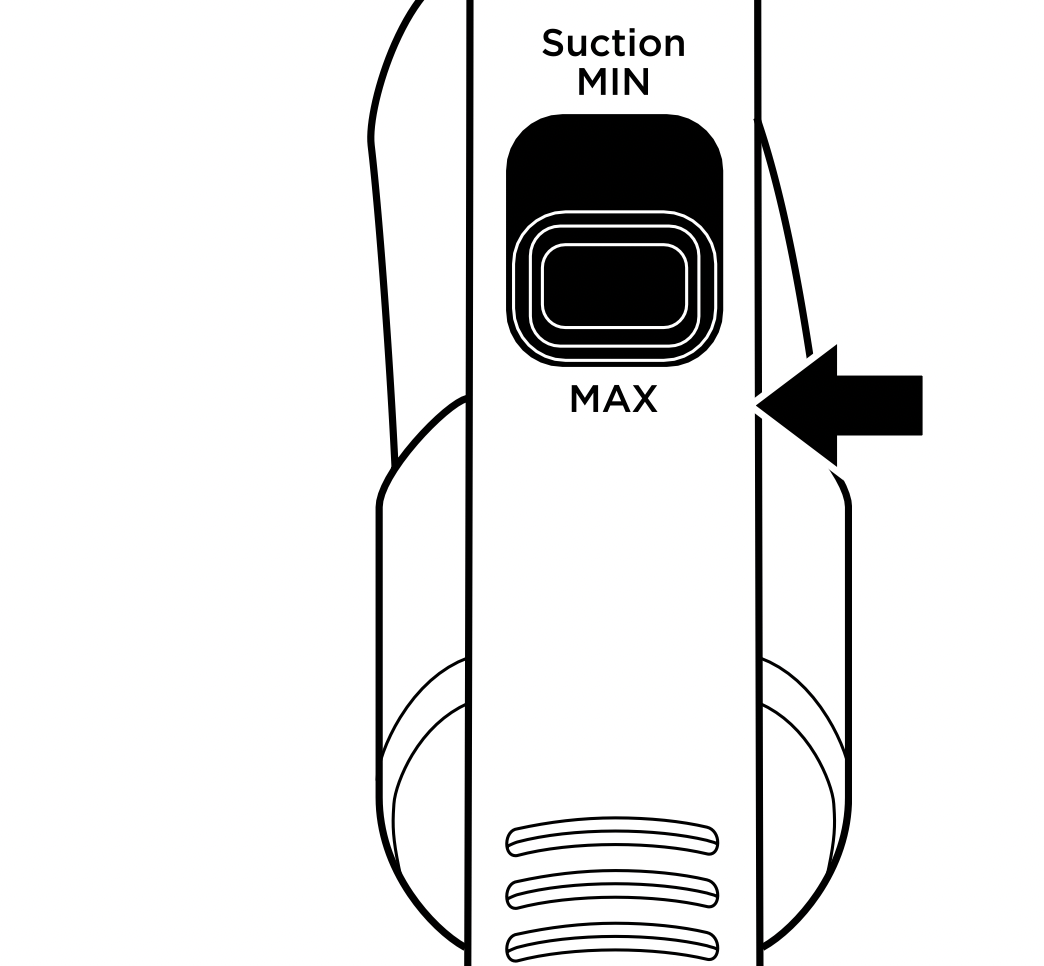
SUCTION CONTROL
The Suction Control Slider located on the handle allows you to adjust the suction depending on the floor type.
MIN: to reduce suction and increase maneuverability on carpets.
MAX: to increase suction on hard floors.
BRUSHROLL INDICATOR LIGHT
INDICATOR LIGHT
WHAT DOES THE BRUSHROLL INDICATOR LIGHT MEAN?
Solid Green: The brushroll is spinning and working as intended.
Solid Red: There is a jam in the brushroll area. Turn off and unplug the vacuum and remove any blockages in the nozzle.
Flashing Red: The motorized floor nozzle is overheating. Turn off the vacuum, unplug it, and remove any blockages. Let the vacuum cool down for at least 60 minutes before restarting. See Troubleshooting section for more information.
NOTE: For deep carpet cleaning per ASTM F608, use setting II (Carpet) with max suction.
CLEANING MODES
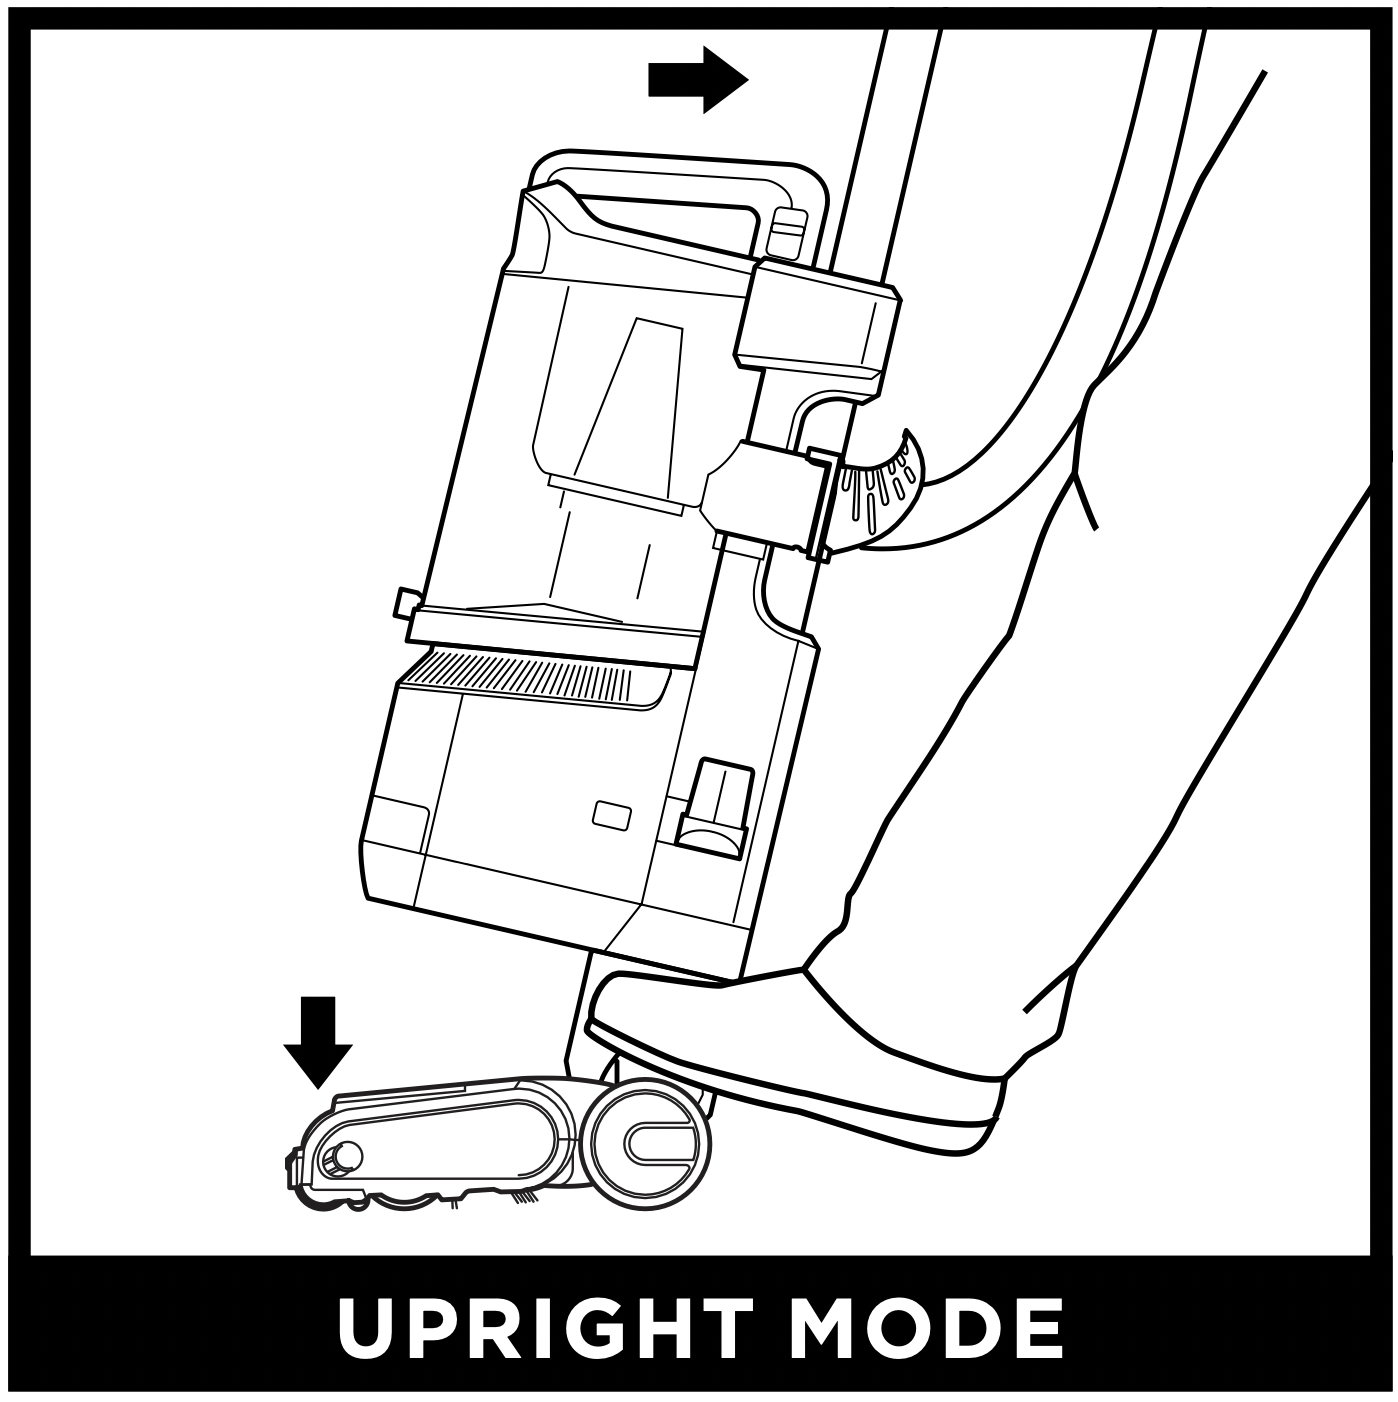
To engage Brushroll, step on floor nozzle and tilt handle back firmly.
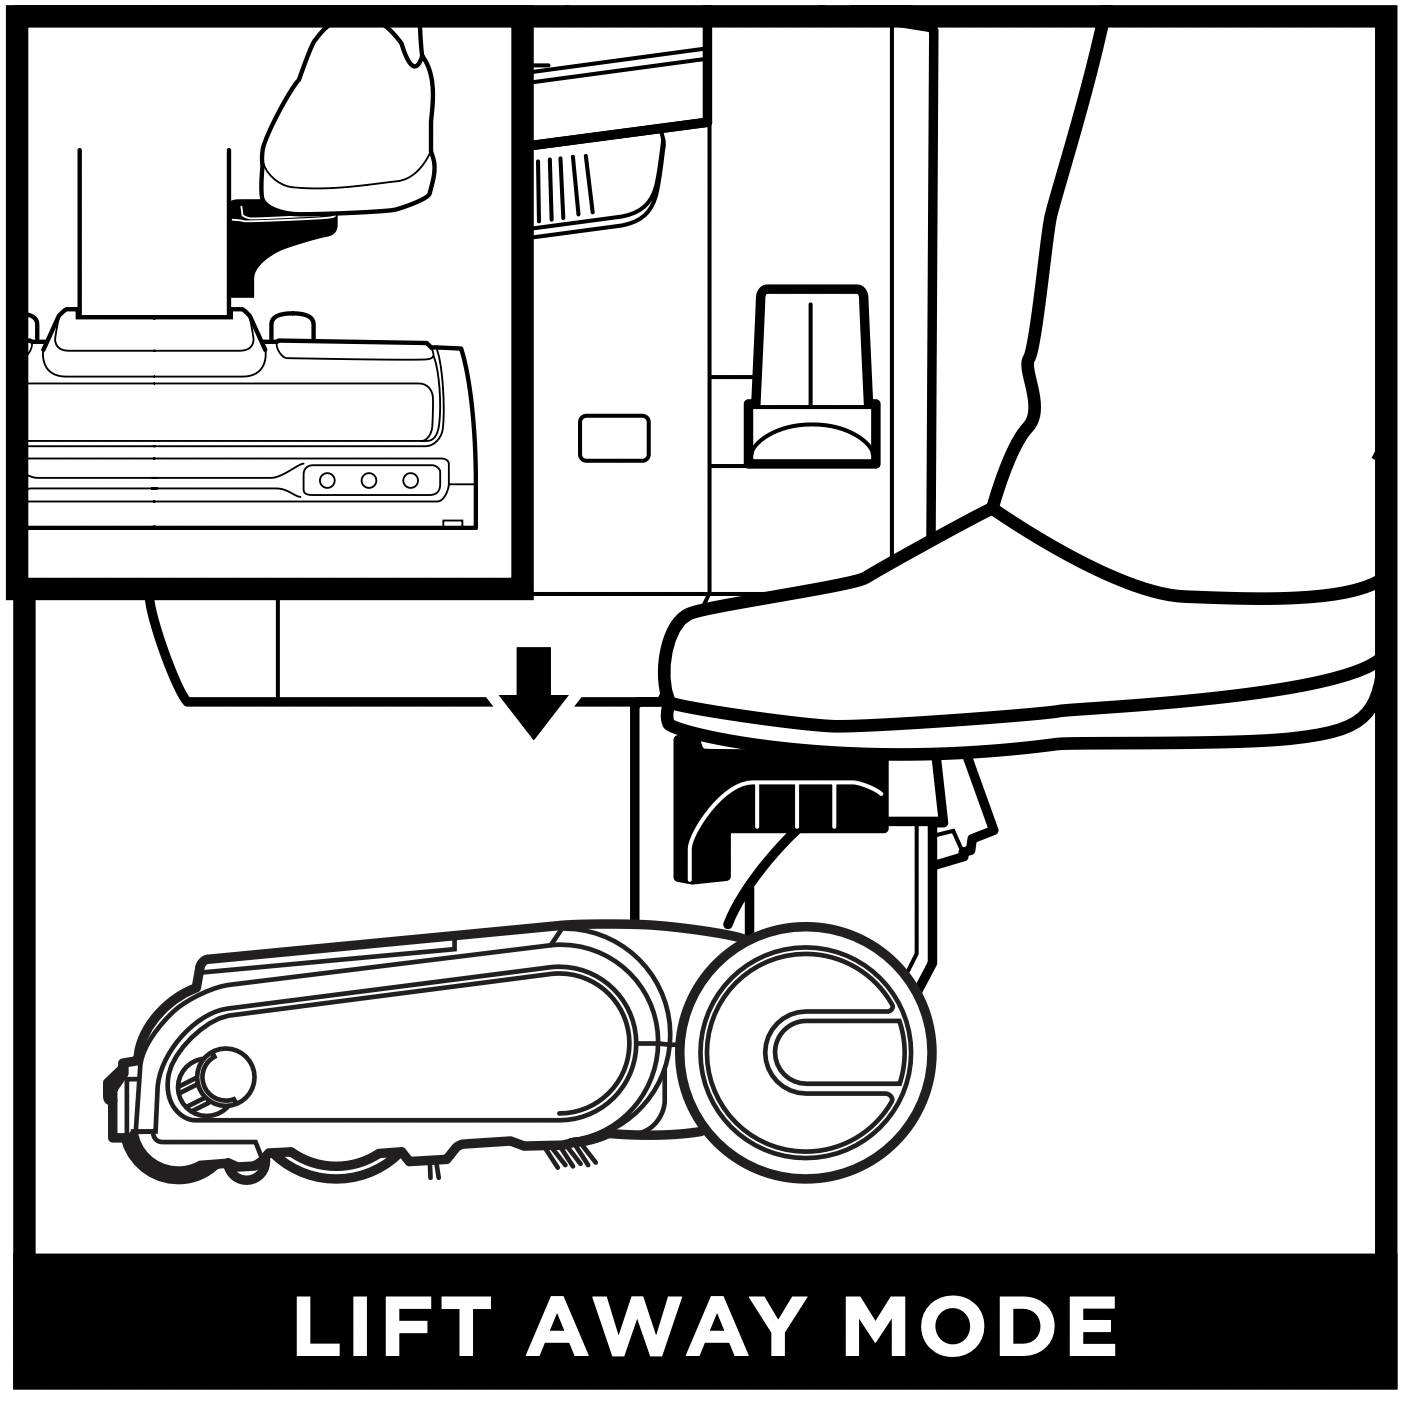
Step on the pedal on the floor nozzle to lift off the pod.
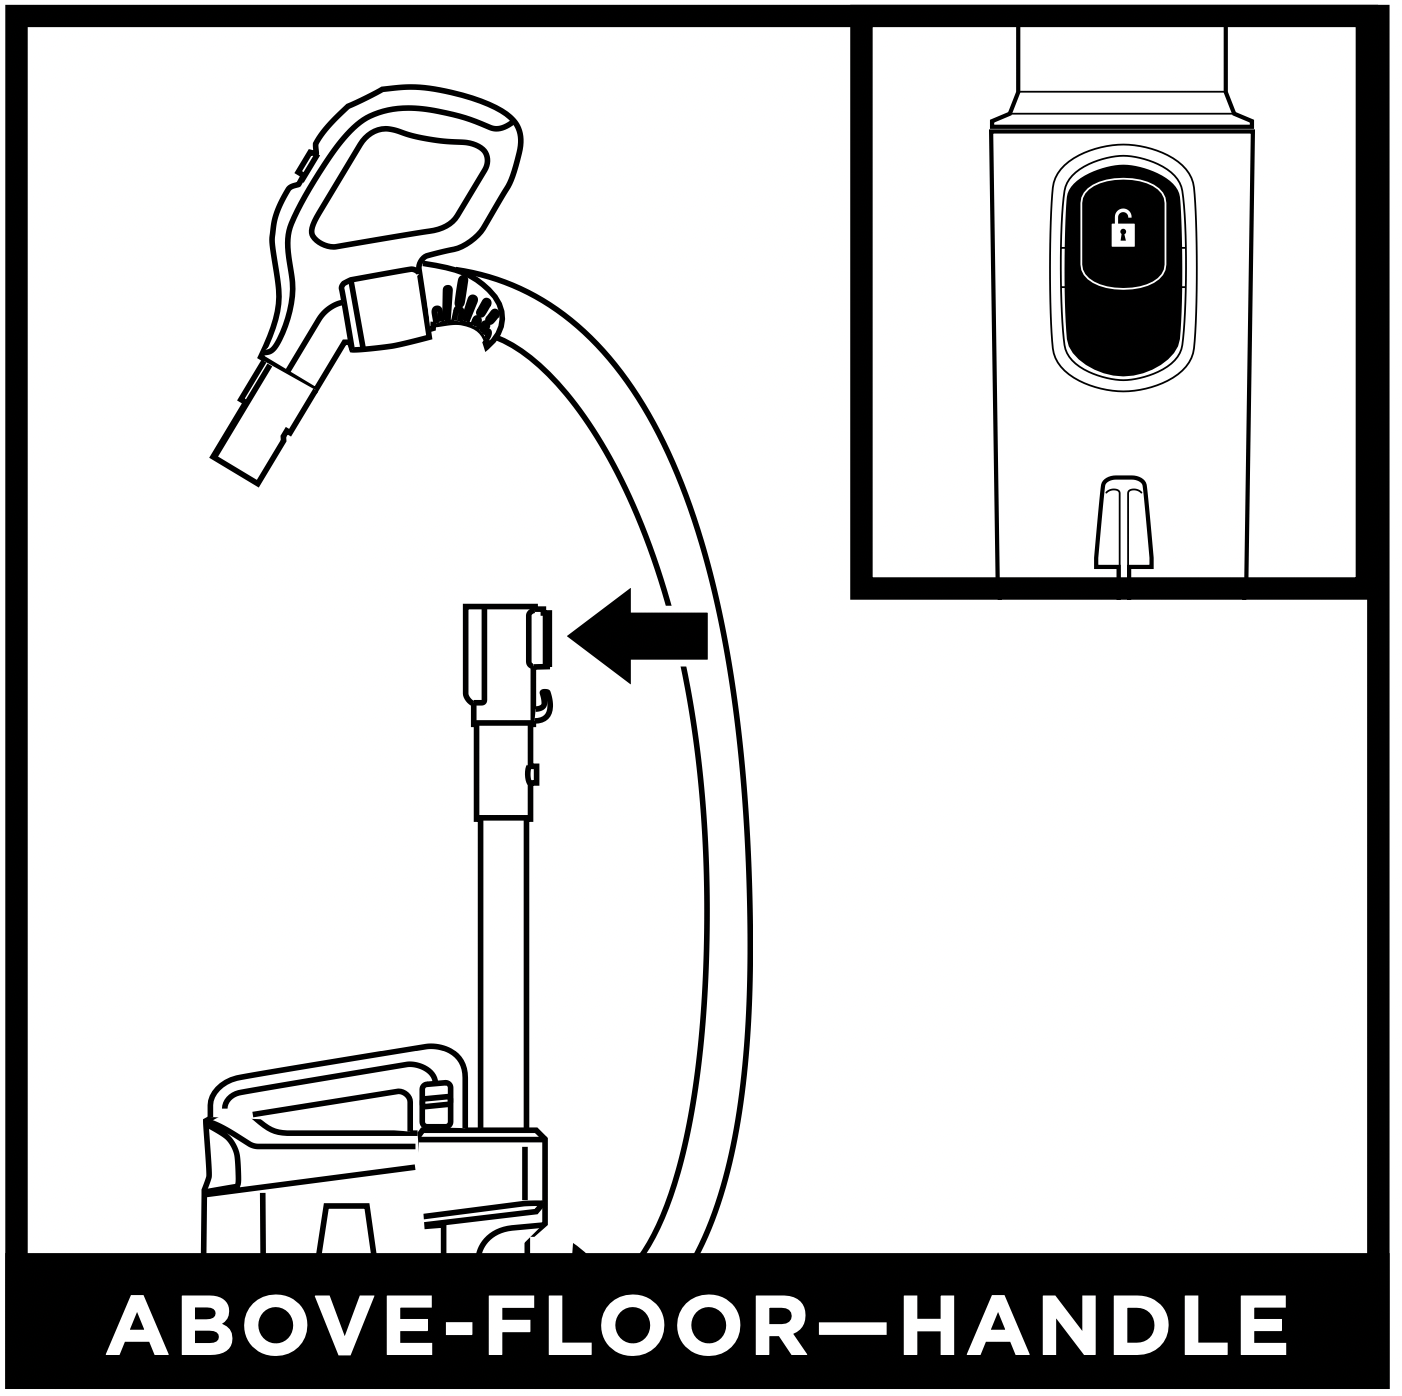
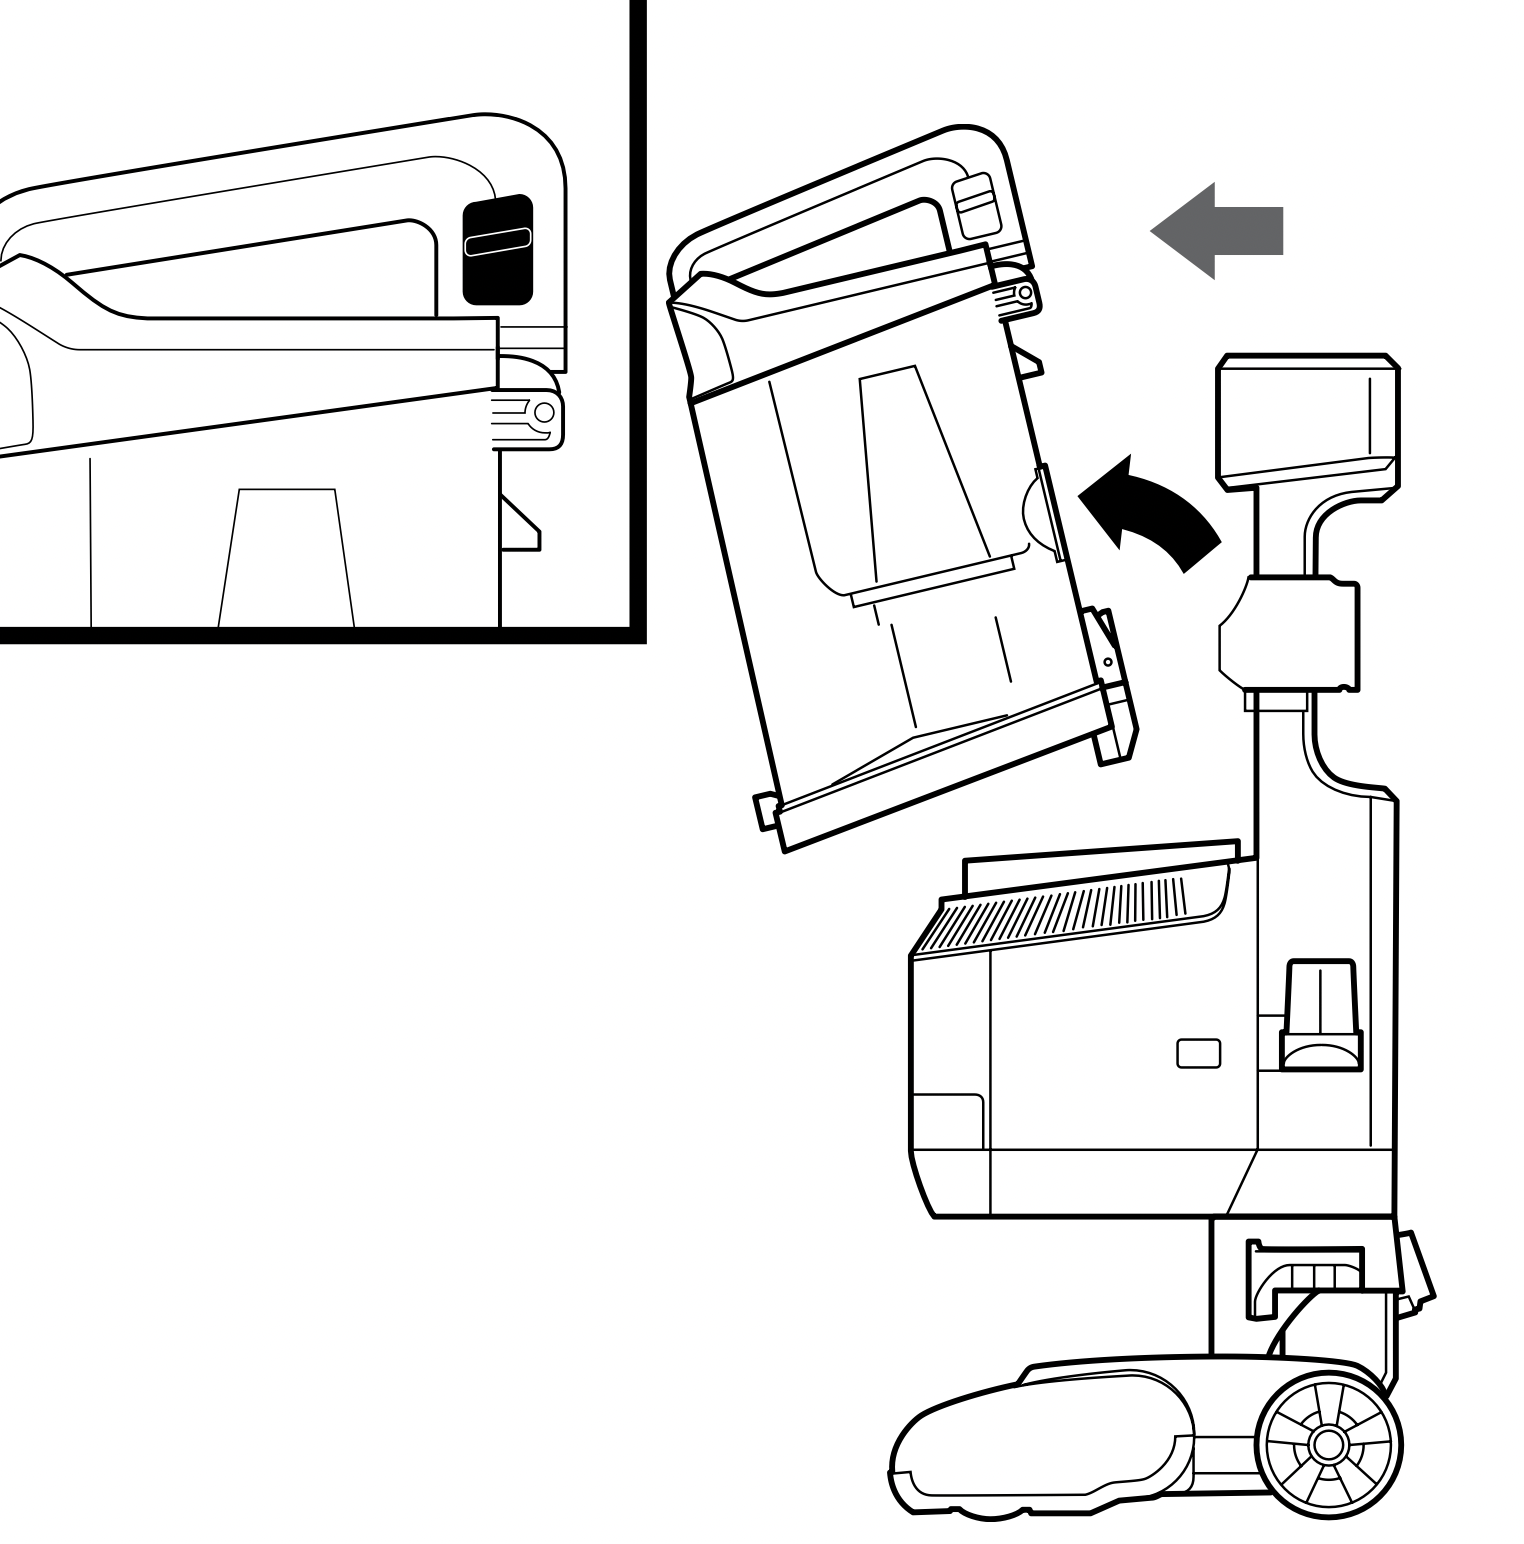
Press the Handle Release button and pull up on the handle to detach it from the wand.
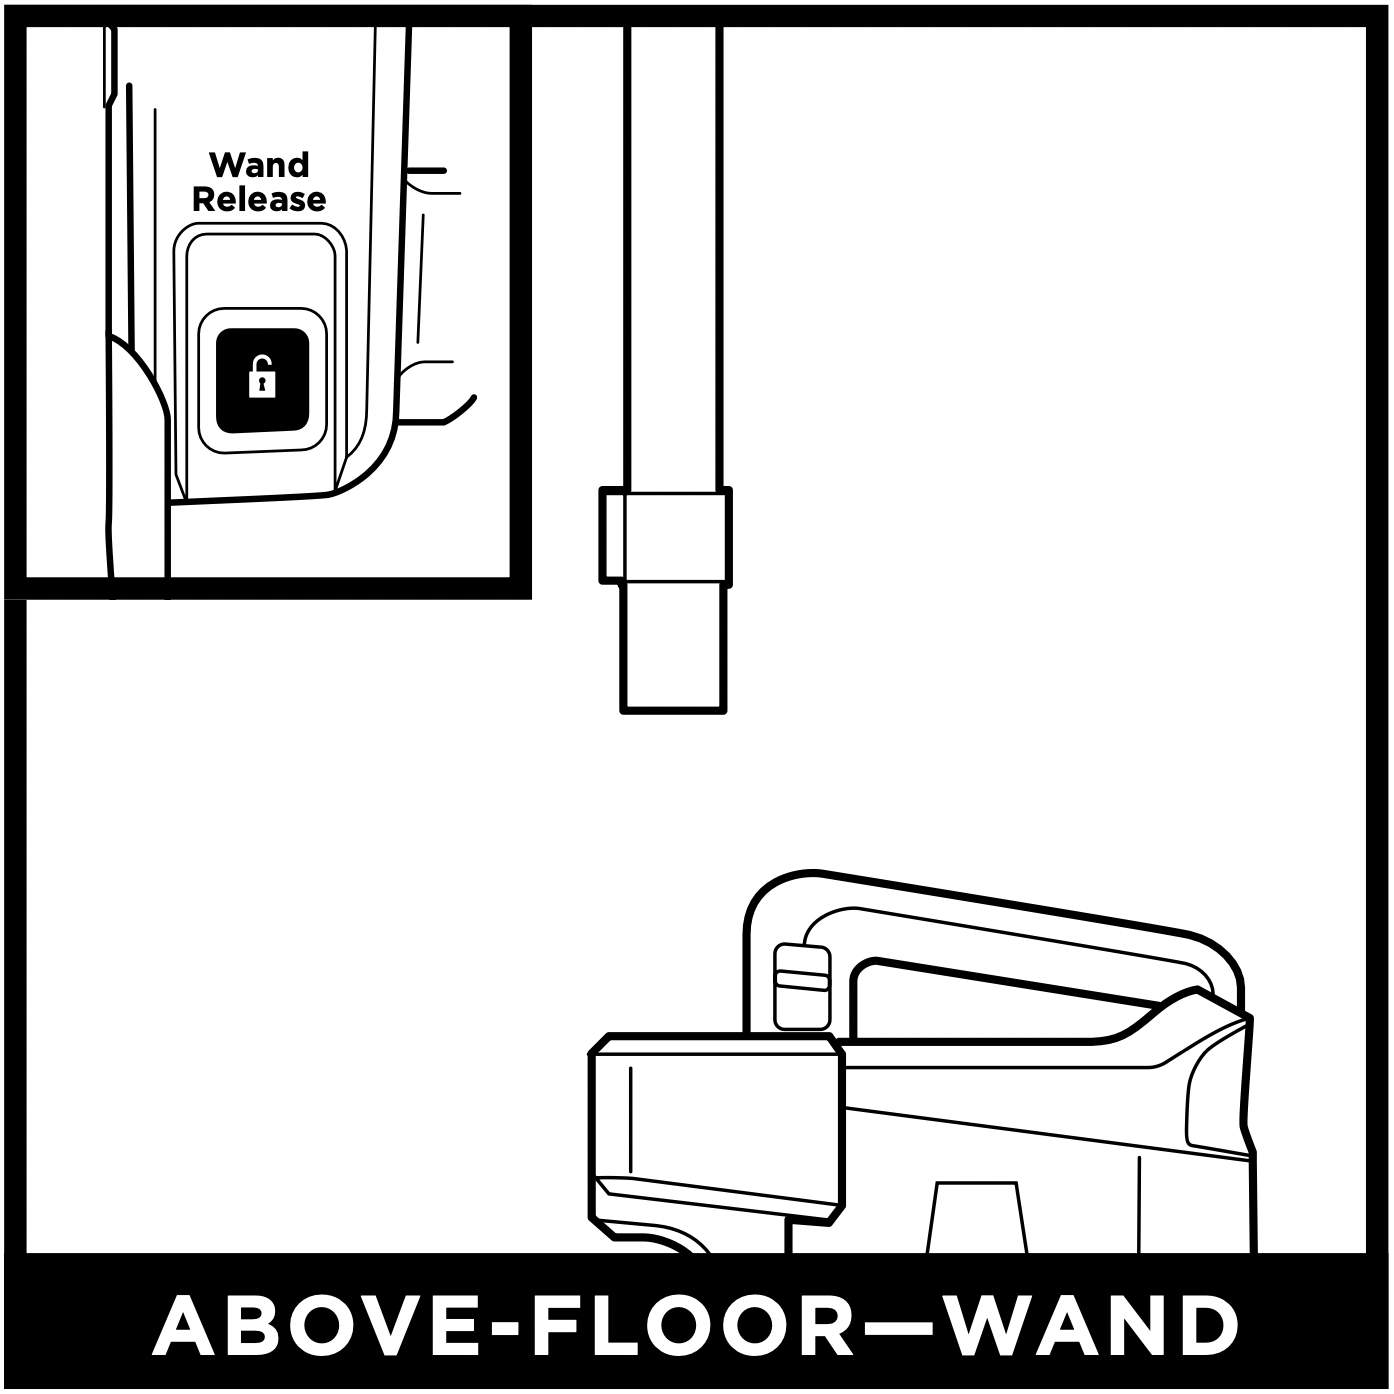
Press the Wand Release button and pull up on the wand to detach it from the pod.
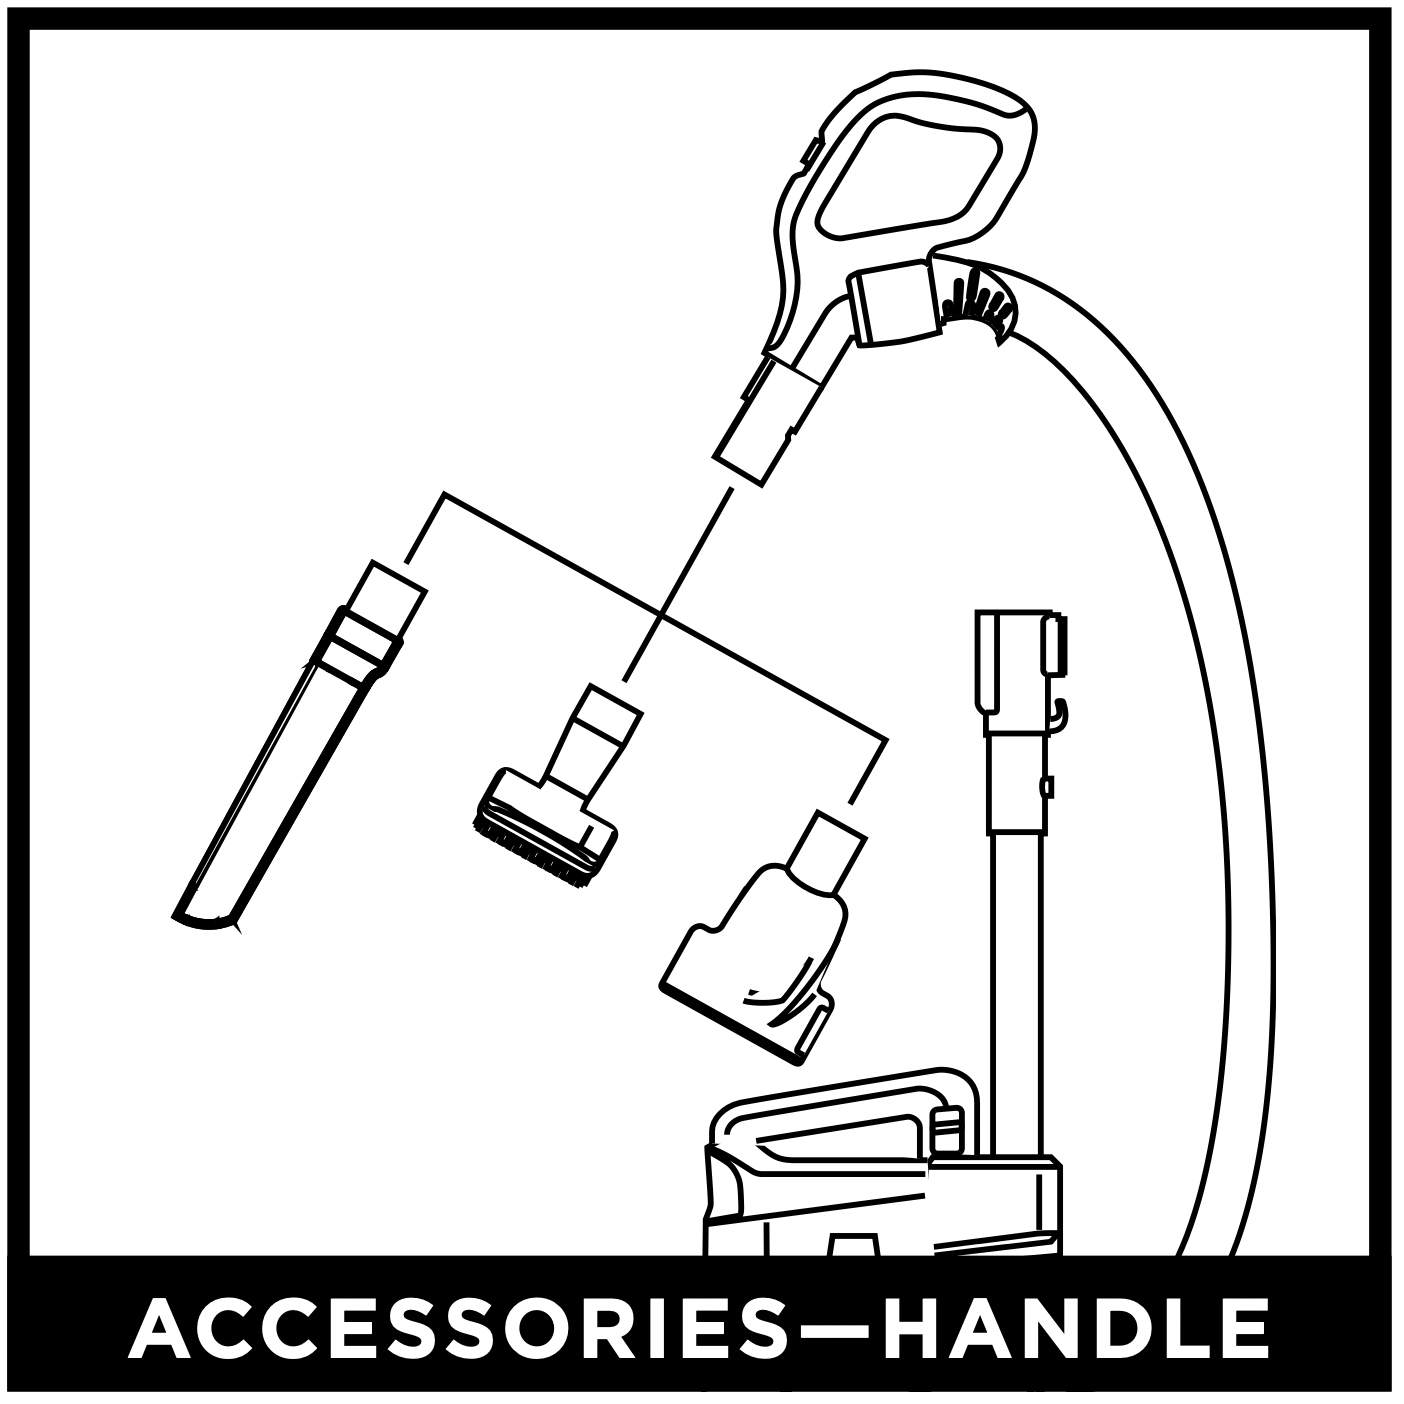
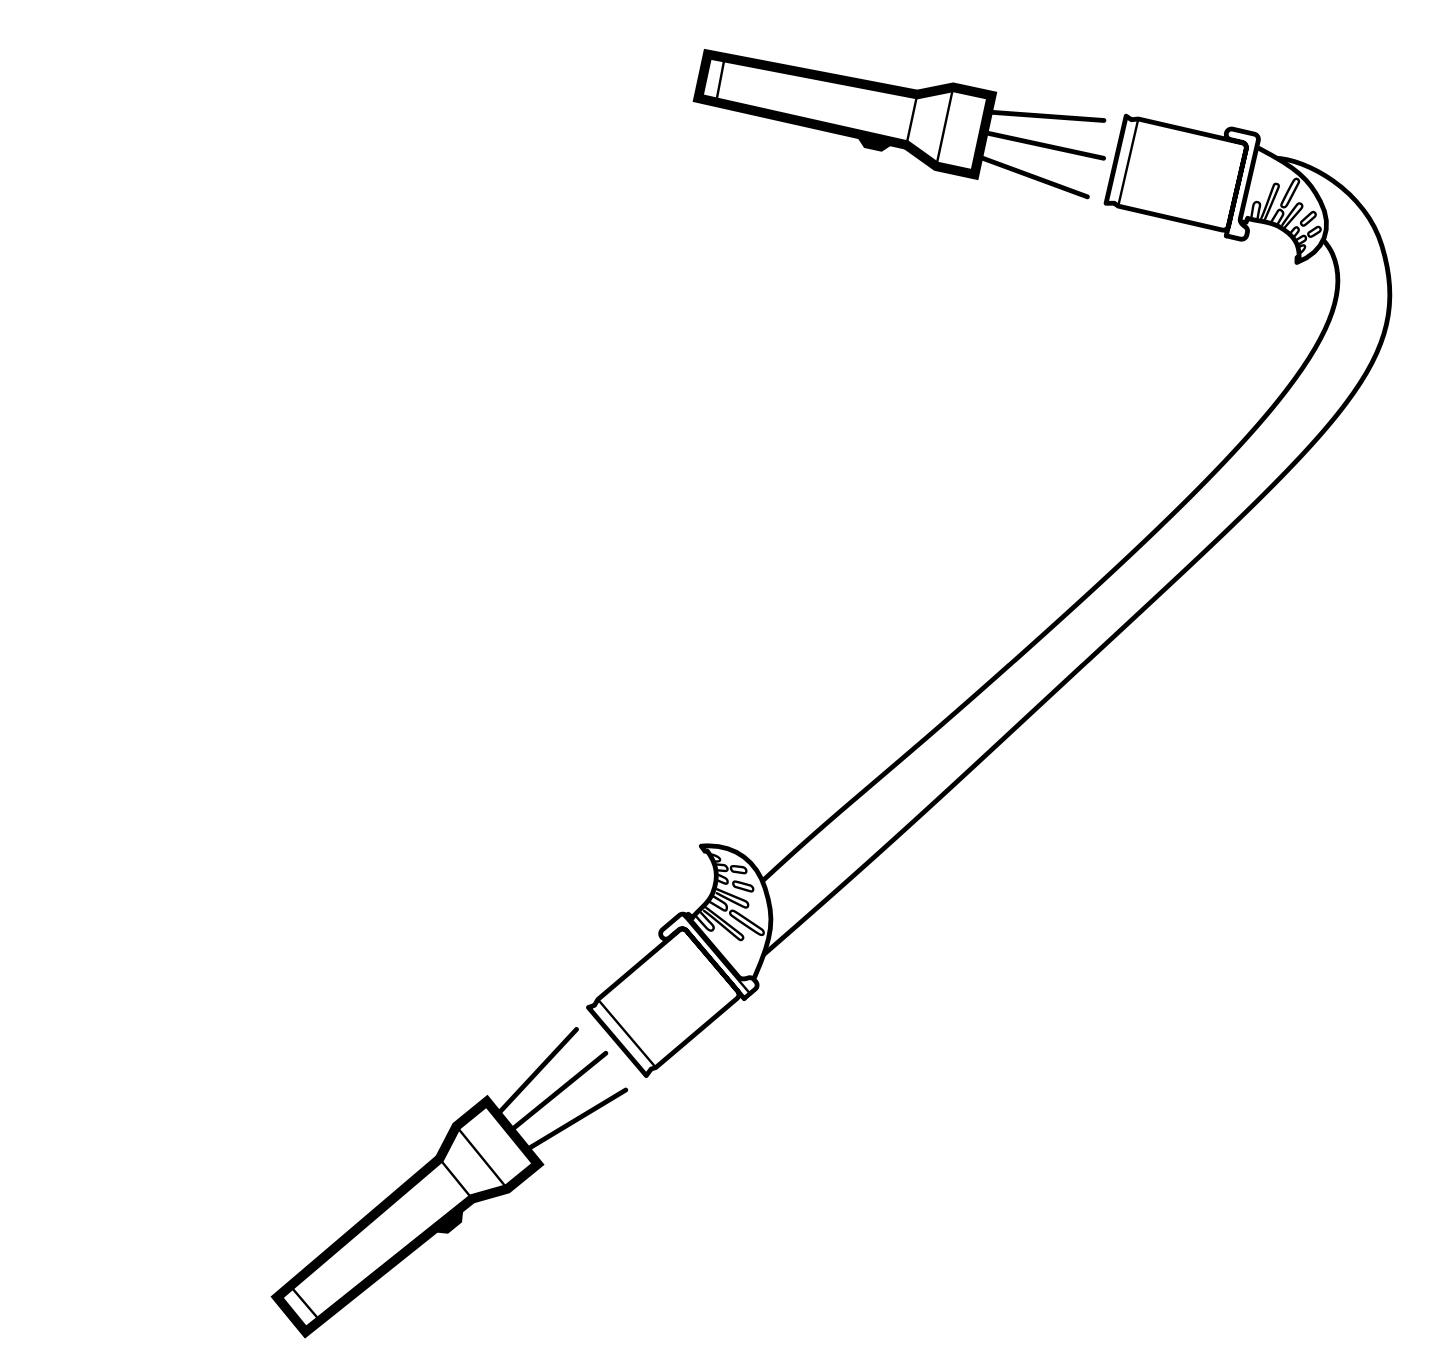
Attach an optional cleaning accessory to handle or wand.
NOTE: All accessories are compatible with both the wand and the handle. Included accessories will vary by model.
EMPTYING THE DUST CUP
IMPORTANT: Unplug the power cord before performing any maintenance.
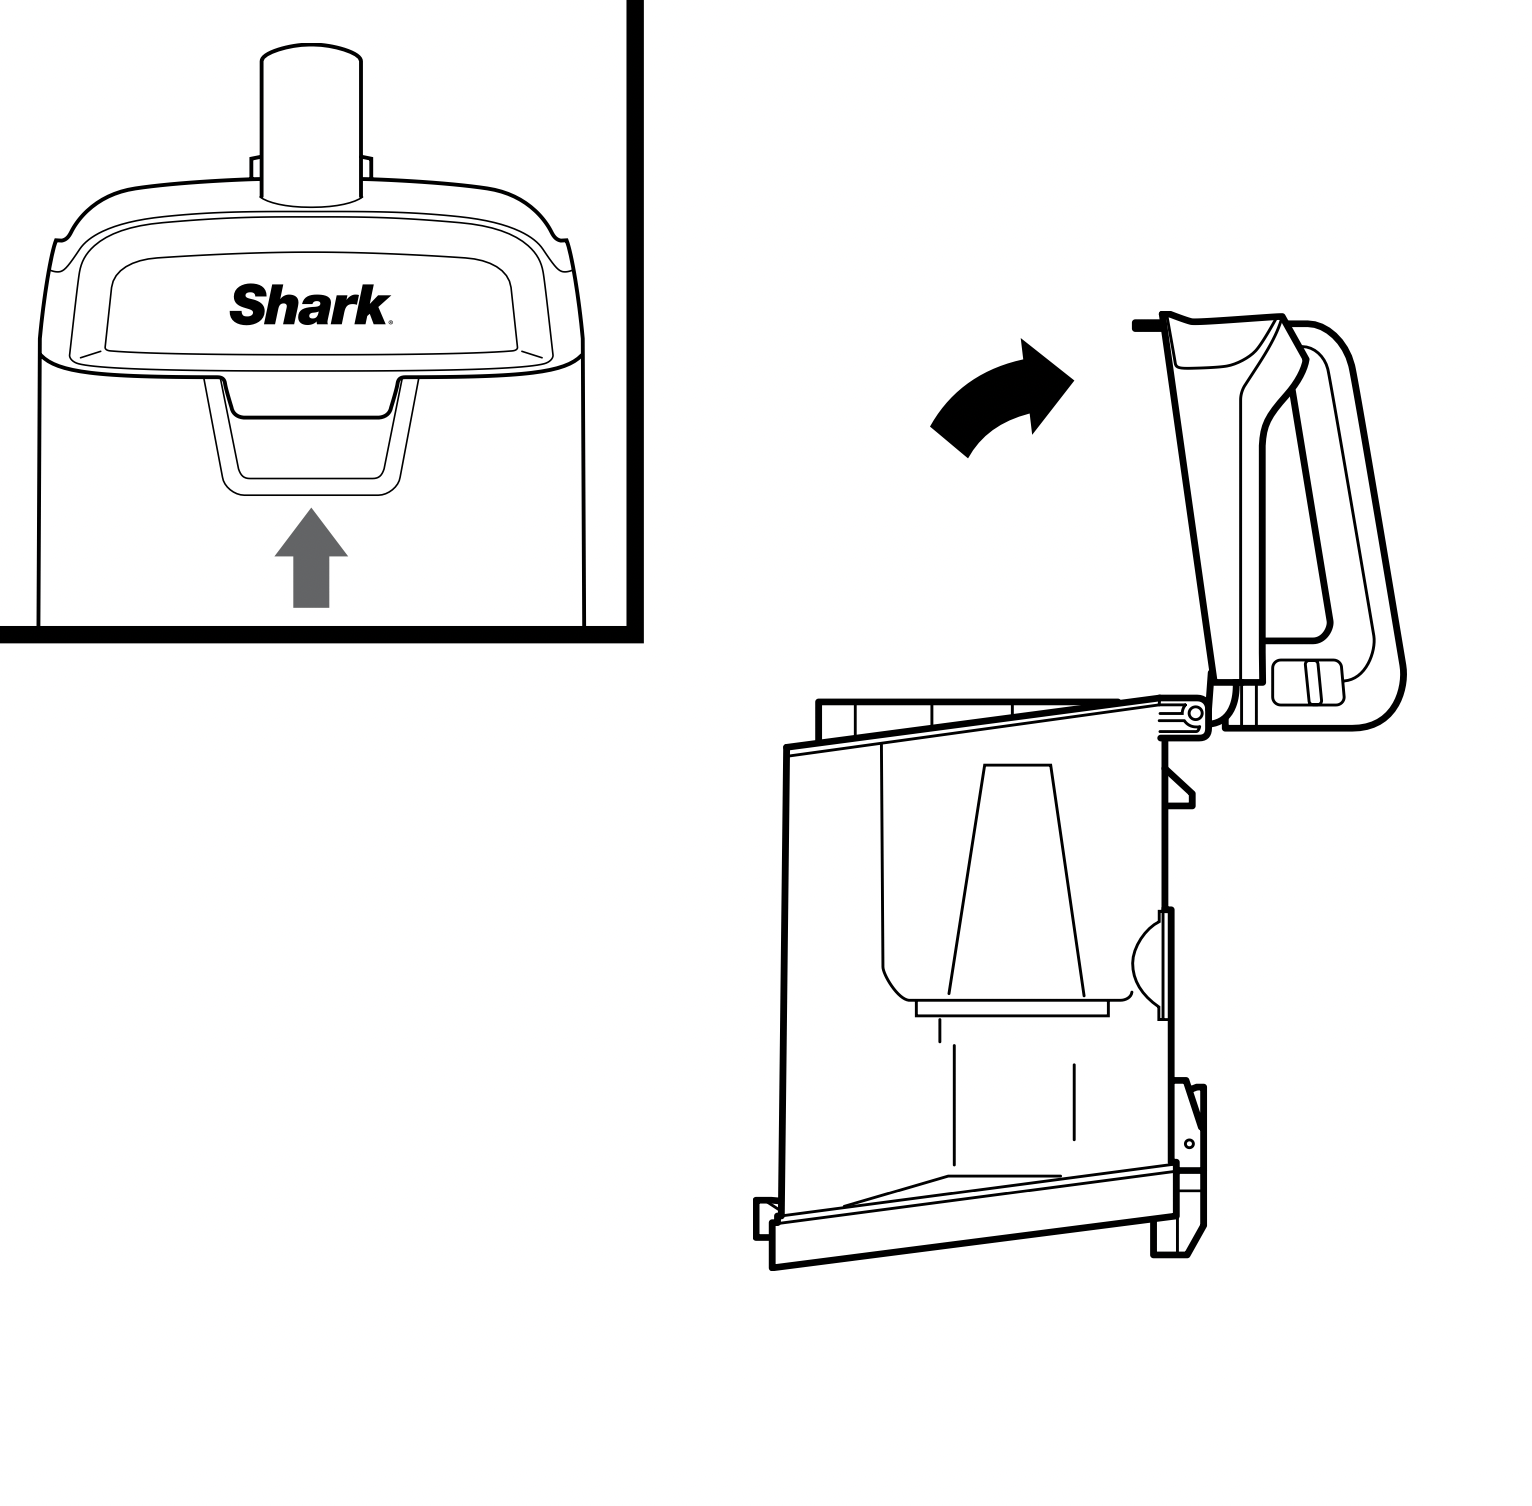
To remove the Dust Cup, slide up on the release button located on the side of dust cup handle. Tilt dust cup forward, then lift to remove.
Clear debris from the Lint Screen in the dust cup. Lift the upper release tab at the top of the dust cup and open the lid. Gently brush the lint screen to remove debris.
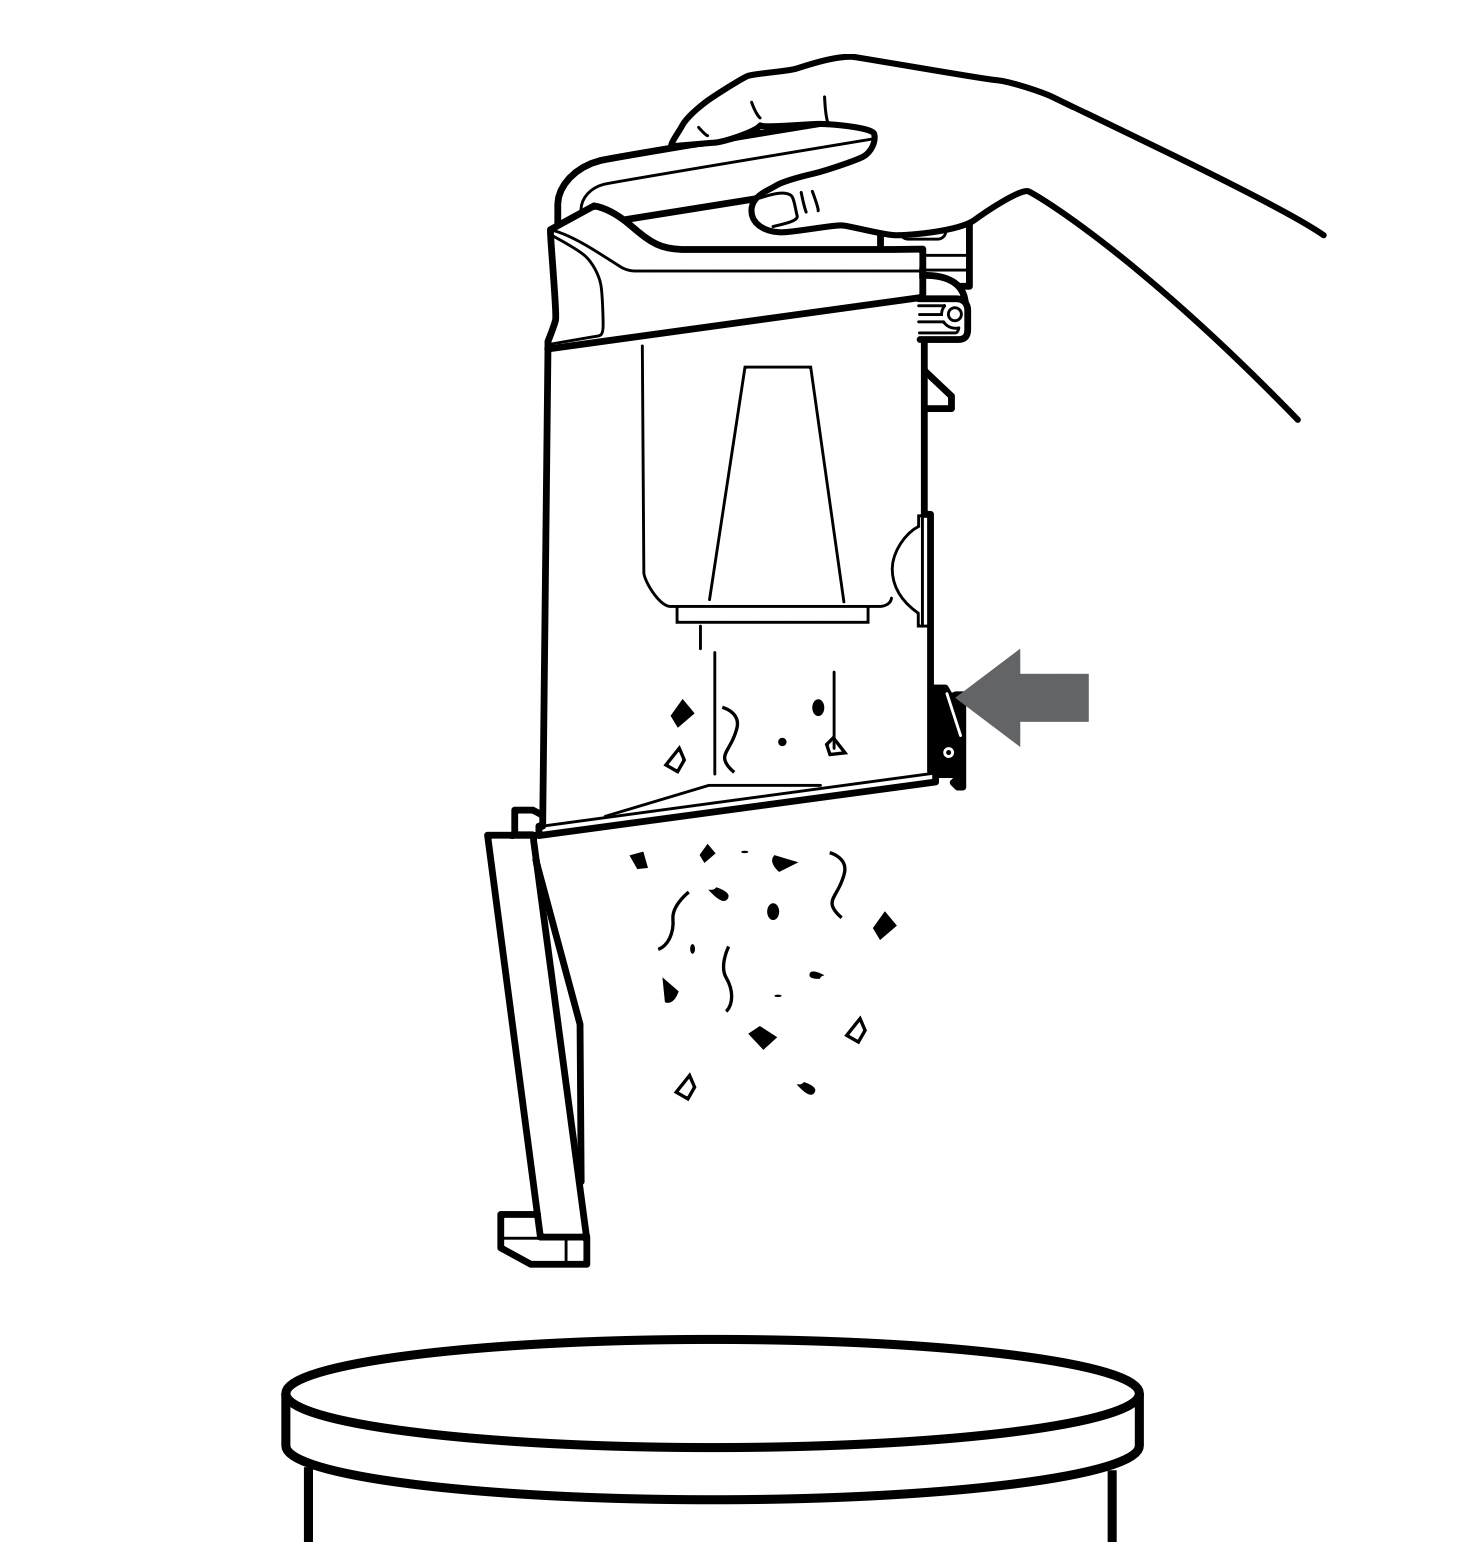
To empty debris into the trash, press the lower release button and the bottom of the dust cup will drop open.
To reinstall, place the bottom of the dust cup onto the pod and then tilt until it clicks into place.
CLEANING THE FILTERS
Regularly rinse the filters to maintain your vacuum's suction power.
Rinse filters with cold water only. Allow all filters to air-dry for at least 24 hours before reinstalling them to prevent liquid from being drawn into electronic parts.
IMPORTANT: DO NOT use soap when cleaning the filters.
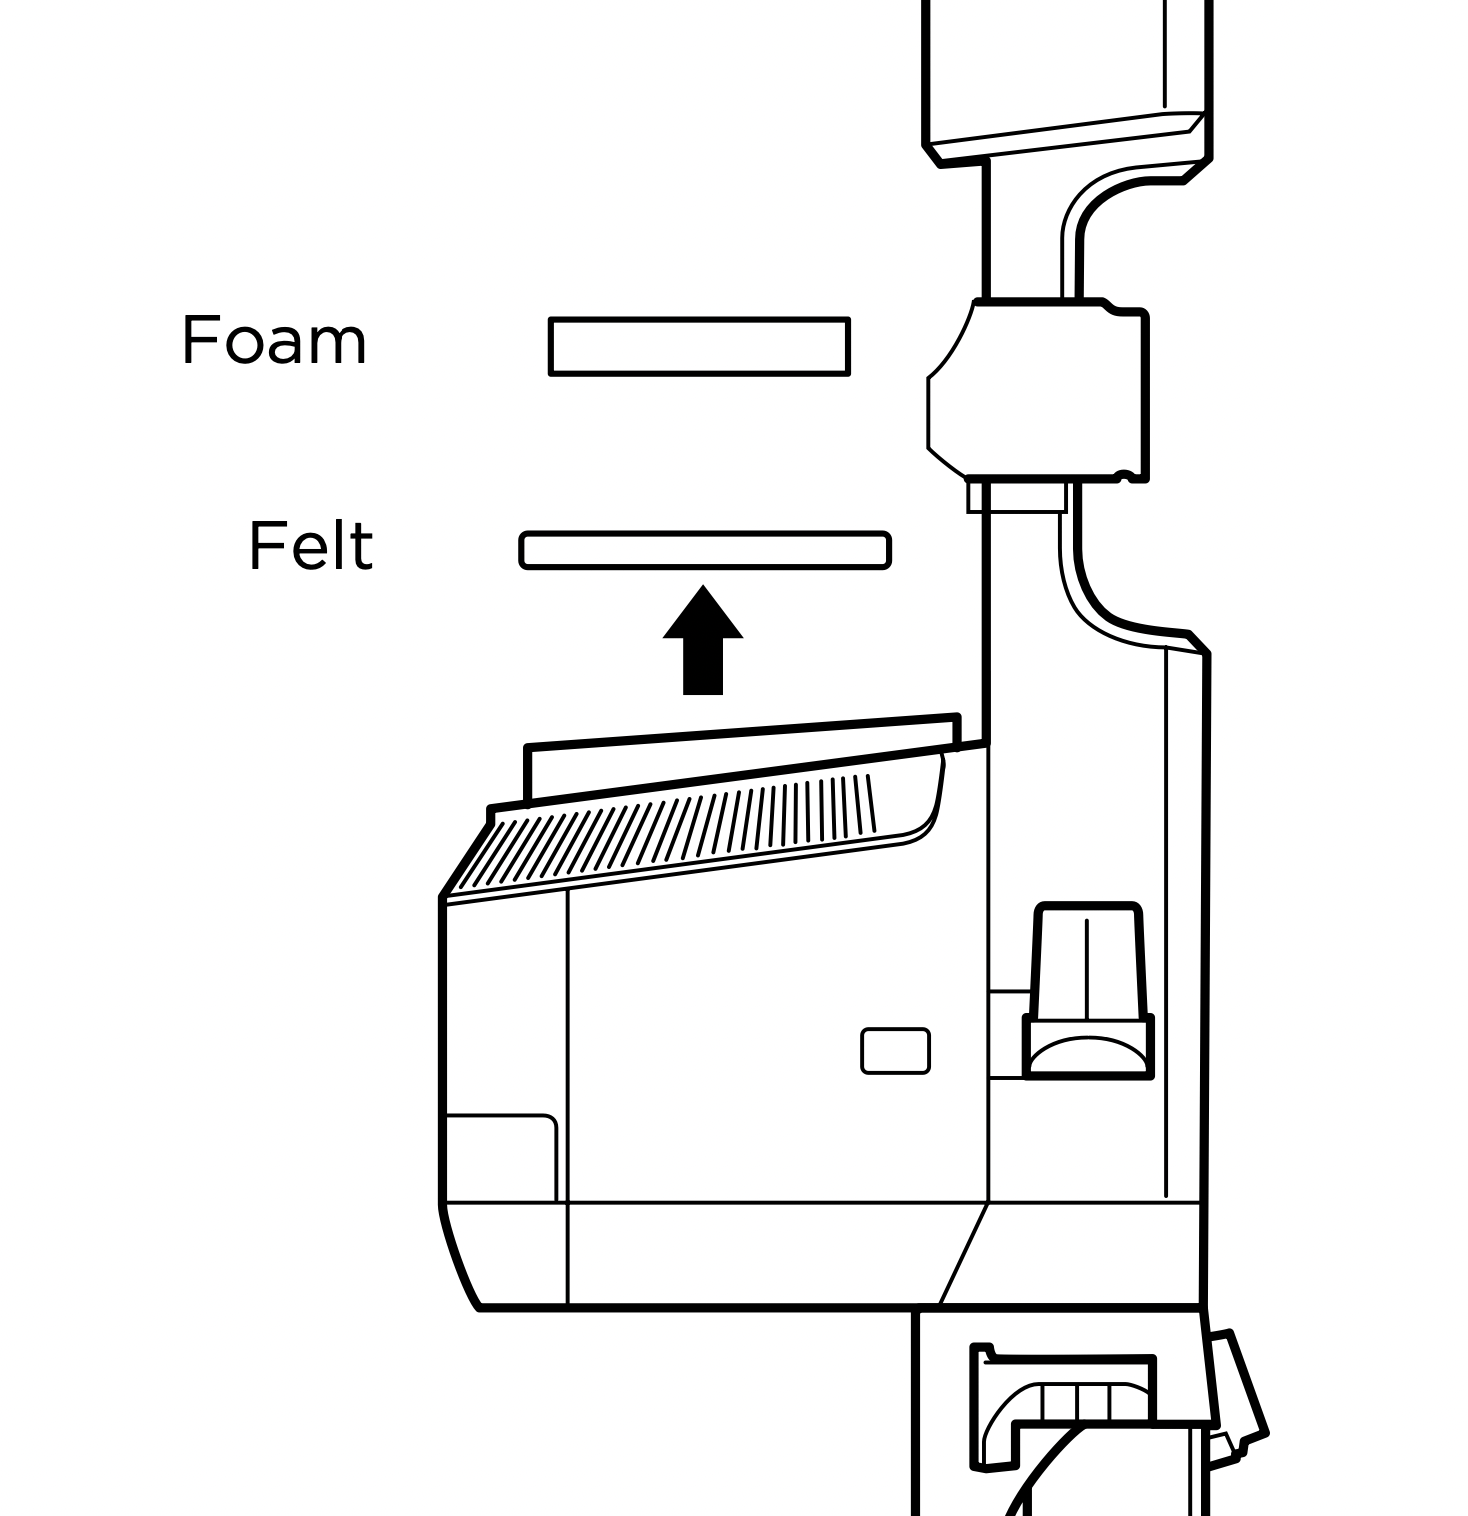
RINSE PRE-MOTOR FILTERS EVERY MONTH
Remove the Dust Cup, then lift out Filters.
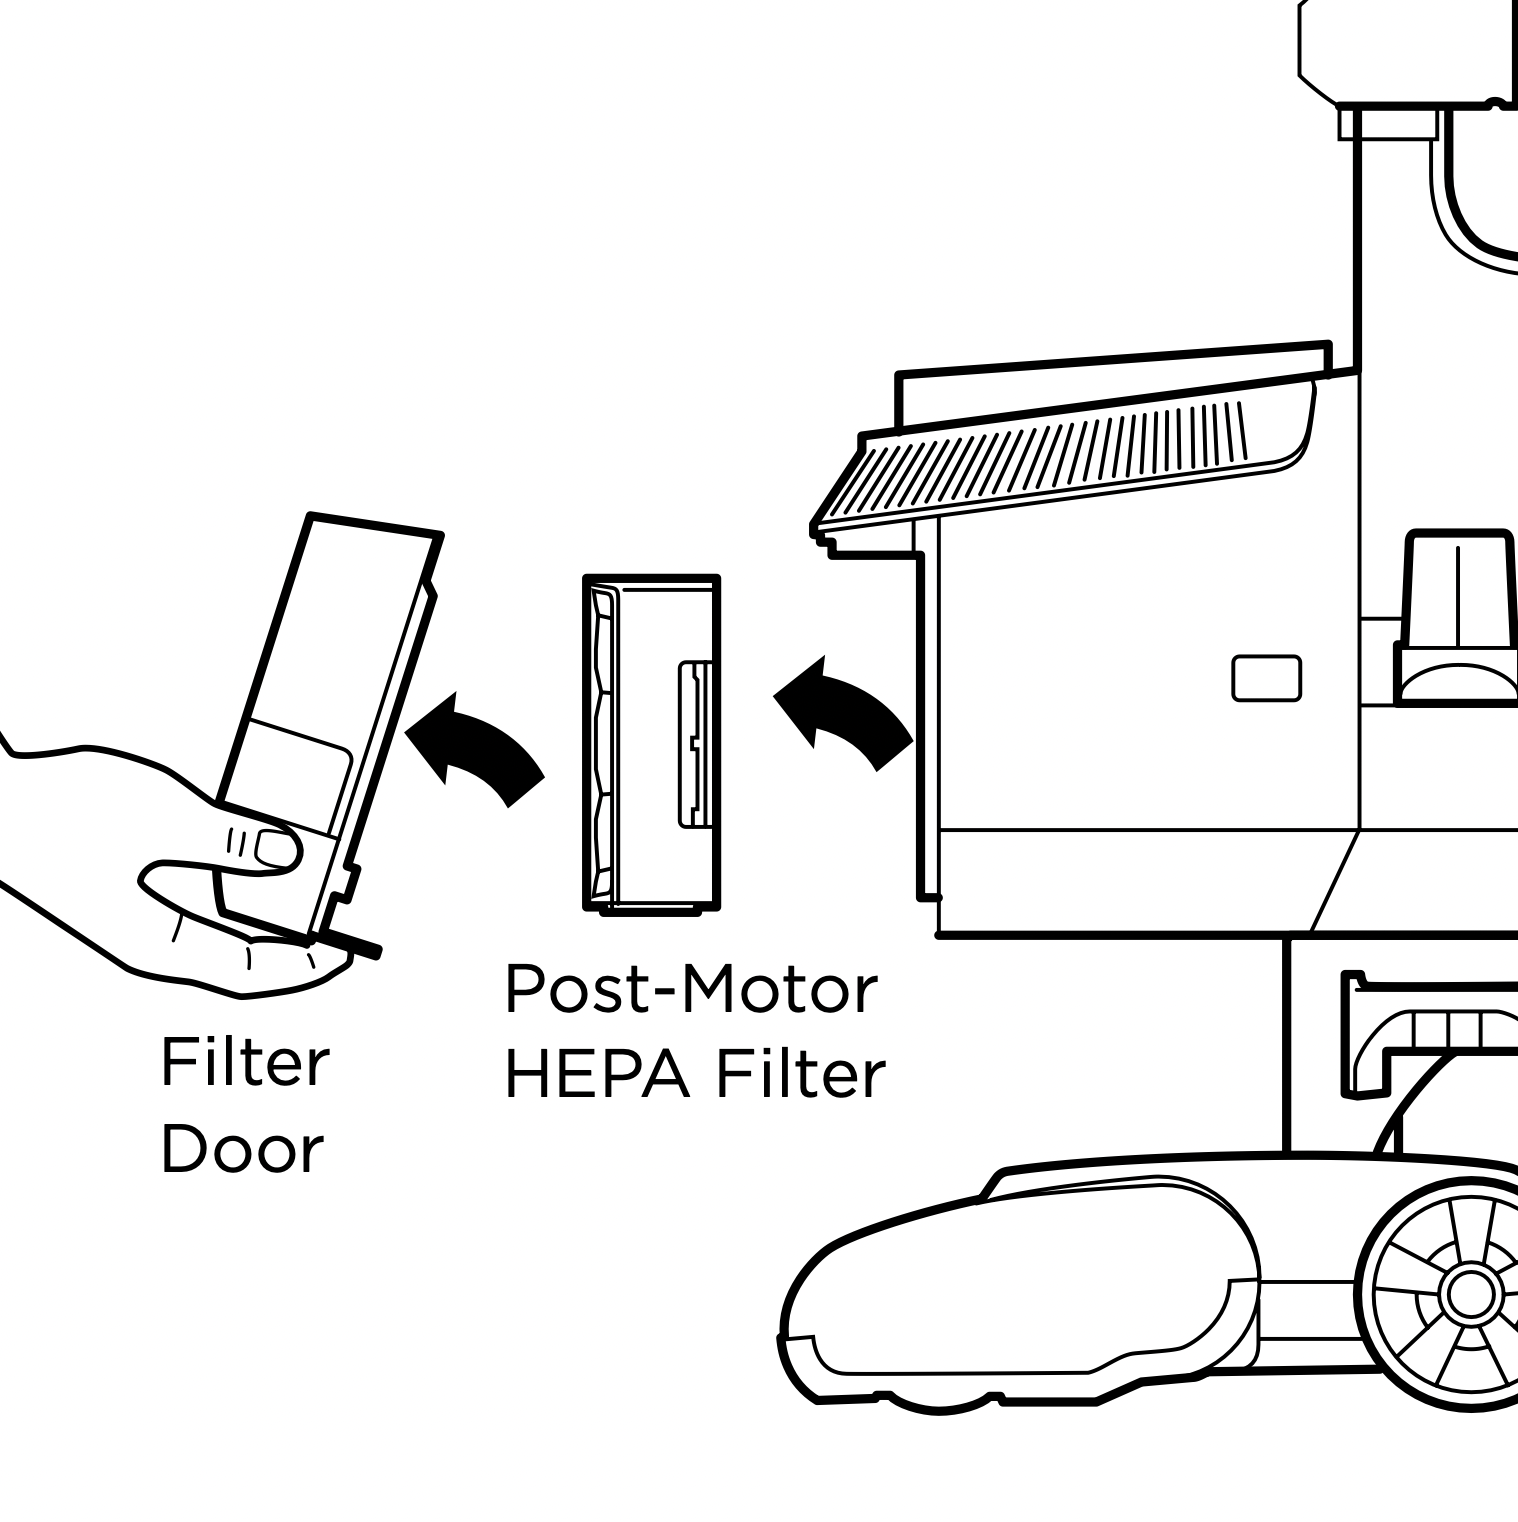
RINSE HEPA FILTER EVERY YEAR
To remove the HEPA Filter, first pull the tab on the bottom of the filter door, then lift off the door. Press the tab on the side of the HEPA filter and pull out the filter.
To reinstall the door, align the top first, then press in the bottom until it clicks into place.
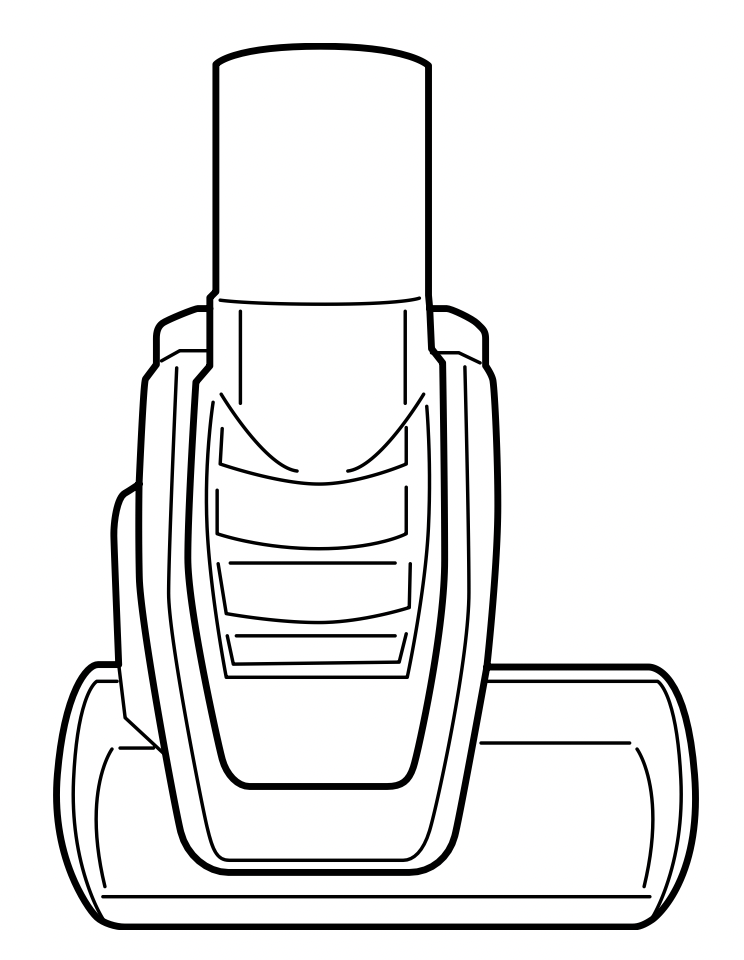
MAINTENANCE
NOZZLE MAINTENANCE
SELF-CLEANING BRUSHROLL
If any hair is wrapped around the brushroll, continue vacuuming, using Carpet/Low Pile mode on a bare floor surface, a low-pile carpet, or a small area rug. This will allow the self-cleaning brushroll to remove the hair wrap and send it to the dust cup.
If you run over a hard or sharp object or notice a noise change while vacuuming, check for blockages or objects caught in the brushroll.
If some fibers remain wrapped around the brushroll after continued use, carefully remove them.
CLEANING THE SOFT ROLLER
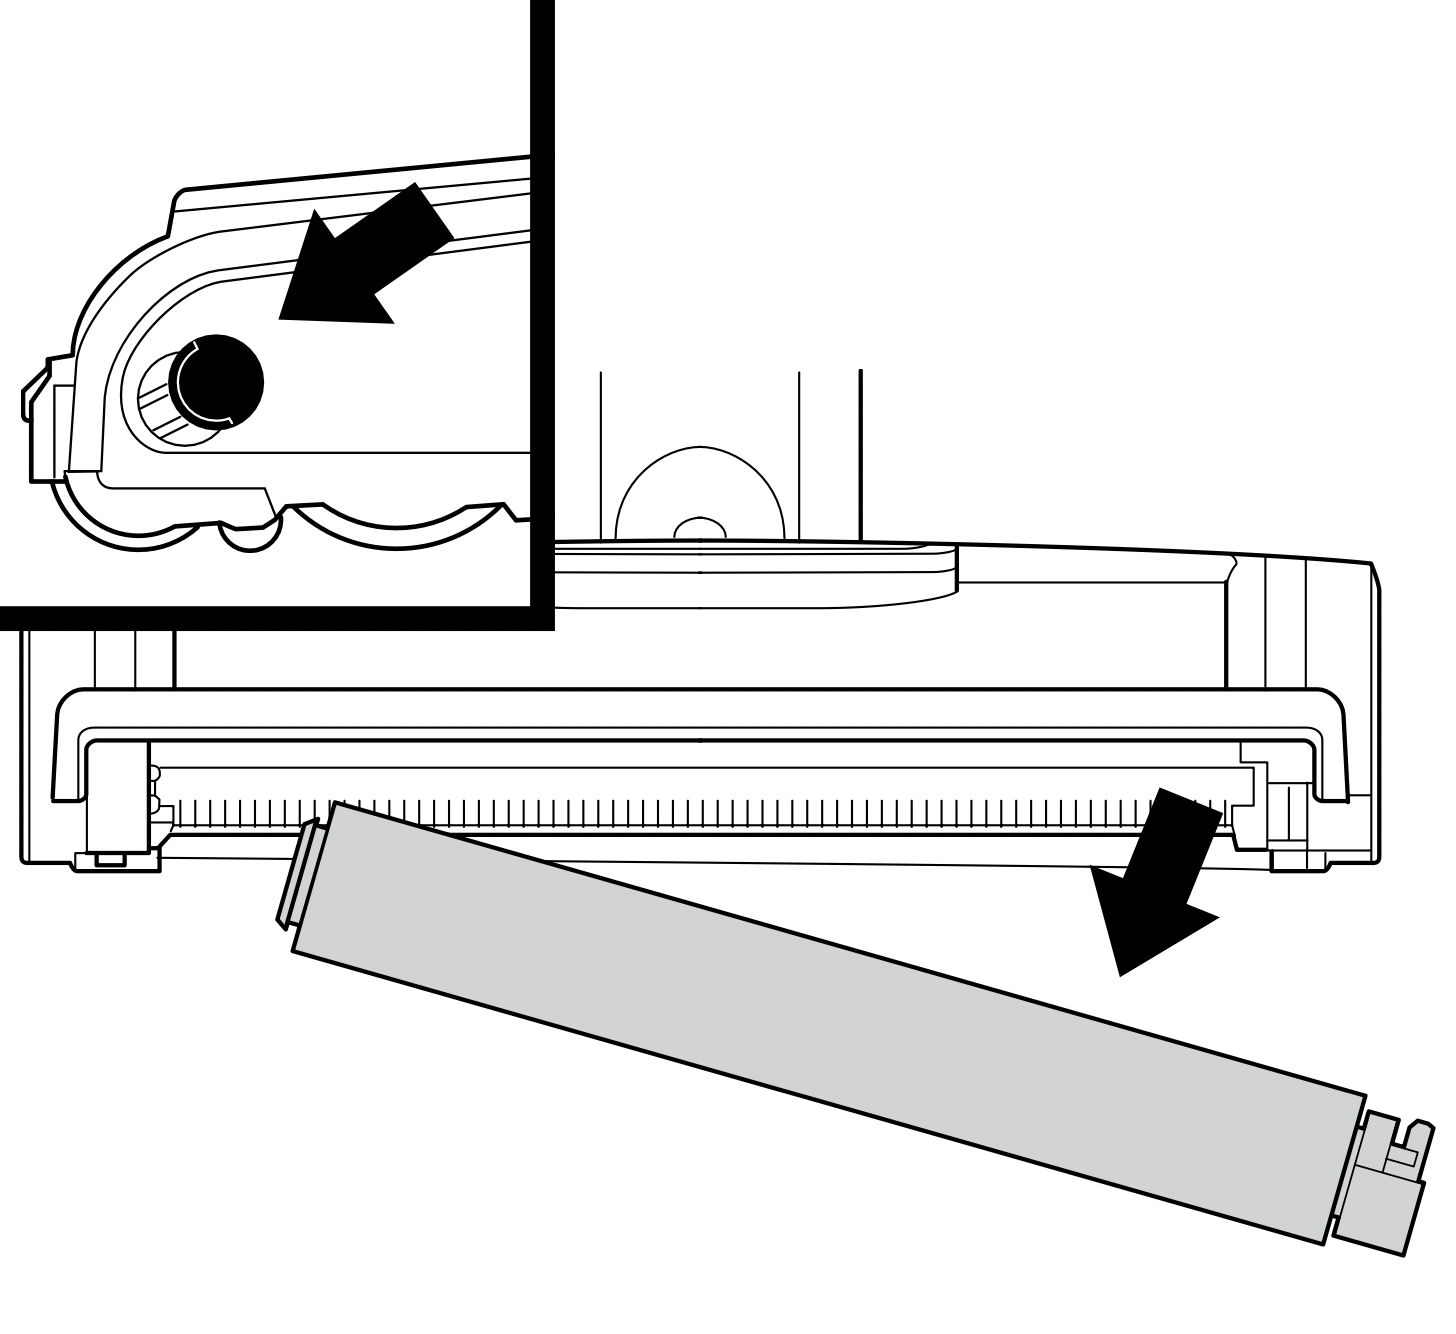
Slide the Soft Roller access button forward to release the Soft Roller.
Hand wash the Soft Roller as needed. Use only water, and allow it to air-dry completely for at least 24 hours. Reinsert the Soft Roller in the front of the nozzle until it clicks into place.
CHECKING FOR BLOCKAGES
DUST CUP BLOCKAGES
Detach dust cup from vacuum pod. Empty dust cup and remove debris from lint screen in the top of the dust cup.
WAND BLOCKAGES
Detach wand from pod and handle, and check both ends for blockages.
HOSE BLOCKAGES
Detach hose from handle by pressing on the release button at the top of the hose. Detach the hose from the pod, and check openings for blockages.
HANDLE BLOCKAGES
Detach handle from wand and check openings for blockages.
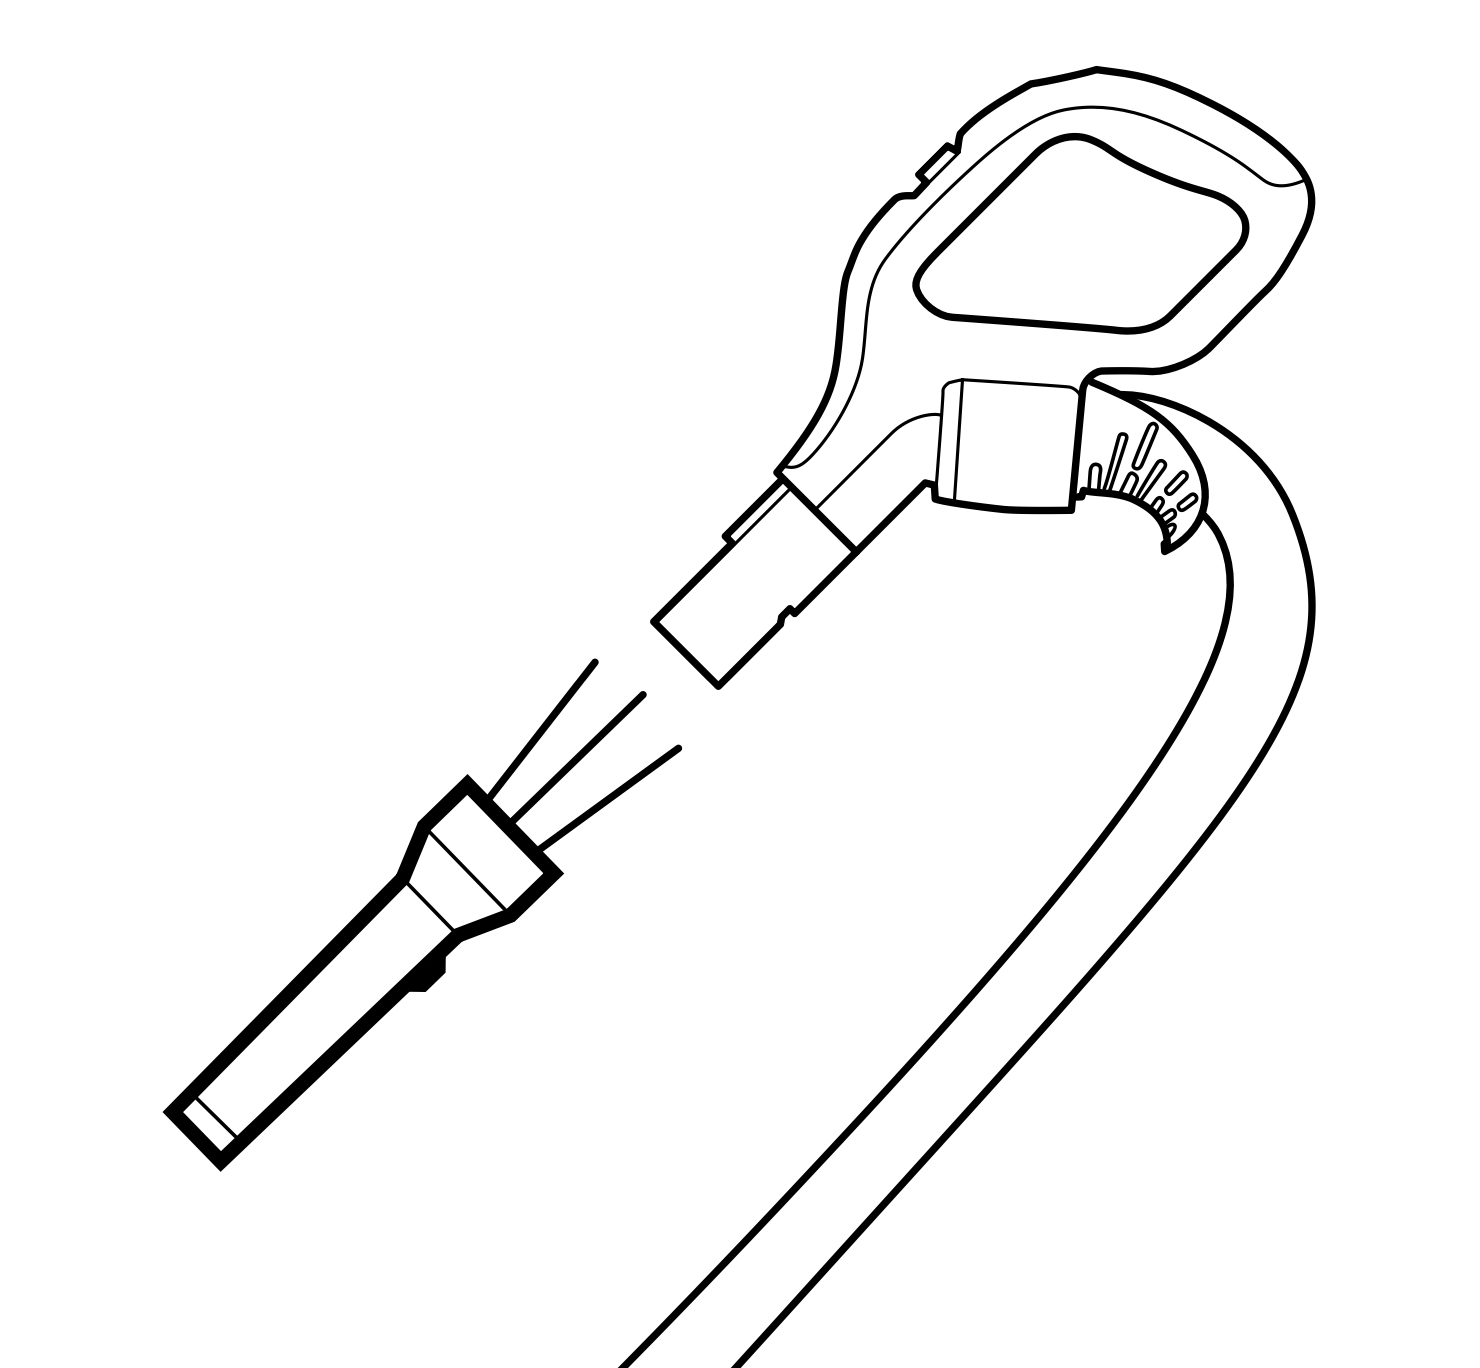
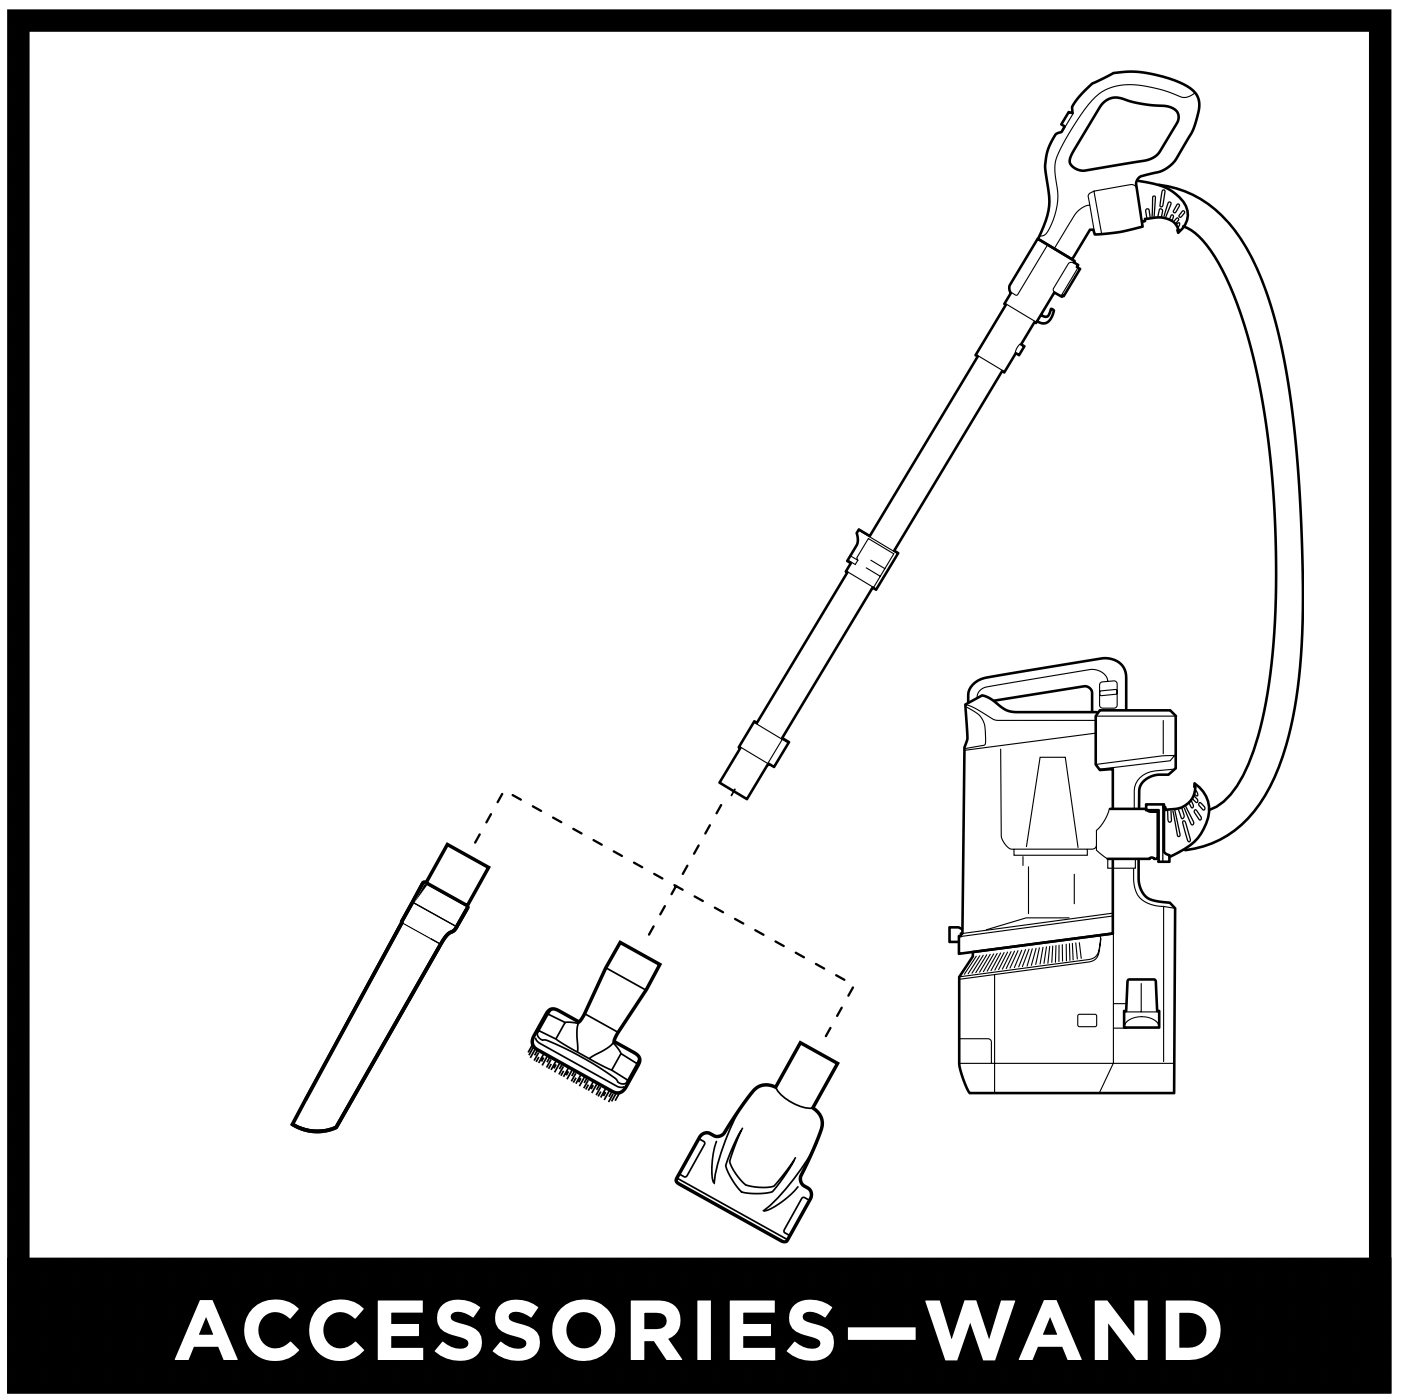
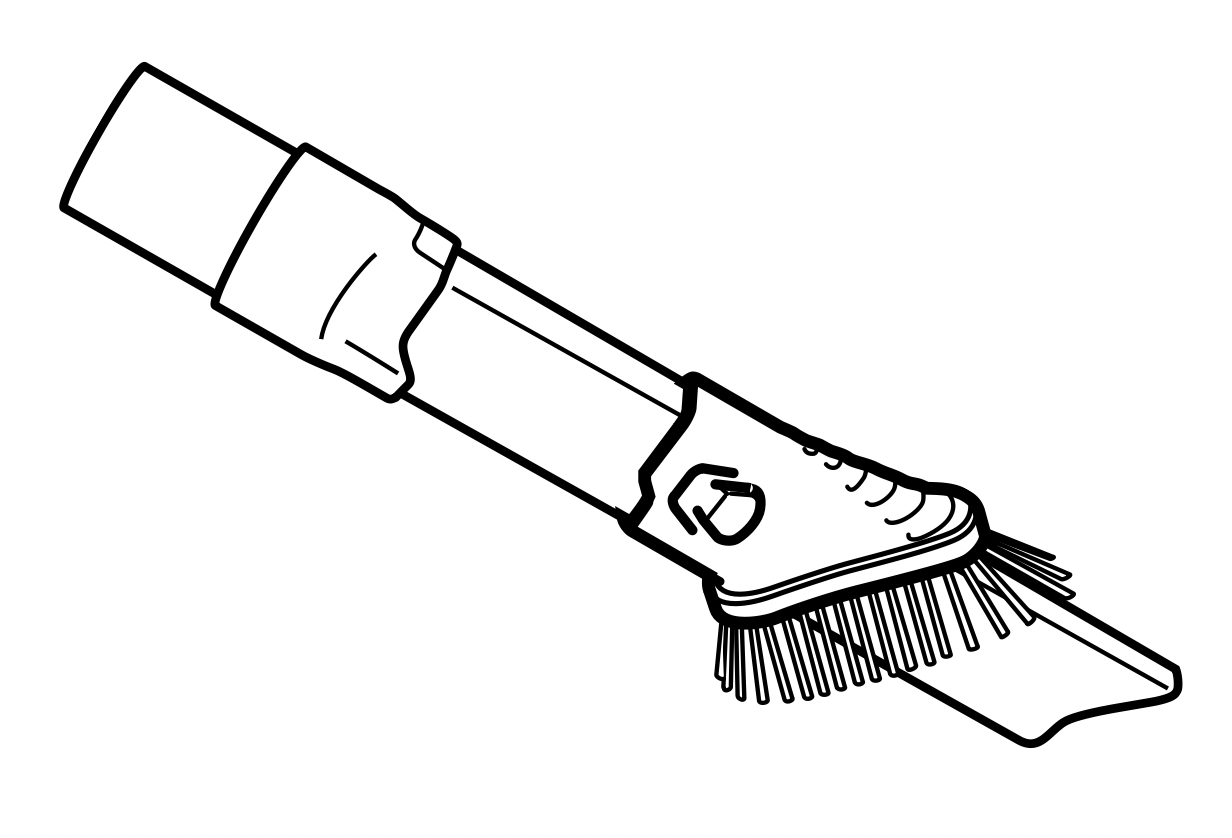
AVAILABLE ACCESSORIES
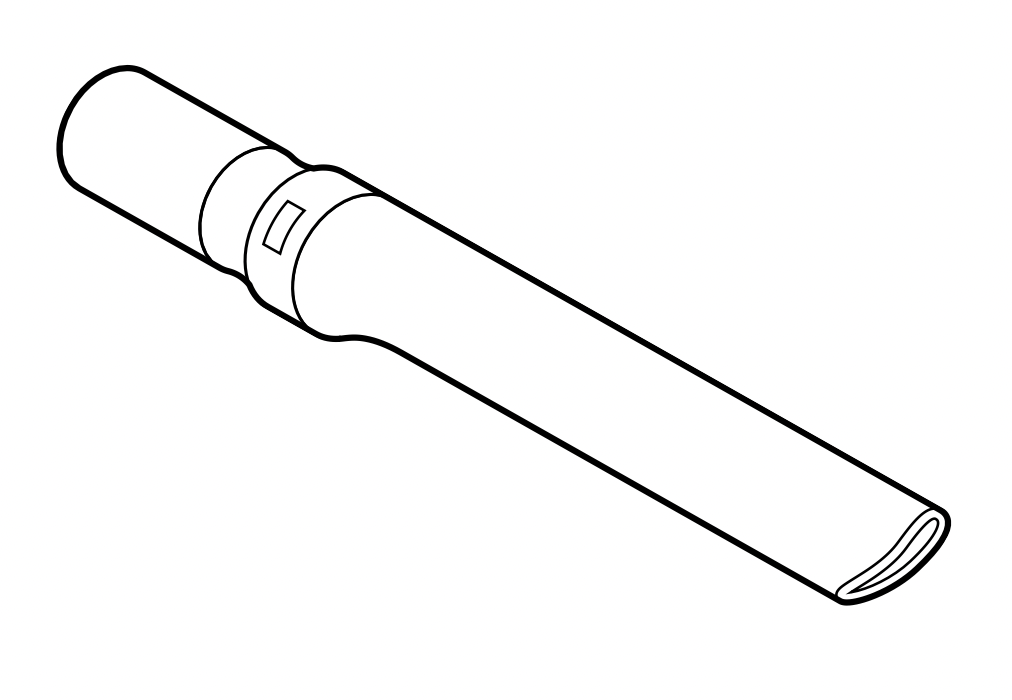
A. Crevice Tool
This slender tool offers extended reach to access corners, baseboards, tight spaces, and ceilings.
B. Pet Crevice Tool
This versatile, slender 8" tool removes pet hair from hard-to-reach spaces like corners, stairs, and between couch cushions.
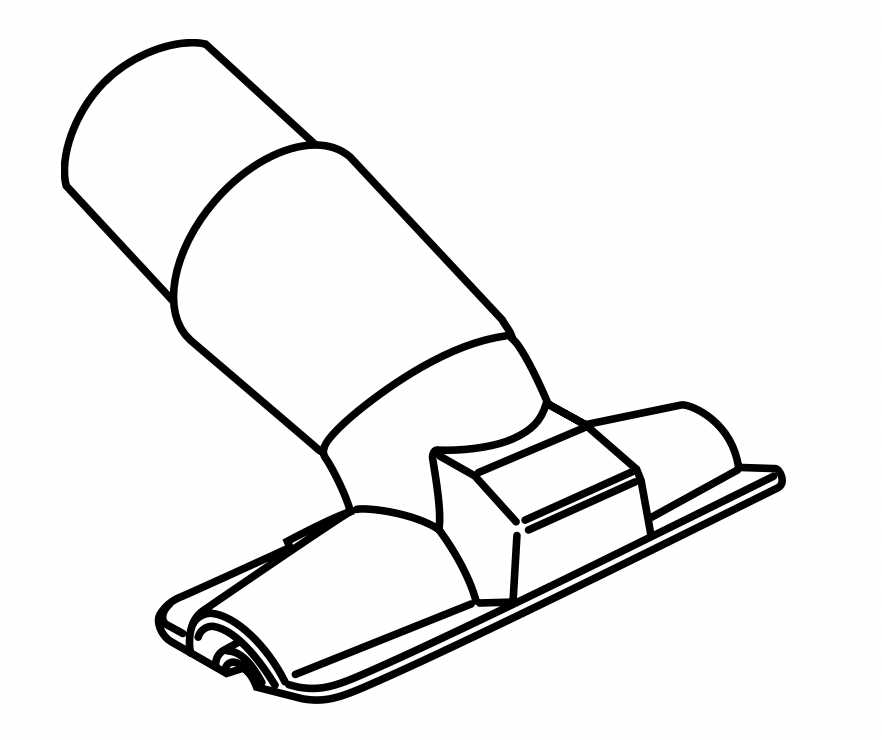
C. Upholstery Tool
Picks up hair, dust, and large debris from mattresses, couches, curtains, lampshades, and other delicate upholstered surfaces.
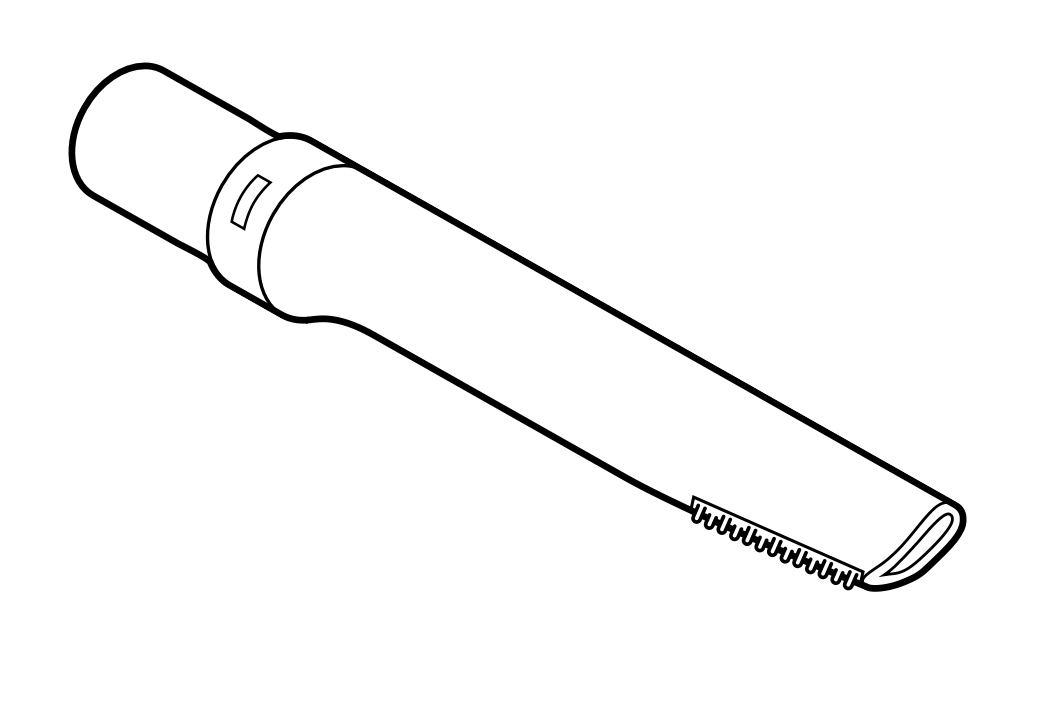
D. Dusting Brush
This brush dusts and cleans delicate surfaces. Great for use on fans, blinds, lampshades, and keyboards.

E. Duster Crevice Tool
Two cleaning tools in one. The crevice tool gives you extended reach to clean in tight spaces, while the soft brush is ideal for dusting delicate surfaces.
F. Pet Multi-Tool
A single convertible tool for cleaning tough pet messes two ways: use the stiff bristle brush to clean stuck-on debris, or take off the bristles to reveal an upholstery tool perfect for removing stubborn pet hair and large piles of debris.
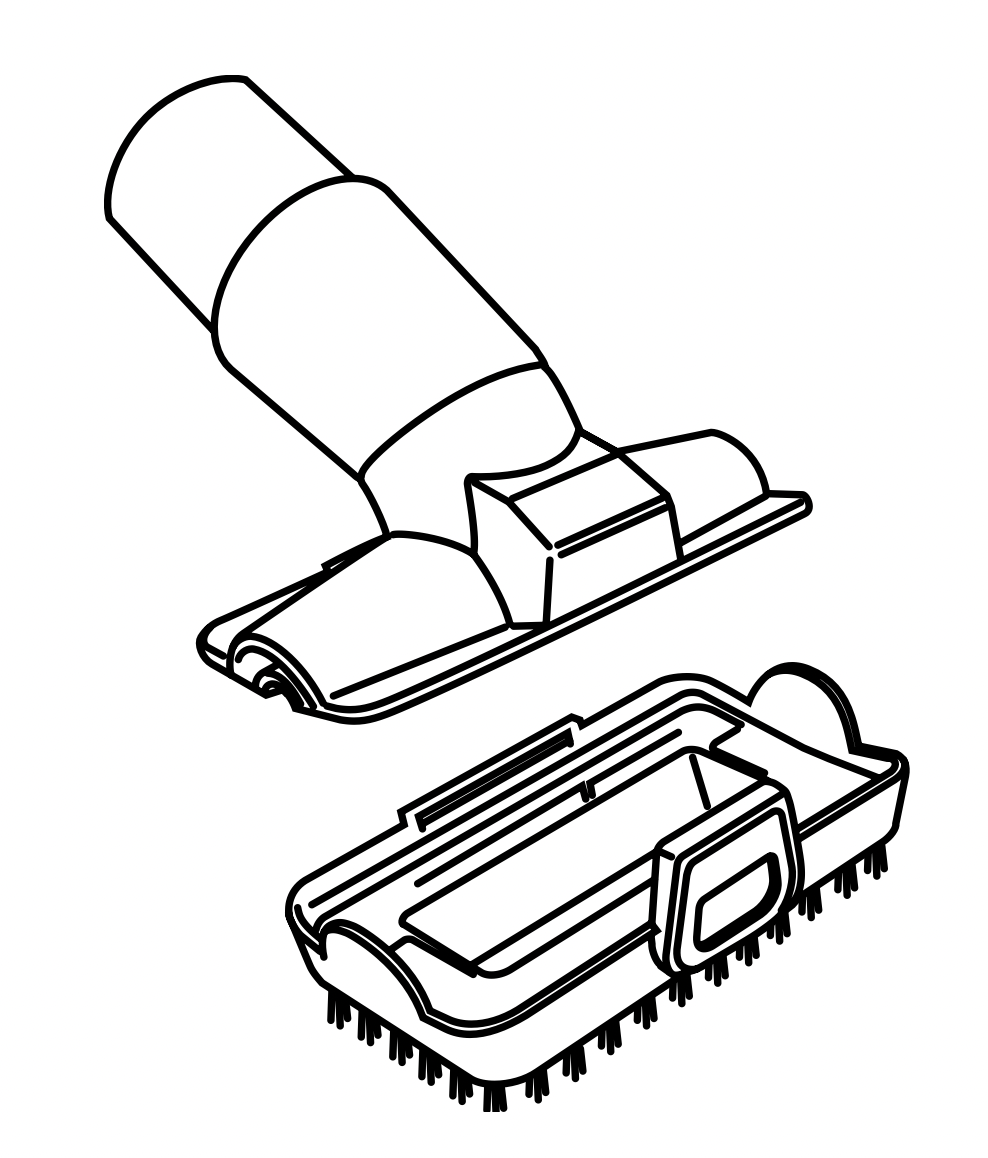
G. Pet Power Brush
The turbine brush loosens and removes pet hair and debris from carpets, and powerfully deep-cleans dander out of upholstery and other surfaces.
H. Self-Cleaning Pet Power Brush
Tackles pet hair and ground-in dirt from above-floor areas like carpeted stairs and upholstery, while actively removing hair wrap as it cleans.
TROUBLESHOOTING
Vacuum is not picking up debris. No suction or light suction.
- Check filters to see if they need cleaning. Follow instructions for rinsing and air-drying the filters before reinstalling them in the vacuum.
- Dust cup may be full; empty dust cup.
- Check handle, hose, hose connections, nozzle, wand, pod, and accessories for blockages.
Clear any blockages found.
- If any string, hair, or carpet fibers are wrapped around the brushroll, carefully cut debris with scissors and remove from brushroll. See Nozzle Maintenance section for more information.
Vacuum lifts area rugs.
- Make sure Power/Surface switch is set to Hard Floor (setting I).
- Ensure the suction control slider on the handle is set to MIN.
- Suction is powerful. Take care when vacuuming area rugs or rugs with delicately sewn edges.
Brushroll does not spin in carpet cleaning mode.
- If the brushroll indicator light turns red, immediately turn off and unplug the vacuum.
Remove pod from floor nozzle and clear any blockages. Reconnect nozzle, plug in vacuum, and turn on power.
- With the power on, recline the handle, which will automatically turn on the brushroll.
- If this problem persists on thick carpets, move the suction control slider to MIN.
Vacuum turns off on its own or indicator light flashes red.
If your vacuum overheats, the thermostat will automatically turn the suction motor off. Perform the following steps to restart the thermostat:
- Turn vacuum off and unplug it.
- Empty dust cup and clean filters (see Emptying the Dust Cup and Cleaning the Filters).
- Check for blockages in hose, wand, nozzle, accessories, and inlet openings.
- Allow unit to cool for a minimum of 60 minutes.
- Plug in vacuum and restart with the Power/Surface switch.