Loading ...
Loading ...
Loading ...
5
INSTALLING YOUR APPLIANCE
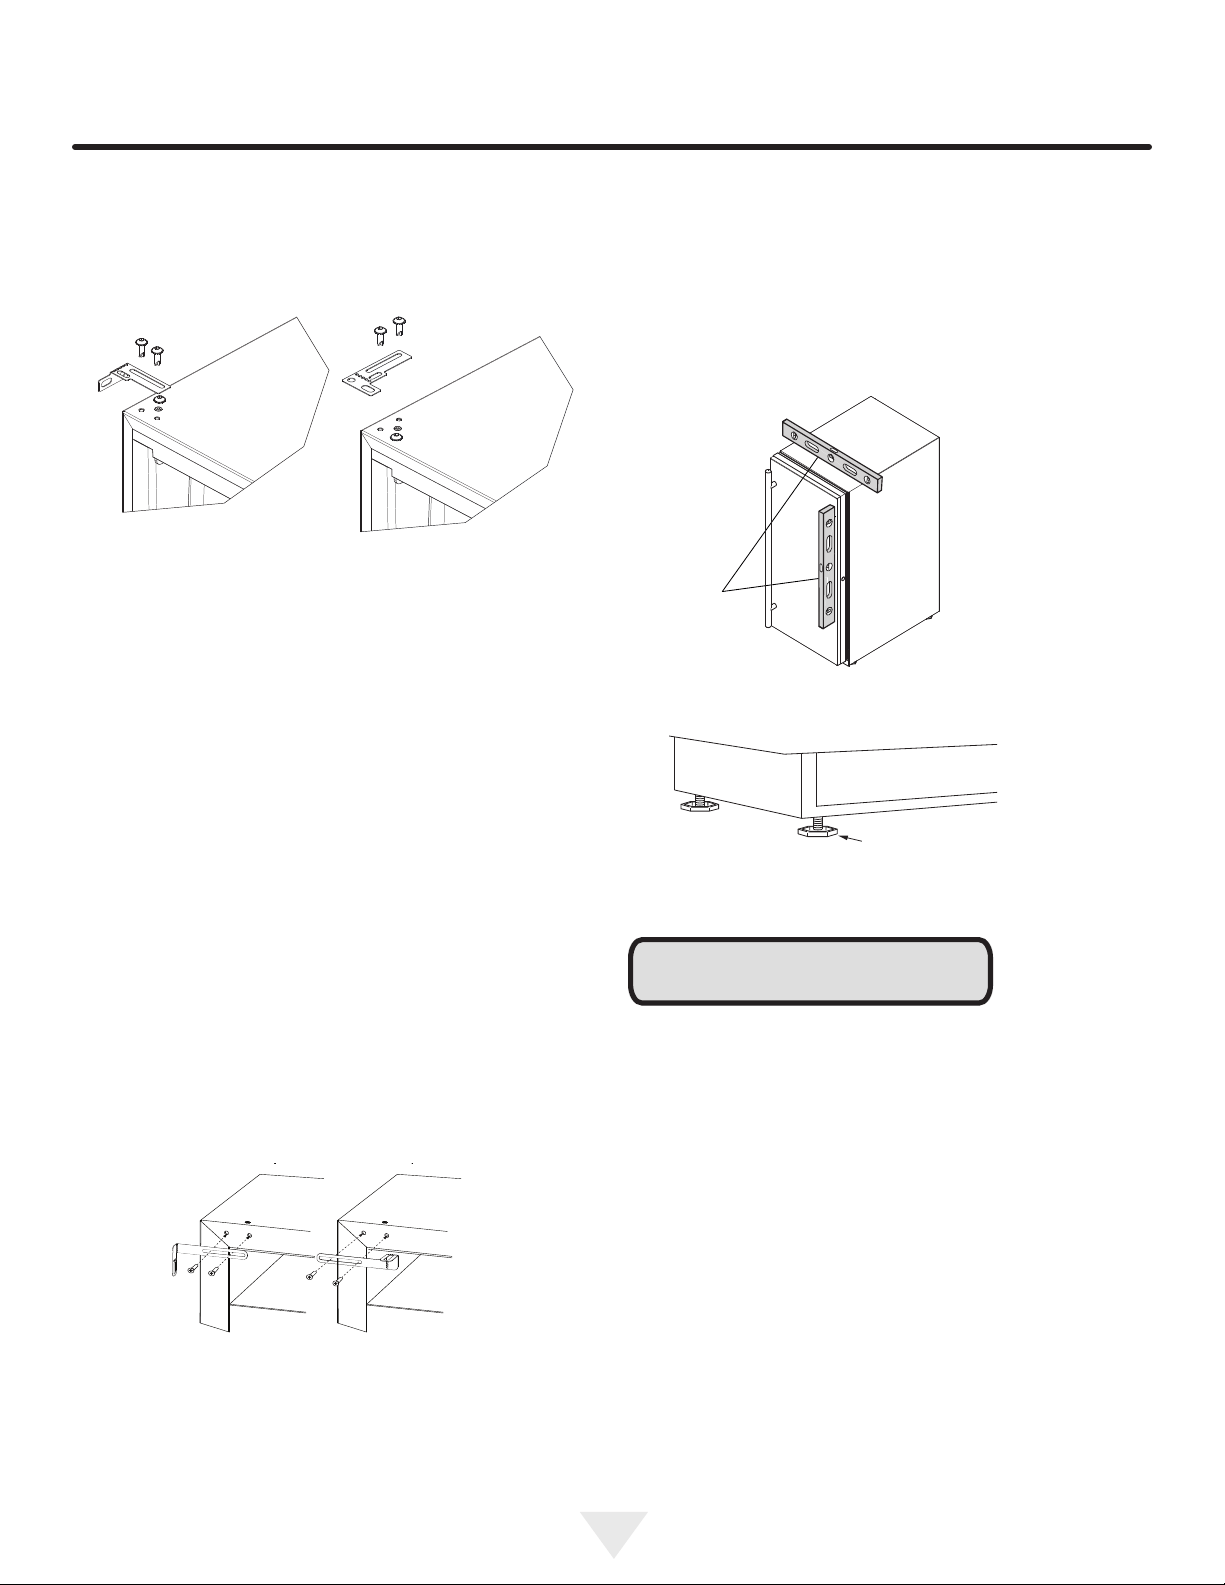
Anti-Tip Bracket - MSNP115
1. Slide unit out so screws on top of unit are easily
accessible.
2. Remove the two screws from the opposite side of the
hinge assembly using a T-25 Torx driver (see below).
3. Place bracket over holes and attach to unit with two
screws removed in step 2 using a T-25 Torx driver.
Tighten screws fully.
4. Gently push unit into position. Be careful not to entangle
the electrical cord or water line, if applicable.
5. Check to be sure the unit is level from front to back and
side to side. Make any necessary adjustments. The
unit’s top surface should be approximately 1⁄8” (3 mm)
below the countertop.
6. Secure bracket onto adjoining surface.
Figure 2
Figure 3
Leveling Information
1. Use a level to conrm the unit is level. Level should be
placed along top edge and side edge as shown.
2. If the unit is not level, adjust the legs on the corners of
the unit as necessary.
3. Conrm the unit is level after each adjustment and
repeat the previous steps as needed.
1
Figure 5
Turn to Adjust
Figure 6
If the room oor is higher than the oor in the cutout open-
ing, adjust the rear legs to achieve a total unit rear height
of 1⁄8” (3 mm) less than opening’s rear height. Shorten the
unit height in the front by adjusting the front legs. This al-
lows the unit to be gently tipped into the opening. Readjust
the front legs to level the unit after it is correctly positioned
in the opening.
Installation
1. Plug in the power/electrical cord.
2. Gently push the unit into position. Be careful not to
entangle the cord or water and drain lines, if applicable.
3. Re-check the leveling, from front to back and side to
side. Make any necessary adjustments. The unit’s top
surface should be approximately 1/8” (3 mm) below the
countertop.
4. Install the anti-tip bracket.
5. Remove interior packing material and wipe out the
inside of the unit with a clean, water-dampened cloth.
NOTE
Anti-Tip Bracket - MLNP115
Use one of the methods below to secure the unit
CABINET/COUNTER ANTI-TIP INSTALLATION
(For built-in applications)
1. Slide unit out so screws on front of unit are easily
accessible.
2. Remove the two screws from the front of the unit.
3. Bend bracket along one of the perforations to allow
attachment to the desired adjoining surface.
4. Gently push unit into position. Be careful not to entangle
the electrical cord or water line, if applicable.
5. Check to be sure the unit is level from front to back
and side to side. Make any necessary adjustments.
The unit’s top surface should be approximately 1/8”
(3 mm) below the countertop.
6. Secure bracket to adjoining surface.
Figure 4
Loading ...
Loading ...
Loading ...