Loading ...
Loading ...
Loading ...
53
182
53
1
3
4
2
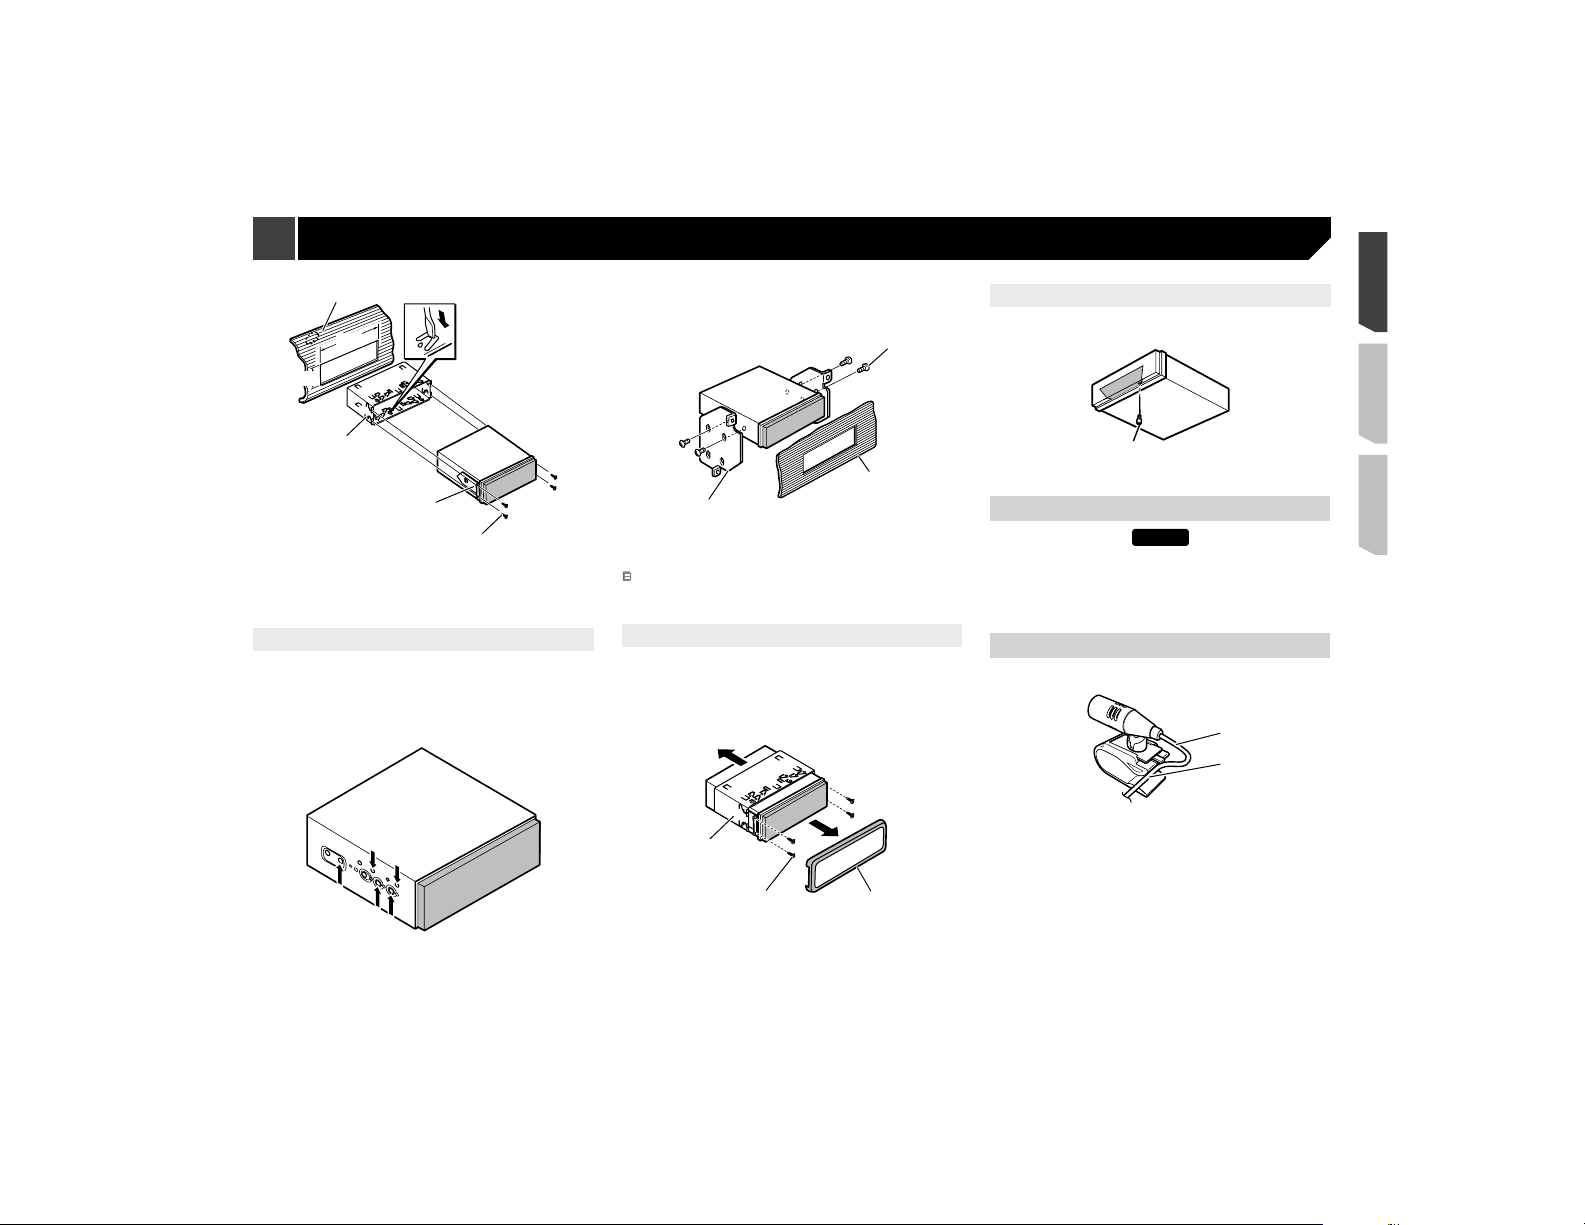
1 Dashboard
2 Mounting sleeve
3 Side bracket
4 Screw(2mm×3mm)
DIN Rear-mount
1 Determine the appropriate position where the
holes on the bracket and the side of the unit
match.
When installing in a shallow space, use the following screw
holes.
1
1
1 Usebinding screws(4mm×3mm)only.
2 Tighten two screws on each side.
Useanyofbindingscrews(4mm×3mm),bindingscrews(5
mm×6mm)orflushsurfacescrews(5mm×6mm),depend-
ing on the shape of screw holes in the bracket.
1
2
3
1 Screw
2 Dashboard or console
3 Factory radio mounting bracket
In some types of vehicles, discrepancy may occur between
the unit and the dashboard. If this happens, use the supplied
frame to fill the gap.
Removing the unit
Extend top and bottom of the trim ring outwards to remove the
trimring.Andthenloosenthescrews(2mm×3mm)toremove
the mounting sleeve.
When reattaching the trim ring, push the trim ring onto the
unit until it clicks. (If the trim ring is attached upside down,
the trim ring will not fit properly.)
1
3
2
1 Mounting sleeve
2 Screw(2mm×3mm)
3 Trim ring
Fastening the front panel
If you do not plan to detach the front panel, the front panel can
be fastened with supplied screw.
1
1 Screw
Installing the microphone
X7800BT
Install the microphone in a place where its direction and dis-
tance from the driver make it easiest to pick up the driver’s
voice.
Be sure to turn off (ACC OFF) the product before connecting
the microphone.
Mounting on the sun visor
1 Fit the microphone lead into the groove.
1
2
1 Microphone lead
2 Groove
2 Attach the microphone clip to the sun visor.
Installation
Loading ...
Loading ...
Loading ...