
Loading ...
Loading ...
Loading ...
8
When to Charge the iON+ 24VBAT
Lithium-Ion Battery
NOTE: The iON+ 24VBAT lithium-ion battery pack does
not develop a "memory" when charged after only a partial
discharge. Therefore, it is not necessary to run down the
battery pack before charging.
• Use the battery indicator lights to determine when to charge
your iON+ 24VBAT lithium-ion battery pack.
• You can "top-o" your battery pack's charge before or after
a long day of use.
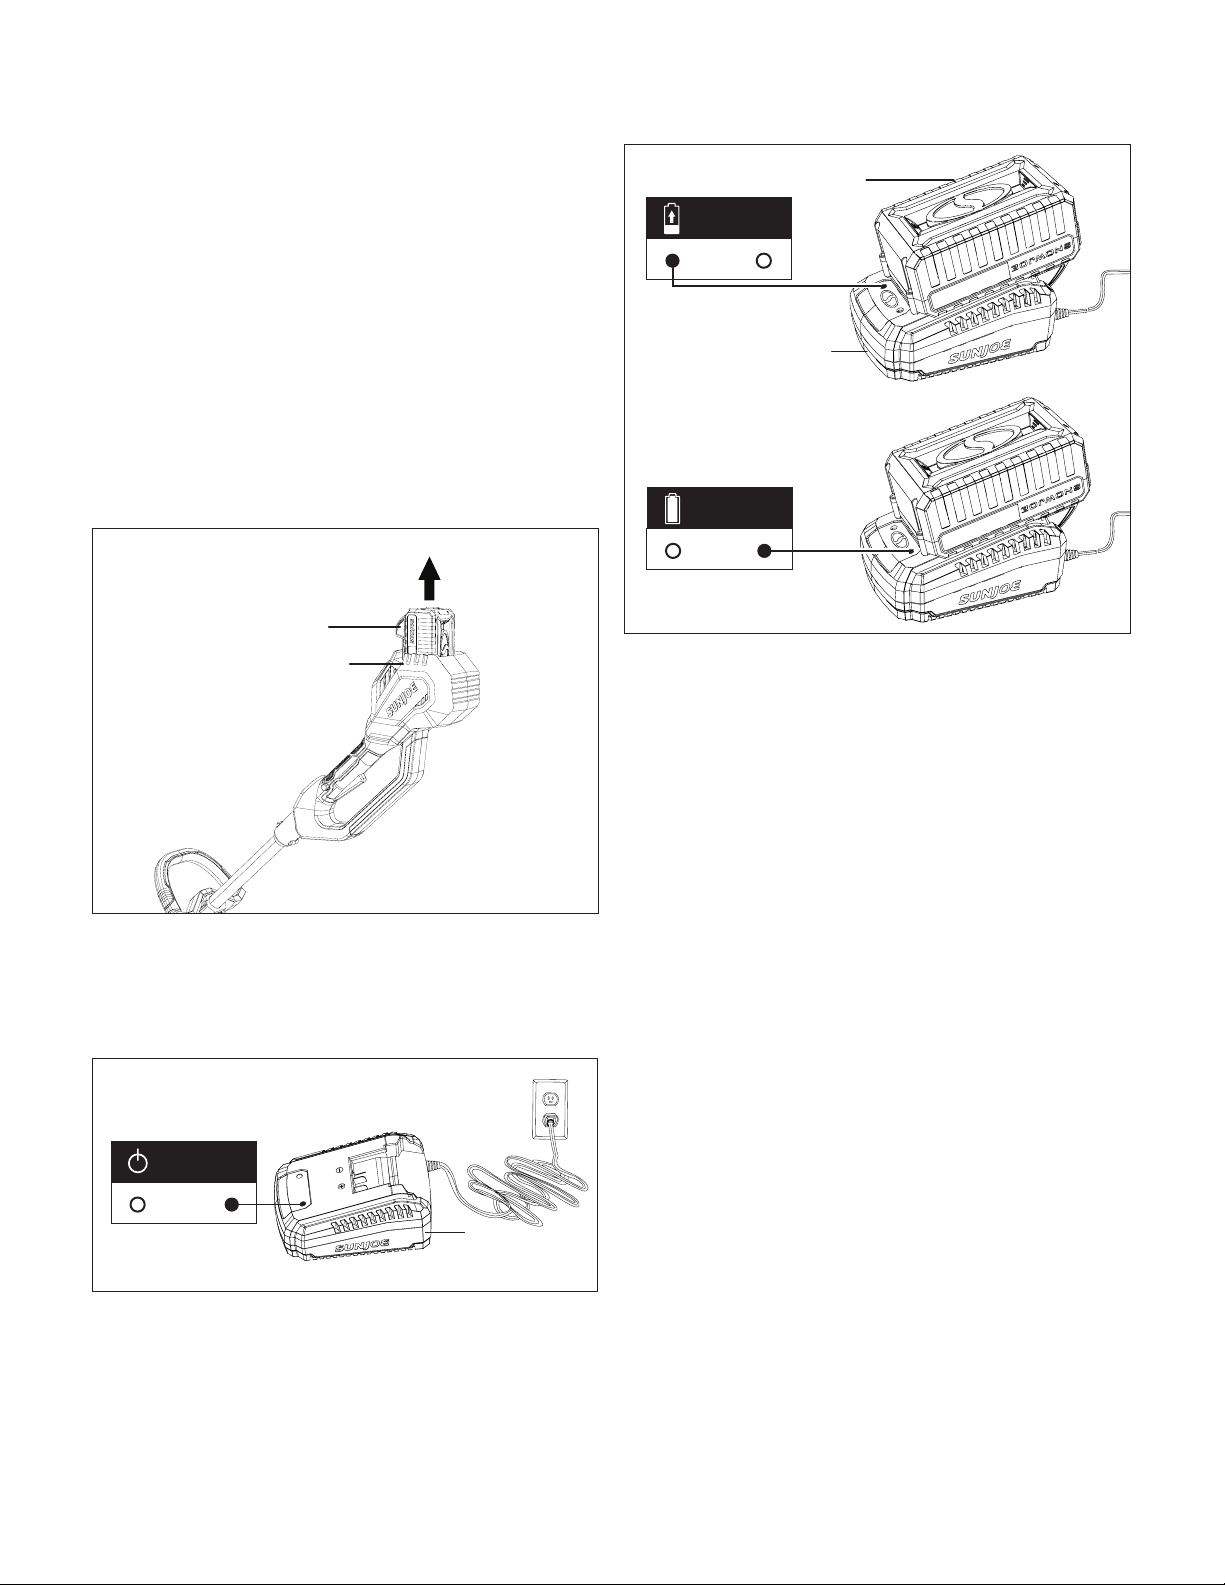
Charging the Battery
1. Push the push lock buttons on the battery to pull the
battery pack out from the battery compartment (Fig. 1).
2. Check that the mains voltage is the same as that marked
on the rating plate of the battery charger. Then, insert the
charger's plug into the electrical wall outlet. When you
plug in the charger, the top right green light will illuminate
and stay green (Fig. 2).
3. Place the battery pack into the charger by sliding the
pack to lock it into position. When you insert the battery
into the charger, the top right green light will go o, and
the top left red light will illuminate to indicate that the
battery is charging (Fig. 3).
4. When the charger light turns green, the battery is fully
charged (Fig. 3).
NOTE: A fully discharged pack with an internal
temperature in the normal range will fully charge in 1 hr 50
mins (between 32ºF/0ºC and 113ºF/45ºC).
5. If the light indicators do not come on at all, check that
the battery pack is fully seated into the bay. Remove
the battery pack and reinsert. If the problem persists,
contact an authorized Snow Joe
®
+ Sun Joe
®
dealer or
call the Snow Joe
®
+ Sun Joe
®
customer service center at
1-866-SNOWJOE (1-866-766-9563) for assistance.
6. When charging is complete, remove the battery from the
charger by pressing the push lock buttons and sliding the
battery backward to unlock it from the charger.
Assembly
m
WARNING! Do not insert the battery until assembly is
complete. Failure to comply could result in accidental starting
and possible serious personal injury.
Fitting the Safety Guard
mWARNING! The safety guard must be properly installed.
The guard provides the operator and other bystanders with
some protection from thrown objects.
1. Remove the battery pack from the trimmer + edger.
2. Slide the tabs of the safety guard into the slots on the
trimmer head. Push to make sure the safety guard clicks
into position (Fig. 4).
Fig. 1
Battery lock button
Battery compartment
Fig. 2
Charger
green
Power on
Fig. 3
Battery pack
Charger
red
Charging
green
Fully
Charged
Loading ...
Loading ...
Loading ...