
Loading ...
Loading ...
Loading ...
14
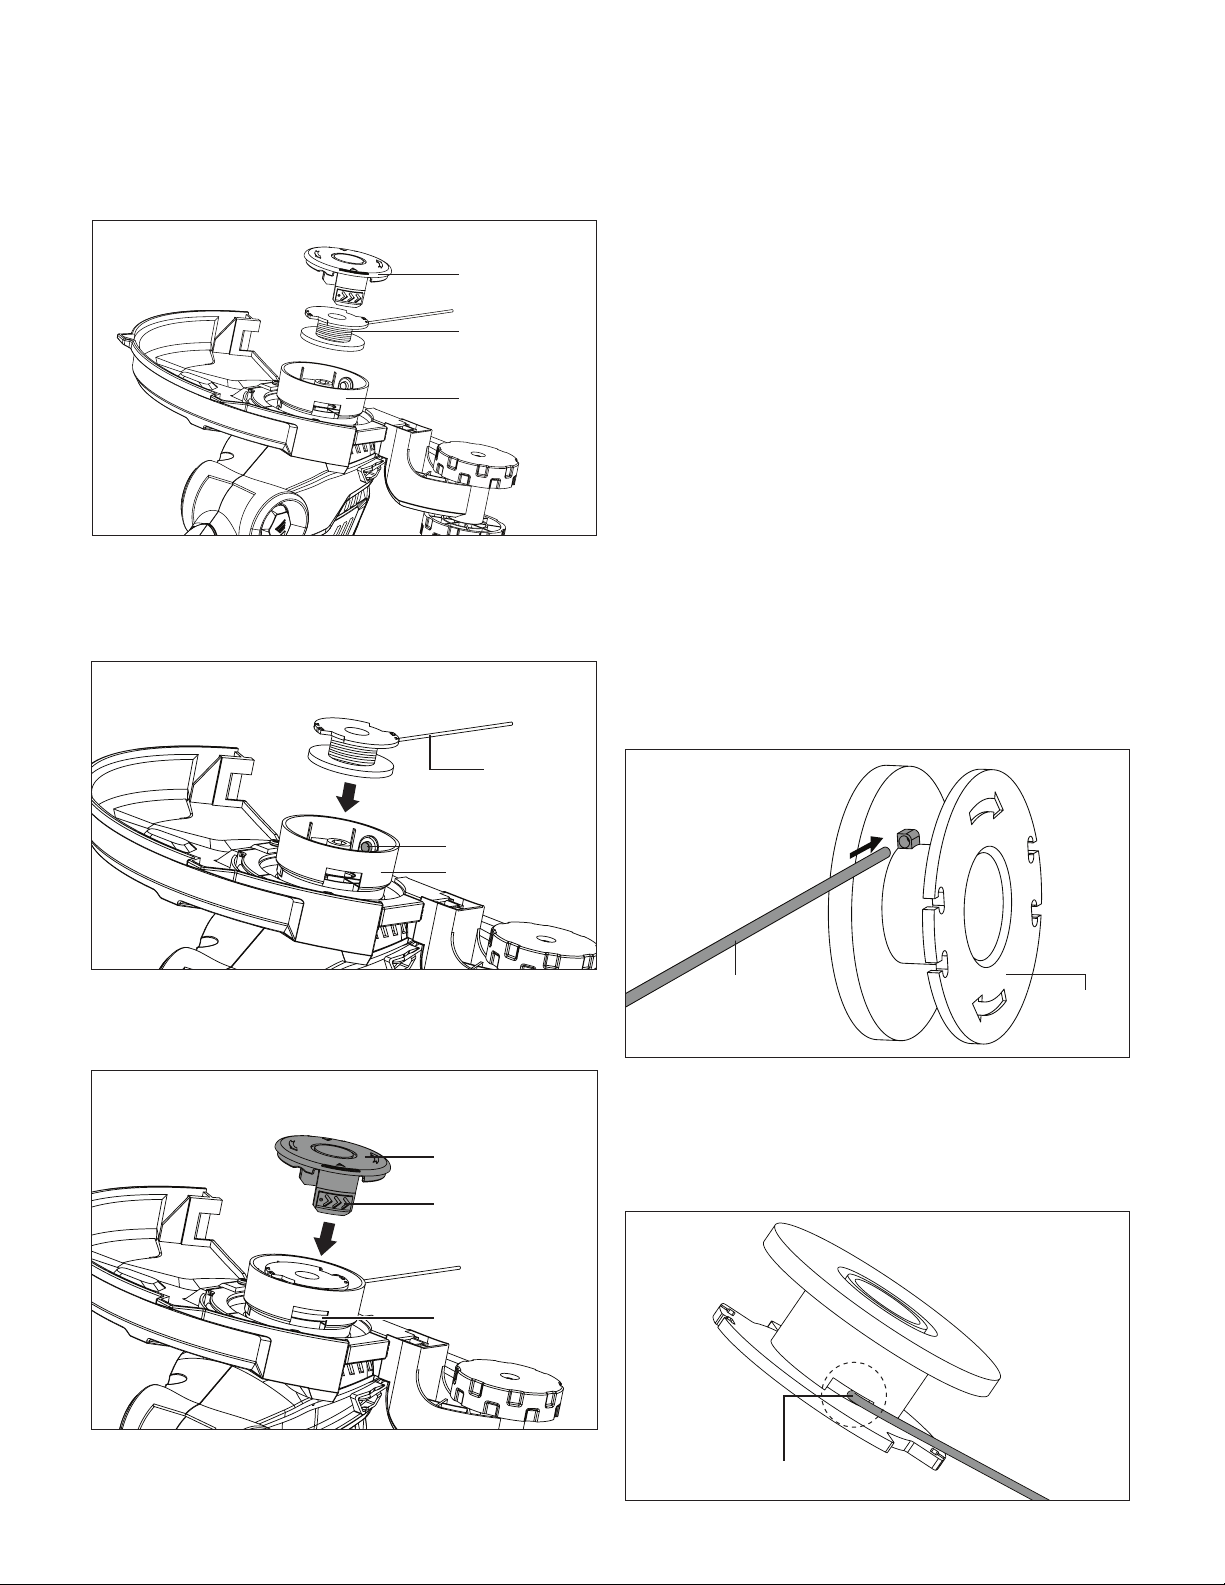
2. Lift and remove the spool out of the hub (Fig. 25) and
clean out the remaining cutting line, remove any jams, or
dirt and grass residue.
3. Re-insert the spool into the spool hub as follow, or insert a
new pre-wounded spool (Fig. 25).
4. Insert each line end through its respective eyelet on each
side of the hub and gently press the spool down (Fig. 26).
5. Reinstall the spool cover by depressing the release tabs
into their slots in the hub, and push down until the spool
cover clicks into place (Fig. 27).
IMPORTANT: Only use original replacement parts specied for
this machine.
You can purchase a replacement pre-wound spool (Model
24V-ST14-SPOOL) and other genuine replacement parts
by visiting us online at sunjoe.com or calling our toll-free
customer service helpline at 1-866-SNOWJOE (1-866-766-
9563). The use of parts that do not meet the original equipment
specications may lead to improper performance of the grass
trimmer, may compromise operator safety and will void the
manufacturer's warranty.
Winding the Line
NOTE: Should you wish to wind the line yourself, the
instructions are provided below. Self-winding, however, is NOT
recommended because if the line is not wound properly it can
cause the trimmer’s auto feed system to malfunction. For this
reason, users are strongly urged to purchase the pre-wound
spool.
1. Turn o and remove the battery. Make sure the spool has
come to a complete stop.
2. To remove the spool from the trimmer hub, follow steps
1 and 2 from the section "Replacing the Spool + Clearing
Jams and Tangled Lines" beginning on page 13.
3. Measure and cut a 16.4 ft (5 m) piece of new cutting line.
Insert the end of the cutting line into the small hole located
inside of the spool (Fig. 28).
4. Bend the cutting line 180 degree around the hole, secure
the bending part with your left hand thumb, and use your
right hand to wind the line according to the arrows on the
spool (Figs. 29 & 30). Use slight tension to make sure the
line is tight around the spool.
Fig. 25
Spool cover
Spool
Spool hub
Fig. 26
Eyelet
Spool hub
Cutting
line
Fig. 27
Spool cover
Release tabs
Slots
Fig. 28
Spool
Cutting line
Fig. 29
Bend the cutting line
Loading ...
Loading ...
Loading ...