Loading ...
Loading ...
Loading ...
9
INSTALLATION INSTRUCTIONS
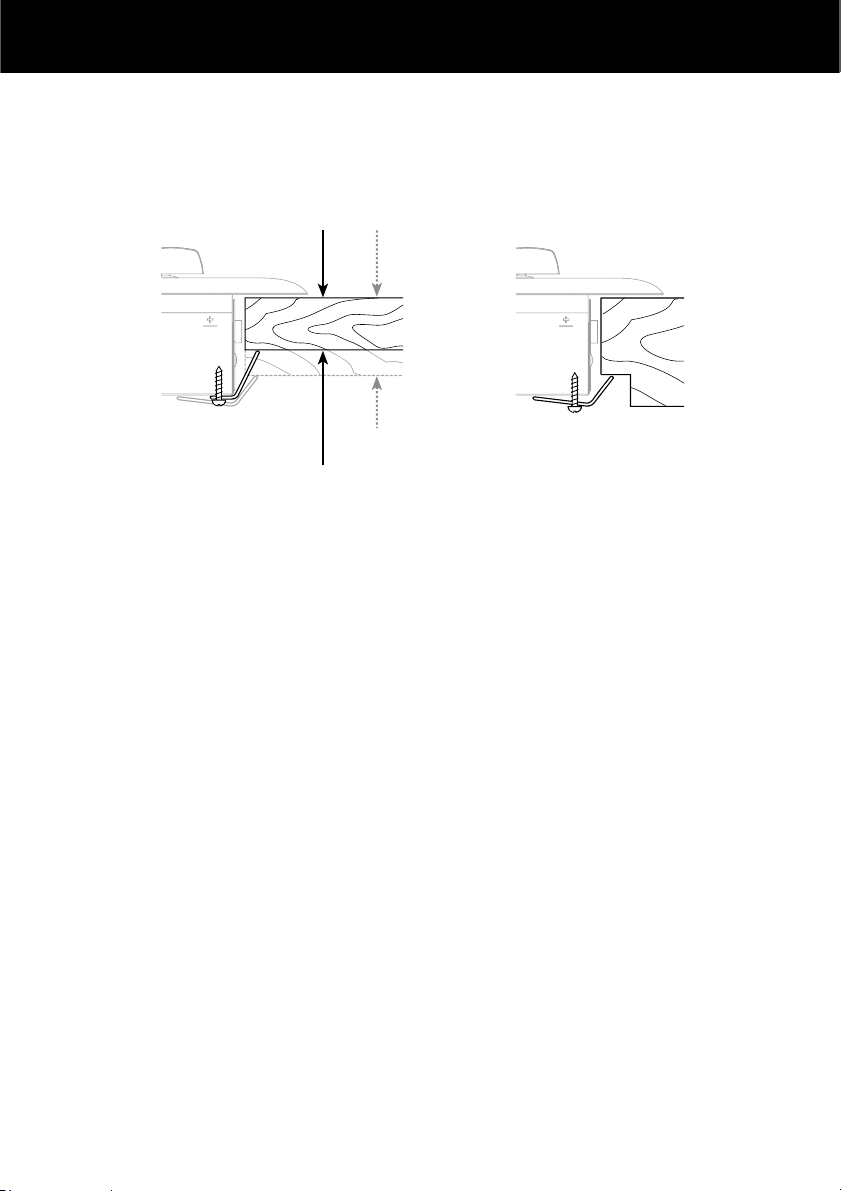
Fastening the cooktop to the bench
This cooktop is suppled with fastening brackets (and screws) that will cope with a
bench thickness of 20-50mm. For benches thicker than 50mm, recess the underside
to a thickness of 20-50mm.
Connecting the cooktop to the gas supply
IMPORTANT!
●
This cooktop is supplied factory-set for either Natural Gas or ULPG.
Please ensure that the factory-set adjustment of the cooktop is compatible with the
local distribution conditions (nature of gas and pressure).
●
The gas connection must be carried out by a suitably qualified person according to
the relevant standards.
●
For Natural Gas, connect the gas supply to the gas pressure regulator supplied with the
cooktop. Adjust the regulator to obtain a test point pressure of 1 kPa (4”W.C.) with the
three largest burners operating at the highest setting.
●
For ULPG, connect the the gas supply to the test point adaptor supplied with the
cooktop. Ensure that the supply pressure is regulated to 2.75 kPa (11” W.C.)
●
Make sure the connection point will be accessible with the cooktop installed.
●
To enable the gas supply to be readily shut off, make sure the connection is fitted with
an isolating valve close to the cooktop.
●
Attach the duplicate appliance data label on a surface adjacent to the cooktop, so that
it will be easily read with the cooktop installed.
●
For instructions on converting the cooktop for use with a different gas type, see section
‘Converting to a different gas type’.
●
Gas connection to these cooktops MUST use the elbow supplied. The regulator will not
seal if installed without it.
●
Ensure the fibre washer (supplied) is located between the elbow (supplied) and
cooktop gas inlet. Failure to use this washer will cause the connection to leak. Tighten
the floating nut to firm finger tight, plus an additional 1/4 turn (90
o
).
20mm
50mm
recessed to
50mm
Fastening the cooktop to the bench
Loading ...
Loading ...
Loading ...