Loading ...
Loading ...
Loading ...
18 Philips · NeoPix Ultra 2
+
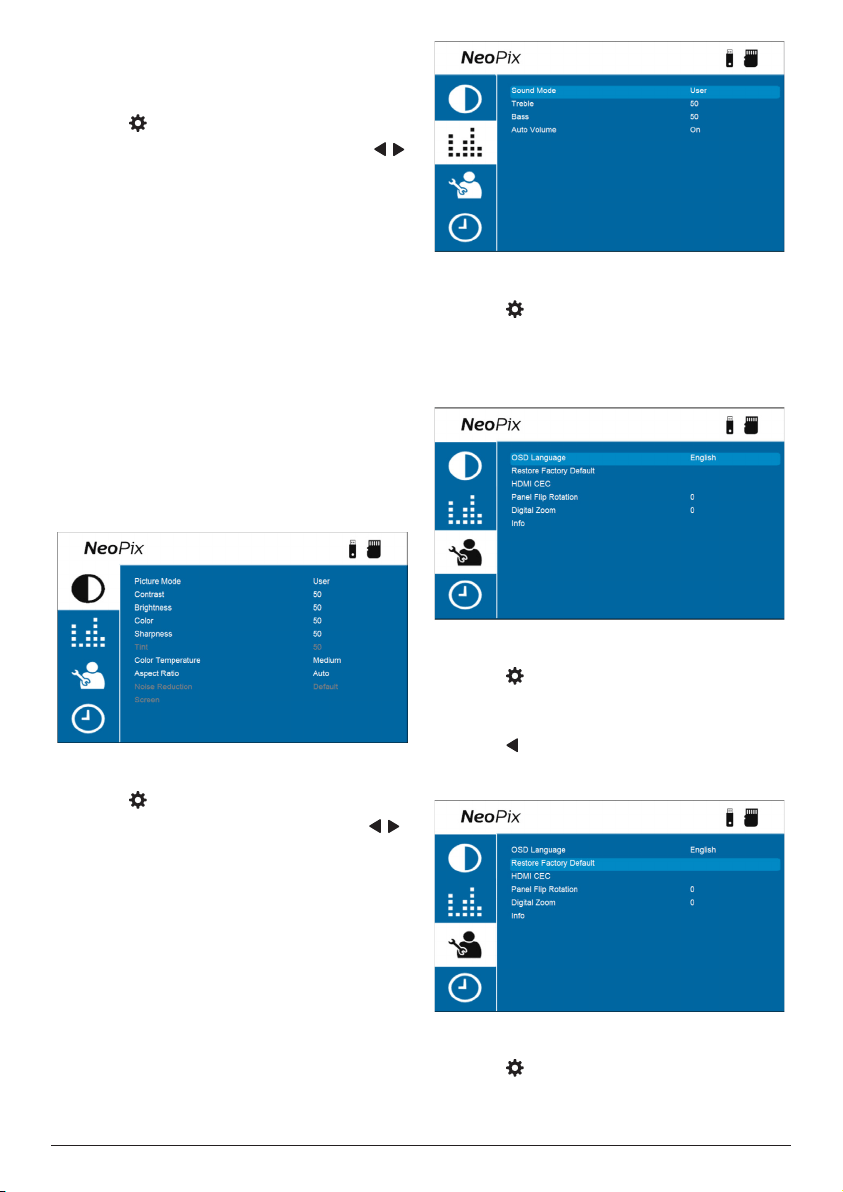
Change projector settings
Picture settings
1 Press
on the projector remote control.
2 Select a picture option, and then press /
or the OK button to change the value.
• Picture Mode: Select predefined color
settings for picture or video display.
Select User to customize the following
settings:
• Contrast: Set color contrast.
• Brightness: Set color brightness.
• Color: Set color saturation.
• Sharpness: Set image sharpness.
• Color Temperature: Set the color
temperature.
• Aspect Ratio: Set the screen aspect
ratio.
• Noise Reduction: Set the noise
reduction level. This option is enabled
only when you play a video or use
Android TV.
Sound settings
1 Press
on the projector remote control.
2 Select a sound option, and then press /
or the OK button to change the value.
• Sound Mode: Select predefined sound
settings for your video or music. Select
User to customize the following settings:
• Treble: Set the treble level.
• Bass: Set the bass level.
• Auto Volume: Turn this on to reduce
sudden changes in volume.
Language settings
1 Press
on the projector remote control.
2 Select OSD Language, and then press the
navigation buttons on the remote control to
select your desired language for on-screen
menu.
Restore default settings
1 Press
on the projector remote control.
2 Select Restore Factory Default, and then
press
the OK button
�
3
Press to start restoring the projector to its
factory default settings. The projector will
turn off after the restoration.
Rotate/flip projection screen
1 Press
on the projector remote control.
2 Select Panel Flip Rotation, and then press
Loading ...
Loading ...
Loading ...