User Manual
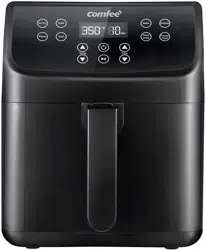
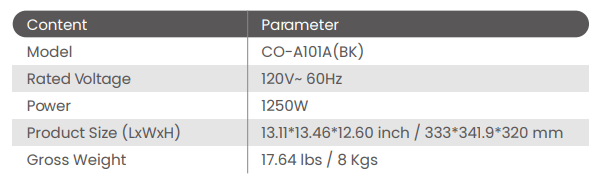
SPECIFICATIONS
PARTS AND ACCESSORIES
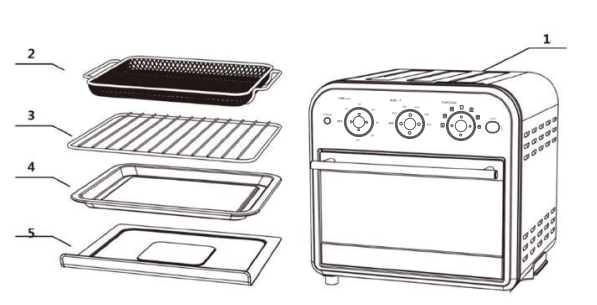
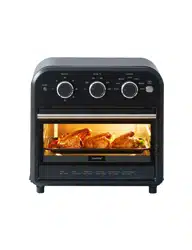
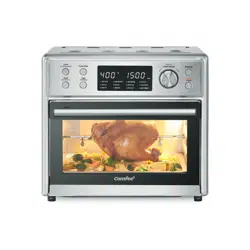
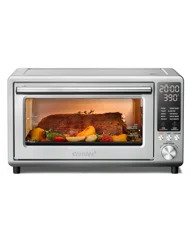
1. Air fryer oven
2. Air fryer basket
3. Wire rack
4. Baking pan
5. Removable crumb tray
2. Air fryer basket
The Air Fryer Basket is grated to allow air to pass through the basket for even cooking. The Air Fryer Basket should be placed in the middle rack position unless a recipe states otherwise.
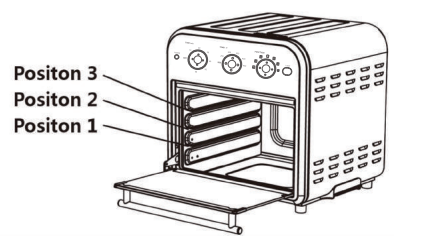
3. Wire rack
The Wire Rack can be used in three rack positions, bottom, middle, and top.
4. Baking pan
The Baking/Drip Pan is can be placed in any of the three rack positions.
5. Removable crumb tray
Always ensure that the Removable Crumb Tray is placed underneath the bottom whenever the oven is being used.
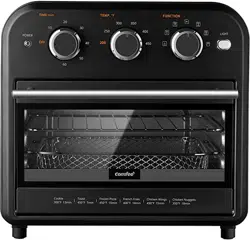
FEATURES AND BENEFITS
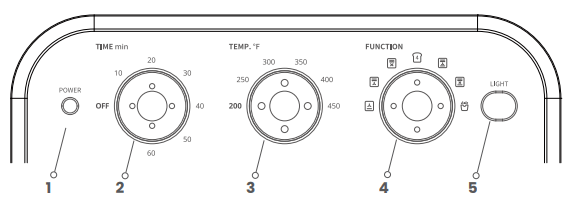
1.POWER ON LIGHT
Indicator light will turn on and remain lit when oven is in use.
2.TIME MIN knob
Use to select time for adjusting.
3.TEMP. °F knob
Use to select temperature for adjusting.
4.FUNCTION Knob
Use to select different cooking functions.
5.Light Button
Push the button to turn on the interior oven light. The light will not work if the power is off.
Oven Rack
Rack have 3 rack positions, top, middle and bottom position.
OPERATION
Operating your Oven
- The time can be adjusted, if user need different time, can turn Time knob to adjust the mode. The timer can be set to 0-60 minutes to adjust the requirements of different foods for the baking time. Turn on the timer,when the light in the furnace chamber is on, a clear ring will be heard at the end of timing, and the lighting in the furnace chamber will be off.
- Mechanical timer, try to avoid frequent positive and negative rotation of timer. Note: when the baking time is set to less than 20 minutes, please turn the timer knob to more than 20 minutes, and then turn it to the required time. The temperature of inside entire cavity may deviate in practice when oven working, but it will not affect the use of the product. Please do not stay away from the oven during baking to avoid the surface of food is burnt in a long time.
- The temperature can be adjusted, if user need different temperature, can The temperature can be adjusted, if user need different temperature, can
Warm 
Set the Temperature Dial to 200-450 °F. Set the Function Dial to Warm. Then turn the Timer Dial to the desired warming time to start the oven and begin warming. The power light will illuminate. The timer will ring once when the cycle is complete and the oven will power off when the time expires. To stop warming, turn the Timer Dial to the OFF position.
Broil  or
or  Broil
Broil 
Set the Function Dial to Broil or  Broil. Set the Temperature Dial to 200-450 °F. Then turn the Timer Dial to the desired cooking time to turn on the oven and begin broiling. The power light will illuminate. The timer will ring once when the cycle is complete and the oven will power off when the time expires. To stop broiling, turn the Timer Dial to the OFF position.
Toast 
Fit Oven Rack into Position 2. If toasting two items, center them in the middle of the Oven Rack. Four items should be evenly spaced – two in front, two in back. Six items should be evenly spaced – three in front, three in back.
Set the Function Dial to Toast. Set the Temperature Dial to desired temperature. Then turn the Timer Dial to the desired cooking time to start the oven and begin toasting. The oven power light will illuminate. When completed, the timer will ring and turn off. To stop toasting, turn the Timer Dial to the OFF position.
Bake  or
or  Bake
Bake 
Set the function to Bake or Bake. Set the Temperature Dial to desired temperature. Then turn the Timer Dial to the desired cooking time to start the oven and begin baking (It is recommended to preheat oven for 5 minutes prior to baking. Incorporate this into the total baking time). The power light will turn on. The timer will ring once when the cycle is complete and the oven will power off when the time expires. Place the pan in Position 2 for baking. For chicken or other large items, the pan can be in Position 1. To stop operation, turn the Timer Dial to the OFF position.
Air Fry 
Place the Air Fryer Basket onto the Baking Pan or Oven Rack. Air Fry in rack Position 2. Set the Function Dial to Air Fry. Set Temperature Dial to desired temperature. Then turn the Timer Dial to the desired cooking time to turn on the oven and begin Air Frying. The oven power light will illuminate. The timer will ring once when the cycle is complete and the oven will power off when the time expires. To stop Air Frying, turn the Timer Dial to the OFF position.
AIR FRYING
Air Frying is a healthy alternative to deep-frying in oil. A high-velocity fan and an upper heating element circulate air to prepare a variety of foods that are both delicious and healthier than traditional fried foods.
- Many foods that can be deep-fried, can be AirFried without using much, if any, oil. AirFried foods will taste lighter and be less greasy than deep-fried foods.
- AirFrying doesn’t require oil, but a light spray can enhance browning and crispiness. Use an oil sprayer or nonstick olive oil cooking spray to keep it extra light, or pour a little oil into a bowl, add food, and toss.
- Most oils can be used for AirFrying. Olive oil is preferred for a richer flavor. Vegetable, canola or grapeseed oil is recommended for milder flavors.
- An assortment of coatings can be used on AirFried foods. Some examples of different crumb mixtures include: breadcrumbs, seasoned breadcrumbs, panko breadcrumbs, crushed cornflakes, potato chips, and graham crackers. Various flours (including gluten-free) and other dry foods like cornmeal work as well.
- Many foods do not need to be flipped while cooking, but larger items, like chicken cutlets, should be flipped halfway through the cooking cycle to ensure results.
- When AirFrying large quantities of food that fill the basket, toss food halfway through cooking cycle to ensure everything is evenly cooked and browned.
Foods will cook more evenly if cut into the same-size pieces.
- Always AirFry with Baking/Drip Pan in place for easy cleanup.
- When AirFrying greasy foods (e.g., bacon), grease will drain into Baking/Drip Pan. As a precaution, allow hot grease to cool in the unit before removing the Baking/Drip Pan.
- Please note that some foods release water as they cook. When cooking large quanti-could leave a little moisture.ties for an extended period of time, condensation may build up which could leave a could leave a little moisture.
CARE AND CLEANING
- Unplug your Air Fryer Oven and allow it to completely cool before cleaning. Do not use abrasive cleaners, as they will damage the finish. Simply wipe the exterior with a clean, damp cloth and dry thoroughly. Apply the cleaning agent to a cloth, not directly onto the Air Fryer Oven. Do not use excess pressure when cleaning the area of the control panel as it could cause the text to be removed over time.
- To clean the interior walls and bottom of the oven (remove the Removable Crumb Tray first) use a damp soapy cloth or sponge. Never use harsh abrasives or corrosive products including oven cleaner sprays. These could damage the oven surface. Never use steel wool pads on the Air Fryer Oven or accessories.
- The Wire Rack, Baking/Drip Pan, Air Fryer Basket and Removable Crumb Tray should be hand-washed in hot, sudsy water or use a nylon scouring pad or nylon brush. These parts are not dishwasher safe.
- Always clean the Removable Crumb Tray after each use. Excess food particles could cause smoking and will be hard to remove from tray. To remove baked- on grease or burnt food particles you can soak the Removable Crumb Tray in hot, sudsy water or use nonabrasive cleaners. Never operate the oven without the Removable Crumb Tray in place.
- The Removal Tool can be cleaned with a For stubborn stains soak them in hot sudsy water prior to cleaning.
- The top interior of the Air Fryer Oven should be cleaned to remove excess grease that may accumulate after cooking greasy foods. smoking in the oven during subsequent uses.