©2018 Spectrum Brands, Inc.
Programming and Troubleshooting Guide
Mastercode 2
Troubleshooting: Locked Turnbutton 6
Troubleshooting: Keypad 7
Troubleshooting: Smart Home Systems 8
Troubleshooting: Battery 10
Battery FAQ 11
62813 Rev 02
1 / 11
Technical Support
1-866-863-6584
www.kwikset.com
1
3
2
4
5
6
©2018 Spectrum Brands, Inc.
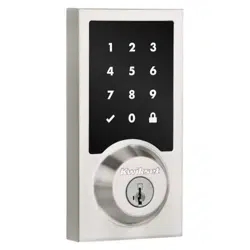
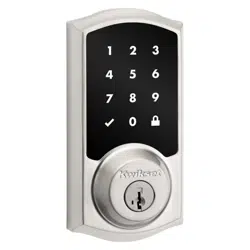
Mastercode
Programming timeout: If no button is pressed for ve seconds, the system will time out
and you will need to restart the procedure.
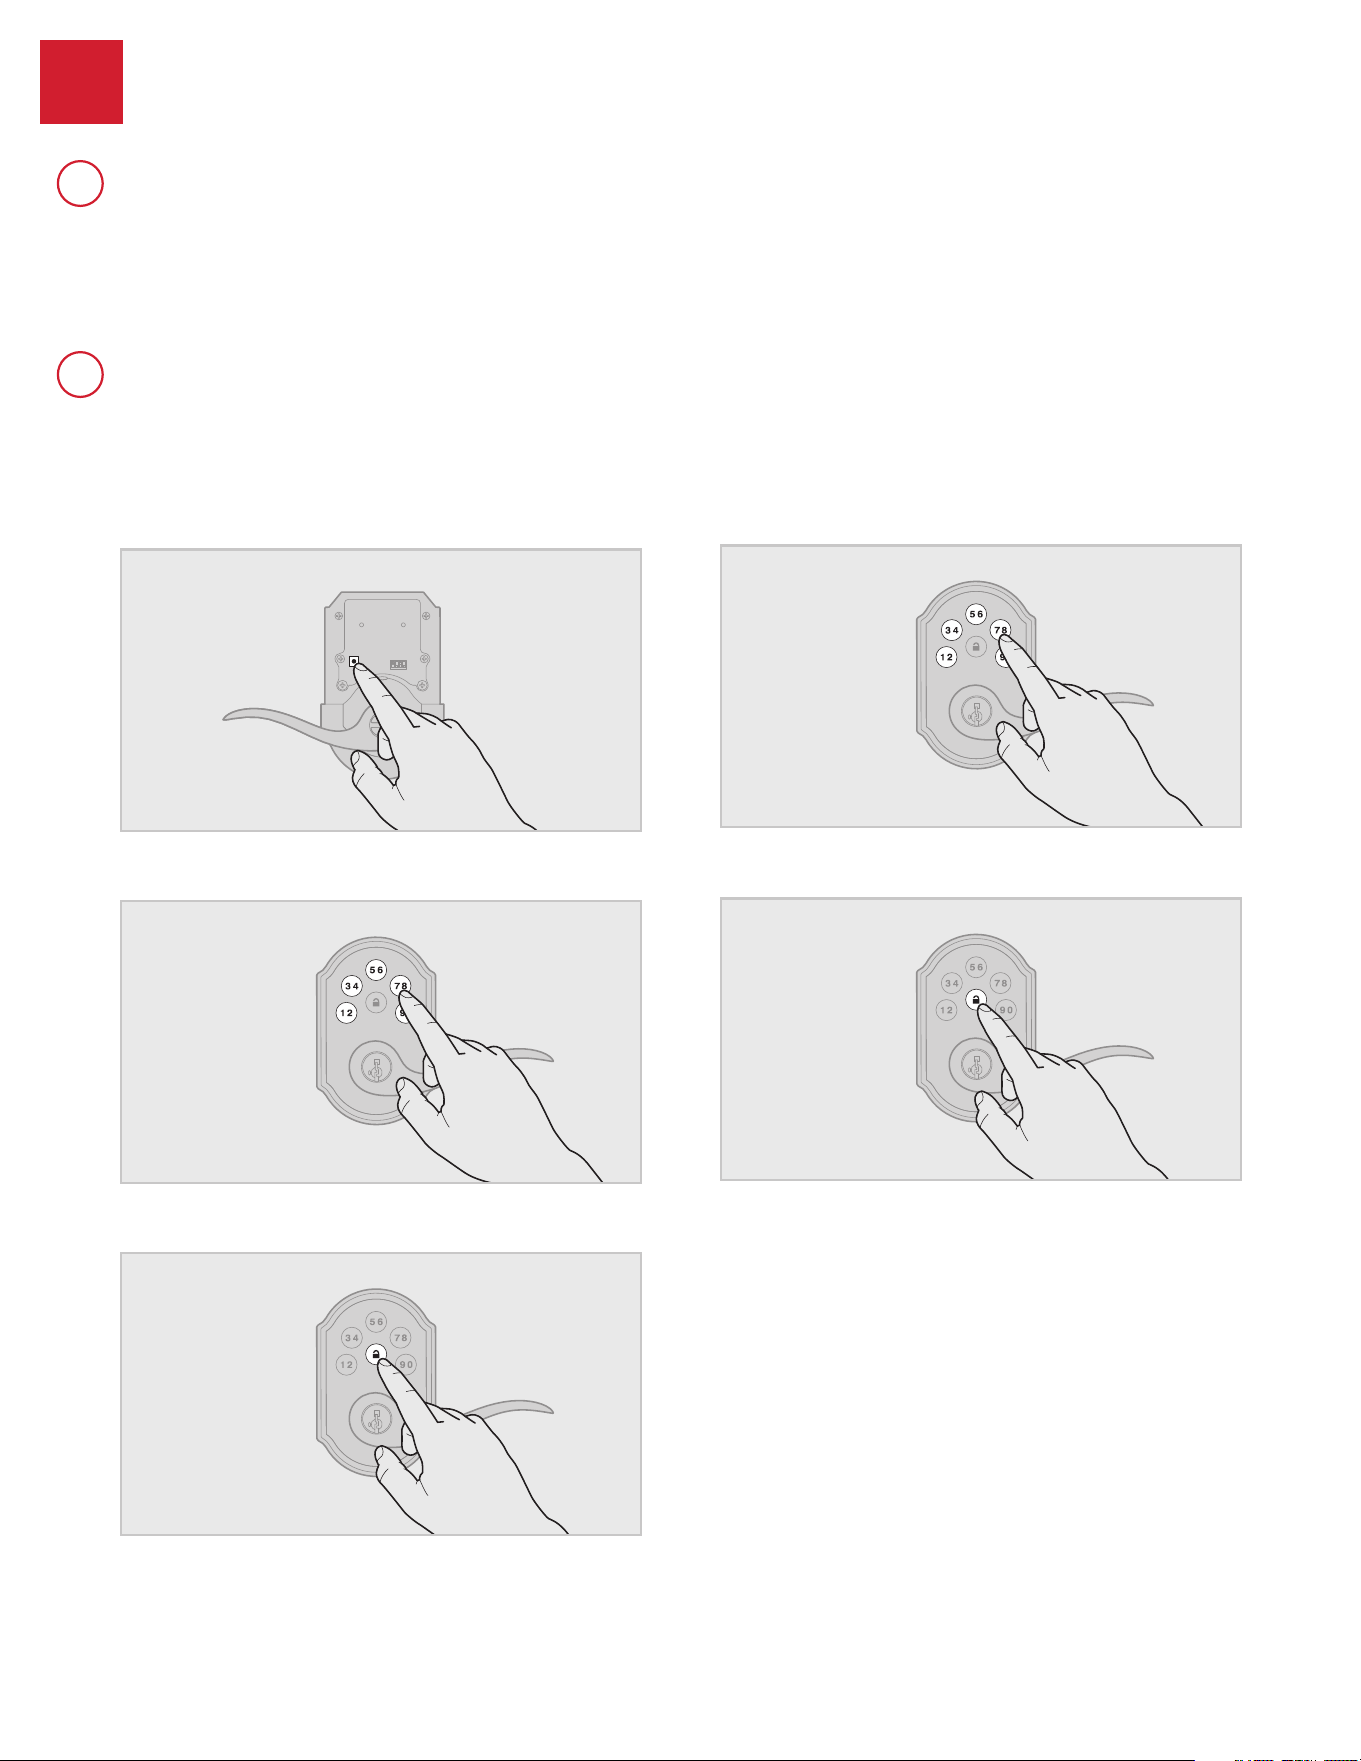
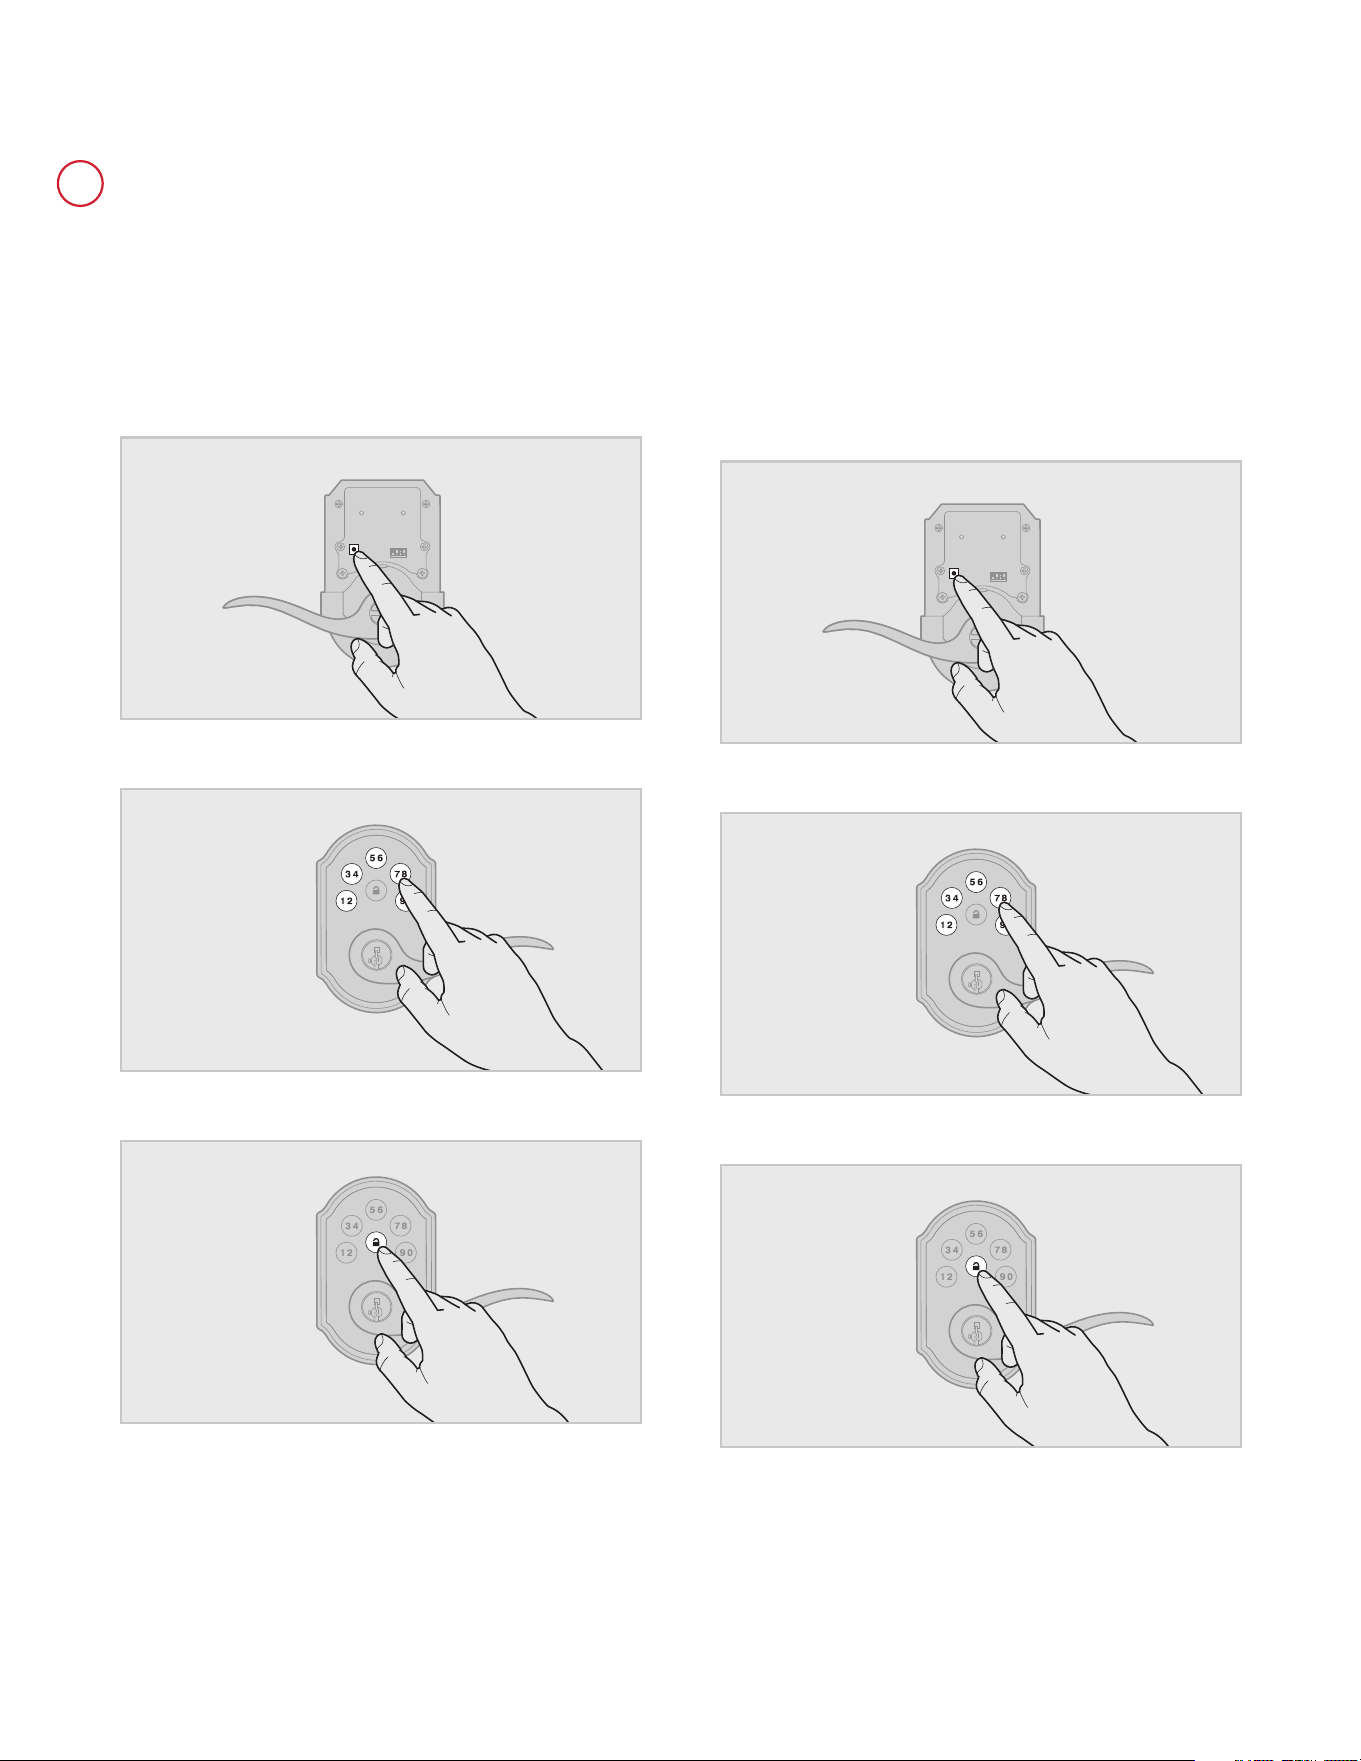
1. Keep door open. Press and HOLD the Program button until the keypad
ashes green (about 5 seconds).
2. Enter new Mastercode.
3. Press Lock button once.
4. Re-enter Mastercode.
5. Press Lock button once.
If programming is successful, the keypad will flash green once with
one beep.
If programming is unsuccessful, the keypad will ash red three times
with three beeps. Make sure the Mastercode has not already been
programmed. Attempt the procedure again, making sure to enter the
same new Mastercode in step 2 and 4.
6. Make sure switch #3 is on, and press the Program button once. If
you hear three beeps and see the keypad ash green three times, the
Mastercode is enabled.
Note: The lock will time out after ve seconds.
Using a Mastercode is an optional, added-security measure. It is not enabled by default. A Mastercode is
used to add and delete user codes, but it cannot unlock the door (unless the same code is programmed
as a user code, though this is not recommended). The Mastercode must be 4-8 digits.
62813 Rev 02
2 / 11
Technical Support
1-866-863-6584
www.kwikset.com
1
A
B
About the Mastercode
Enabling and Setting the Mastercode
©2018 Spectrum Brands, Inc.
1. Keep door open. Press the Program button once. The keypad will ash
green and you will hear three beeps.
2. Enter Mastercode.
3. Press Lock button once.
4. Press the Program button the number of times that corresponds to
the user code position being programmed.
Example: If programming the third code, press the button three times.
5. Enter new user code.
6. Press Lock button once.
The procedure for adding user codes is different when the Mastercode is enabled. For instuctions on how
to add user codes when the Mastercode is disabled, see the Installation and User Guide that came with
your lock.
Procedure continued on next page
62813 Rev 02
3 / 11
Technical Support
1-866-863-6584
www.kwikset.com
C
Adding User Codes with the Mastercode Enabled

©2018 Spectrum Brands, Inc.
If programming is successful, the keypad will flash green once with
one beep.
If programming is unsuccessful, the keypad will ash red three times
with three beeps. Make sure the user code is not a duplicate and that it
is between 4 and 8 digits during your next attempt. Make sure to enter a
valid Mastercode in step 2.
7. While the door is open and locked, test the user code to make
sure it unlocks the door.
62813 Rev 02
4 / 11
Technical Support
1-866-863-6584
www.kwikset.com
©2018 Spectrum Brands, Inc.
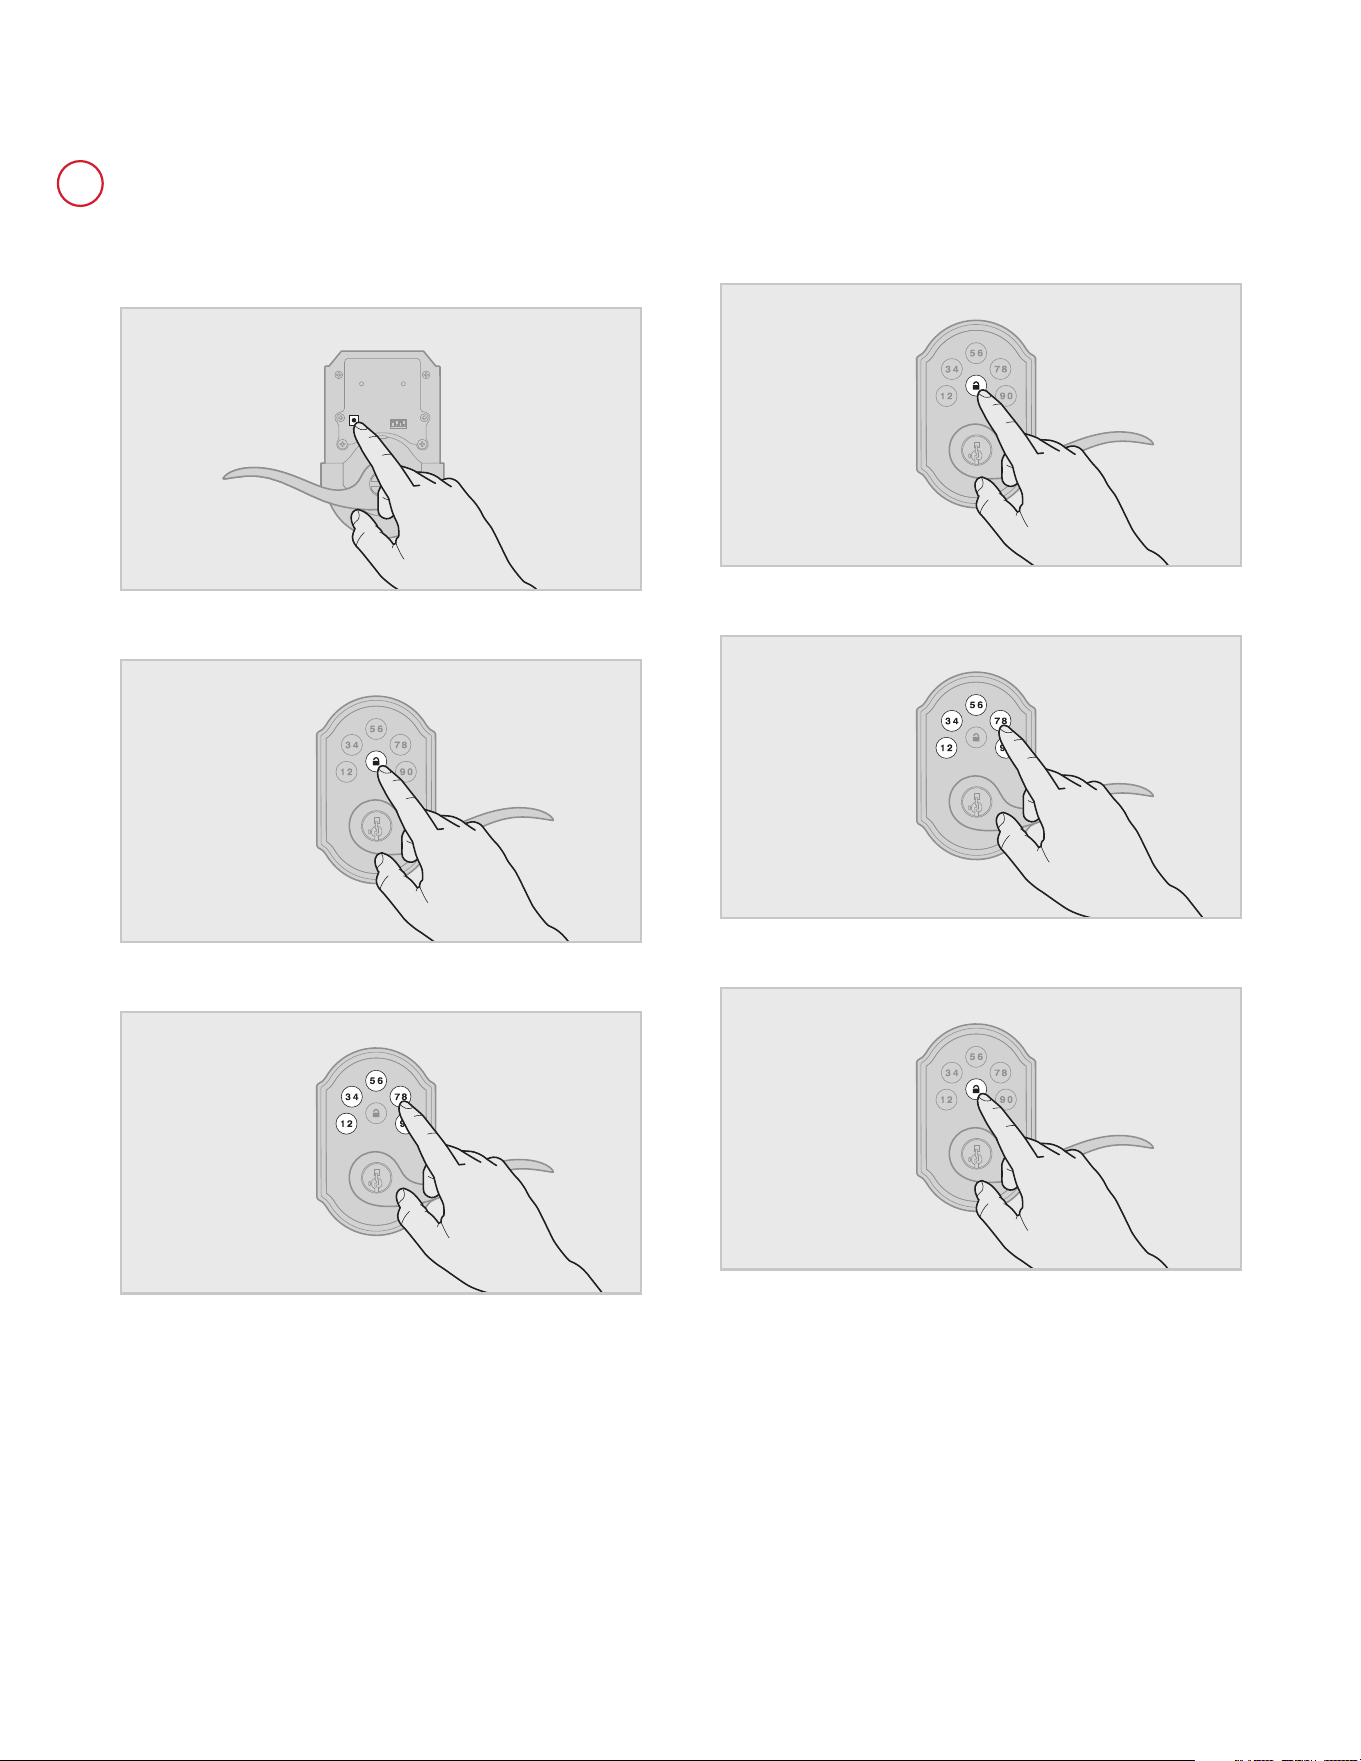
1. Keep door open. Press and HOLD the Program button until the keypad
ashes green (about 5 seconds).
2. Press Lock button once.
3. Enter Mastercode.
4. Press Lock button once.
5. Re-enter Mastercode.
6. Press Lock button once.
If programming is successful, the keypad will flash green once with
one beep.
If programming is unsuccessful, the keypad will ash red three times with
three beeps. Make sure the Mastercode has been enabled before trying
to disable it. Attempt the procedure again, making sure to enter the same
Mastercode in steps 3 and 5.
7. Make sure switch #3 is on, and press the Program button once. If you
don’t immediately hear three beeps and see the keypad ash green
three times, the Mastercode is disabled.
Note: The lock will time out after ve seconds.
62813 Rev 02
5 / 11
Technical Support
1-866-863-6584
www.kwikset.com
D
Disabling and Deleting the Mastercode
©2018 Spectrum Brands, Inc.
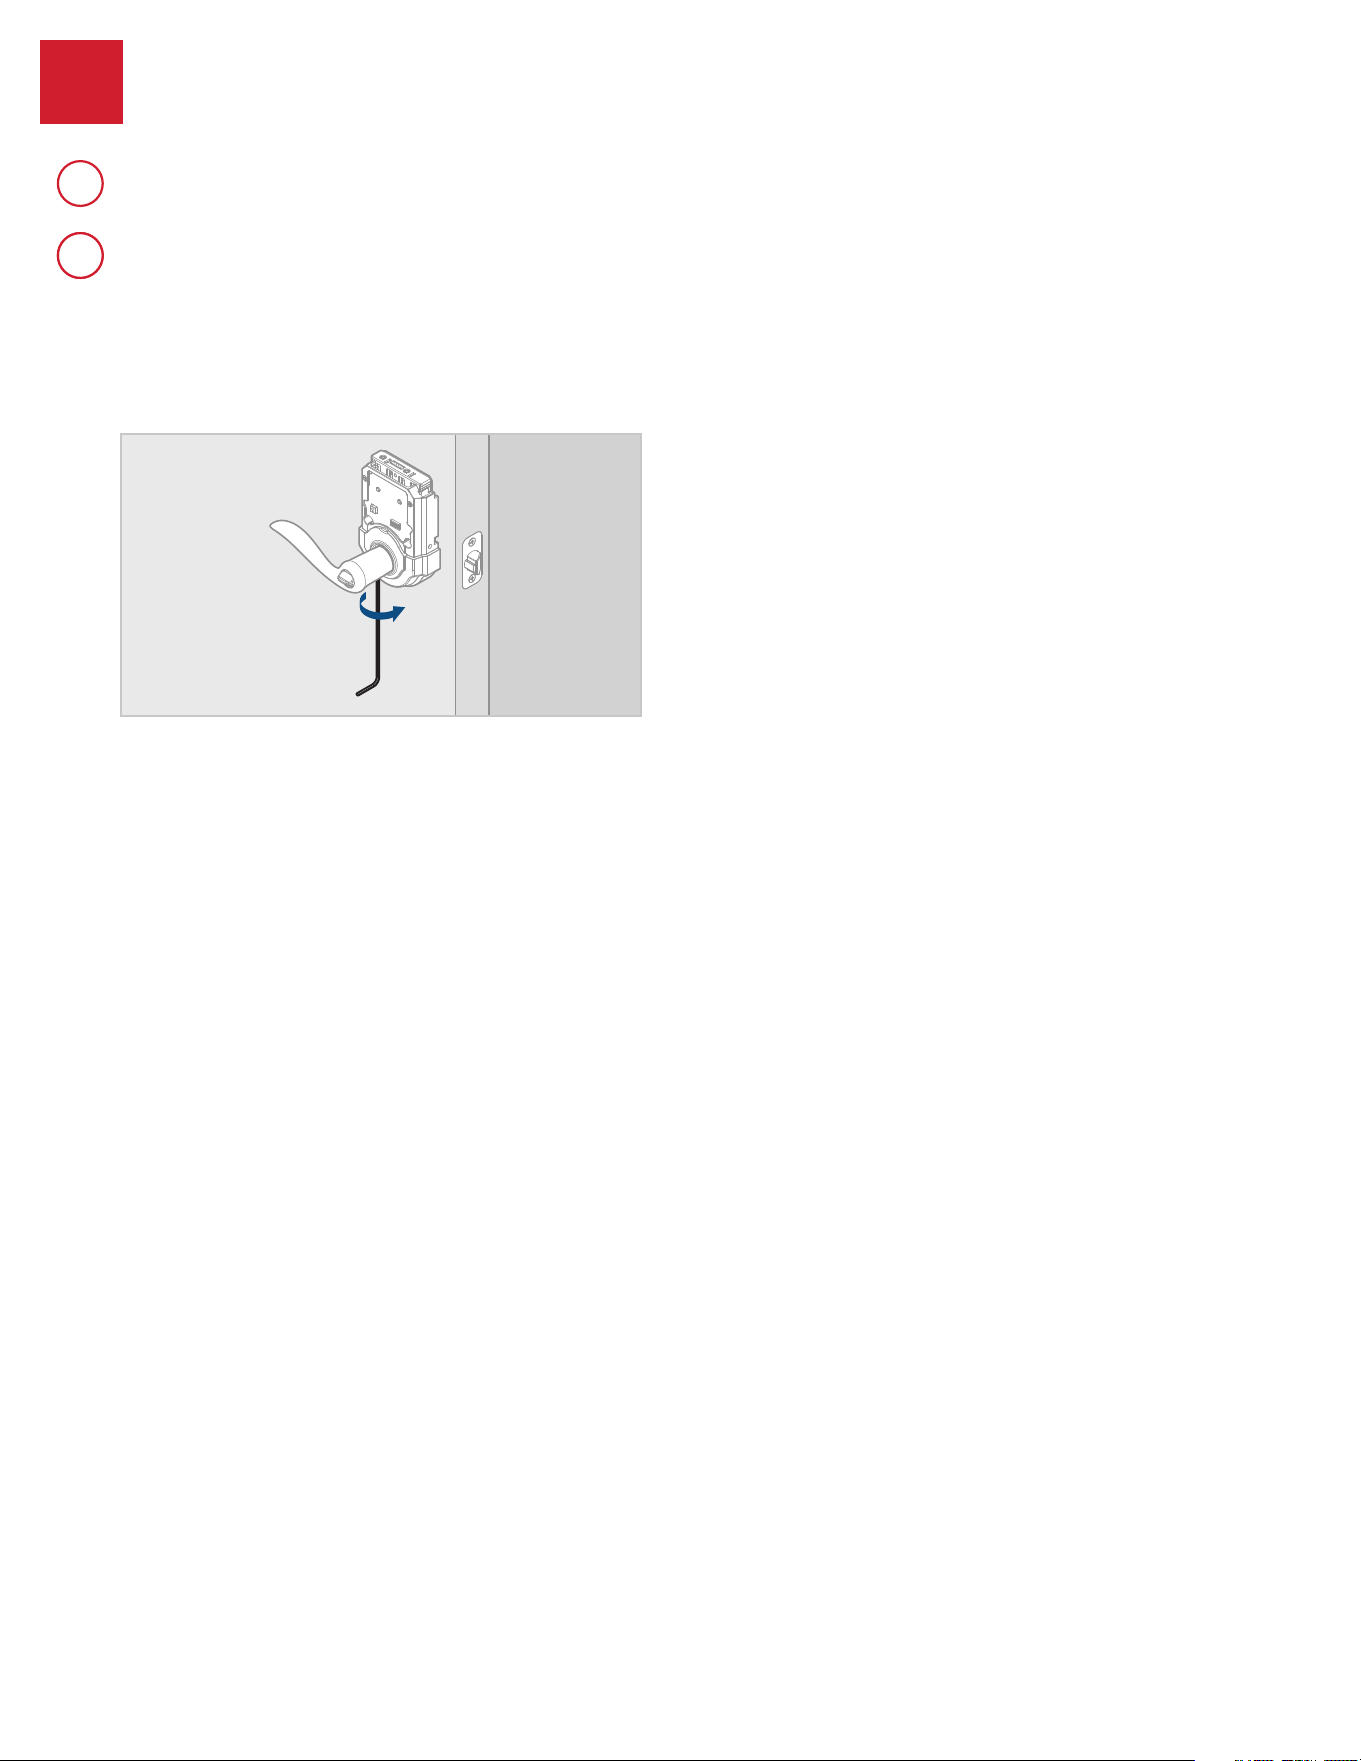
Troubleshooting: Locked Turnbutton
The set screw in the lever was not fully
tightened.
Fully tighten the pre-installed set screw at the bottom of the interior
lever.
62813 Rev 02
6 / 11
Technical Support
1-866-863-6584
www.kwikset.com
2
A
The turnbutton cannot rotate.
BB
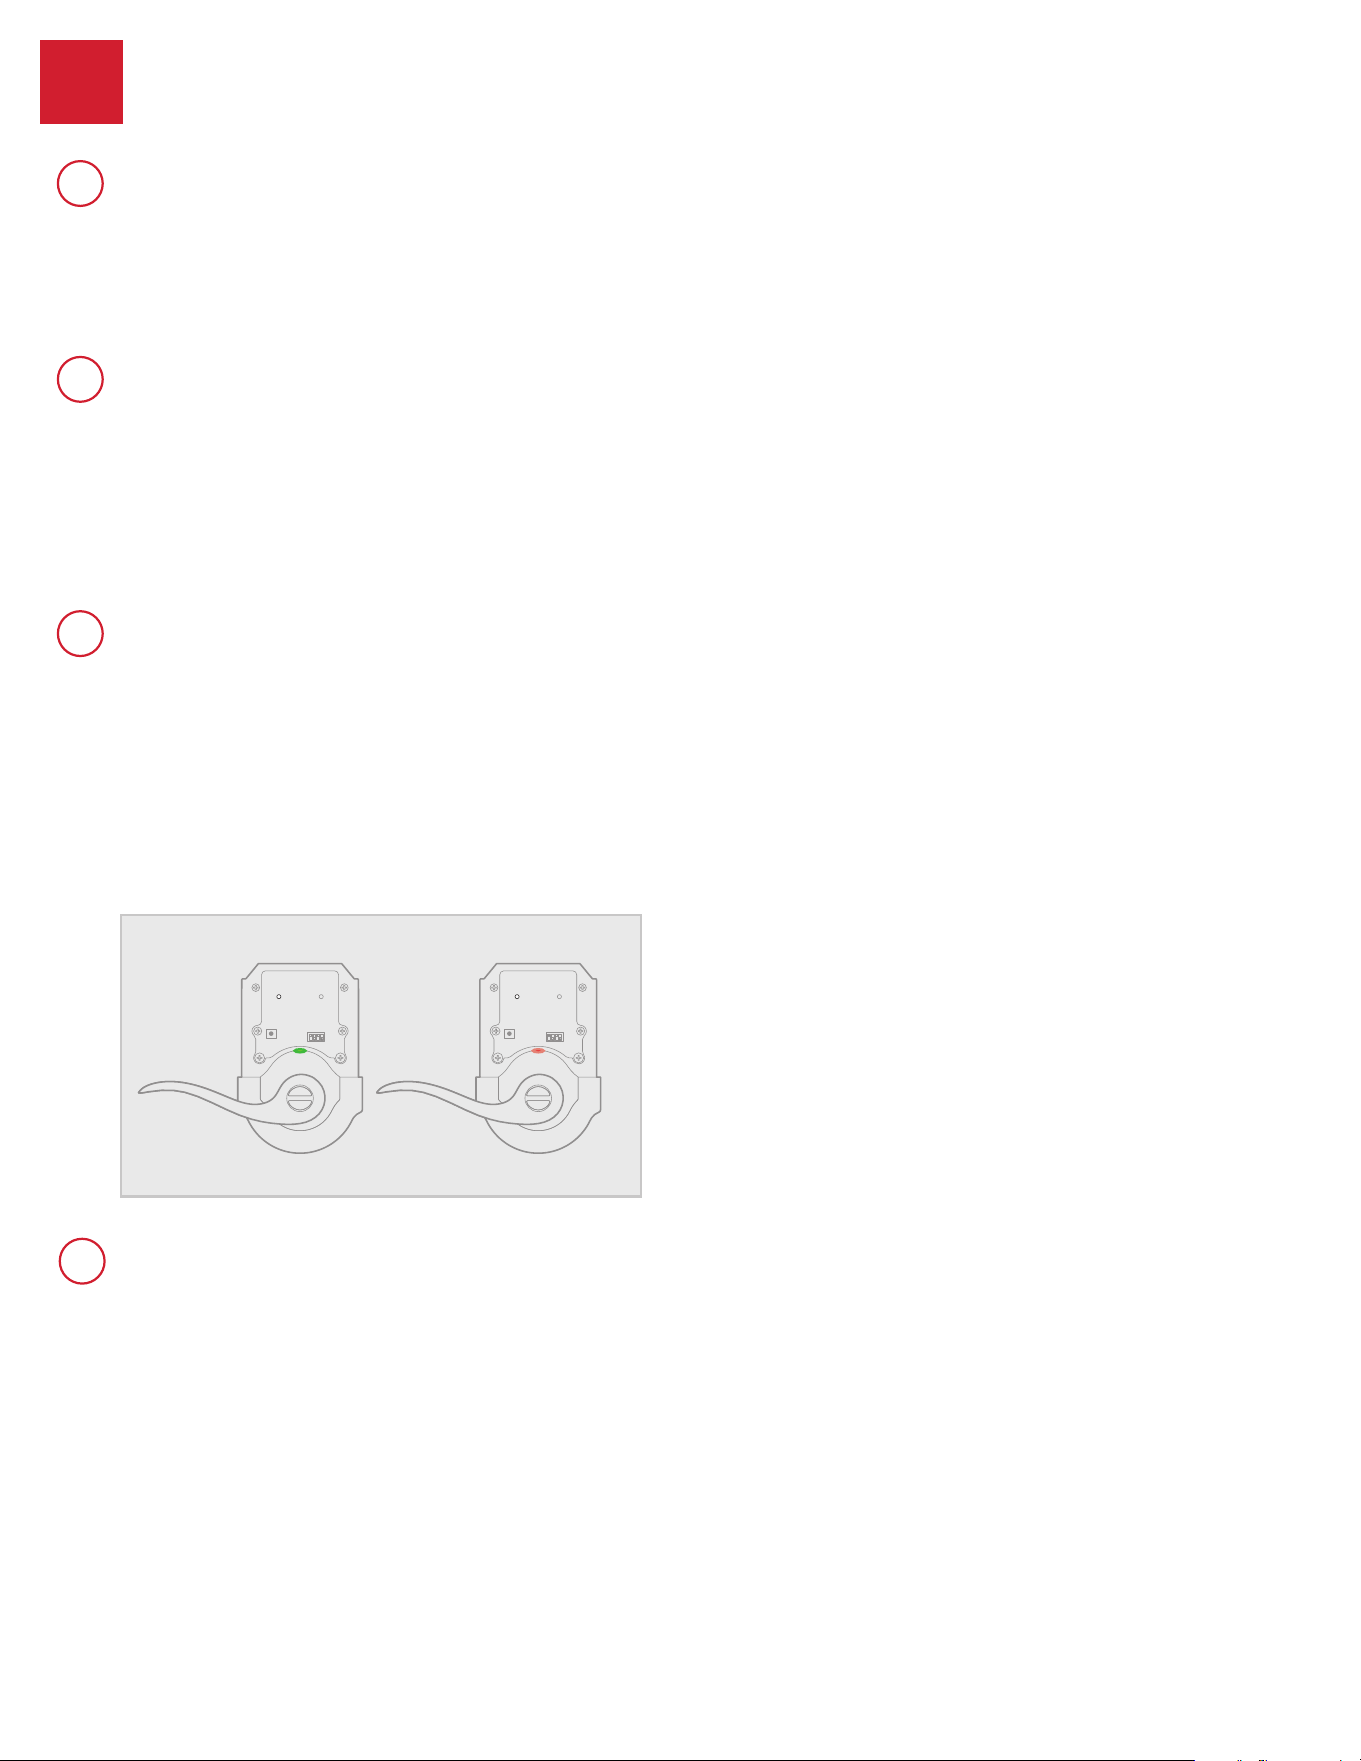
The lock beeps, the keypad flashes red, and the door cannot lock or unlock.
©2018 Spectrum Brands, Inc.
Troubleshooting: Keypad
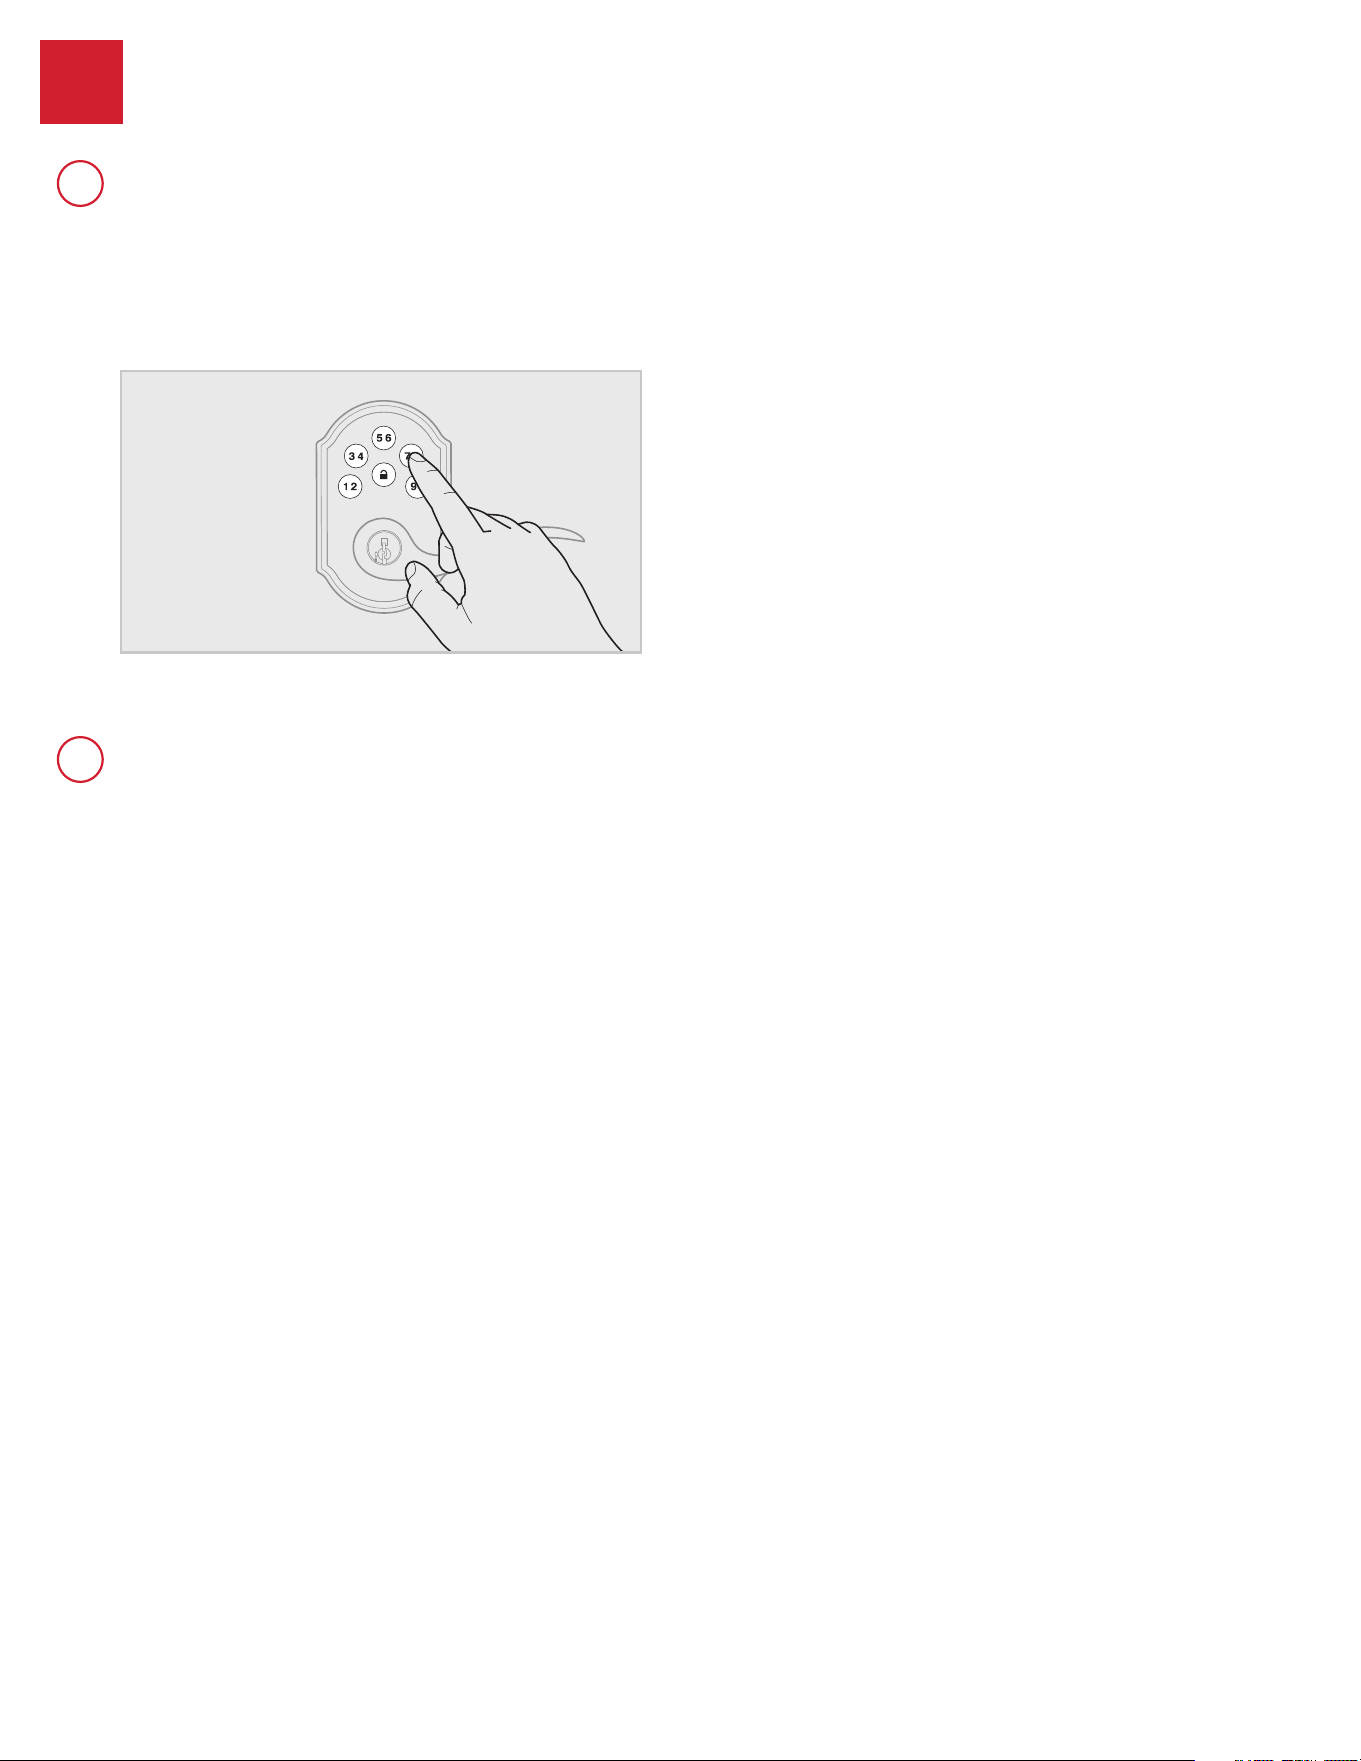
Keypad error test
Install a fresh set of batteries and turn switch #3 to the ON position. Test
each button on the keypad (one at a time) and listen for a beep on each
button press. If beeping is not heard on all buttons, contact Technical
Support for further troubleshooting.
Keypad lockout
If three incorrect codes were entered within one minute, the keypad will
lock for 60 seconds.
No user codes are programmed.
If there are no codes in the lock, the lock button will not lock the door.
This is indicated by the keypad ashing red three times with three
beeps. Program at least one user code and test the Lock button again.
The battery is too low to lock the door.
This is indicated by the keypad ashing red three times with three beeps.
Remove the batteries and replace with a fresh set.
The set screw in the lever was not fully
tightened.
Fully tighten the pre-installed set screw at the bottom of the interior
lever.
62813 Rev 02
7 / 11
Technical Support
1-866-863-6584
www.kwikset.com
3
A
B
The keypad is unresponsive.
The Lock button does not lock the door.

©2018 Spectrum Brands, Inc.
Troubleshooting: Smart Home Systems
The lock was not removed completely from
another network before being paired with the
new network.
Follow your smart home system’s instructions to remove (exclude/unpair)
the device from any other network. Then, attempt to pair (add/include)
the lock again.
The lock is not close enough to the controller.
Some Z-wave systems require that the lock be within 12” of the
controller during the pairing process. If the lock has already been
installed on the door, remove the interior assembly from the mounting
plate. Make sure the batteries are installed, and bring the interior
assembly next to the controller. Follow your smart home system’s
instructions to begin pairing at the controller. The lock may need to
remain stationary for 60 seconds during pairing.
Z-Wave
Controller
12"
305 mm
Note: Some locks have an anti-tamper alarm that will sound if the
interior is disconnect from the exterior. If this alarm is heard, perform the
following:
a. Remove the battery pack from the interior.
b. Remove the exterior assembly from the door.
c. Connect the cable from the exterior assembly to the interior
assembly.
d. Reinstall the battery pack.
e. Perform the pairing process while the interior and exterior are
connected.
Z-Wave
Controller
12"
305 mm
62813 Rev 02
8 / 11
Technical Support
1-866-863-6584
www.kwikset.com
4
A
4
A
The lock fails to pair with a Z-wave smart home system.

©2018 Spectrum Brands, Inc.
The system needs a repeater or router to
reach the lock.
Adding repeaters to your system may help communication between your
lock and the controller, especially if they are far away from each other.
The network configuration changed.
If any repeaters or routers in the system were moved since adding the
lock to the system, perform the “rediscover” process in your system’s
user interface.
The lock is in sleep mode.
If the lock has been unable to communicate with the system after
multiple attempts, it will go into sleep mode. Lock and unlock the door
with a key so that the lock status transmits to the system. If it still does
not communicate, remove (exclude/unpair) the lock from your system.
Then, pair (add/include) the lock with your system again. If the problem
persists, add a repeater or router between the controller and lock if none
presently exist in the system.
The light module or switch is not beaming
capable.
Z-Wave locks: Ensure the light module or switch located between the
controller and lock is beaming capable.
ZigBee locks: Ensure the router is reachable by both controller and lock.
62813 Rev 02
9 / 11
Technical Support
1-866-863-6584
www.kwikset.com
B
I can see the lock in my controller, but I can’t control it from the controller.
1. Reboot the lock:
a. Remove the battery pack from the lock.
b. Press the "Program" button for 5 seconds and then the "A"
button for 5 seconds.
c. If TS (touchscreen controller) shows low battery trouble for
the lock subjected to the rmware update then install new
batteries in pack.
d. Replace the battery pack into the lock.
e. If lock still fails to OTA update rmware, proceed to Step 2.
2. Delete, default, and pair lock again:
a. Delete the lock from TS (touchscreen controller).
b. Perform a factory reset:
i. Remove the battery pack from the lock.
ii. Press the "Program" button for 5 seconds and then
the "A" button for 5 seconds.
iii. Press and hold the "Program" button while
reinserting the battery pack. Keep holding the button
for 30 seconds until the lock beeps and the status
LED ashes red.
iv. Press the "Program" button momentarily.
v. After several seconds, the lock will ash the status
LED red and green several times and beeps twice
(if audio is enabled) to indicate factory reset is
complete.
c. For model 910 or 914, perform handing on the lock. For
model 916, it will automatically perform handing.
d. Pair the lock with TS again.
e. If lock still fails to OTA update rmware, proceed to Step 3.
3. If lock still fails to OTA update rmware after going through steps
1 and 2, it is recommended that your MSO/service provider contact
Kwikset/Weiser for advanced replacement of the lock.
C
The lock fails to update or pair with a service provider's ZigBee smart
home system.
Lock fails to OTA (Over the Air) update firmware.
©2018 Spectrum Brands, Inc.
Troubleshooting: Battery
The lock must be replaced. Contact Technical Support.
Keypad error.
See “Keypad error test” on page 7.
The Wireless Card LEDs are staying on.
Remove the battery pack, press and hold the program button for ve
seconds. Replace the battery pack. If the Wireless Card LEDs continue
to stay on, contact Technical Support.
The smart home system’s user interface falsely
reports a low battery.
If you receive an alert from your smart home system indicating that
the battery is low, conrm this is true at the lock. Turn on switch #1 so
that the status LED ashes every six seconds. If the LEDs turn amber
or green, followed by a red ash, the battery is low. If the red ash is
not seen, the battery is not low. This is an error on the smart home
system side that will often be xed when the lock is manually locked or
unlocked.
The smart home system controller’s
communication with the lock is draining the
battery.
Remove the lock from your system. Put a new set of batteries in the
lock. Operate the lock in stand-alone mode for a week. If the batteries
drain within the week, the problem resides in the lock. If the batteries do
not drain, the problem may be the smart home controller. Call Technical
Support.
The smart home system controller’s ping
frequency is too high.
Decrease the ping frequency from the controller to the lock to the lowest
possible setting.
To ensure proper operations post power cycle, allow 30 seconds
between battery removal and replacement. If the lock still displays low
battery behavior and/or fails to join/rejoin a ZigBee network, remove
the battery pack, press and hold the program button for 5 seconds then
press and hold button A for 5 seconds. Replace the battery pack.
D
The lock still shows low battery behavior locally and/or on SmartHome console
after fresh batteries were installed:
62813 Rev 02
10 / 11
Technical Support
1-866-863-6584
www.kwikset.com
5
A
B
C
The batteries drain within one day.
The batteries drain within one week.
The batteries drain within a few weeks.

©2018 Spectrum Brands, Inc.
Battery FAQ
How long will the lock operate on a set of
batteries?
Based on 10 operations per day, a single, new set of Alkaline batteries
will operate the lock for over a year.
What type of batteries do you recommend?
For best results, use new non-rechargeable Alkaline batteries only.
I am planning to be away for several months.
Will my lock operate when I get back?
When the system is idling, it consumes minimum power (very close to
battery shelf life.) With alkaline batteries, the lock should be operable
after years of idle.
I replaced my batteries less than a year ago
and need to replace them again.
Check your door alignment. If the deadbolt makes several unsuccessful
attempts to lock or unlock the door, it may mean that the door is warped
and the latch does not line up correctly with the strike. Operating the
lock excessively reduces battery life. Avoid turning on the keypad light
unnecessarily.
What settings should I use to get the
maximum battery life out of my lock?
Set switches #1, #2, and #3 to the OFF position.
62813 Rev 02
11 / 11
Technical Support
1-866-863-6584
www.kwikset.com
6