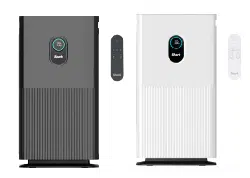
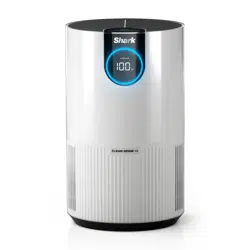
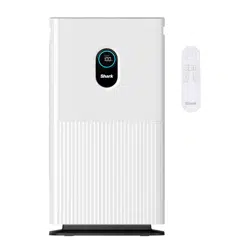
Shark HE601 Air Purifier 6
Product's Documents
Below are documents related to this product, you can read online or download:
- Owner's manual - (English) Read Online | Download pdf
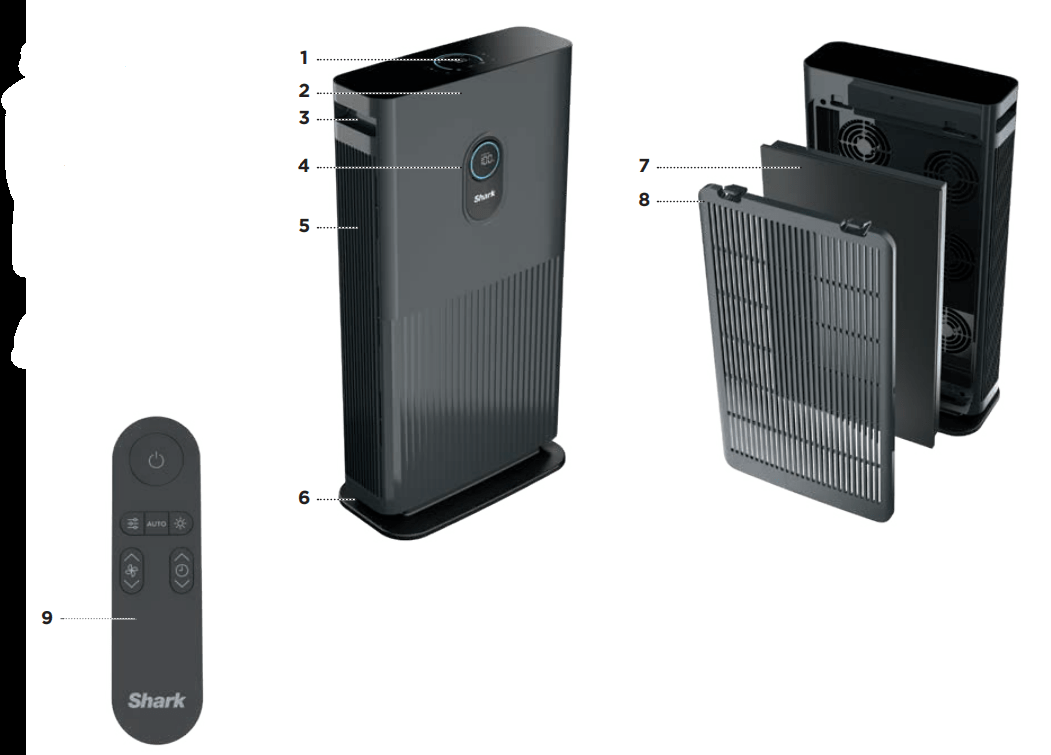
Parts:
TIPS FOR SETTING UP YOUR UNIT
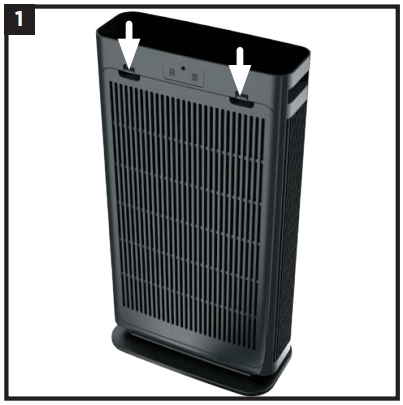
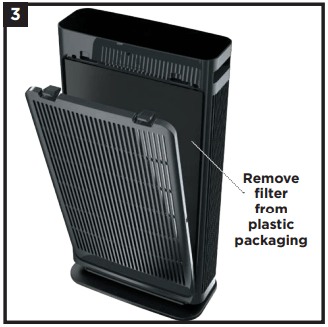
1. Before plugging in the unit for the first time, you must remove the filter and take it out of its packaging. First, remove the filter cover from the back of the unit. Press the tabs near the top and pull the cover toward you.
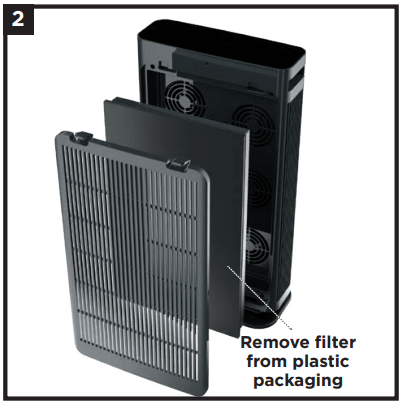
2. Remove the filter from the unit. Take the filter out of its sealed plastic packaging. To reinstall it, insert it into the unit.
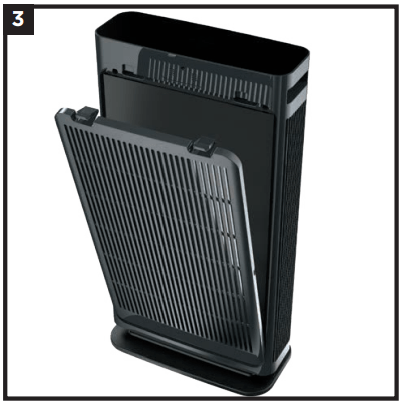
3. With the filter installed, replace the filter cover. Insert the tabs on the bottom of the cover into the slots on the unit. Press the top of the cover, then the sides, until it clicks into place. DO NOT run the air purifier unless the filter is removed from its packaging and installed correctly.
4. Set up the unit upright on a level floor. For best results, set it up in the space you spend the most time in, such as the kitchen, living room, or bedroom. Make sure the unit is at least 3 inches (8cm) away from all walls, large objects, or electronics.

5. Plug the unit into an electrical outlet and press the power button on the top control panel or on the remote.
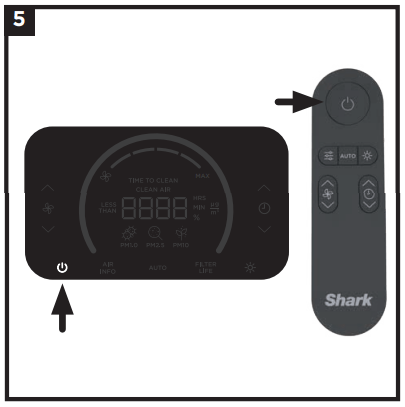
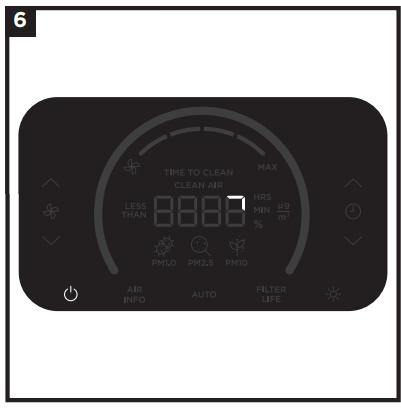
6. When the unit is powered on, it will begin to analyze the air quality indicated by the rotating lights. After a few seconds the unit will display the current air quality and you can customize the settings on your unit.
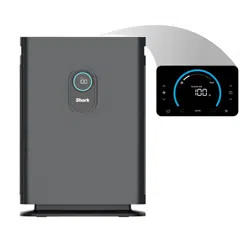
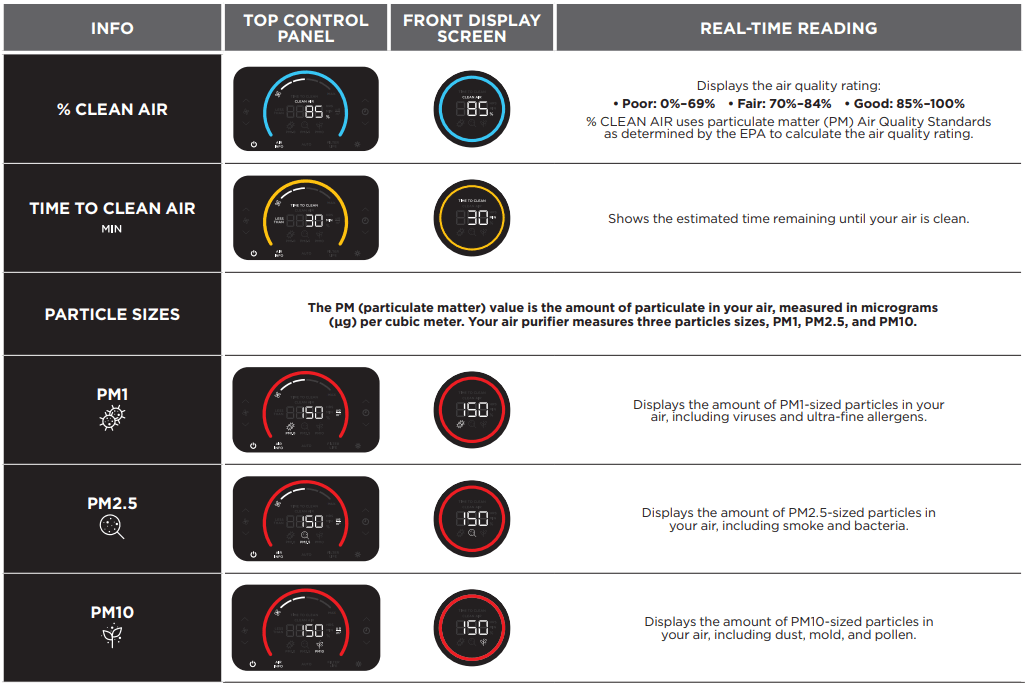
Your Air Purifier 6 is equipped with digital displays on both the top and front of the unit.
TOP CONTROL PANEL
Displays the current air quality status based on the AIR INFO option selected, and includes controls that allow you to customize the settings.
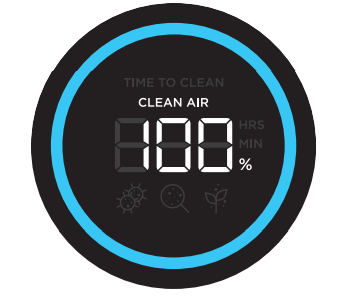
FRONT DISPLAY SCREEN
Displays the current air quality status based on the Air Info mode selected on the top control panel.
TOP CONTROL PANEL BUTTONS
 On/Off: Press to turn the power on or off.
 Air Info: Press to switch between air quality display options. See the Air Info Settings section for more information.
 Auto Mode: Press to turn on Auto Mode. In this setting the fan speed automatically adjusts based on real time air quality readings. As the air quality improves, the fan speed will decrease. If air quality worsens, the fan speed will increase. Leave your unit in Auto Mode for optimal filter life and performance.
 Filter Life: Press to show the remaining filter life in hours. Once the filter has 0 hours remaining, the FILTER LIFE button will flash to indicate the filter needs to be changed. See Installing and Removing the Filter section for more information.
 Brightness: Adjusts the brightness of both the front display screen and the top control panel. Switch between 3 options: full brightness, partially dim, fully dim.
 Shut-Off Timer: Set the number of hours for the air purifier to run before it automatically shuts off. Timer can be set between 1–12 hours.
 Fan Speed: Adjusts the speed of the fan. Select one of 4 settings: 1 Low, 2 Medium, 3 High, 4 Maximum. Note: If fan speed is manually changed, auto mode will be deactivated. For tips on optimal fan setting, see Optimizing Fan Speed section.
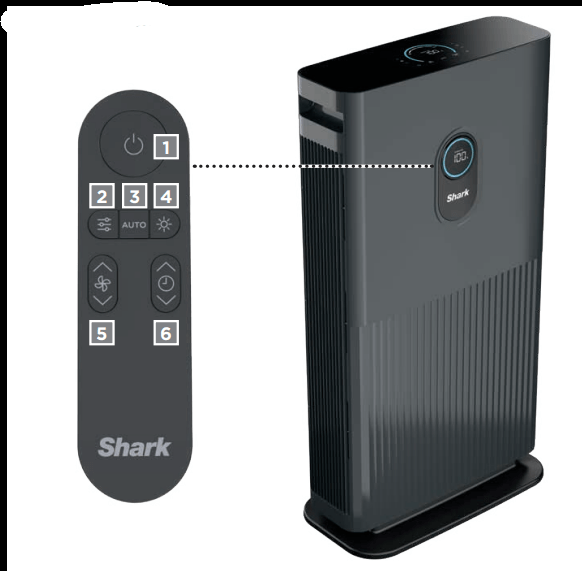
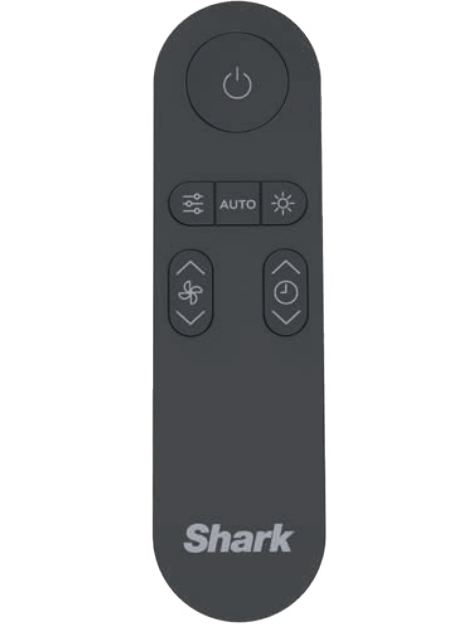
Your air purifier includes a remote control that can turn the power on or off, and adjust the settings
USING THE REMOTE CONTROL
To use the remote control, aim it at the front display screen and press the buttons on the remote. The remote control has a range of 15 ft. (5 meters). For best results, make sure no obstacles are between the remote control and the display screen.
REMOTE CONTROL BATTERY
This remote uses a CR2025 3-volt replaceable battery. To replace the battery, follow the steps below.
REMOTE CONTROL BUTTONS
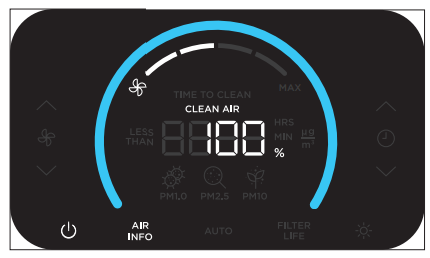
The built-in sensor detects your air quality to give you real-time information. Use the AIR INFO button to switch between air quality display options.
The ring on the front and top displays will change color as your air quality changes, allowing you to easily monitor your air quality even when you are far from the unit.
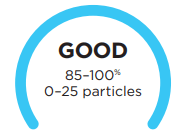
A blue ring means your air quality is good, with a low level of particle concentration.
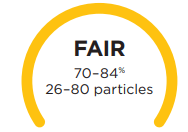
An amber ring means your air quality is fair, with a moderate level of particle concentration. For better results, increase fan speed or select Auto Mode.
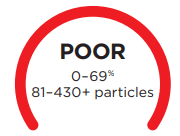
A red ring means your air quality is poor, with a high level of particle concentration. For better results, increase fan speed or select Auto Mode.
Note: Air quality sensor uses a cumulative particle count across all particle sizes to determine air quality percentage.
OPTIMIZING FAN SPEED
Your air purifier is equipped with 4 fan speed settings. Adjust fan speed to optimize your cleaning performance.

NOTE: Always remove all protective packaging from the filter before installing.
When the filter timer has 0 hours remaining, the FILTER LIFE button on the top control panel will blink, indicating that it’s time to install a new filter.
1. Turn off and unplug the unit before removing or installing filters.
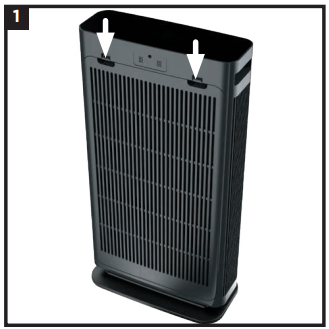
2. Remove the back cover from the unit by pressing the tabs at the top (1), then pulling the cover toward you.
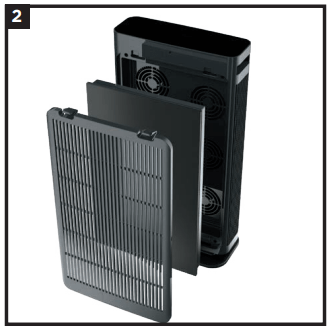
3. To remove the old filter, pull it out by the tabs at the top and bottom of the filter (2). Discard old filter in trash.
4. Remove all packaging and wrapping from the new filter.
5. Insert the new filter, then replace the filter cover. Insert the tabs on the bottom of the cover into the slots on the unit (3). Press the top of the cover, then the sides, until it clicks into place.
6. Plug the unit back in and turn on power. Calibration will begin.
7. After installing a new filter, press and hold the Filter Life button on the top control panel for 3 seconds to reset the timer. The unit will beep when the timer is activated.
Disposing of used filters
Filters can’t be cleaned or recycled. After removing a used filter, wrap it in an airtight plastic bag for disposal. As an extra precaution, wear gloves when handling a dirty filter.
NOTE: Always unplug the unit before doing any cleaning or maintenance.
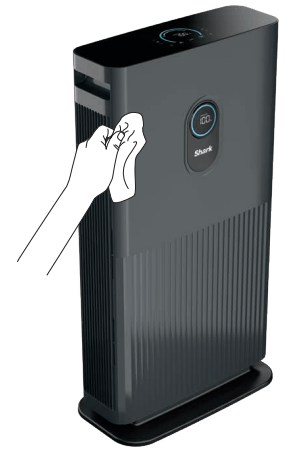
Exterior Cleaning:
For best results, clean the exterior of the unit every two months or as needed. Use a microfiber cloth to remove dust. To sanitize, wipe down the exterior with a microfiber cloth dampened with warm, soapy water. Avoid excess water and abrasive chemical cleaners to prevent damage.
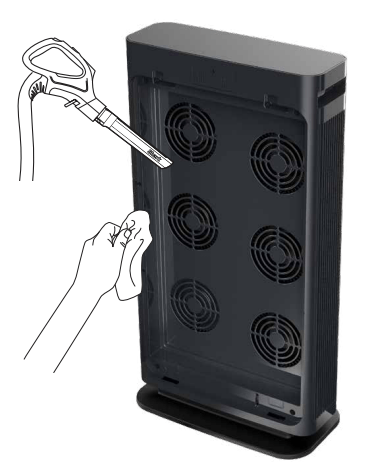
Interior Cleaning:
For best results, clean the interior of the unit every two months or as needed. Remove the filter cover, take out the filter, and use a vacuum cleaner or a microfiber cloth to remove dust and debris from the interior of the unit. DO NOT use abrasive chemical cleaners on the inside of the unit.
Remote Control
Use the remote control to operate your air purifier from a distance.
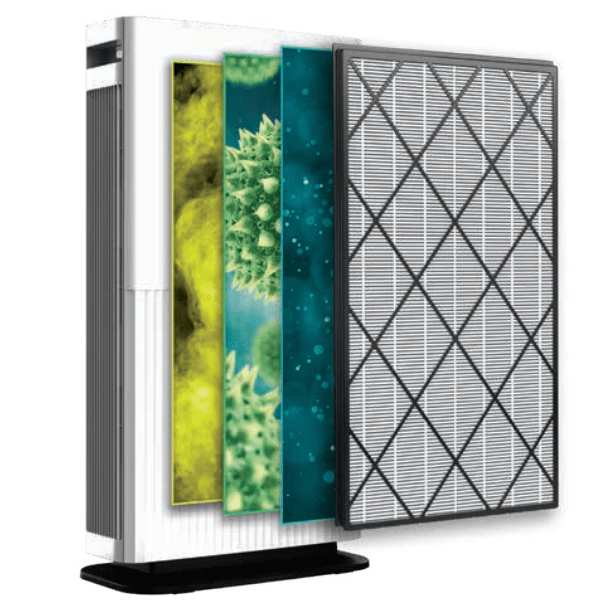
SHARK™ AIR PURIFIER 6 TRUE HEPA MULTI-FILTER
Removes 99.97% of particles up to 0.3 microns from the air and is equipped with carbon for protection against household odors and VOCs.
SHARK™ AIR PURIFIER 6 TRUE HEPA MULTI-FILTER WITH ADVANCED ODOR LOCK
Removes 99.97% of particles up to 0.3 microns from the air and is equipped with carbon for heightened protection against household odors and VOCs.
SHARK™ AIR PURIFIER 6 TRUE HEPA MULTI-FILTER WITH ADVANCED ODOR LOCK & FUMES LOCK
Removes 99.97% of particles up to 0.3 microns from the air and is equipped with carbon for heightened protection against household odors, VOCs, and fumes such as formaldehyde found in plants, furniture, and flooring.
| PROBLEM | SOLUTION |
| My air purifier is not powering on. What should I do? | Make sure the unit is plugged in and that the outlet works. Press the power button to start air purification. Make sure the filter cover is properly installed. |
| Why is there no air flow? | Increase the fan speed on your unit to improve performance. Make sure that all packaging is removed from the filter and it is properly installed in the unit. Unplug the unit and clean off any dust or debris from the intake and the air vent areas. |
| Why is my air purifier vibrating or making unusual loud noises? | Make sure the unit is set up on its base, and on a flat, level space on the floor. |
| Why does my air smell bad? | If there recently have been odors in the area, such as from cigarettes or food, allow more time for the unit to remove them. Clean off any dust or debris from the intake and the air vent areas. The filter may need to be replaced. |
| Can I wash the filter? | No, the filter is not washable. Keep filter away from water and dispose of it when it is dirty. |
| How do I know when my air purifier is in Auto Mode? | The Auto Mode button on the top control panel illuminates when the unit is in Auto Mode. |
Reference file: Shark HE601 Air Purifier 6
Series: HE600