Loading ...
Loading ...
Loading ...
Page 1505.17.17
Front Trim Assembly
POWER SUPPLY SERVICE MUST BE COMPLETED PRIOR TO FINISHING TO AVOID RECONSTRUCTION.
HEAT VENTS AND AIR OPENINGS CANNOT BE COVERED IN ANY CIRCUMSTANCES.
WARNING
FinishingFinishing
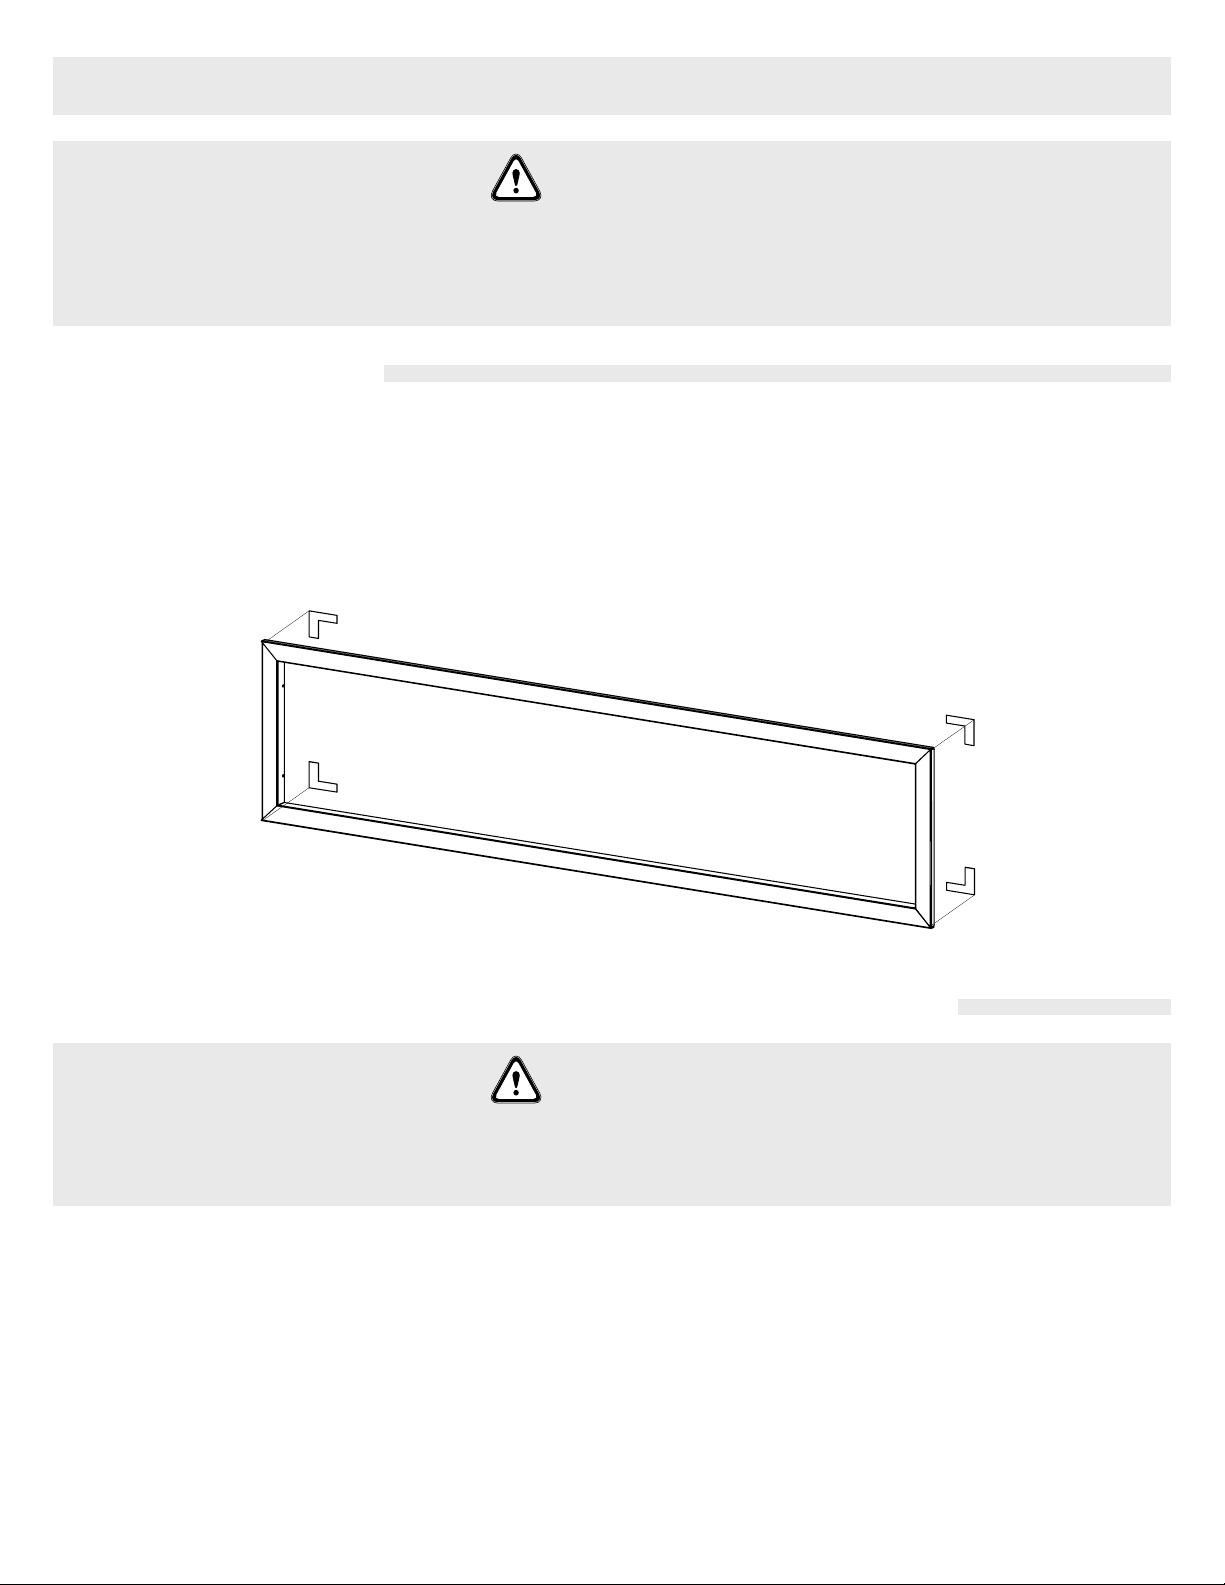
1. Included are 4 trim pieces (2 long and 2 short metal strips) and 4 “L” shape brackets (sticker bracket)
2. Assemble the trims in a rectangular shape and align the trims in the accurate position.
3. Stick the “L” shape brackets to the back of the corners of the trim rectangle, connecting the gaps between
the trims, and fasten their positions
4. Carefully install the rectangular trim onto the rebox Return or with the Return extension kit if you need
more clearance for thicker dry wall.
1. Remove two screws on both sides of the trim; Remove three screws on top and bottom sides of the trim.
Carefully put aside the trim in safe, at area until re-attachment. (FIGURE 1)
2. Remove two screws on both sides of the Return Extension kit; Remove three screws on top and bottom
sides of the extension kit. The Return Extension kit consists of two long and two short metal strips.
(FIGURE 2)
3. To attach the Return Extension kit to the trim, use the screws mentioned above.
4. To install the trim (with the Return extension kit) back to the rebox Return, adjust the spacing from dry
wall to the trim.
5. Attach all the screws back to the above Return extension kit and Trim. (FIGURE 3)
Front Trim / Return Extension Kit Removal and Attachment
BEFORE THE FRONT TRIM AND FRONT GLASS IS INSTALLED OR REMOVED, UNPLUG THE APPLIANCE AND
WAIT UNTIL APPLIANCE IS COOL TO THE TOUCH. GLASS CAN BE HEAVY AND FRAGILE SO HANDLE WITH CARE.
WARNING
Loading ...
Loading ...
Loading ...