Loading ...
Loading ...
Loading ...
Piston/Piston Rings/Piston Pin
3. Route the cam chain through the cylinder
head and install the cylinder head (6).
Do not damage mating surfaces when installing
the cylinder head.
4. Apply engine oil to all cylinder head bolt
threads and seating surface.
Install the washers and cylinder head bolts (7)
and tighten them to the specified torque in a
crisscross pattern in two or three steps:
38 lbf·ft (51 N·m, 5.2 kgf·m)
Do not let the washers fall into the crankcase.
5. Install the cylinder bolt (8) and tighten it to
the specified torque:
7 lbf·ft (10 N·m, 1.0 kgf·m)
NOTICE
NOTICE
(6) cylinder head
(7) washers and cylinder head bolts
(8) cylinder bolt
(9) left cylinder head hanger plate
(10) right cylinder head hanger plate
(11) cylinder head hanger plate bolts
(12) cylinder head hanger bolts
(6)
(8)
(7)
(9)
(12)
(11)
6. Install the left cylinder head hanger plate (9)
and right cylinder head hanger plate (10), then
loosely install the cylinder head hanger plate
bolts (11) and cylinder head hanger bolts (12).
Tighten the cylinder head hanger bolts and
cylinder head hanger plate bolts to the
specified torque:
cylinder head hanger bolts:
40 lbf·ft (54 N·m, 5.5 kgf·m)
cylinder head hanger plate bolts:
24 lbf·ft (33 N·m, 3.4 kgf·m)
(10)
(12)
(11)
80 Servicing Your Honda
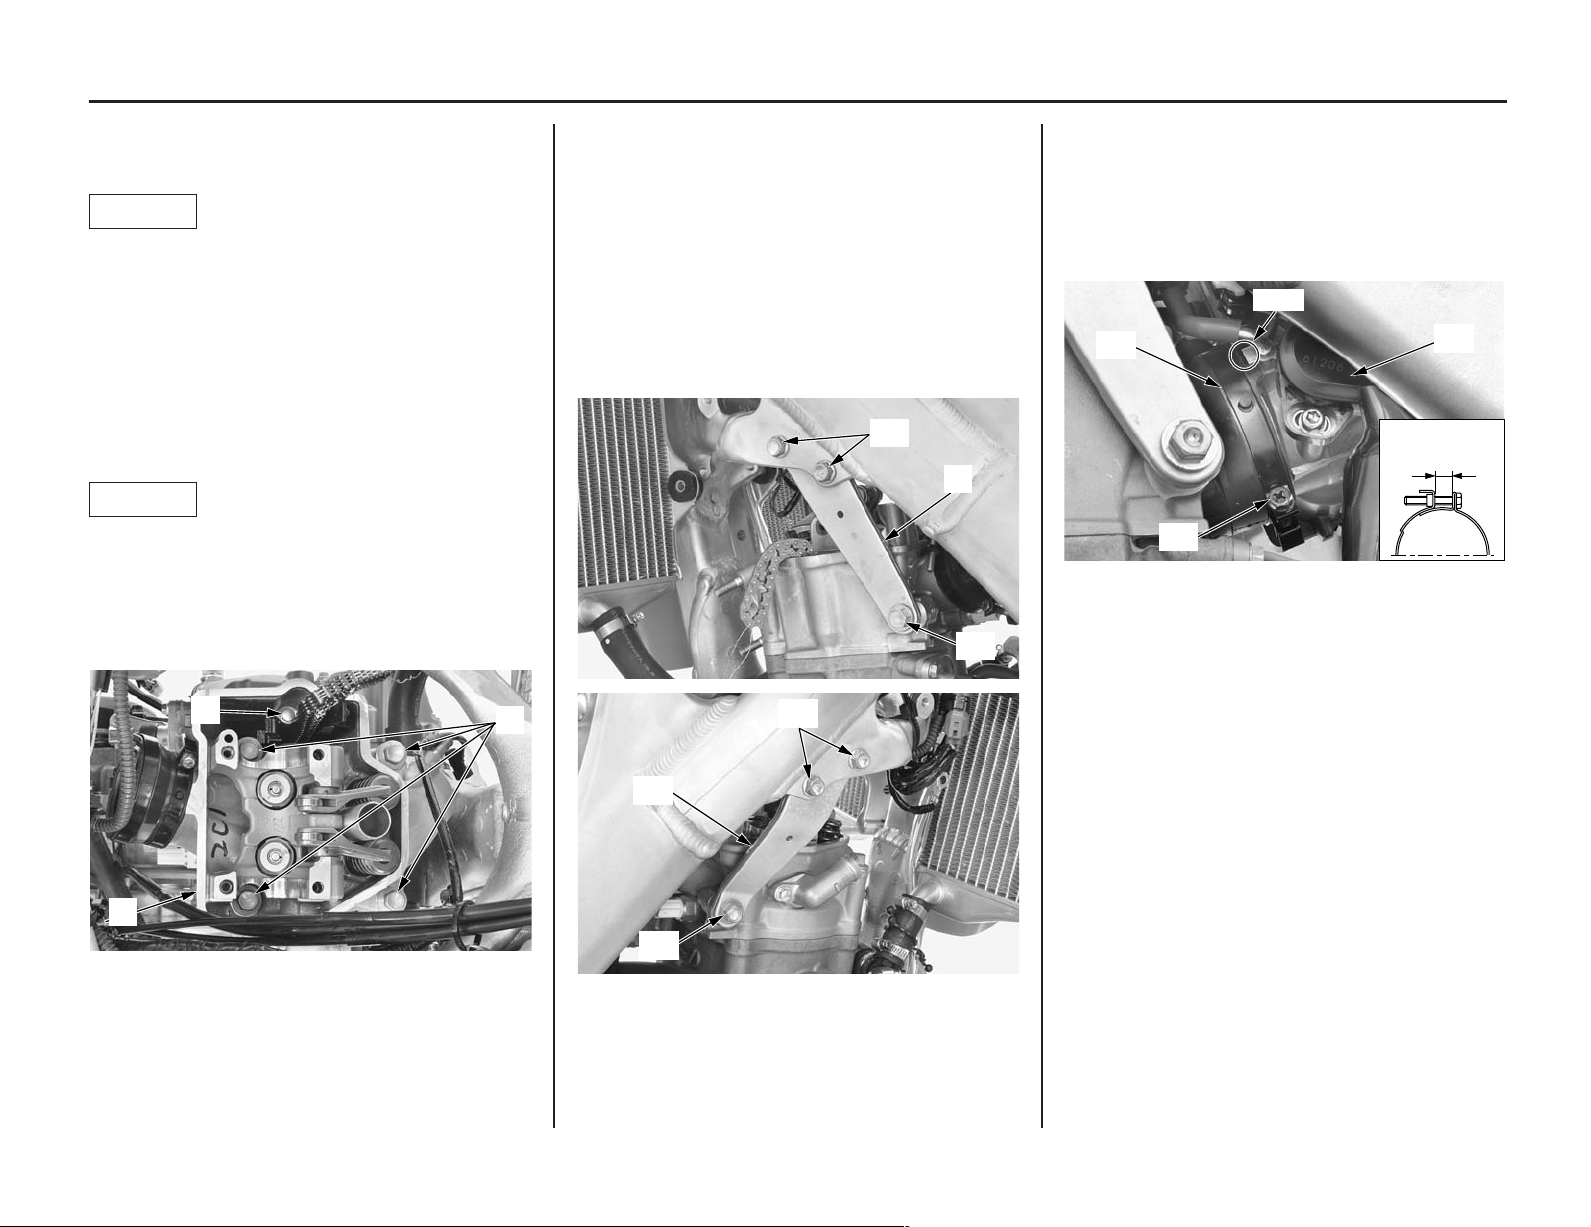
7. Install the throttle body (13) to the insulator
(14) by aligning the tab of the throttle body
with the groove of the insulator and tighten
the insulator band screw (15) so the distance
between the band ends is 0.47 ± 0.04 in
(12.0 ± 1.0 mm).
(13)
(14)
(15)
Align
0.47 ± 0.04 in
(12.0 ± 1.0 mm)
(13) throttle body (15) insulator band screw
(14) insulator
Loading ...
Loading ...
Loading ...