Loading ...
Loading ...
Loading ...
Fuel System
44 Servicing Your Honda
Fuel Pressure Increasing
Make sure the fuel remains enough (0.3 US gal
(1.0
r) minimum) in the fuel tank and add fuel if
necessary before increasing fuel pressure.
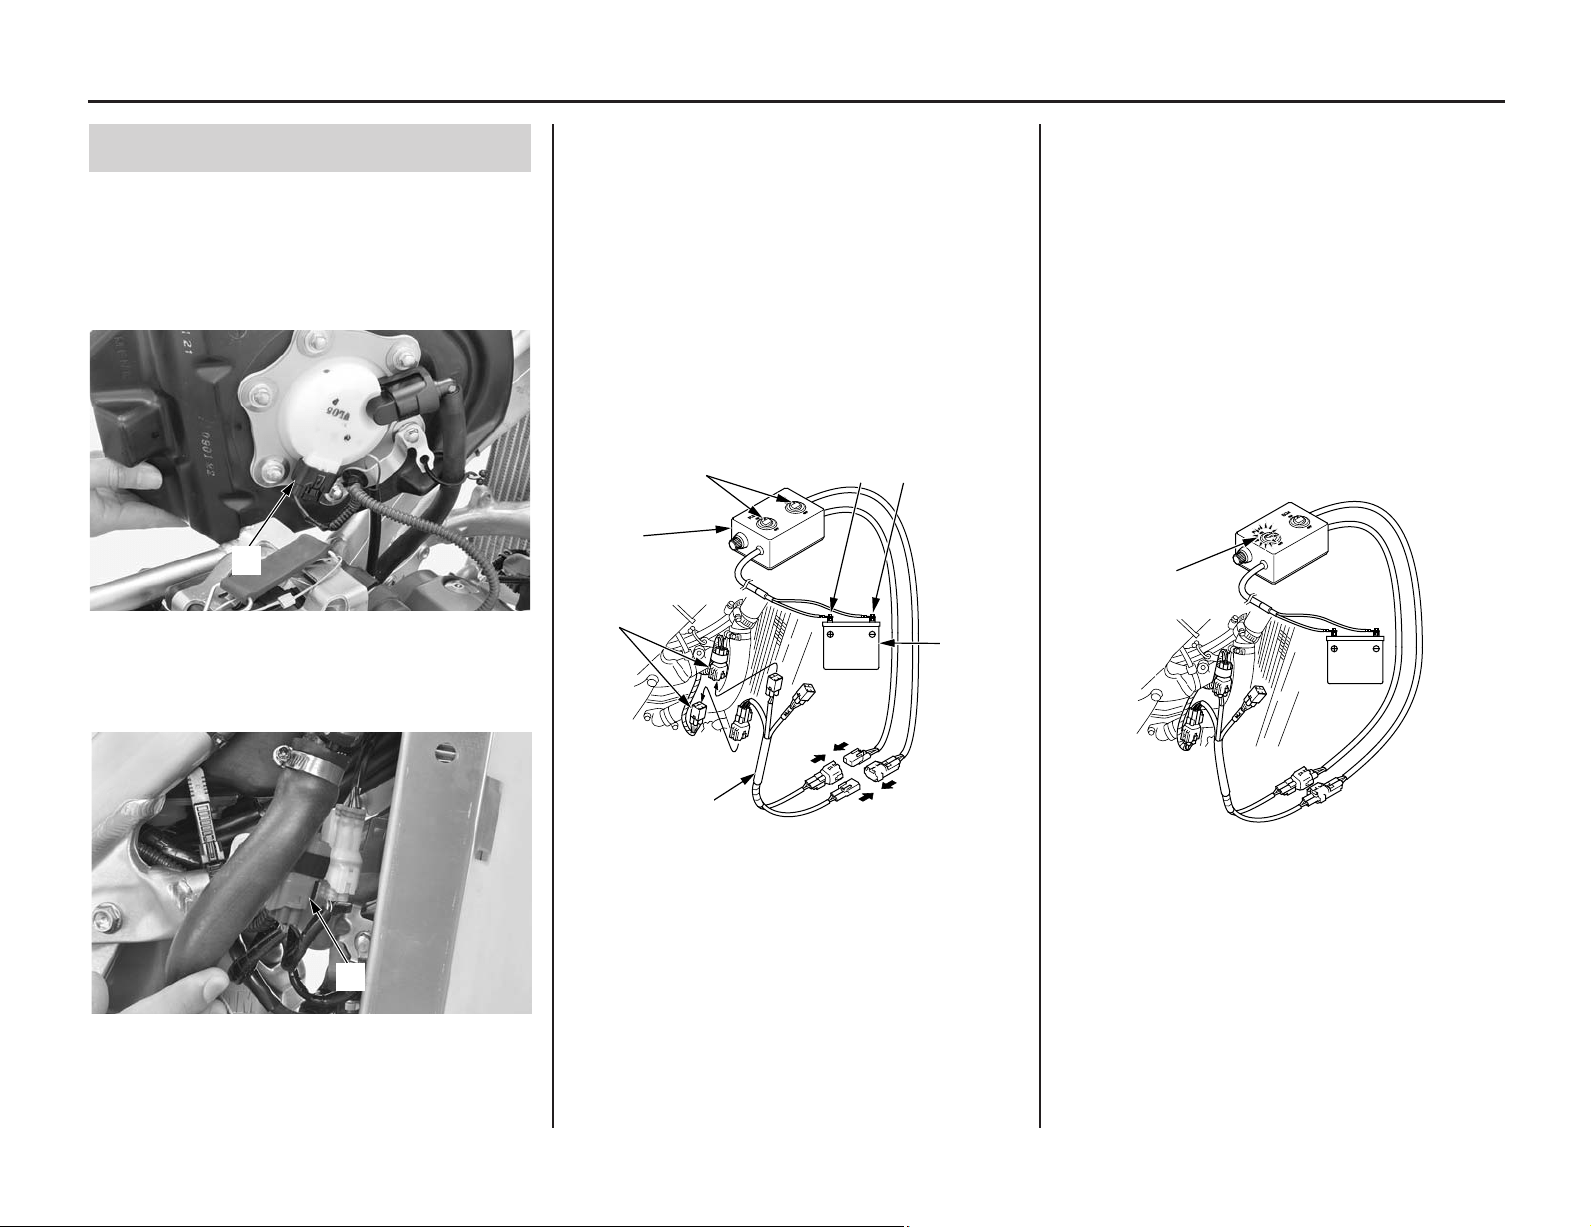
1. Connect the fuel pump connector (1).
(1) fuel pump connector
2. Disconnect the DLC/fuel pump sub harness
connector (2).
(1)
6. Position the fuel tank on the main frame.
7. Turn the “PUMP” selector switch (9) ON.
The selector switches can be used to change
power delivery as follows:
–“ECM” selector switch ON:
Power to ECM only.
–“PUMP” selector switch ON:
Power to fuel pump only.
– Both selector switches ON:
Power to ECM and fuel pump.
8. Run the fuel pump for about 3 – 5 seconds,
and fuel pressure will rise.
9. Turn the “PUMP” selector switch OFF.
Check that there is no leakage in the fuel line.
(3)
(8)
(7)
(4)
(5) (6)
BATTERY
(2)
(9) “PUMP” selector switch
10. Make sure that the battery harness selector
switches are OFF.
11. Disconnect the battery harness negative (–)
cable from the battery first, then disconnect
the battery harness positive (+) cable.
12. Remove the battery harness and battery
harness adaptor.
13. Connect the DLC/fuel pump sub harness
connector.
14. Install the fuel tank (page 35).
(9)
BATTERY
(2) DLC/fuel pump sub harness connector
(2)
3. Before connecting the battery harness cables
to a 12V battery (3), make sure that the
battery harness selector switches (4) are OFF.
4. Connect the battery harness positive (+) cable
(5) first, then connect the battery harness
negative (–) cable (6) to the terminals of a
12V battery .
5. Connect the battery harness adaptor (7)
between the battery harness (8) and the
DLC/fuel pump sub harness connector as
shown.
• Battery harness
070MZ-MEN0100
• Battery harness adaptor 070MZ-KRN0100
(2) DLC/fuel pump sub harness connector
(3) battery
(4) battery harness selector switches
(5) positive (+) cable
(6) negative (–) cable
(7) battery harness adaptor
(8) battery harness
Loading ...
Loading ...
Loading ...