Documents: Go to download!
- Owner's manual - (English, French, Spanish)
- How to assemble your Spotless Portable Carpet Cleaner:
- Before you begin cleaning:
- Getting started with your Spotless Portable Carpet Cleaner:
- Pre-treating:
- How to clean with your Spotless Portable Carpet Cleaner:
- Keeping your Spotless Portable Carpet Cleaner running properly:
- Hoover Cleaning Solution Guide:
- Troubleshooting:
Table of contents
User manual Vacuum Cleaner
How to assemble your Spotless Portable Carpet Cleaner:
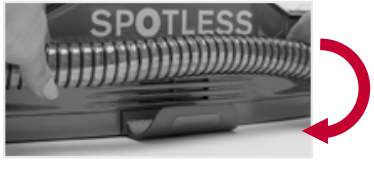
1. Snap hose clips into place in the front and back at the bottom of the unit
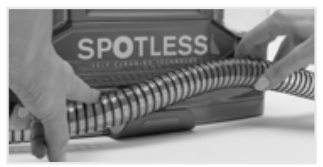
2. Wrap flex hose around unit, starting in front, and place hose in each clip.
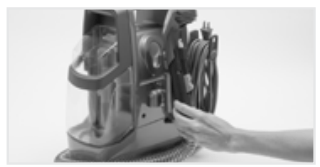
3. Attach the cleaning tool to the end of the hose and then snap the end of the hose into the third hose clip located in the center of the back of the unit.
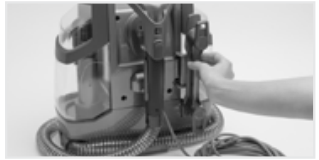
4. Insert the power cord wrap in the back of the unit and wrap cord around.
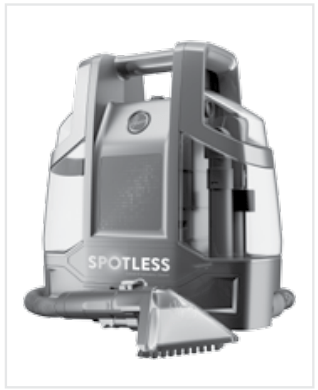
5. Ensure both tanks are snapped into a locked position.
Cord storage:
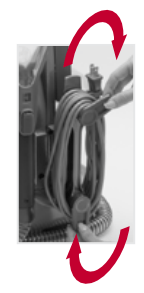
Wrap cord around the cord hooks for convenient storage. Attach the plug end to the cord.
For fast cord release, simply turn upper cord wrap downward.
Before you begin cleaning:
Don’t use the carpet cleaner as a dry vacuum cleaner.
Use your Hoover® portable carpet cleaner only if upholstery fabric is marked with a “W” (for “wet” clean) or “S/W” (for “solvent/dry” or “wet” clean). Don’t clean fabric marked “S” (“solvent/ dry” clean only).
Test for colorfastness in a small, hidden area. Gently rub surface with a dampened white cloth. Wait ten minutes and check for color removal or bleed with a white paper towel.
Move furniture out of area to be cleaned. Place aluminum foil or wax paper under legs of furniture too heavy to move to prevent wood finishes from staining carpet. Pin up furniture skirts and draperies.
ATTENTION Some Berber, Natural Fiber, and Soft Fiber carpets can fuzz with wear. Some vacuums & carpet cleaners can worsen this carpet wear. Test a hidden area before using on a full room & consult with your carpet manufacturer on cleaning recommendations.
NOTE: To prevent staining, use plastic or aluminum foil to protect wood or metal surfaces from possible water spray
NOTE: To avoid damage to wood floors underneath area rugs or carpet, place waterproof material (e.g. plastic) underneath them before cleaning.
Getting started with your Spotless Portable Carpet Cleaner:
1. To fill the clean water/solution tank:
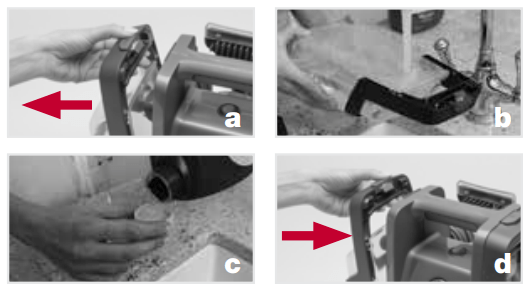
a. Press down on top latch of clean water tank, tilt and lift up to remove.
b. Turn cap counter-clockwise and pull up to remove. Add warm water to desired fill line (for small or large messes). DO NOT BOIL OR MICROWAVE WATER.
c. Fill cap with detergent and pour into tank. Use the recommended amount of detergent per instructions on detergent label. You can also refer to the table below.
d. Replace cap securely and insert tank bottom first then push top in until you hear it snap into place.

CAUTION Do not fill with water above 140˚F (60˚C).
NOTE: Using more than the recommended amount of cleaning solution may cause excessive foaming.
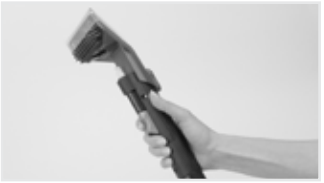
2. Unwrap hose from unit. Select preferred tool and make sure it is attached securely
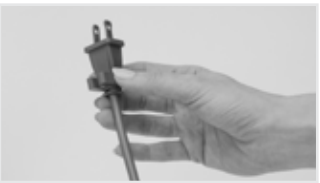
3. Unwrap power cord and plug unit in.
WARNING Use only HOOVER® cleaning products intended for use with this machine. (See the "Cleaning products" section in this manual for details.) They are specially formulated for use with your cleaner. Non-Hoover® cleaning solutions may harm the machine and void the warranty
Pre-treating:
For best cleaning results, pretreat stains with a Hoover spot treatment (see Cleaning Solution Guide, pg. 11) to help loosen and remove even the most stubborn stains.
Distribute a generous amount of pretreat spray or gel on spot, stain, or high traffic area. Always follow specific directions found on detergent label.
Wait 5-10 minutes
How to clean with your Spotless Portable Carpet Cleaner:
If using on upholstery, be sure to check its cleaning code and use your cleaner only on upholstery marked "W" or "W/S".
Be sure to check Hoover® Cleaning Guide on page 4 and the cleaning code on your upholstery. Use your cleaner only on upholstery marked “W” or “W/S”.
CAUTION To reduce risk of injury from moving parts – Unplug before servicing.
For best cleaning results, Hoover recommends to rinse the upholstery with water only. This removes residual cleaning detergent.
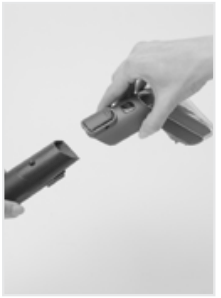
1. Insert selected tool on the cleaning hose until it clicks into place (some models include additional tools).
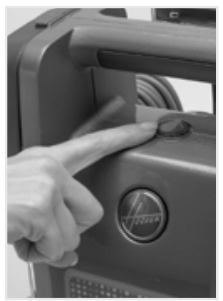
2. Press the power button on top of unit to turn the unit on.
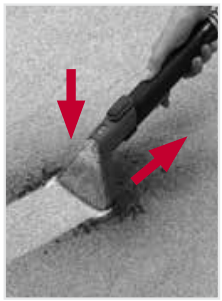
3. For wet stains, suction up excess liquid by placing the tool on the soiled area and applying downward pressure on the front of the cleaning tool while pulling it towards you slowly.
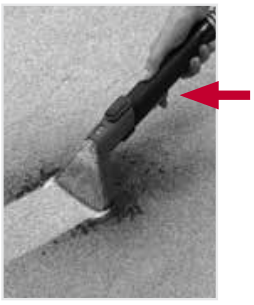
4. Spray a generous amount of cleaning solution over the soiled area by pressing the trigger behind the tool and scrub the stain in a back and forth motion.
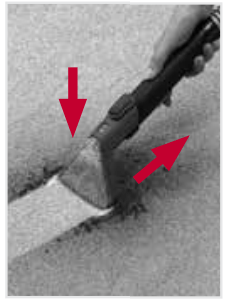
5. To lift the stain, suction up the dirt and cleaning solution by applying downward pressure on the front of the cleaning tool and pulling towards you. Repeat as needed.
If additional cleaning is necessary, wait until the upholstery is completely dry before using the tool again.
Empty Dirty Water Tank when the motor sound becomes higher pitched and there is a loss in suction (see “Automatic Shut-Off”).
When finished cleaning, follow "Keeping your Spotless portable carpet cleaner running properly" instructions on page 9.
Keeping your Spotless Portable Carpet Cleaner running properly:
LUBRICATION
The motor is equipped with bearings which contain sufficient lubrication.
Additional lubricant could cause damage. Do not add lubricant to motor.
Familiarize yourself with these home maintenance tasks. Proper use and care of your cleaner will ensure continued cleaning effectiveness.
Any other servicing should be done by an authorized service representative. If appliance is not working as it should, has been dropped, damaged, left outdoors, or dropped into water, take it to a service center prior to continuing use.
Note: During normal use, debris may accumulate inside of dirty water tank. In order to keep your unit functioning properly, rinse out your dirty water tank with fresh water after each use.

1. Clean your hose using Hoover exclusive Self-Clean technology:
a. EMPTY DIRTY WATER TANK. You can empty and rinse the tank through the quick cap on the top of the tank or by turning the cap on the bottom counter clockwise. Replace back onto the unit.
b. Add warm water to the small mess fill line on the clean water tank.
c. Remove any cleaning tool/attachment from the hose.
d. Turn unit on and push the open end of the hose into yellow self-clean port on the back of the unit for 5-10 seconds only. DO NOT PRESS TRIGGER. The clean water from the clean water tank will rush through the hose, effectively cleaning and removing the odor causing bacteria left in the hose.
e. Repeat process as needed and turn off the unit when hose is fully clean.
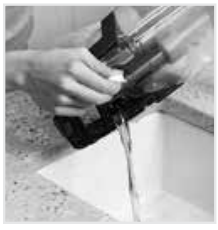
2. Empty and thoroughly rinse dirty water tank by opening quick cap or bottom cap and placing it under faucet. High pressure clean water will help remove dirt and debris.
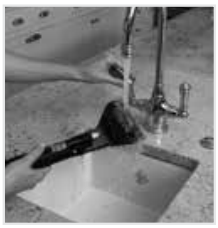
3. Disassemble and rinse tools under faucet.
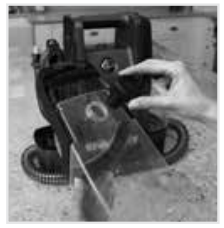
4. Empty solution tank and let air dry
Hoover Cleaning Solution Guide:
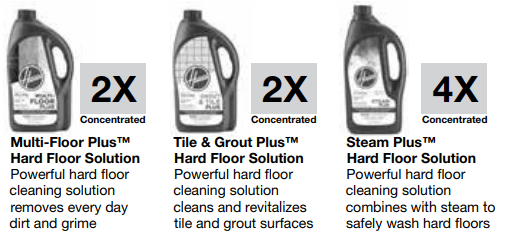
For optimal performance use Hoover® brand solutions and spot cleaners available at Hoover.com and retailers nationwide.
WARNING To reduce risk of fire and electric shock due to internal component damage, use only Hoover® cleaning products intended for use with the appliance.
EXPERT CARPET SOLUTIONS: PROFESSIONAL GRADE

PLUS CARPET SOLUTIONS

HARD FLOOR SOLUTIONS
Need Help?
If you need further assistance:
If your product needs servicing within the warranty period, please contact Customer Service at 1-800-944-9200. Always identify your carpet washer by the complete model number when requesting information or ordering parts. (The model number of the carpet cleaner is located on the data plate).
PLEASE DO NOT RETURN THIS CLEANER TO THE STORE.
Troubleshooting:
Any other servicing should be done by an authorized service representative.
USE TROUBLESHOOTING GUIDE AS A FIRST STEP TO RESOLVE ANY PROBLEMS YOU MAY BE EXPERIENCING.
If appliance is not working as it should, has been dropped, damaged, left outdoors, or dropped into water, call Customer Service at 1-800-944-9200 for further instruction before continuing use.
WARNING To reduce the risk of personal injury - Unplug before cleaning or servicing.
| PROBLEM | POSSIBLE CAUSE | POSSIBLE SOLUTION |
| Cleaner won’t run | 1. Power cord not firmly plugged into outlet. 2. Blown fuse or tripped breaker. 3. Needs service. | 1. Plug unit in firmly. 2. Check fuse or breaker in home. Replace fuse/reset breaker in home. 3. Take to service center. To find nearest location, visit our website at www.hoover.com or call 1-800-944- 9200. |
| Cleaner won’t pick-up or low suction | 1. Dirty Water Tank is not installed correctly. 2. Dirty Water Tank is full. 3. Dirty Water Tank is clogged. 4. Air path is clogged. | 1. Review Placing Dirty Water Tank in base of cleaner 2. Empty Dirty Water Tank. 3. Clean Dirty Water Tank. 4. Unclog air path. |
| Water escaping from Cleaner | 1. Dirty Water Tank is full. 2. Dirty Water tank is not installed correctly. 3. Clean Water Solution Tank not installed properly. | 1. Empty Dirty Water Tank. 2. Review Placing Dirty Water Tank in base of cleaner. 3. Review Clean Water Solution Tank Installation. |
| Cleaner won’t dispense | 1. Clean Water Solution Tank is empty. 2. Clean Water Solution Tank not installed properly. 3. Needs service. | 1. Fill Clean Water Solution Tank. 2. Review Clean Water Solution Tank Installation. 3. Take to service center. To find nearest location, visit our website at www.hoover.com or call 1-800-944- 9200. |
| Hose nozzle will not spray after filling the Clean Water Tank or Detergent Container. | 1. Air is trapped in the pump and hose. | 1. Turn on the cleaner. If hose does not spray, prime the pump by lowering the hose down to the floor and hold the trigger for up to 1 minute. |
| Motor noise becomes high-pitched | 1. Dirty Water Tank is full. 2. Dirty Water Tank is clogged. 3. Air path is clogged. 4. The float in the Dirty Water Tank has been activated. | 1. Empty Dirty Water Tank. 2. Clean Dirty Water Tank. 3. Unclog air path. 4. Review Emptying & Cleaning the Dirty Water Tank. |
| Water or foam escaping from dirty water tank | 1. Self-clean option ran too long and caused dirty water tank to overflow. | 1. Empty dirty water tank and let air dry. |
See other models: FH11100 BH70800 BH52210CA BH52210 BH52160
