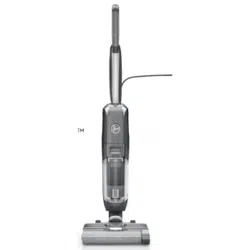
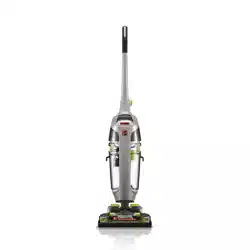
User manual Vacuum Cleaner
-631093.png)
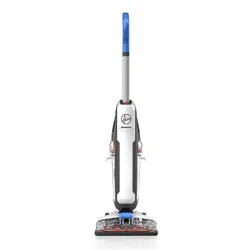
How to assemble your FloorMate® Edge:
WARNING To reduce the risk of personal injury - Unplug before cleaning or servicing.
-934323.png) |
-977564.png) |
-510260.png) |
-655459.png) Place the body into the base. It'll click. Place the body into the base. It'll click. |
-247498.png) Lock handle into place Lock handle into place |
-907178.png) Turn handle release dial counter-clockwise into ‘locked’ position. Turn handle release dial counter-clockwise into ‘locked’ position. |
Before you begin cleaning:
Please remove any large objects and debris off your floor. It is advisable to then vacuum your floor prior to using your FloorMate® Edge.
WARNING Use only HOOVER® cleaning products intended for use with this machine. (See the "Cleaning products" section in this manual for details.) They are specially formulated for use with your cleaner. Non-Hoover® cleaning solutions may harm the machine and void the warranty.
CAUTION To prevent damage to wood floors, follow manufacturer's cleaning recommendations. If using cleaner on sealed wood floors, inspect floor surface for worn finish, bare wood or separated joints. Do not use Hoover® Multi-Floor cleaning solution to clean sealed wood floors if any of these conditions exist.
-605988.png) |
-405986.png) |
-386825.png) |
| To remove the clean water tank, squeeze release button and pull to remove. |
Twist tank cap counterclockwise and lift to remove |
Using the water tank cap as a measuring cup, pour in the required amount of solution (approx. 1 oz. per quart of water). |
Getting started with your FloorMate® Edge:
Remove and replace clean water solution tank:
WARNING To reduce the risk of personal Injury—Unplug before cleaning or servicing. Do not use cleaner without tank in place.
WARNING To reduce the risk of fire and electric shock due to internal component damage, use only Hoover® hard floor cleaning solution for use with this appliance.
-720660.png) |
-987240.png) |
-429805.png) |
| Pour cleaning solution into tank. Top up tank to fill line with warm water (Max 100°F). |
Twist the tank cap to secure. |
Place the bottom of the clean water tank into the machine first and click the top into place. |
CAUTION Water will drip from the brushes and underside of the product after use and may puddle. To avoid damage to wood and laminate flooring and to avoid potential slip hazard, after use (a) do not leave the product on wood and laminate surfaces and move to a hard surface and (b) place unit on absorbent material (such as a towel) to soak up drips.
Using your FloorMate® Edge:
CAUTION Do not clean over floor electrical outlets. Water will drip from the brushes and underside of the product after use and may puddle.
-843690.png) |
-498812.png) |
| Push ON/OFF switch to turn machine on, push switch again to turn machine off. |
Step on handle release pedal to recline machine. |
Using your FloorMate® Edge:
NOTE: Your cleaner may also be used to pick up small liquid spills one and a half quarts or less in Dry Mode, never to exceed 1/4 inch in depth on non-carpeted floors. Release the trigger and continue to move cleaner over the area to pick up the spill.
CAUTION Do not use the cleaner to pick up flammable or combustible liquids or chemicals.
Using your FloorMate® Edge:
NOTE: Wrap cord around hooks for convenient storage. Attach the plug end to the cord.
NOTE: Empty Dirty Water Tank when the motor sound becomes higher pitched and there is a loss in suction (see “Automatic shut-off”).
NOTE: It is best to alternate wet and dry strokes.
-848129.png) |
-886149.png) |
-584992.png) |
| In WASH mode slowly move the machine forward to arms length squeezing the trigger to release the water and solution. Release trigger and pull back to pick up the remaining liquid. Switch to DRY mode for additional drying. |
When finished cleaning, return the unit to its upright position. |
The machine may be moved by using the carry handle at the front of the machine. |
Emptying your FloorMate® Edge dirty water tank:
NOTE: The recovery tank has an automatic shut off to prevent the tank from overflowing. If this is activated, the machine will not pick up and the sound of the motor will change. The recovery tank will need to be emptied.
-928942.png) |
-280089.png) |
-92445.png) |
-302342.png) |
| To remove the recovery tank, press down on release button and pull. |
Unclip latches on recovery tank lid, remove lid to empty |
Pour dirty water into sink. Reattach lid to tank. |
-837690.png) Place the bottom of the recovery tank onto the machine first and click the top into place. Place the bottom of the recovery tank onto the machine first and click the top into place. |
Keeping your FloorMate® Edge running properly:
Cleaning the filter:
-473423.png)
Pull the recovery tank lid open after each use and gently remove the filter.
-471500.png)
Rinse under water to remove debris (max. 100°F) and leave for at least 24 hours or until fully dry before replacing in the machine.
Keeping your FloorMate® Edge running properly:
Cleaning the Nozzle and SpinScrub®:
IMPORTANT: The tanks should be emptied and cleaned after each use and before storage.
CAUTION To reduce risk of injury from moving parts – Unplug before servicing.
Lubrication: The motor is equipped with bearings which contain sufficient lubrication for their lifetime. The addition of lubricant could cause damage. Do not add lubricant to motor.
Any other servicing should be done by an authorized service representative. If appliance is not working as it should, has been dropped, damaged, left outdoors, or dropped into water, take it to a service center prior to continuing use.
-427074.png) |
-774639.png) |
-295681.png) |
| Nozzle can be removed for easy cleaning. Slide the two nozzle release latches outwards. |
Remove nozzle by tilting downward then pulling straight out. Rinse under running water to clean. |
Pull SpinScrub® block out. The brushes can be rinsed under water to remove debris (Max 100°F). To replace the SpinScrub® block, press firmly and lock into place. Then replace nozzle by sliding the two latches inward, locking the nozzle in place. |
Troubleshooting
Cleaner won’t run
- Power cord not firmly plugged into outlet.
- Blown fuse or tripped breaker.
- Check fuse or breaker in home. Replace fuse/reset breaker in home.
- Needs service.
- Take to service center. To find nearest location, visit our website at www.hoover.com or call 1-800-944-9200.
Cleaner won’t pick-up or low suction
- Dirty Water Tank is not installed correctly.
- Review Placing Dirty Water Tank in base of cleaner - pg. 10.
- Dirty Water Tank is full.
- Dirty Water Tank is clogged.
- Air path is clogged.
Water escaping from Cleaner
- Dirty Water Tank is full.
- Dirty Water tank is not installed correctly.
- Review Placing Dirty Water Tank in base of cleaner - pg. 10.
- Clean Water Solution Tank not installed properly.
- Review Clean Water Solution Tank Installation.
Cleaner won’t dispense
- Clean Water Solution Tank is empty.
- Fill Clean Water Solution Tank.
- Clean Water Solution Tank not installed properly.
- Review Clean Water Solution Tank Installation.
- Needs service.
- Take to service center. To find nearest location, visit our website at www.hoover.com or call 1-800-944-9200.
Motor noise becomes high-pitched
- Dirty Water Tank is full.
- Dirty Water Tank is clogged.
- Air path is clogged.
- The float in the Dirty Water Tank has been activated.
- Review Emptying & Cleaning the Dirty Water Tank.
SpinScrub® brushes are not spinning
- Unit is in DRY mode.
- Slide pedal to WASH mode to spin.
- Debris is preventing SpinScrub® brushes from spinning.
- Remove SpinScrub® brushes and clean - pg 12, check that brushes can spin freely by rotating them be hand.
Safety Instructions
SAVE THESE INSTRUCTIONS
When using an electrical appliance, basic precautions should always be followed, including the following:
READ ALL INSTRUCTIONS BEFORE USING THIS APPLIANCE.
THIS PRODUCT IS INTENDED FOR HOUSEHOLD USE ONLY. IF USED COMMERCIALLY WARRANTY IS VOID.
WARNING: TO REDUCE THE RISK OF FIRE, ELECTRIC SHOCK, DAMAGE OR INJURY:
- Fully assemble before operating.
- Operate cleaner only at voltage specified on data plate on lower back of cleaner.
- Do not leave appliance when plugged in. Unplug from outlet when not in use and before cleaning or servicing.
- Use indoors only.
- Use only HOOVER® cleaning products intended for use with this machine.
- Do not allow to be used as a toy. Not intended for use by children age and under. Close supervision is necessary when used near children.
- To avoid injury or damage, keep children away from product, and do not allow children to place fingers or other objects into any openings.
- Use only as described in this manual. Use only manufacturer’s recommended attachments and products.
- Do not use with damaged cord or plug. If appliance is not working as it should, has been dropped, damaged, left outdoors, or dropped into water, take it to a service center prior to continuing use.
- Do not pull or carry by cord, use cord as a handle, close a door on cord, or pull cord around sharp edges or corners. Do not place product on cord. Do not run appliance over cord. Keep cord away from heated surfaces.
- Do not unplug by pulling on cord. To unplug, grasp the plug, not the cord.
- Do not handle plug or appliance with wet hands.
- Do not put any object into openings. Do not use with any opening blocked; keep free of dust, lint, hair, and anything that may reduce air flow.
- Keep hair, loose clothing, fingers, and all parts of body away from openings and moving parts.
- Turn off all controls before unplugging.
- Use extra care when cleaning on stairs. To avoid personal injury or damage, and to prevent the cleaner from falling, always place cleaner at bottom of stairs or on floor. Do not place cleaner on stairs or furniture, as it may result in injury or damage.
- Do not use to pick up flammable or combustible liquids, such as gasoline, or fine wood sandings, or use in areas where they may be present.
- Connect to a properly grounded outlet only. See Grounding Instructions.
- Do not pick up anything that is burning or smoking, such as cigarettes, matches, or hot ashes.
- Do not use without filters and tanks in place.
- Do not clean over floor electrical outlets.
- Not intended for use on carpets.
WARNING: This product contains chemicals known to the State of California to cause cancer, birth defects or reproductive harm. WASH HANDS AFTER HANDLING.
GROUNDING INSTRUCTIONS:
This appliance must be grounded. If it should malfunction or breakdown, grounding provides a path of least resistance for electric current to reduce the risk of electric shock. This appliance is equipped with a cord having an equipment-grounding conductor (C) and grounding plug (A). The plug must be inserted into an appropriate outlet (B) that is properly installed and grounded in accordance with all local codes and ordinances.
WARNING:Improper connection of the equipmentgrounding conductor can result in the risk of electric shock. Check with a qualified electrician or service person if you are in doubt as to whether the outlet is properly grounded. Do not modify the plug provided with the appliance - if it will not fit the outlet, have a proper outlet installed by a qualified electrician. This appliance is for use on a nominal 120-volt circuit and has a grounding plug that looks like the plug (A) illustrated in Fig. 1.
A temporary adapter (D) may be used to connect this plug to a 2-pole receptacle (E) if a properly grounded outlet is not available (Fig. 2). The temporary adapter should be used only until a properly grounded outlet (B) can be installed by a qualified electrician (Fig. 1). The green colored rigid ear, lug, or the like (F) extending from the adapter must be connected to a permanent ground (G) such as a properly grounded outlet box cover (Fig. 2). Whenever the adapter is used, it must be held in place by a metal screw.
NOTE: In Canada, the use of a temporary adapter is not permitted by the Canadian Electrical Code.
-456098.png)
CAUTION:TO REDUCE THE RISK OF DAMAGE:
- Avoid picking up hard, sharp objects with this product, as they may cause damage.
- Store appropriately indoors in a dry place. Do not expose machine to freezing temperatures.
- Do not use sharp objects to clean out hose as they can cause damage.
- To assist in reducing drying time, be certain the area is well ventilated when using detergents and other cleaners with this machine.
- Do not store extractor with solution in tanks.
- With brushes on, do not allow cleaner to sit in one location for an extended period of time, as damage to the floor can result.
- Water will drip from the brushes and underside of the product after use and may puddle. To avoid damage to wood and laminate flooring and to avoid potential slip hazard, after use (a) do not leave the product on wood and laminate surfaces and remove to a hard surface and (b) place unit on absorbent material (such as a towel) to soak up drips.
-933770.png)
-624552.png)