Loading ...
Loading ...
Loading ...
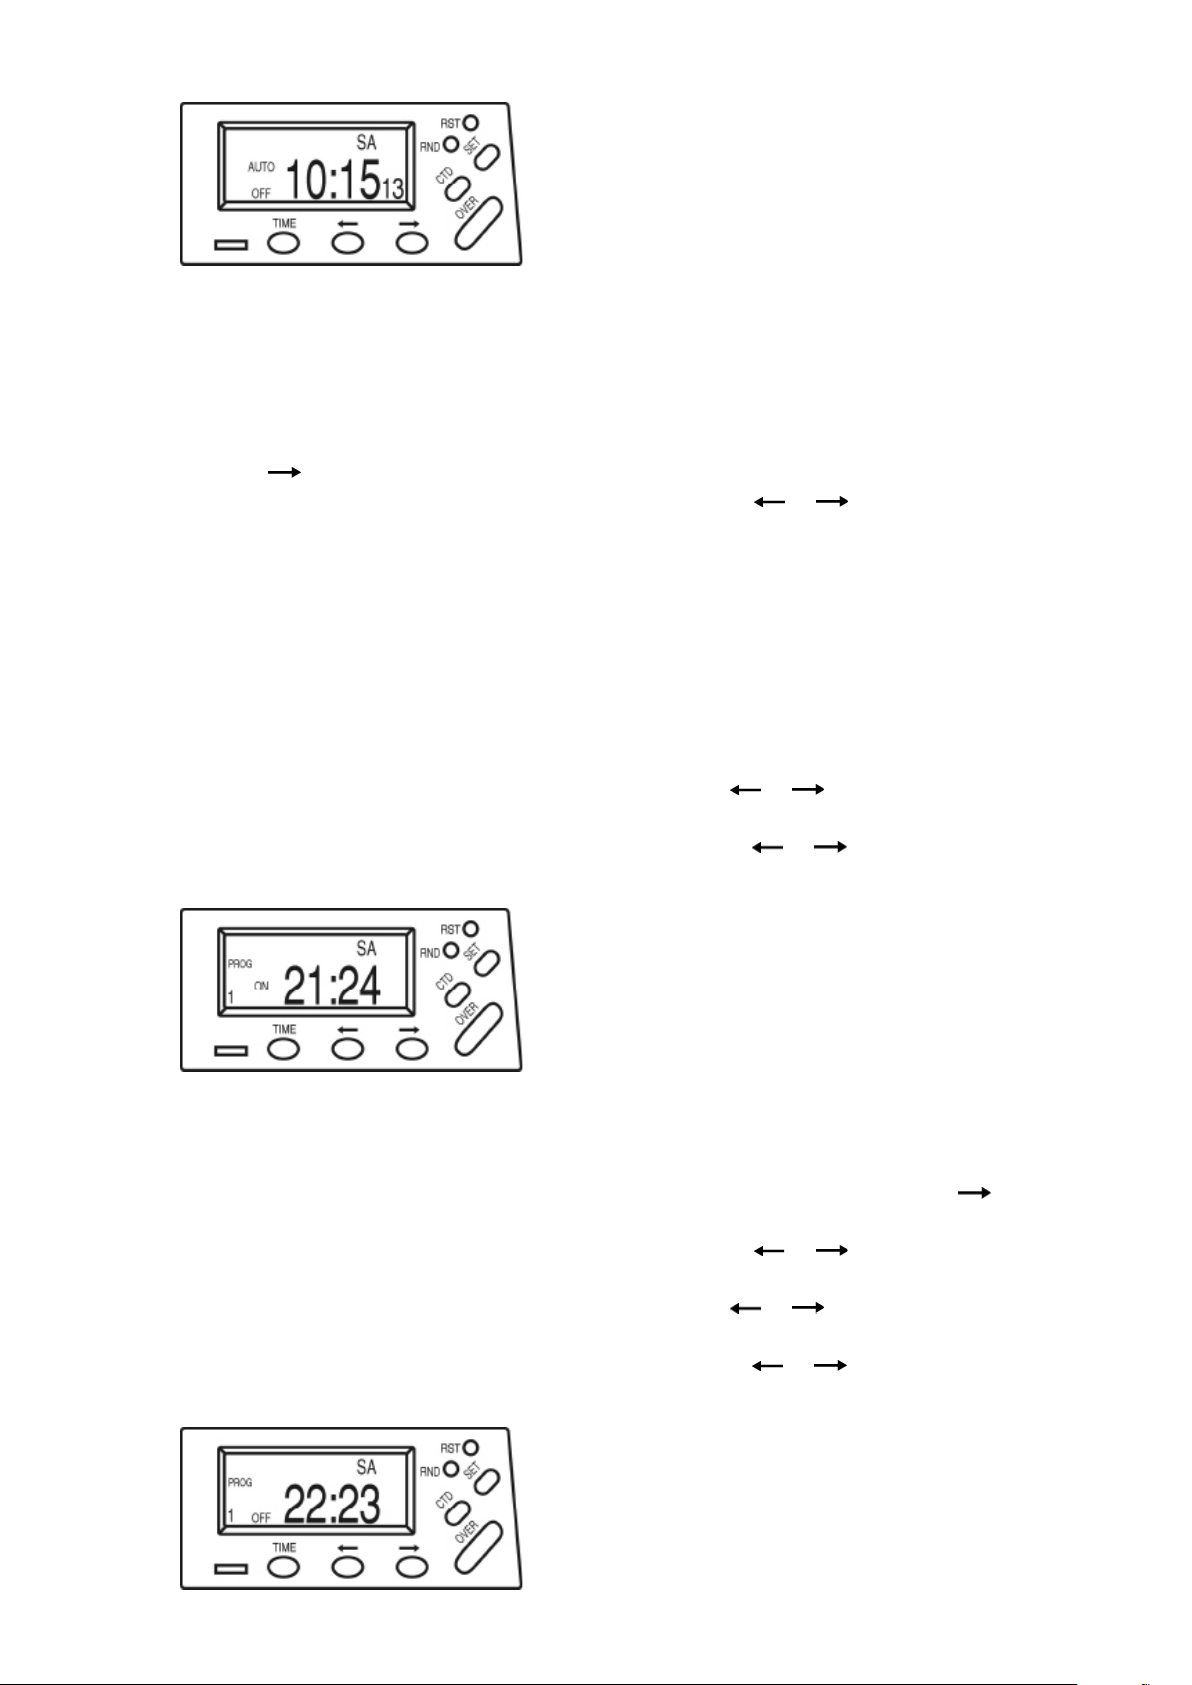
The timer display will appear like this:
2) Programs and Features
This section will demonstrate how to set a programmed “ON” time and an “OFF” time. In this case,
program (PROG1) will be used however this timer can store up to 20 ON/OFF programs which are
active over a week of time. These are numbered PROG1 to PROG20.
a) How to set an “ON” time
i) Press to select PROG 1 ON. “1 ON” will be ashing.
ii) Press SET and the day grouping will begin to ash. Use or to select either a single day
or day-group. The possible selections are as follows:
MO or TU or WE or TH or FR or SA or SU (each day separate)
MO through FR (program runs each day Monday through Friday)
SA and SU (program runs only on Saturday and Sunday)
MO through SA (program same each day Monday through Saturday)
MO, WE, FR (program runs on Monday and Wednesday and Friday
MO through WE (program runs Monday, Tuesday and Wednesday)
TH through SA (program runs Thursday, Friday and Saturday)
MO through SU (program runs every day of the week)
iii) Press SET and the hour digits will begin to ash. Use or to select the desired hour for
the timer to “turn on”. Note AM or PM.
iv) Press SET and the minute digits will begin to ash. Use or to select the desired minute.
The timer display will appear like this:
v) To nish programming the “ON” time press TIME.
b) How to set an “OFF” time
i) From the regular screen (depicting the current day and time) repeatedly press until PROG1
OFF is selected. “1OFF” will be ashing.
ii) Press SET and the day grouping will begin to ash. Use or to match the same day or
day groupings previously selected for the “ON” times.
iii) Press SET and the hour digits will begin to ash. Use or to select the desired hour for
the timer to “turn off”. Note AM or PM.
iv) Press SET and the minute digits will begin to ash. Use or to select the desired minute.
The timer display will appear like this:
Page 6
Loading ...
Loading ...
Loading ...