Loading ...
Loading ...
INSTRUCTIONS FOR WALL MOUNTING
1. This heater may be mounted in front of a standard 10 amp socket outlet with the plug inserted.
See Fig 2. Ensure the heater fully covers the socket outlet and plug which results in a very clean
looking installation.
2. Remove the wall bracket from the back of the heater by pressing down on the two metal tabs on
the top of each end of the bracket and pulling it away from the heater. A long screw driver may be
required to press the tab situated at the bottom of the plastic control housing. Lift the two bottom
tabs of the wall bracket away from the heater through slots in the back of the heater.
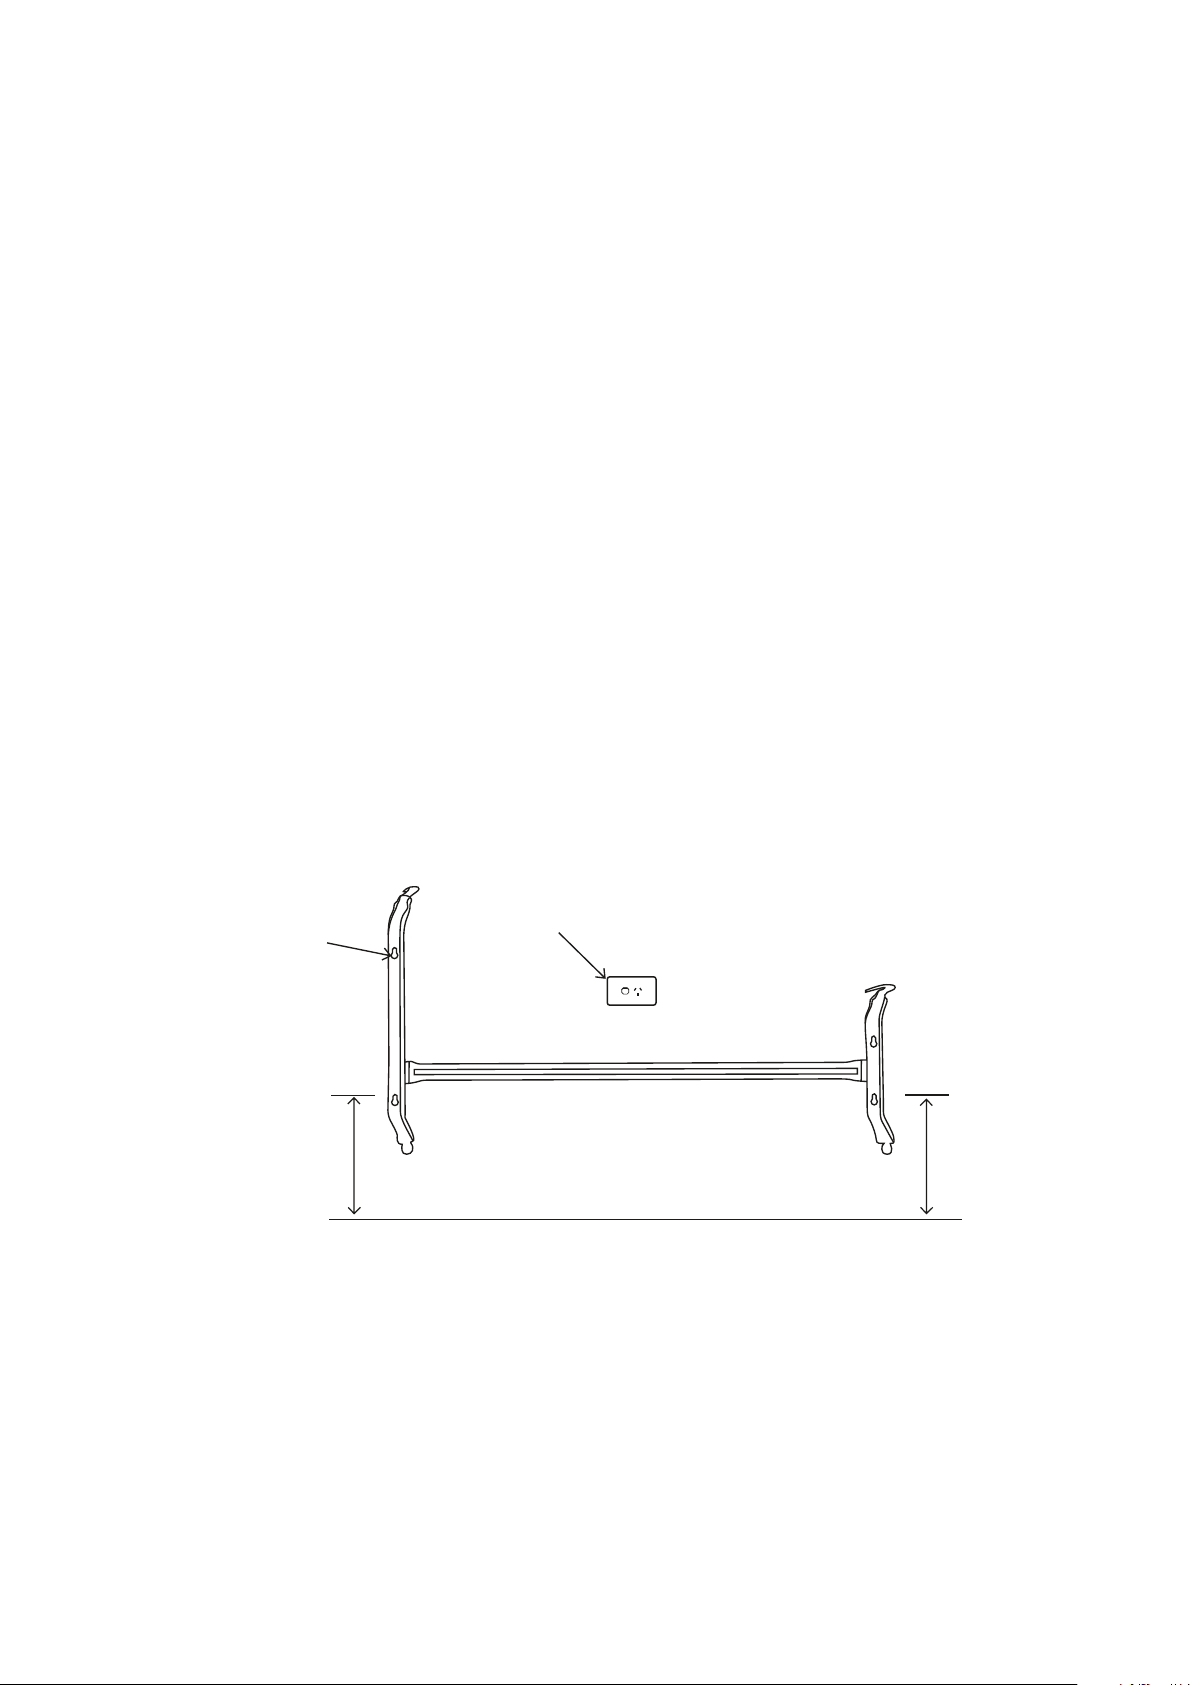
3. Using the wall bracket as a template, and, keeping a minimum 215mm off oor level to the
bottom holes in the wall bracket, carefully mark the position of the four plasterboard anchors
or wallmates (locating a stud is not necessary), using the holes in the wall bracket as a guide.
These anchors(not supplied) should be able to support a load of 5kg each. If a stud is accidentally
located secure the bracket there using wood screws. See Fig 2. Keep the wall bracket level by
placing a spirit level on the horizontal rail of the wall bracket.
4. Install the four self drilling plasterboard anchors. Insert 8 gauge zinc coated (corrosion protected)
self tappers through the holes in the wall bracket and into the wall anchors. Tighten the self
tappers securely. Check that the wall bracket is level by placing a spirit level on the horizontal rail
of the wall bracket.
5. Re-attach the heater to the wall bracket by locating the slots in the bottom of the heater onto
the wall bracket. Then locate top slots and push heater rmly into the metal tabs until it clicks
securely into position. Use a long screw driver to press the two metal tabs down to remove the
heater from the wall bracket in the future.
Floor
215mm
min
215mm
min
Mark 4 holes using
bracket as a guide.
Install 4 plasterboard
anchors into plaster walls.
Insert screws into these
anchors to hold bracket.
Standard 10 amp switched socket
outlet (heater can be installed in
front of this outlet if desired)
Fig 2 – Wall bracket showing how to attach to a wall
Page 3
Loading ...
Loading ...
Loading ...