1
2
1
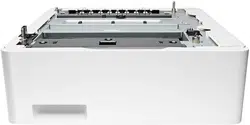
CF404A
Lea esto primero
www.hp.com/support
2
5
4
3

3
6
EN
OS X: The list of installed options should automatically update
perform the following steps:
1. System Preferences.
2. Select Print & Scan (or Printers & Scanners).
3. Options & Supplies
then select the Options
4.
Windows® 8.0 and 8.1, and Windows 10: When attaching the
following steps:
1.
the window that displays.
2. Select Control Panel. Under Hardware and Sound
.
3.
.
4.
5. Installable Options
Update Now
option is not present or if the
the accessory.
Windows XP, Windows Vista® and Windows 7: When attaching
perform the following steps:
1.
2. Open the Windows Start
Printers (or Printers and Faxes for XP).
3.
(or Properties for XP).
4.
5. Installable Options section.
6.
Update Now
appropriate category and selecting the accessory.
FR
Préférences Système.
Imprimer et numériser (ou Imprimantes
).
Options
Options.
. Sous Matériel
et audio
.
Propriétés de l’imprimante.
.
5. Dans la section Options installables
Mettre à jour
maintenant.
n’est pas présente
manuellement l’accessoire en ouvrant la catégorie appropriée
et en le sélectionnant.
l'accessoire après l'installation du logiciel de l'imprimante ou si
connecté à votre ordinateur ou au réseau.
Démarrer
(ou sur Imprimantes
pour XP).
Propriétés de l’imprimante (ou Propriétés
.
Options installables.
6. Dans la liste déroulante en regard de
Mettre à jour maintenant en

4
DE
OS X: Die Liste mit den installierten Optionen wird während
folgenden Schritte aus:
.
2. Wählen Sie Drucken & Scannen (oder Drucker & Scanner).
Optionen.
Windows® 8.0 und 8.1 und Windows 10:
Fenster.
2. Wählen Sie . Wählen Sie unter Hardware
die Option .
.
.
5. Wählen Sie im Bereich Installierbare Optionen in der
die
Option Jetzt aktualisieren. Wird die Option
Windows XP, Windows Vista® und Windows 7: Wenn Sie das
Start
Geräte und Drucker).
).
.
Installierbare Optionen.
die Option Jetzt aktualisieren. Falls Sie eine
OS X:
seguire la procedura descritta:
Preferenze di sistema.
Stampa e scansione (o Stampanti e scanner).
Opzioni
Opzioni.
Windows® 8.0 e 8.1 e Windows 10: Se si collega l'accessorio
al computer con un cavo USB. Se si collega l'accessorio dopo
1. Scorrere nell'angolo inferiore sinistro dello schermo e fare clic
Panello di controlloHardware e suoni
.
3. Fare clic con il pulsante destro del mouse sul nome della
Proprietà stampante.
Impostazioni periferica.
5. Nell’area Opzioni installabili
automatica
automatica non è presente o se la stampante è connessa con
Windows XP, Windows Vista® e Windows 7: Se si collega
non sia collegata al computer con un cavo USB. Se si collega
l'accessorio dopo aver installato il software della stampante o
1. Controllare che la stampante sia accesa e collegata al
computer o alla rete.
Start
(o Stampanti e fax per XP).
Proprietà stampante
(o Proprietà per XP).
Impostazioni periferica.
Opzioni installabili.
6. Nella casella a discesa vicino a
l’accessorio.

5
ES
OS X:
estos pasos:
Preferencias del sistema.
2. Seleccione Print & ScanPrinters &
Scanners
Opciones y
consumiblesOpciones.
Windows® 8.0, 8.1 y Windows 10:
después de instalar el software del producto o cuando utilice una
2. Seleccione Panel de control. En Hardware y sonido
.
3.
Propiedades de la
impresora.
.
5. En el área Opciones instalables
automática.
no está presente
.
Windows XP, Windows Vista® y Windows 7:
accesorio después de instalar el software del producto o cuando
en (o Impresoras y faxes en XP).
3.
esta impresora y seleccione Propiedades de la impresora
Propiedades en XP).
.
Opciones instalables.
6.
.
y seleccionando el accesorio.
OS X:
.
).
.
Windows® 8.0 8.1., Windows 10:
.
3.
.
.
Windows XP, Windows Vista® Windows 7:
3.
.
.

6
CA
OS X:
System Preferences (Preferències
del sistema).
2. Seleccioneu Print & ScanPrinters &
Scanners
Options & Supplies
Options (Opcions).
Windows® 8.0 i 8.1, i Windows 10: si connecteu l'accessori
l'accessori després d'instal·lar el programari de la impressora o
2. Seleccioneu Tauler de control. A
Visualitza dispositius i impressores.
Propietats de la impressora.
4. Feu clic a la pestanya .
Opcions instal·lables
automàticaActualitza ara
o si
seleccionant l’accessori.
Windows XP, Windows Vista® i Windows 7: si connecteu
si connecteu l'accessori després d'instal·lar el programari de
Inici del Windows i feu clic a Dispositius
(o a Impressores i faxos per a l'XP).
impressora i seleccioneu Propietats de la impressora
(o Propietats per a l’XP).
4. Feu clic a la pestanya .
Opcions instal·lables.
seleccioneu Actualitza ara
l’accessori.
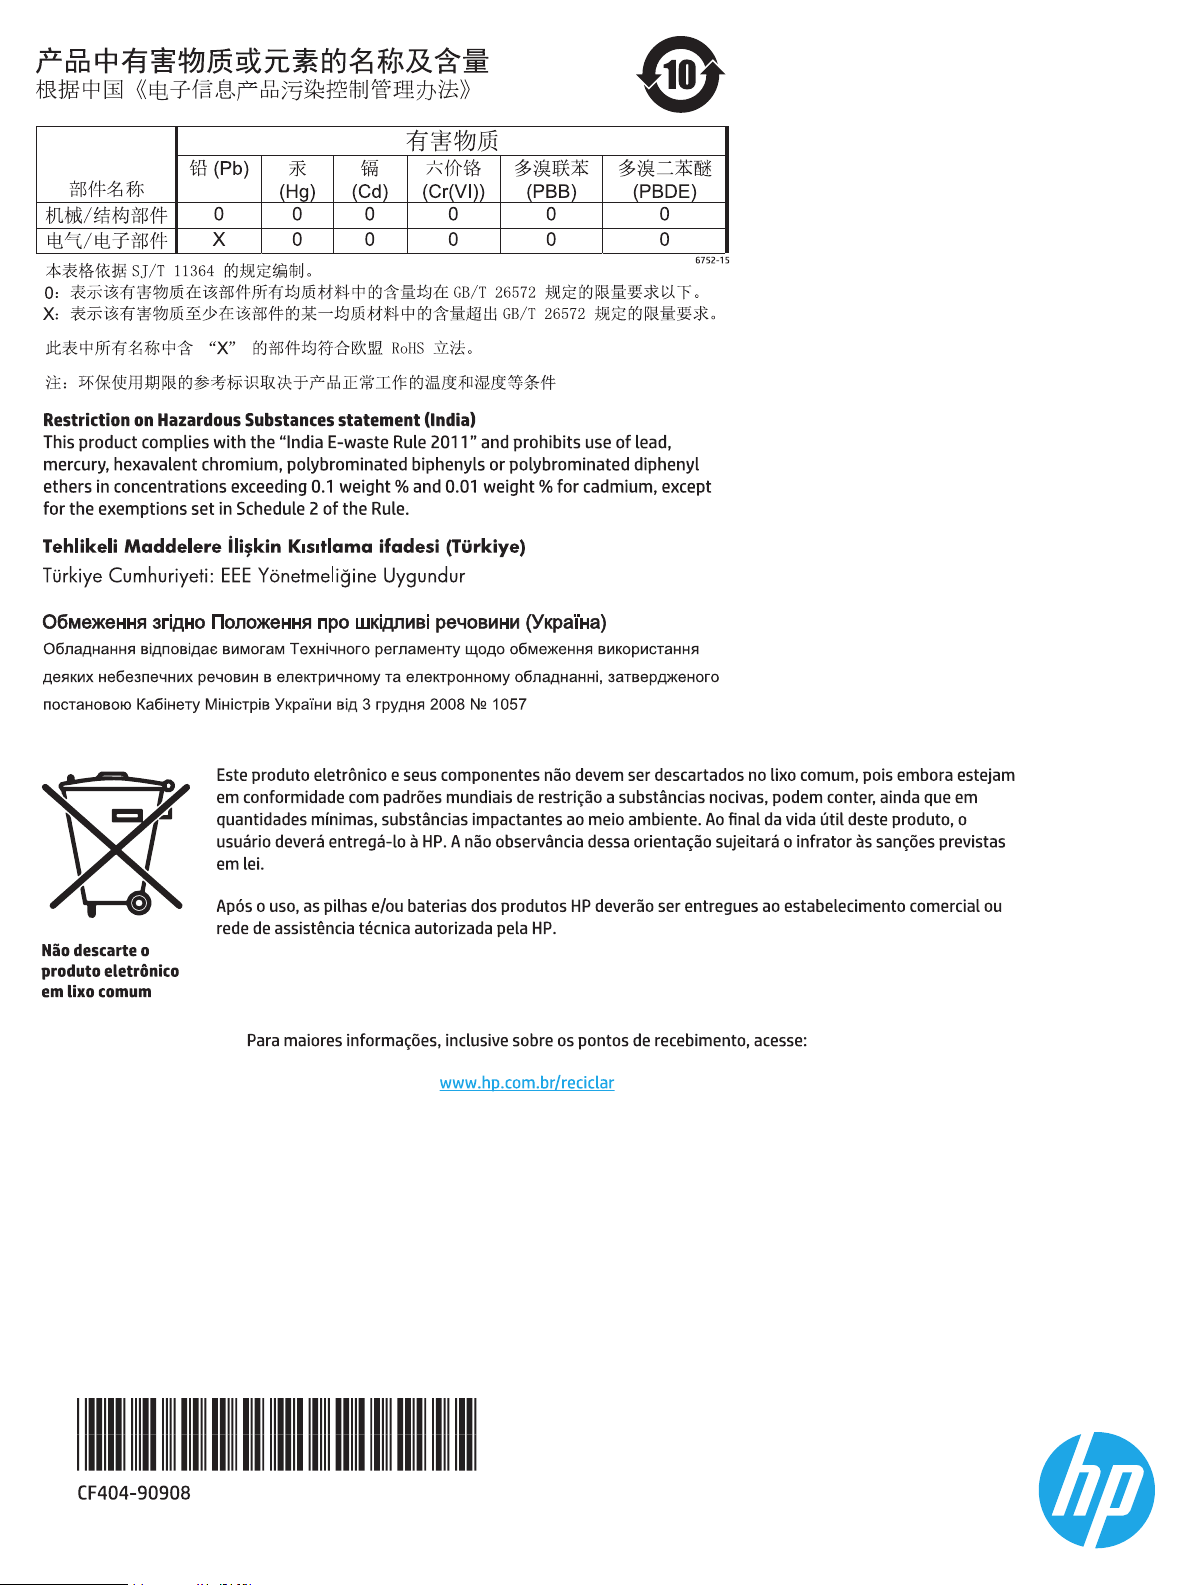
CN
OS X:安装附件后,在第一个打印作业期间,应
自动更新已安装的选件列表。否则,请执行以下
步骤:
1. 从Apple菜单中,单击系统偏好设置。
2. 选择打印与扫描(或打印机与扫描仪)。
3. 选择打印机,然后单击选件和耗材按钮,然后
选择选件选项卡。
4. 手动配置附件。
Windows® 8.0、8.1 和 Windows 10:在安装打印
机软件之前连接附件时,不必进行此过程,除非
打印机通过USB电缆连接到计算机。在安装打印
机软件之后连接附件时或使用USB连接时,执行
以下步骤:
1. 滚动至屏幕左下角,然后右键单击所显示的窗
口。
2. 选择控制面板。在硬件和声音下,选择查看设
备和打印机。
3. 右键单击打印机名称,然后选择打印机属性。
4. 单击设备设置选项卡。
5. 在 可安装选件部分中,如果显示自动配置,则
使用下拉箭头选择立即更新。如果未显示自动
配置选项,或用USB电缆连接打印机,则通
过打开相应的类别并选择附件,手动安装该附
件。
Windows XP、Windows Vista® 和 Windows 7:在
安装打印机软件之前连接附件时,不必进行此过
程,除非打印机通过USB电缆连接到计算机。在
安装打印机软件之后连接附件时或使用USB连接
时,执行以下步骤:
1.确保打印机打开电源并连接至计算机或网络。
2.打开Windows 开始菜单,然后单击设备和打印
机(在XP中单击打印机和传真)。
3.右键单击本打印机的名称,然后选择打印机属
性(在XP中单击属性)。
4.单击设备设置选项卡。
5.单击可安装选件部分。
6. 在 自动配置旁的下拉框中,使用下拉箭头选择
立即更新。如果使用USB连接,则通过打开相
应的类别并选择该附件,手动安装该附件。

7
HR
OS X:
System Preferences
Print & Scan (Ispis i skeniranje (ili Printers &
Scanners
Options & Supplies
Options
Windows® 8.0 i 8.1 i Windows 10:
Control Panel
Hardware and Sound
and printers
Printer Properties
.
Installable Options
vidite
Update Now
Windows XP, Windows Vista® i Windows 7:
Start
Printers and Faxes
Printer Properties (ili Properties
.
Installable Options
instalirati).
Update Now
sada) s
CS
OS X:
.
).
materiál.
.
Vlastnosti tiskárny.
.
Automatická
Start
Vlastnosti tiskárnyVlastnosti
.
.
Automatická

8
DA
OS X:
Systempræferencer.
Print & ScanPrinters & Scanners
(Printere og scannere)).
Options & Supplies
Options
Hvis du tilslutter
. Under
.
.
.
Installerbart ekstraudstyr og hvis Automatisk
Opdater nu
rullepilen. Hvis indstillingen
Hvis du tilslutter
Start
(eller for XP).
(eller for XP).
.
Installerbart ekstraudstyr.
Opdater nu
NL
OS X:
2. Selecteer Printen en scannen (of Printers en scanners).
Opties.
Windows® 8.0 en 8.1 en Windows 10: Als u het accessoire
rechts op het getoonde venster.
2. Selecteer . Selecteer onder Hardware
de optie Apparaten en printers bekijken.
.
.
5. Als in de sectie Installatieopties
Nu bijwerken
en het accessoire te selecteren.
Windows XP, Windows Vista® en Windows 7: Als u het accessoire
2. Open het Windows StartApparaten
en printers (of Printers en faxapparaten voor XP).
selecteer (of voor XP).
.
Installeerbare opties.
de optie Nu bijwerken
accessoire te selecteren.

9
OS X:
System Preferences.
Print & Scan (tai Printers & Scanners).
Options & Supplies
Options
4. Määritä lisälaite manuaalisesti.
Windows® 8.0 ja 8.1 sekä Windows 10: Tätä vaihetta ei tarvitse
suorita seuraavat vaiheet:
Laitteisto ja äänet
Näytä laitteet ja tulostimet.
Tulostimen ominaisuudet.
4. Napsauta Laitteen asetukset
5. Määritä
Automaattinen kokoonpano
Automaattinen kokoonpano
Windows XP, Windows Vista® ja Windows 7: Tätä vaihetta
2. Avaa Windowsin Laitteet ja
tulostimet (tai Windows XP:ssä Tulostimet ja faksit).
valitse Tulostimen ominaisuudet (tai Windows XP:ssä
Ominaisuudet).
4. Napsauta Laitteen asetukset
5. Napsauta
Automaattinen kokoonpano
EL
OS X:
System Preferences
Print & ScanPrinters
Options &
Supplies
Options
.
.
.
.
.

10
HU
OS X:
System Preferences
Print & Scan
Printers & Scanners
Options & Supplies
Options
elemet. A
elemet.
5. Ha a Automatikus
most
Windows XP, Windows Vista® és Windows 7:
2. Nyissa meg a Windows Start
) elemre.
)
5. Kattintson a
OS X:
System Preferences (Preferensi Sistem).
2. Pilih Print & ScanPrinters & Scanners)
Options & Supplies
Options (Pilihan).
Windows® 8.0 dan 8.1 serta Windows 10: Bila memasang
2. Pilih Control Panel (Panel Kontrol). Dalam Hardware and
Sound
printers
Printer Properties
(Properti Printer).
Installable Options (Pilihan yang Dapat
Update Now
Automatic
Windows XP, Windows Vista®, dan Windows 7: Bila memasang
Start
PrintersPrinters and Faxes
Printer Properties (Properti
Printer) (atau Properties
Installable Options (Pilihan yang Dapat Diinstal).
Update Now

11
KK
OS X:
System Preferences
2. Print & Scan
Printers & Scanners
Options & Supplies
Options
2. Control Panel
Hardware and Sound
Printer
Properties
4.
5. Installable Options
Update Now
2. Windows Start
and Printers
Printers and Faxes
Printer Properties
Properties
4.
5. Installable Options
6.
Update Now
KO
OS X: 부속품을 설치한 후 첫 번째 인쇄 작업 시 설치된 옵션의
목록이 자동으로 업데이트됩니다. 그렇지 않은 경우 다음 단계를
수행합니다.
1. Apple 메뉴에서 시스템 환경 설정을 클릭합니다.
2. 인쇄 및 스캔(또는 프린터 및 스캐너)을 선택합니다.
3. 프린터를 선택하고 옵션 및 소모품 버튼을 클릭한 다음,
옵션 탭을 선택합니다.
4. 부속품을 수동으로 구성합니다.
Windows® 8.0, 8.1 및 Windows 10: 프린터 소프트웨어 설치
전에 부속품을 장착하는 경우, 프린터가 USB 케이블로 컴퓨터에
연결되어 있지 않으면 이 과정은 필요 없습니다. 프린터
소프트웨어 설치 후 부속품을 장착하거나 USB 연결을 사용하는
경우, 다음 단계를 수행하십시오.
1. 화면의 왼쪽 하단으로 스크롤하여 표시되는 창을 마우스
오른쪽 버튼으로 클릭합니다.
2. 제어판을 선택합니다. 하드웨어 및 소리에서 장치 및 프린터
보기를 선택합니다.
3. 프린터의 이름을 마우스 오른쪽 버튼으로 클릭하고 프린터
속성을 선택합니다.
4. 장치 설정 탭을 클릭합니다.
5. 설치 가능 옵션 영역에 자동 구성 옵션이 표시되면 지금
업데이트를 선택합니다. 자동 구성 옵션이 표시되지 않거나
프린터가 USB 케이블로 연결되어 있는 경우, 적절한
카테고리를 열고 부속품을 선택하여 부속품을 수동으로
설치합니다.
Windows XP, Windows Vista® 및 Windows 7: 프린터
소프트웨어 설치 전에 부속품을 장착하는 경우, 프린터가
USB 케이블로 컴퓨터에 연결되어 있지 않으면 이 과정은 필요
없습니다. 프린터 소프트웨어 설치 후 부속품을 장착하거나 USB
연결을 사용하는 경우, 다음 단계를 수행하십시오.
1. 프린터가 켜져 있고 컴퓨터나 네트워크에 연결되어 있는지
확인합니다.
2. Windows 시작 메뉴를 열고 장치 및 프린터(XP의 경우 프린터
및 팩스)를 클릭합니다.
3. 프린터의 이름을 마우스 오른쪽 버튼으로 클릭한 다음 프린터
속성(XP의 경우 속성)을 선택합니다.
4. 장치 설정 탭을 클릭합니다.
5. 설치 가능한 옵션 영역을 클릭합니다.
6. 자동 구성 옆의 드롭다운 상자에서 드롭다운 화살표를
사용하여 지금 업데이트를 선택합니다. USB 연결을 사용하는
경우, 적절한 카테고리를 열고 부속품을 선택하여 수동으로
부속품을 설치합니다.

12
NO
OS X:
(eller ).
.
.
.
du Oppdater nå med rullegardinpilen. Hvis alternativet
2. Åpne Start-menyen i Windows
(eller i XP).
(eller i XP).
.
.
velger du Oppdater nå
PL
System OS X:
System Preferences
systemowe).
Print & ScanPrinters &
Scanners
Options & Supplies
Options
System Windows® 8.0 i 8.1 oraz Windows 10:
Panel sterowania
.
.
.
Opcje instalowalne
polecenie Aktualizuj teraz
Windows XP, Windows Vista® i Windows 7:
Start
Drukarki i faksy w
systemie XP).
.
Opcje do zainstalowania.
Aktualizuj teraz

13
PT
OS X:
Preferências do sistema.
2. Selecione (ou Impressoras e scanners).
Opções e suprimentos
Opções.
Windows® 8.0 e 8.1, e Windows 10:
estas etapas:
2. Selecione Painel de Controle. Em Hardware e Som
.
Propriedades da Impressora.
.
usando a seta
presente ou se a impressora estiver conectada por meio de
Windows XP, Windows Vista® e Windows 7:
estas etapas:
computador ou à rede.
Iniciar
(ou em Impressoras e Faxes
impressora e selecione Propriedades da Impressora
(ou Propriedades para o XP).
.
.
selecione
RO
OS X:
System Preferences
Print & ScanPrinters &
Scanners
Options & Supplies
Options
Panou de control. La
.
.
.
Start
pe (sau Printers and Faxes
(sau
.

14
RU
OS X.
.
).
.
.
.
.
.
Windows XP, Windows Vista® Windows 7.
.
.
.
SK
OS X:
Print & Scan
Printers & Scanners
Options & Supplies
Options
Control Panel
Hardware and Sound
Printer Properties
Installable Options
Update Now
Windows XP, Windows Vista® a Windows 7:
Start
Printers
and Faxes
Printer Properties
Properties
Installable options
Update Now

15
SL
OS X:
System Preferences (Nastavitve
sistema).
Print & Scan Printers &
Scanners
Options & Supplies
Options
Windows® 8.0 in 8.1 ter Windows 10:
ta navodila:
.
Lastnosti tiskalnika.
.
Posodobi zdaj ni
Windows XP, Windows Vista® in Windows 7:
2. Odprite meni Start
tiskalniki (ali Tiskalniki in faksi
Lastnosti tiskalnika (ali Lastnosti
.
.
Posodobi zdaj.
OS X:
.
(eller ).
.
. Under
.
.
.
och om Automatisk
Uppdatera nu
i nedrullningsmenyn. Om alternativet Automatisk
2. Öppna Windows Startmenyn
(eller
(eller
.
.
Uppdatera
nu
16
TH TW
OS X: 已安裝的選項清單應會在安裝附件之後,在執行第
1 個列印工作期間自動更新。 如果清單未更新,
請執行下列步驟:
1. 在「Apple」選單中,按一下系統偏好設定。
2. 選擇列印與掃描(或 Printers & Scanners(印表機與
掃描器))。
3. 選擇印表機,按一下選項與耗材按鈕,
然後選擇選項標籤。
4. 手動設定附件。
Windows® 8.0、8.1 和 Windows 10: 如果是在安裝印表機軟
體之前安裝附件,此程序可以省略,但是透過 USB 纜線連接
印表機與電腦的情形除外。 如果是在安裝印表機軟體之後安
裝附件,或者如果是使用 USB 連接的情形,請執行下列步驟:
1. 捲動至螢幕左下角,然後用滑鼠右鍵按一下顯示的視窗。
2. 選擇控制台。 在硬體和音效下,選擇檢視裝置和印表機。
3. 在印表機名稱上按一下滑鼠右鍵,然後選擇印表機內容。
4. 按一下裝置設定標籤。
5. 在可安裝的選項區段中,如果自動設定有出現,請使用下
拉箭頭選擇立即更新。 如果自動設定選項沒有出現,或者
如果印表機是透過 USB 纜線連接,請開啟適當的類別並選
擇附件以手動安裝附件。
Windows XP、Windows Vista® 和 Windows 7: 如果是在安裝
印表機軟體之前安裝附件,此程序可以省略,但是透過 USB
纜線連接印表機與電腦的情形除外。 如果是在安裝印表機軟
體之後安裝附件,或者如果是使用 USB 連接的情形,請執行
下列步驟:
1. 請確定印表機電源已打開,且已連接至電腦或網路。
2. 開啟 Windows 開始功能表,然後按一下裝置和印表機(如
果是 XP,則是印表機和傳真)。
3. 用滑鼠右鍵按一下本印表機的名稱,然後選擇
印表機內容(如果是 XP,則是內容)。
4. 按一下裝置設定標籤。
5. 按一下可安裝的選項區段。
6. 在自動設定旁邊的下拉式方塊中,使用下拉箭頭選擇立即
更新。 如果是使用 USB 連接,請開啟適當的類別並選擇附
件以手動設定附件。

17
TR
OS X:
2. (veya
Seçenekler
2.
4.
5.
'
2. Windows
4.
5.
6. '
UK
OS X.
System Preferences
Print & Scan
Printers & Scanners
Options & Supplies
Options
.
.
.
Windows XP, Windows Vista®
.
.
18
AR

19
20
www.hp.com
