Loading ...
Loading ...
Loading ...
9 Installer Manual
INSTRUCTIONS
DAY/ TIME
BACK NEXT
HUMIDITY
The Installer Settings must be properly configured in order for this thermostat to operate correctly. The
Installer Settings are menu driven. The portion of these settings that do not apply to your setup will be
skipped. These settings are indicated below with comments. More detail on each setting follows this table.
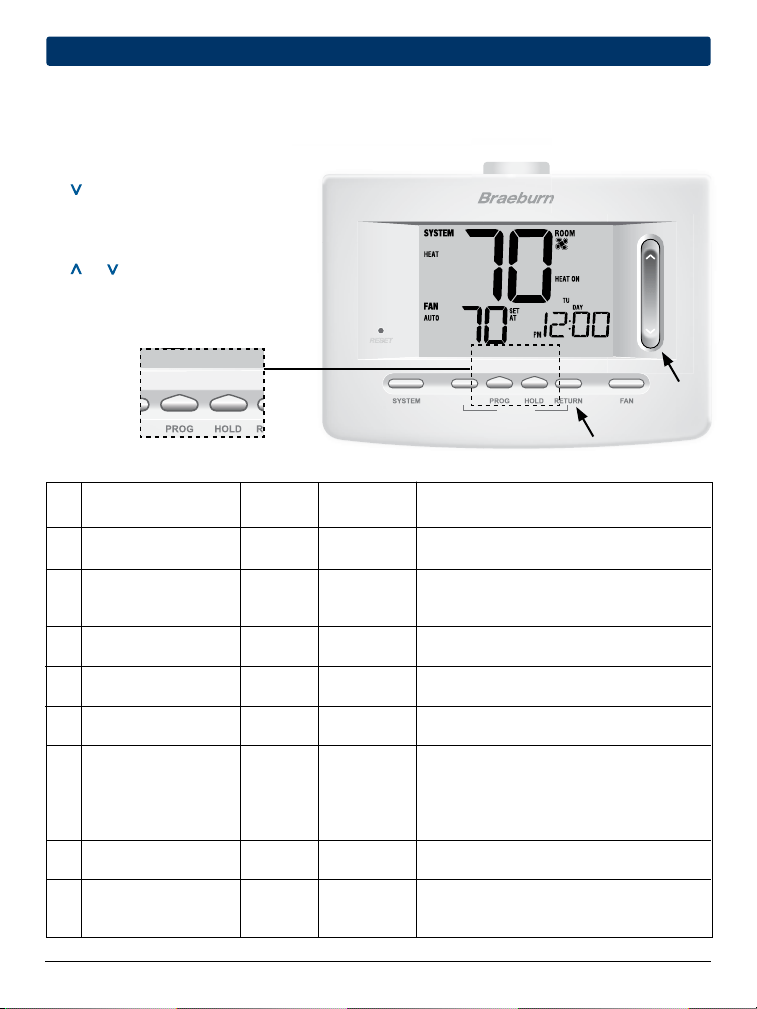
1.
Press and hold down the RETURN and
buttons for 3 seconds.
2. Release both buttons and the first
installer setting will be displayed.
3.
Change settings as required using the
or portion of the SpeedBar
®
.
4.
Press NEXT (HOLD) or BACK (PROG) to
move to the next or previous setting,
press RETURN to exit.
No. Installer Setting Factory Setting Comments
(Notes follow this table) Default Options (More information follows this table)
1 Residential or RES RES Select for Residential profile
or Commercial Profile COMM Select for Commercial profile
2 Programming Mode 7 PROG 7 PROG Select for 7 day programming mode
[note 1] 52 PROG Select for 5-2 day programming mode
NO PROG Select for non-programmable mode
3 Clock Format 12 HR 12 HR Select for 12 hour clock
24 HR Select for 24 hour clock
4 Temperature Scale F DEG F DEG Select for Fahrenheit display
C DEG Select for Celsius display
5 Auto Changeover oF AUTO oF AUTO Disables Auto Changeover mode
ON AUTO Enables Auto Changeover mode
11CONV Select for 1H/1C Conventional system
6 System Type 11CONV 11HP Select for 1H/1C Heat Pump system
21 HP
Select for 2H/1C Heat Pump system
1HD Select for Heat Only Hydronic system
11HD Select for Hydronic Heat/1C system
7 1st Stage Differential 0.5 DIF1 0.5, 1.0 or Select a 1st stage temperature differential of
2.0 DIF1 .5°, 1° or 2° F (0.2°, 0.5° or 1.0° C)
8 2nd Stage Differential 2.0 DIF2 1.0, 2.0, 3.0, Select a 2nd stage temperature differential of
[note 2] 4.0, 5.0 or 1°, 2°, 3°, 4°, 5° or 6° F (0.5°, 1.0°, 1.5°, 2.0°,
6.0 DIF2 2.5° or 3.0° C)
4
Installer Settings
INSTRUCTIONS
DAY/ TIME
BACK NEXT
Loading ...
Loading ...
Loading ...