XTU R1 Battery Powered Camera
Product's Documents
Below are documents related to this product, you can read online or download:
- Owner's manual - (English) Read Online | Download pdf
NOTES:
1. Please install the mlcroSD Card (not included) before powering on the camera. This camera supports microSD Card with capacity up to 128G.
If a microSD card is needed, please contact us or get it from an authorized XTU store.
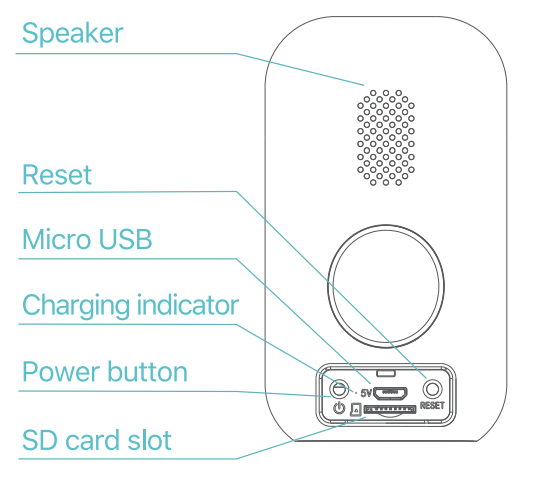
2. Press and hold the Power Button for 5 seconds to turn on/off the camera. If it does not power on, please use USB adapter (not included) with standard 5V output to charge, then try again.
3. Press the Power Button once to wake up the camera from sleep mode.
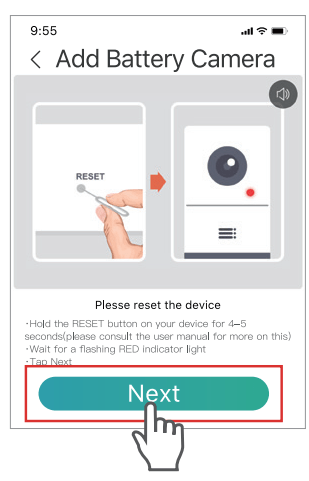
4. Insert the Reset Pin into the Reset Hole and press for 5 seconds to reset the camera if the connection is failed or you need to connect the camera with another Cloudedge account. There is beeping sound from the camera after a successful reset.
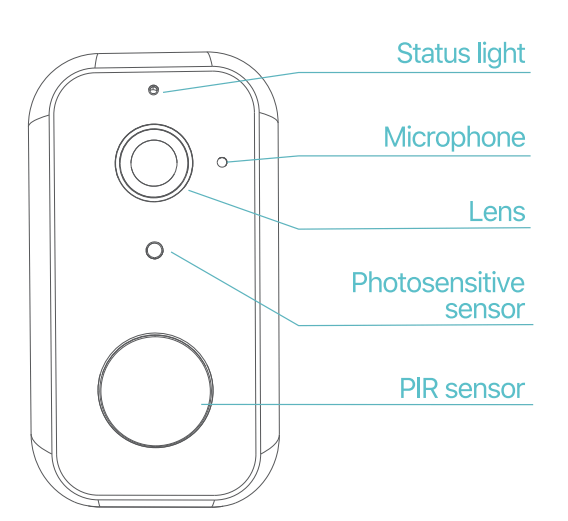
5. PIR Sensor: Passive Infrared Sensor. This camera is not designed for 7/24 all day recording. It only starts to record videos when the PIR sensor of the camera detects the movements of human body.
6. Please insert the waterproof rubber stopper into the back part of the camera to prevent the camera from water leakage when the camera is used for outdoor.
LED Status | Camera Status |
Solid red light on | the camera is turning on or multifunctional |
Blinking red light | awaiting WiFi connection (slowly blinking) connecting the WiFi (quickly blinking) |
Blinking blue light | currently connecting |
Solid blue light on | the camera runs correctly |
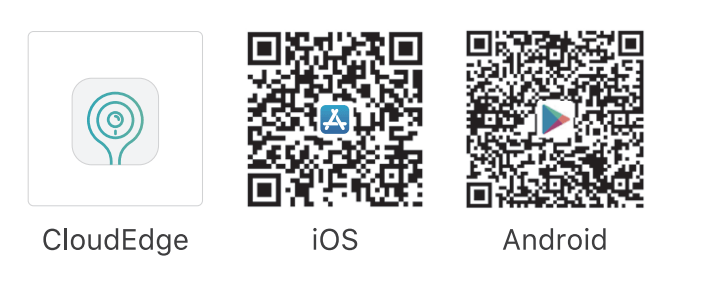
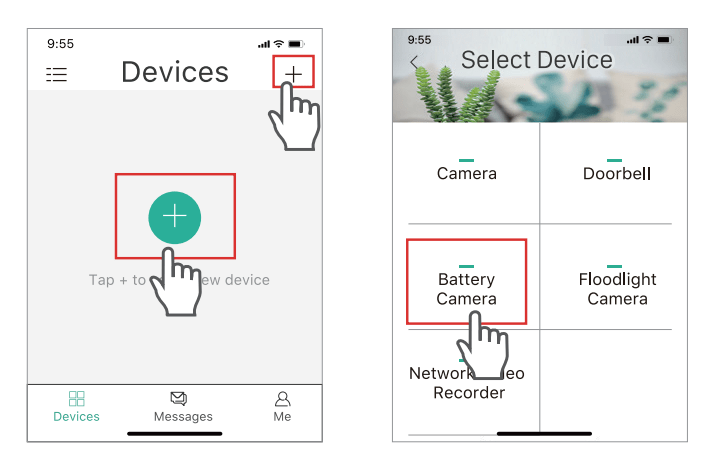
Option 1:
Search for Cloudedge from App Store or GooglePlay, then download and install it into your mobile device.
Option 2:
Scan the QR codes below to download and install.
Account Registration and Login
Please register an account with a valid email address at your first use of Cloudedge App, then log in.
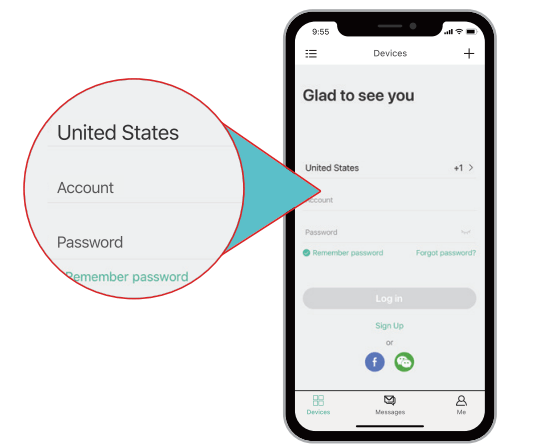
NOTE: A valid email Is a must for password reset.
IMPORTANT:
1. To connect the camera successfully, please allow Cloudedge to use your WLAN & Cellular Data at the first run of this App.
2. The camera only supports 2.4GHz Wi-Fi.
3. Make sure the camera and your mobile device are close to the router.
4. Press the Power Button once to wake up the camera from sleep mode and make sure the LED indicator flashes RED slowly.
5. Insert the Reset Pin into the Reset Hole and press for 5 seconds to reset the camera. There is beeping sound from the camera after a successful reset.
Step 1:
Log in to Cloudedge App, tap '+' to add Battery
Step 2:
Start to connect the camera.

Make sure the LED indicator flashes RED slowly.

Select your router's Wi-Fi and enter the right password.
Step 3:
Align the QR code on your mobile device with the lens of the camera and keep a distance of 5-8
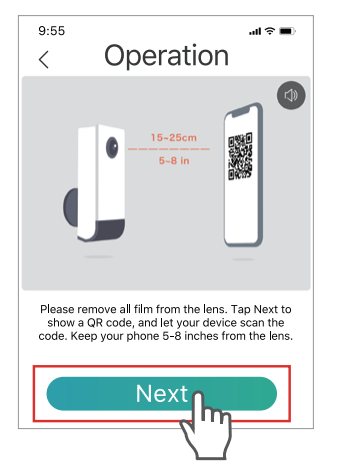
Keep your mobile device still and move the camera accordingly.
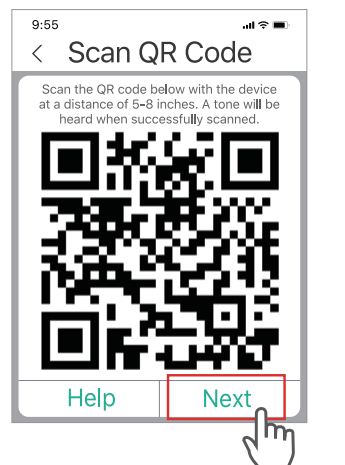
Tap 'Next' after ' hearing the beeping sound from the camera.
Step 4:
Wait for connection after scanning. Device Found stands for a successful connection, then tap Done to start the experience.

The camera is connecting to your Wi-Fi.

Tap  to edit the name of the camera.
After the camera is connected to Cloudedge App successfully, the camera will be displayed on the
 : hide or show the preview camera image(s).
 : access to the videos recorded,
 : enter the interface of Cloud directly.
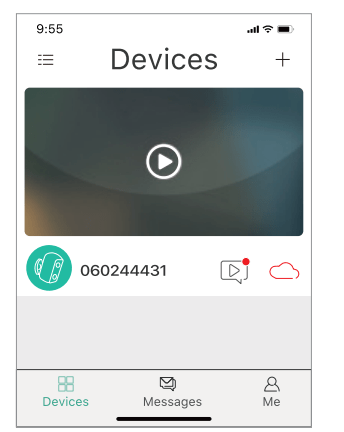
Devices:
show all the connected cameras and cameras being shared.
Messages:
Alarm Messages will show all the videos recorded after tapping on the preview camera image you'd like to check, then tap  on the left to watch the videos recorded.
System Messages contains system operation logs.
Friends:
add another registered Cloudedge account, then go to Settings > Share to share with the account added in Friends.
Me:
check the pictures and videos saved to your mobile device;
contact Cloudedge support team directly from Help & Feedback;
check the App version;
clear cache of the App;
reset the password.
Live Video:
Tap on the main interface to enter the live video of the camera.
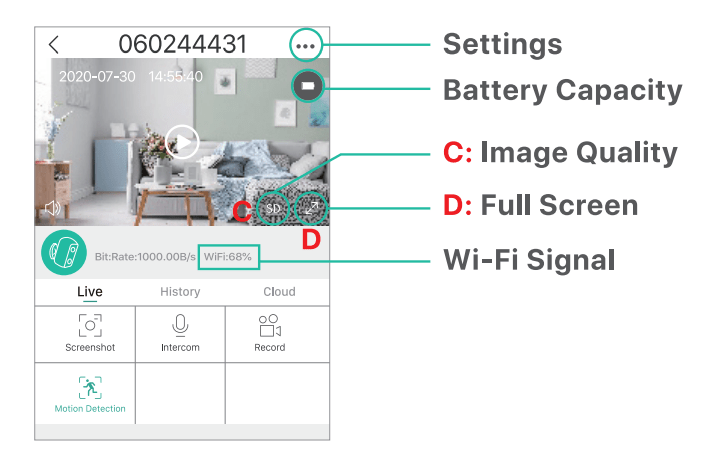
* Tap on the live video to show C and D
Settings:
Tap to enter detailed settings of the camera.
You can check more about it in the section of Settings on page 18.
Battery Capacity:
show the power status of the camera. If the power is less than 2 bars, please charge the camera timely.
Image Quality:
tap SD to switch the image quality between HD and SD. SD is recommended for a smoother streaming.
Wi-Fi signal:
if the percentage is lower than 80%, the camera may be disconnected, please move your camera to be closer to your router for better signal.
Screenshot:
tap to capture the current live picture and save it to your mobile device.
Intercom:
hold and talk to people through the camera.
Record:
tap to start recording the current live streaming; tap again to end and save it to the internal storage of your mobile device.
Body Detection:
the option is ON by default. When the camera detects the movements of human body, it will start to record video. If you switch it off, you can only watch the live picture.
Video Playback:
Tap on History to play the videos recorded in the microSD card (not included).
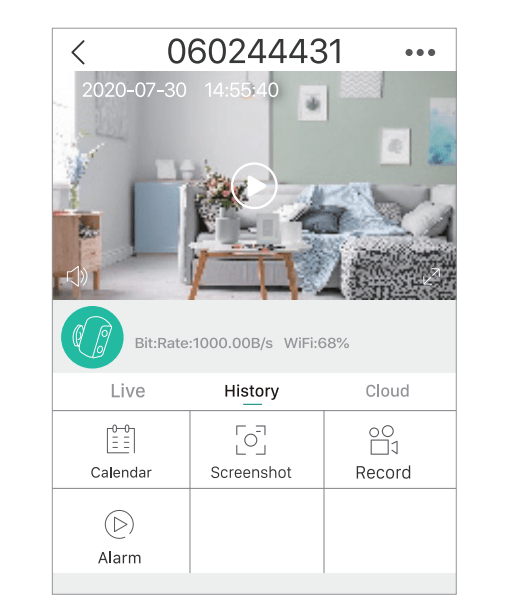
Timeline:
slide leftward and rightward on the timeline to watch the video recorded. Blue color refers to the videos recorded and the blank part means there is no video recorded.

Calendar:
tap to show a calendar, then tap the date with Blue background to play the video recorded on the selected date.
Screenshot:
after sliding to the Blue color on the timeline, tap  to capture a picture and save to your mobile device.
Record:
after sliding to the Blue color on the timeline, tap  : to start recording the video, then tap again to end and save it to the internal storage of your mobile device.
Alarm:
check the starting time of every alarm when the camera detects the movements of human body.
* Tap on 'Cloud' to play the videos recorded in the cloud if there is a cloud plan subscribed.
If you have installed a microSD card and subscribed a cloud plan, then the videos will be recorded in the microSD card and cloud at the same time.
Settings:
Tap to enter the interface of detailed settings about the camera.
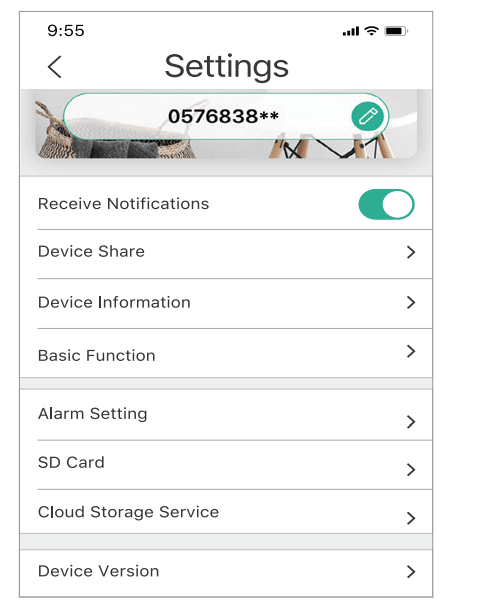
Device name:
tap  to change the name of your camera.
SN:
Serial Number of your camera. It may be required when technical support is needed.
Receive Notifications:
turn it on and allow Cloudedge App to push notifications to your mobile device after the camera records the alarm video.
Share:
after adding an account in Friends on page 14, tap Share, then select the account you plan to share with.
Cloud Storage Service (optional):
tap it to subscribe a cloud plan.
Network Information:
check the quality of your network.
SD card:
check the remaining capacity of the microSD card or format the card.
Rotate View:
flip the live video when mounting the camera on the ceiling if it's ON.
Body Detection:
set up the sensitivity of the camera, including Low, Medium and High.
Speaker Volume:
adjust the volume of the camera's speaker.
Version:
check the version of the firmware.
Night Vision:
turn on/off the night vision of the camera, or set it Automatic to turn on night vision when the ambient lighting is dark.
Power Management:
check the remaining battery of the camera, etc...
Battery
This battery powered camera utilizes an advanced low power technology. If there are no movements of human body detected when the camera is powered on, the camera will enter sleep mode.
With a full charge, the camera may work for around 4 months if the camera is woken up/detects the movements of human body for 10 times per day and works for 20s per time.
TIPS:
1. If the camera is woken up frequently or detects the movements of human body for many times, the power of the camera will be consumed quickly. Charging the camera regularly is recommended. The battery in the camera can be charged for 500 times. If we charge the camera once a week, the life span of the battery can extend more than 9 years.
2. An exclusive solar panel for constantly charging the camera is recommended. Contact us for more information about it.
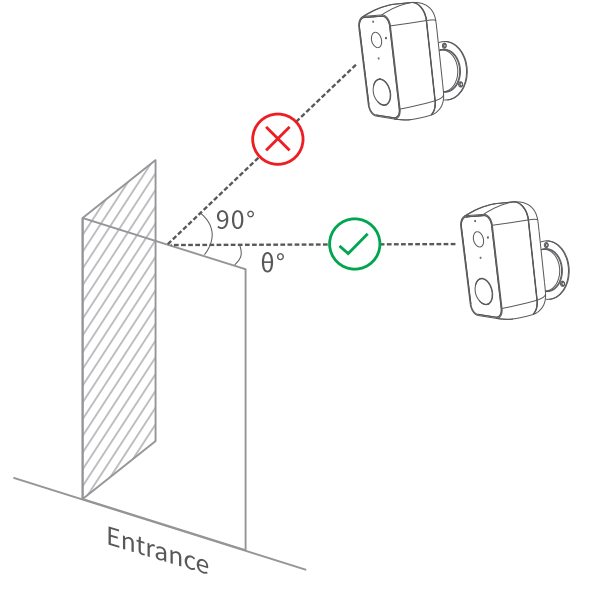
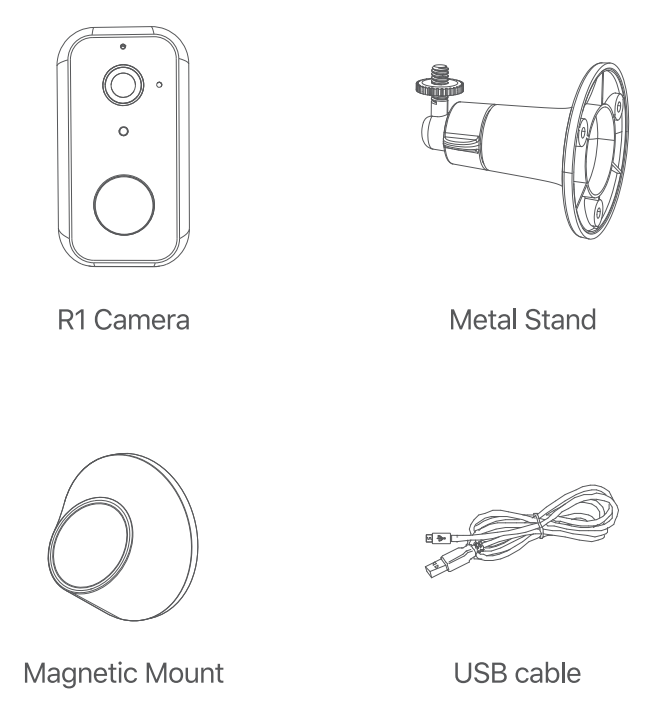
There are 2 options for mounting the camera.
Option 1: Mount with the Magnetic Mount
Step 1: Install the screws on the bracket.
Step 2: A|jgn the Magnetic Mount Hole with the Magnetic Mount to fix the camera.
Option 2: Mount with the Metal Stand
Step 1: Screw the stand into the bottom of the camera, then loosen the screw in the joint of the stand to adjust the angle. Tighten the
Step 2: Fix the base of the stand into the wall/ceiling with the screws provided.
Q1. The camera can't connect to Wi-Fi.
Q2. How can I reset the camera?
There is beeping sound after a successful reset and the RED LED indicator will flash slowly.
Q3. Why can't I receive the push notifications of the alarms?
Q4. Why there is no video recorded?
This device complies with part 15 of the FCC Rules. Operation is subject to the following two conditions:
(1) this device may not cause harmful Interference.
(2) this device must accept any interference received, including interference that may cause undesired operation.