Loading ...
Loading ...
Loading ...
INS10477B - 1/20
15
CLEANING AND MAINTENANCE
DO NOT ATTEMPT TO LUBRICATE YOUR DISPOSAL!
The motor is permanently lubricated. The disposal is self-cleaning and scours its internal parts with each use. NEVER put lye or chemical drain cleaners into the disposal,
as they cause serious corrosion of metal parts. If used, resulting damage can be easily detected and all warranties are void. Mineral deposits from your water can form
on the stainless steel turntable, giving the appearance of rust. DO NOT BE ALARMED, the stainless steel turntables used will not corrode or rust.
LIMPIEZA Y MANTENIMIENTO
NO TRATE DE LUBRICAR SU TRITURADOR!
El motor está permanentemente lubricado. El triturador es auto limpiante y friega sus partes internas con cada uso. No ponga NUNCA sosa cáustica o limpiadores de
desagüe químicos en el triturador, ya que causan severa corrosión de las piezas metálicas. Si los usa, el daño resultante puede ser detectado fácilmente y todas las
garantías quedarán nulas. Pueden formarse depósitos minerales de su agua sobre la placa giratoria de acero inoxidable, dando la apariencia de óxido. NO SE ALARME, las
placas giratorias de acero inoxidable utilizadas no se oxidan ni corroen.
NETTOYAGE ET ENTRETIEN
NE PAS TENTER DE LUBRIFIER VOTRE BROYEUR!
Le moteur est lubrié à vie. Le broyeur est autonettoyant et rince ses pièces internes à chaque utilisation. NE JAMAIS mettre de produits à base d’hydroxyde de sodium
ni de nettoyants chimiques de conduits d’évacuation dans le broyeur, car ces produits pourraient corroder les pièces métalliques. S’ils sont utilisés, le dommage causé sera
facilement identiable et annulera la garantie de votre appareil. Les dépôts minéraux de votre eau peuvent s’accumuler sur la table tournante en acier inoxydable, lui
donnant une apparence rouillée. IL NE FAUT PAS S’EN INQUIÉTER, car les tables tournantes en acier inoxydable utilisées ne se corrodent pas ni ne rouillent.
TROUBLESHOOTING
Before seeking repair or replacement, we recommend that you review the following:
NOISES:
• (Other than those during grinding of small bones and fruit pits): These are usually caused by accidental entry of a spoon, bottle cap, dishwasher knockout plug
(page 8, step 8) or other foreign object.
• To correct this, turn o the electrical switch and the water. After the disposal has stopped running, remove the object from the disposal. WARNING: Never put your hands
or ngers inside disposal.
• A humming noise with no grinding could be that the turn table is not rotating (see below).
UNIT DOES NOT START:
• Unplug the power cord or turn either the wall switch or breaker box switch to the “OFF” position, depending on your model and wiring conguration.
• Remove the stopper.
• Check to see if the turntable will rotate freely, in either direction, using a wooden spoon.
• If the turntable rotates freely, check the re-set button to see if it has been tripped.
• The re-set button is red and located opposite the discharge elbow, near the bottom. Push the button in until it clicks and remains depressed.
• If the re-set button has not been tripped, check for shorted or broken wires connecting to the disposal.
• Check the electrical power switch, fuse box or circuit breaker.
• If wiring and electrical components are intact, the unit may have an internal problem that requires service or replacement.
NOTE: if you are not familiar with electrical power and procedures, call a qualied electrician.
IF THE TURNTABLE DOES NOT ROTATE FREELY:
• Turn o the disposal and the water, then power o.
• After the disposal has stopped running, check for any foreign object(s) lodged between the turntable and grind ring.
• Dislodge any object(s) by rotating the turntable, in either direction, with a wooden spoon and remove the object(s). Unjamming wrench
service kit available for order on moen.com part number 1037.
• If no foreign object is present, there may be an internal problem that requires service or replacement.
• After turning the power back on, press the red reset button before resumming use.
LEAKS:
• If the unit leaks at the top, it may be due to:
1. Improper seating of the sink ange (gasket centering, sealant or tightening). – Re-check the installation.
2. Mount Screws not tightened properly. – Re-check the installation.
3. Defective or improperly installed Hush Cushion. – Re-check the installation.
• If the unit leaks at the waste elbow or from bottom of unit, it may be due to:
1. Improper installation of the discharge elbow and gasket. – Re-check the discharge elbow & gasket installation. (see page 8, step 7)
2. Improper tightening of elbow ange screws. – Re-check the discharge elbow and ange installation. (see page 8, step 7)
• If unit leaks at dishwasher hose connection:
1. Check the hose and clamp connection.
• If the unit leaks from elsewhere, there may be an internal problem that requires service or replacement.
Reset Button
Botón de reinicio
Bouton de
rétablissement
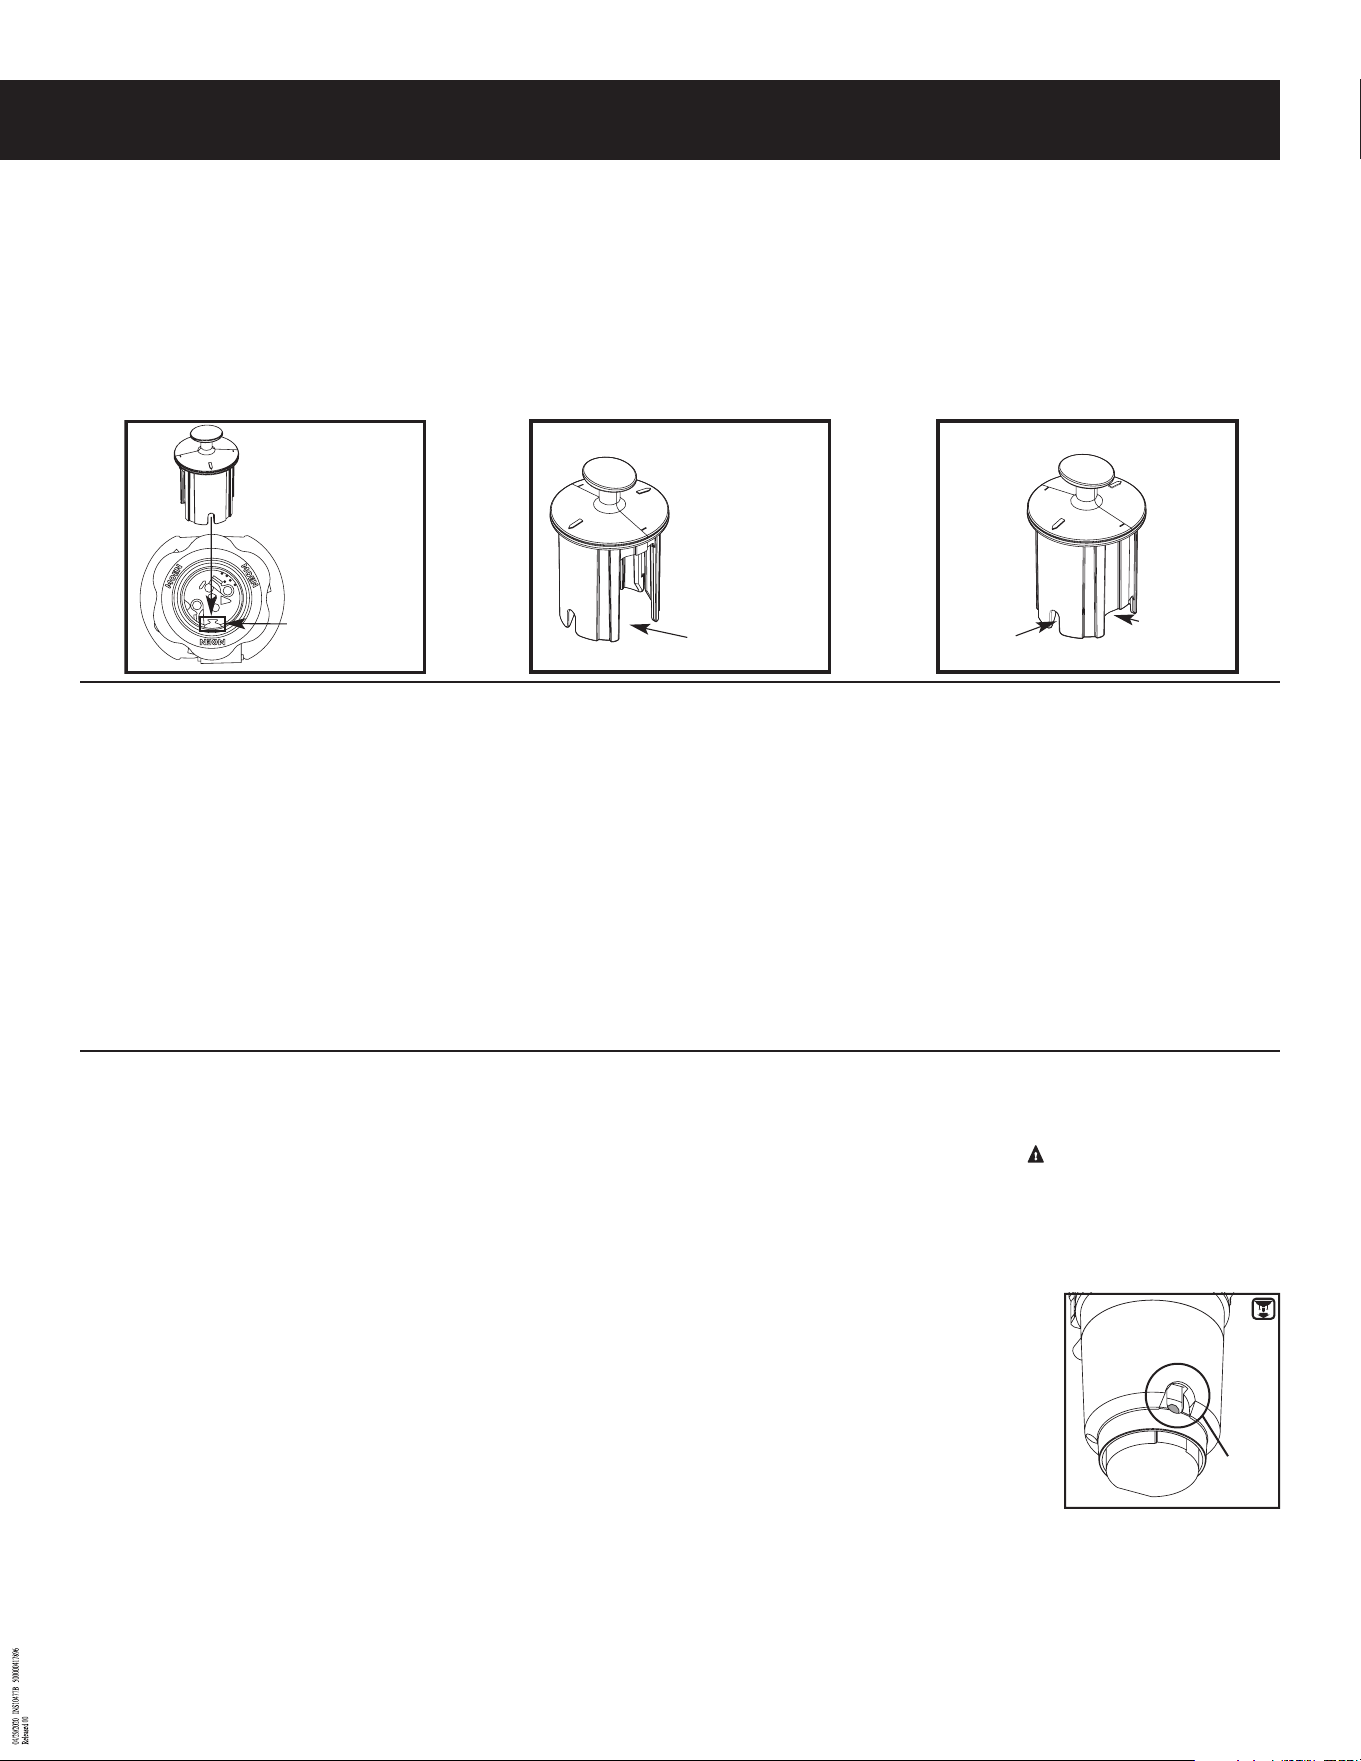
7A
7B
7C
positionne le
bouchon pour
fermer le drain
pour activer
le broyage
drain couvert,
mais non
scellé
INTERRUPTEUR
D’ACTIVATION
GRANDE
ENCOCHE:
PETITE
ENCOCHE
PETITE
ENCOCHE:
ENCOCHE
DE TAILLE
MOYENNE:
DIRECTIVES DE FONCTIONNEMENT DE L’ALIMENTATION PAR LOT (Modèle GXB75c)
A. Enlever le bouchon d’alimentation par lot et ouvrir l’eau froide à un débit moyen.
B. Pousser sur les déchets alimentaires dans le broyeur.
C. Insérer le bouchon pour faire démarrer le broyeur. En utilisant les èches situées sur le dessus du bouchon pour vous guider, aligner l’une
des deux petites fentes sur le bouchon sur l’interrupteur d’activation situé à l’intérieur du col du broyeur (voir 7A). Pousser fermement sur le
bouchon pour faire démarrer le broyeur. Soulever le bouchon pour arrêter le broyeur.
D. Faire couler l’eau pendant 15 secondes après l’arrêt du broyeur. Ainsi tous les déchets seront bien évacués dans le tuyau d’évacuation.
E. Pour remplir l’évier, insérer le bouchon d’alimentation par lot et aligner les plus grandes fentes (voir 7B) sur l’interrupteur d’activation.
Pouss er sur le bouchon pour fermer la bonde de l’évier sans faire démarrer le broyeur. Lorsque la fente de taille moyenne (voir 7C) dans
la base du bouchon est alignée sur l’interrupteur d’activation, l’eau peut s’écouler, mais un objet ne pourrait pas tomber accidentelle
ment dans le broyeur. REMARQUE : Le bouchon d’alimentation par lot doit être lavé à la main avec une eau savonneuse.
Ne pas le placer dans le lave-vaisselle.
Loading ...
Loading ...
Loading ...