Loading ...
Loading ...
Loading ...
3 Correction of Lens Aberrations due to Optical CharacteristicsN
154
3
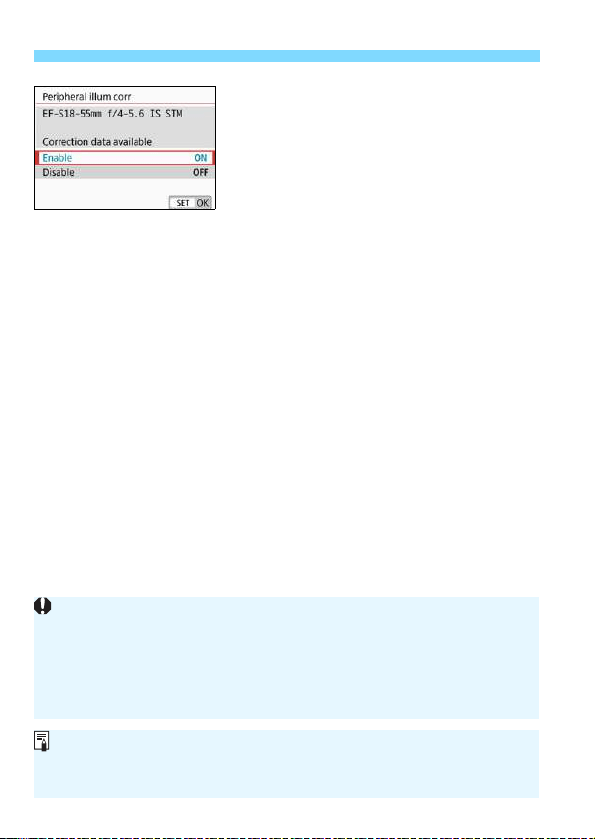
Select [Enable].
Check that [Correction data
available] is displayed for the
attached lens.
Select [Enable], then press <0>.
4
Take the picture.
The image will be recorded with the
peripheral illumination corrected.
Depending on shooting conditions, noise may appear on the image
periphery.
The higher the ISO speed, the lower the correction amount will be.
If you use the magnified view during Live View shooting, the peripheral
illumination correction will not be reflected in the image displayed on the
screen.
The correction amount applied will be slightly lower than the maximum
correction amount that can be applied with Digital Photo Professional (EOS
software, p.444).
Loading ...
Loading ...
Loading ...