Loading ...
Loading ...
Loading ...
116
Image Protection
You can protect images to prevent accidental erasure.
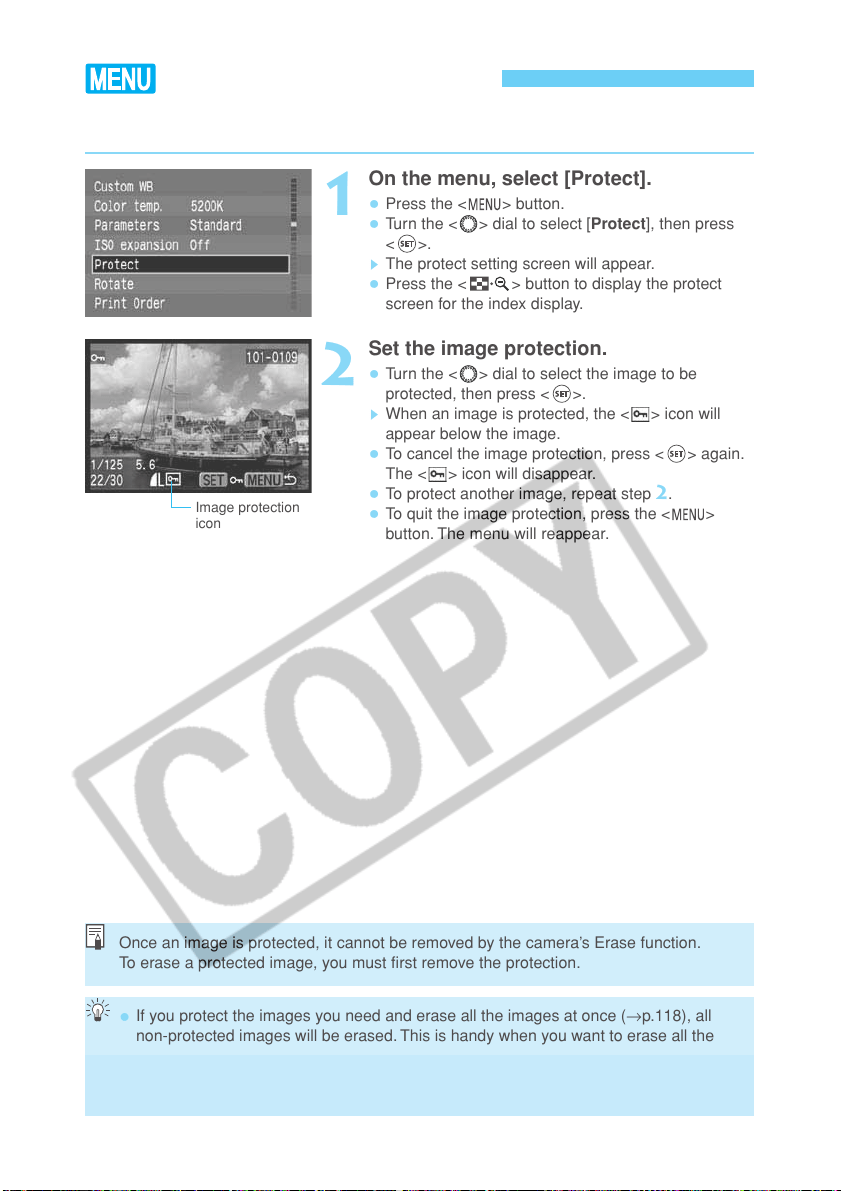
On the menu, select [Protect].
•
Press the < > button.
•
Turn the < > dial to select [Protect], then press
<
>.
s
The protect setting screen will appear.
•
Press the < > button to display the protect
screen for the index display.
1
Set the image protection.
•
Turn the < > dial to select the image to be
protected, then press <
>.
s
When an image is protected, the < > icon will
appear below the image.
•
To cancel the image protection, press < > again.
The <
> icon will disappear.
•
To protect another image, repeat step 2.
•
To quit the image protection, press the < >
button. The menu will reappear.
2
Once an image is protected, it cannot be removed by the camera’s Erase function.
To erase a protected image, you must first remove the protection.
•
If you protect the images you need and erase all the images at once (→p.118), all
non-protected images will be erased. This is handy when you want to erase all the
images you do not need at once.
•
Image protection is also possible during image with shooting information display and
magnified view.
Image protection
icon
Loading ...
Loading ...
Loading ...