Loading ...
Loading ...
Loading ...
Connecting the Jumper Cables
WARNING: Do not attach the cables
to fuel lines, engine rocker covers, the
intake manifold or electrical components
as grounding points. Stay clear of moving
parts. To avoid reverse polarity
connections, make sure that you correctly
identify the positive (+) and negative (-)
terminals on both the disabled and booster
vehicles before connecting the cables.
WARNING: Do not attach the end of
the positive cable to the studs or L-shaped
eyelet located above the positive (+)
terminal of your vehicle’s battery. High
current may flow through and cause
damage to the fuses.
WARNING: Do not connect the end
of the second cable to the negative (-)
terminal of the battery to be jumped. A
spark may cause an explosion of the gases
that surround the battery.
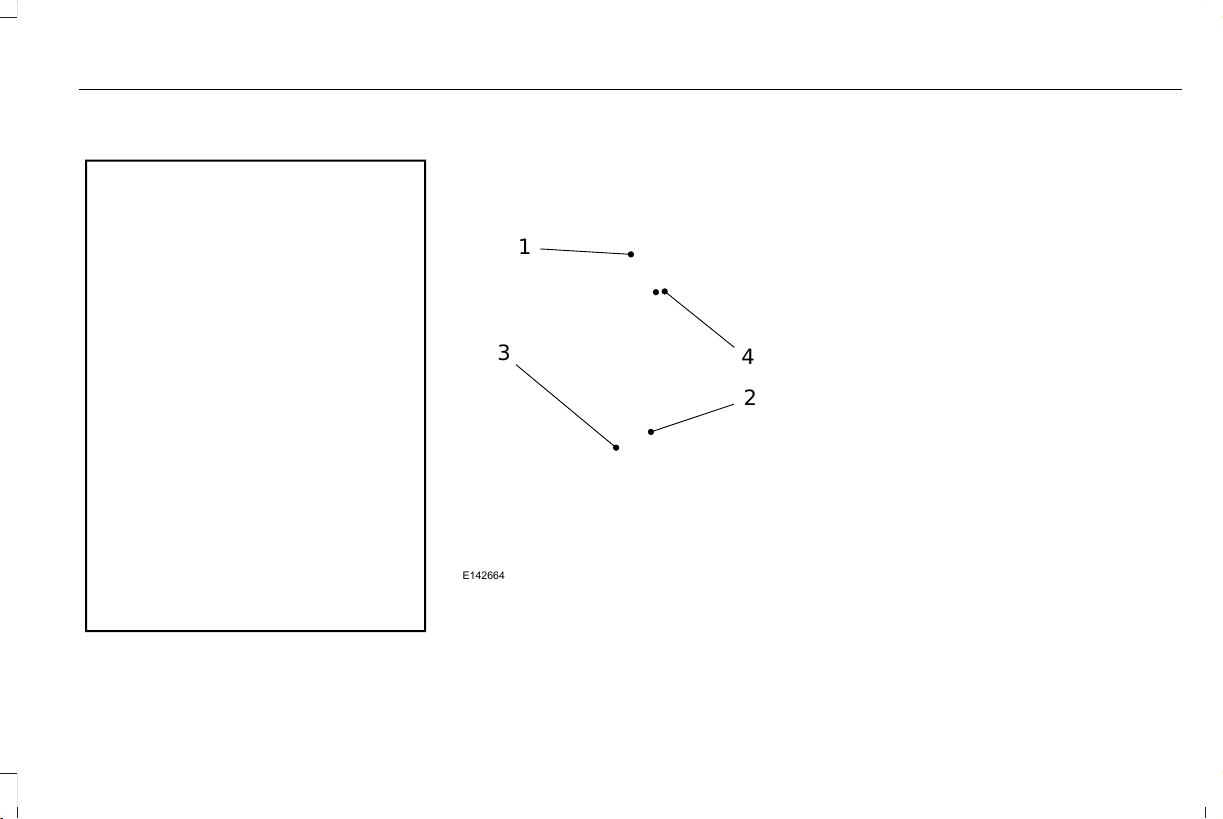
Note: In the illustration, the bottom vehicle
represents the booster vehicle.
4
2
1
3
E142664
1. Connect the positive (+) jumper cable to
the positive (+) terminal of the discharged
battery.
2. Connect the other end of the positive (+)
cable to the positive (+) terminal of the
booster vehicle battery.
3. Connect the negative (-) cable to the
negative (-) terminal of the booster
vehicle battery.
4. Make the final connection of the negative
(-) cable to an exposed metal part of the
stalled vehicle's engine, away from the
battery and the fuel injection system, or
connect the negative (-) cable to a ground
connection point if available.
Jump Starting
1. Start the engine of the booster vehicle
and rev the engine moderately, or press
the accelerator gently to keep your
engine speed between 2000 and 3000
RPM, as shown in your tachometer.
2. Start the engine of the disabled vehicle.
3. Once the disabled vehicle has been
started, run both vehicle engines for an
additional three minutes before
disconnecting the jumper cables.
291
Nautilus (CD9) Canada/United States of America, enUSA, Edition date: 201907, First-Printing
Roadside Emergencies
Loading ...
Loading ...
Loading ...