Loading ...
Loading ...
Loading ...
Check operation of oven broil burner
1. Press the "BROIL" pad.
* "Hi" will appear in the display.
, The "BROIL" indicator will light.
2_Press the "START" pad.
, "HEAT"and "ON"' indicators will light.
NOTE: A faint ticking sound will be heard whib the
oven burner lights. The oven burner shouH light
within 8 seconds.
Verifique eUfuncionamiento del
quemador de asado del homo
1. Oprima el bot6n de "BROIL" (Asado}.
En la pantalla aparecera "HI".
, Se encendera la luz indicadora de "BROIL"
(Asado}.
2_Oprima el bot6n de "START" (Ernpezar}.
, Se encenderan las luces indicadoras de "HEAT"
(Calentar} y "ON" (Encendido}.
NOTA: Mientras el quemador del homo se enciende,
hara un sonido seco y breve. El quemador del horno
debe encenderse en 8 segundos.
23.
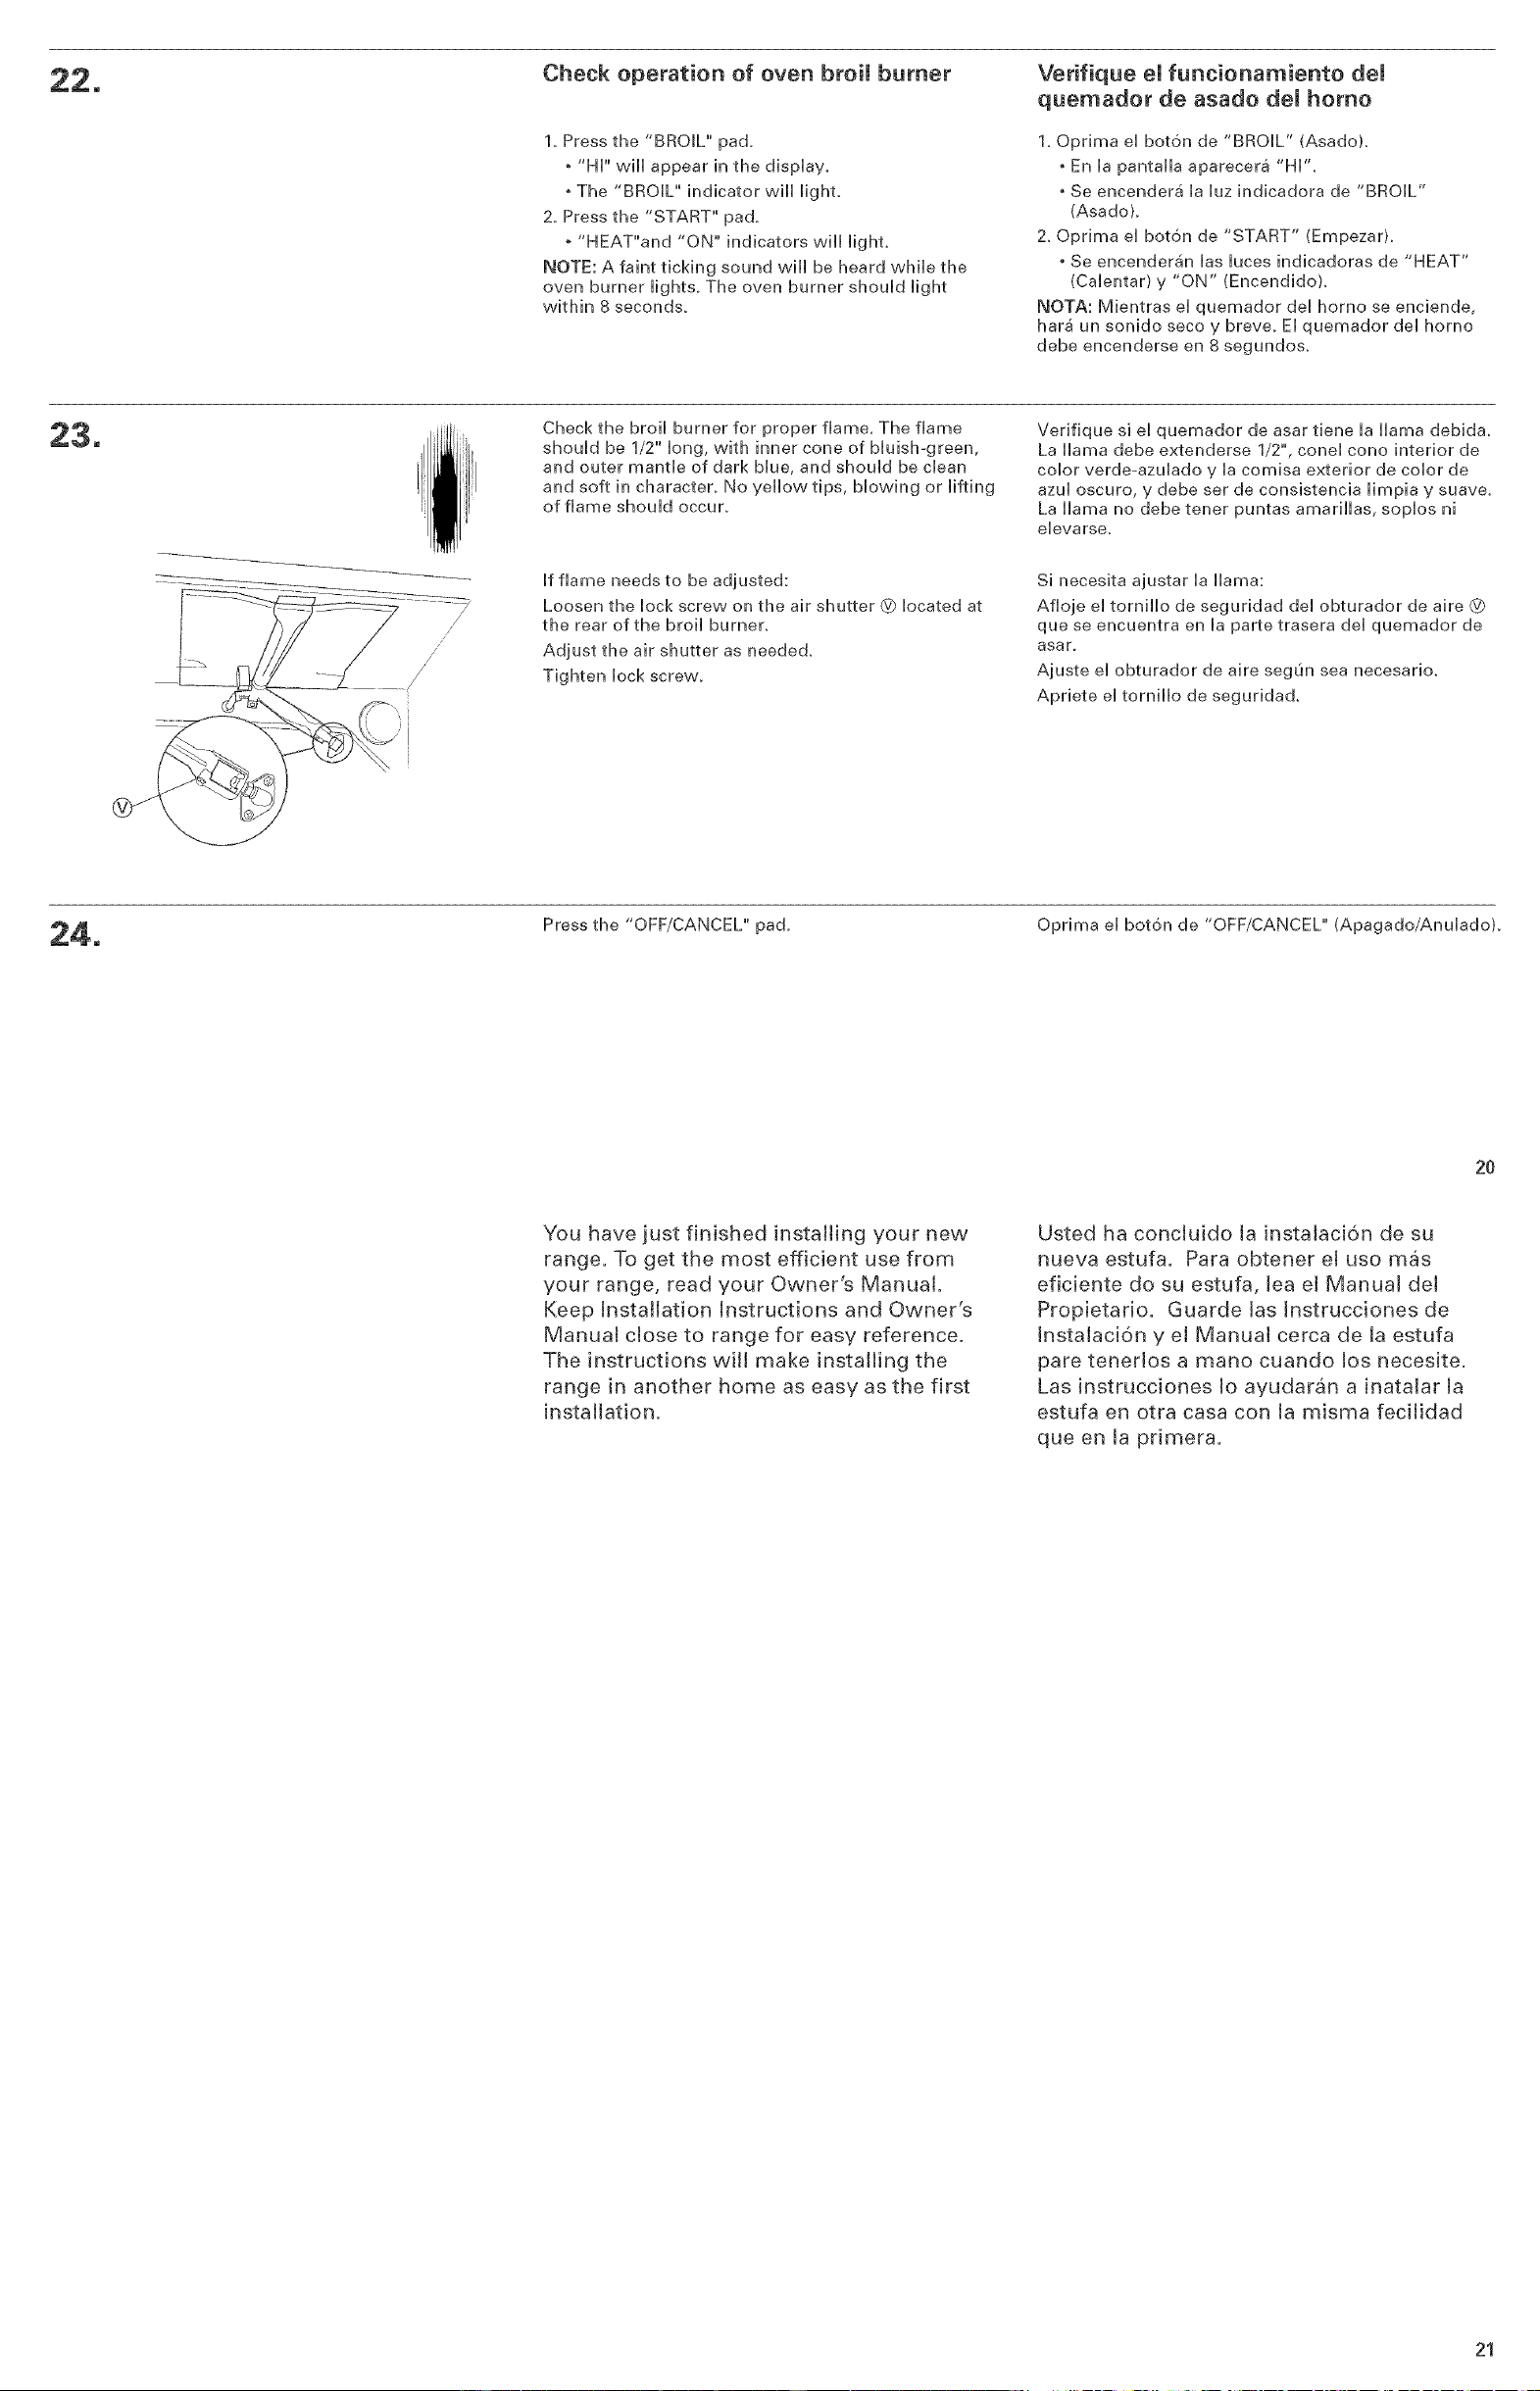
Check the broil burner for proper flame. The flame
shouH be 1/2"' long, with inner cone of bluish-green,
and outer mantle of dark blue, and should be clean
and soft in character. No yellow tips, blowing or lifting
of flame should occur.
Verifique si el quernador de asar tiene la llama debida.
La llama debe extenderse 1/2", conel cono interior de
color verde-azulado y la comisa exterior de color de
azul oscuro, y debe ser de consistencia lirnpia y suave,
La llama no debe tener puntas arnarillas, soplos ni
elevarse.
/
/
//
/
/
/
If flame needs to be adjusted:
Loosen the lock screw on the air shutter @ located at
the rear of the broil burner,
Adjust the air shutter as needed,
Tighten lock screw.
Si necesita ajustar ia llama:
Afloje ei torniiio de seguridad del obturador de aire @
que se encuentra en la parte trasera del quemador de
asar_
Ajuste el obturador de aire segun sea necesario,
Apriete el tornillo de seguridad,
Press the "OFF/CANCEL" pad. Oprima el bot6n de "OFF/CANCEL" (Apagado/Anulado).
2O
You have just finished installing your new
range. To get the most efficient use from
your range, read your Owner's Manual.
Keep Installation Instructions and Owner's
Manual close to range for easy reference.
The instructions will make installing the
range in another home as easy as the first
installation.
Usted ha conciuido Ja instaJaci6n de su
nueva estufa. Para obtener el uso mas
eficiente do su estufa, tea et ManuaJ deJ
Propietario. Guarde tas tnstrucciones de
tnstalaci6n y el Manual cerca de Ja estufa
pare tenerlos a mano cuando los necesite.
Las instrucciones Jo ayudaran a inataJar la
estufa en otra casa con ta misma fecitidad
que en ta primera.
21
Loading ...
Loading ...
Loading ...