Loading ...
Loading ...
Loading ...
16.
®
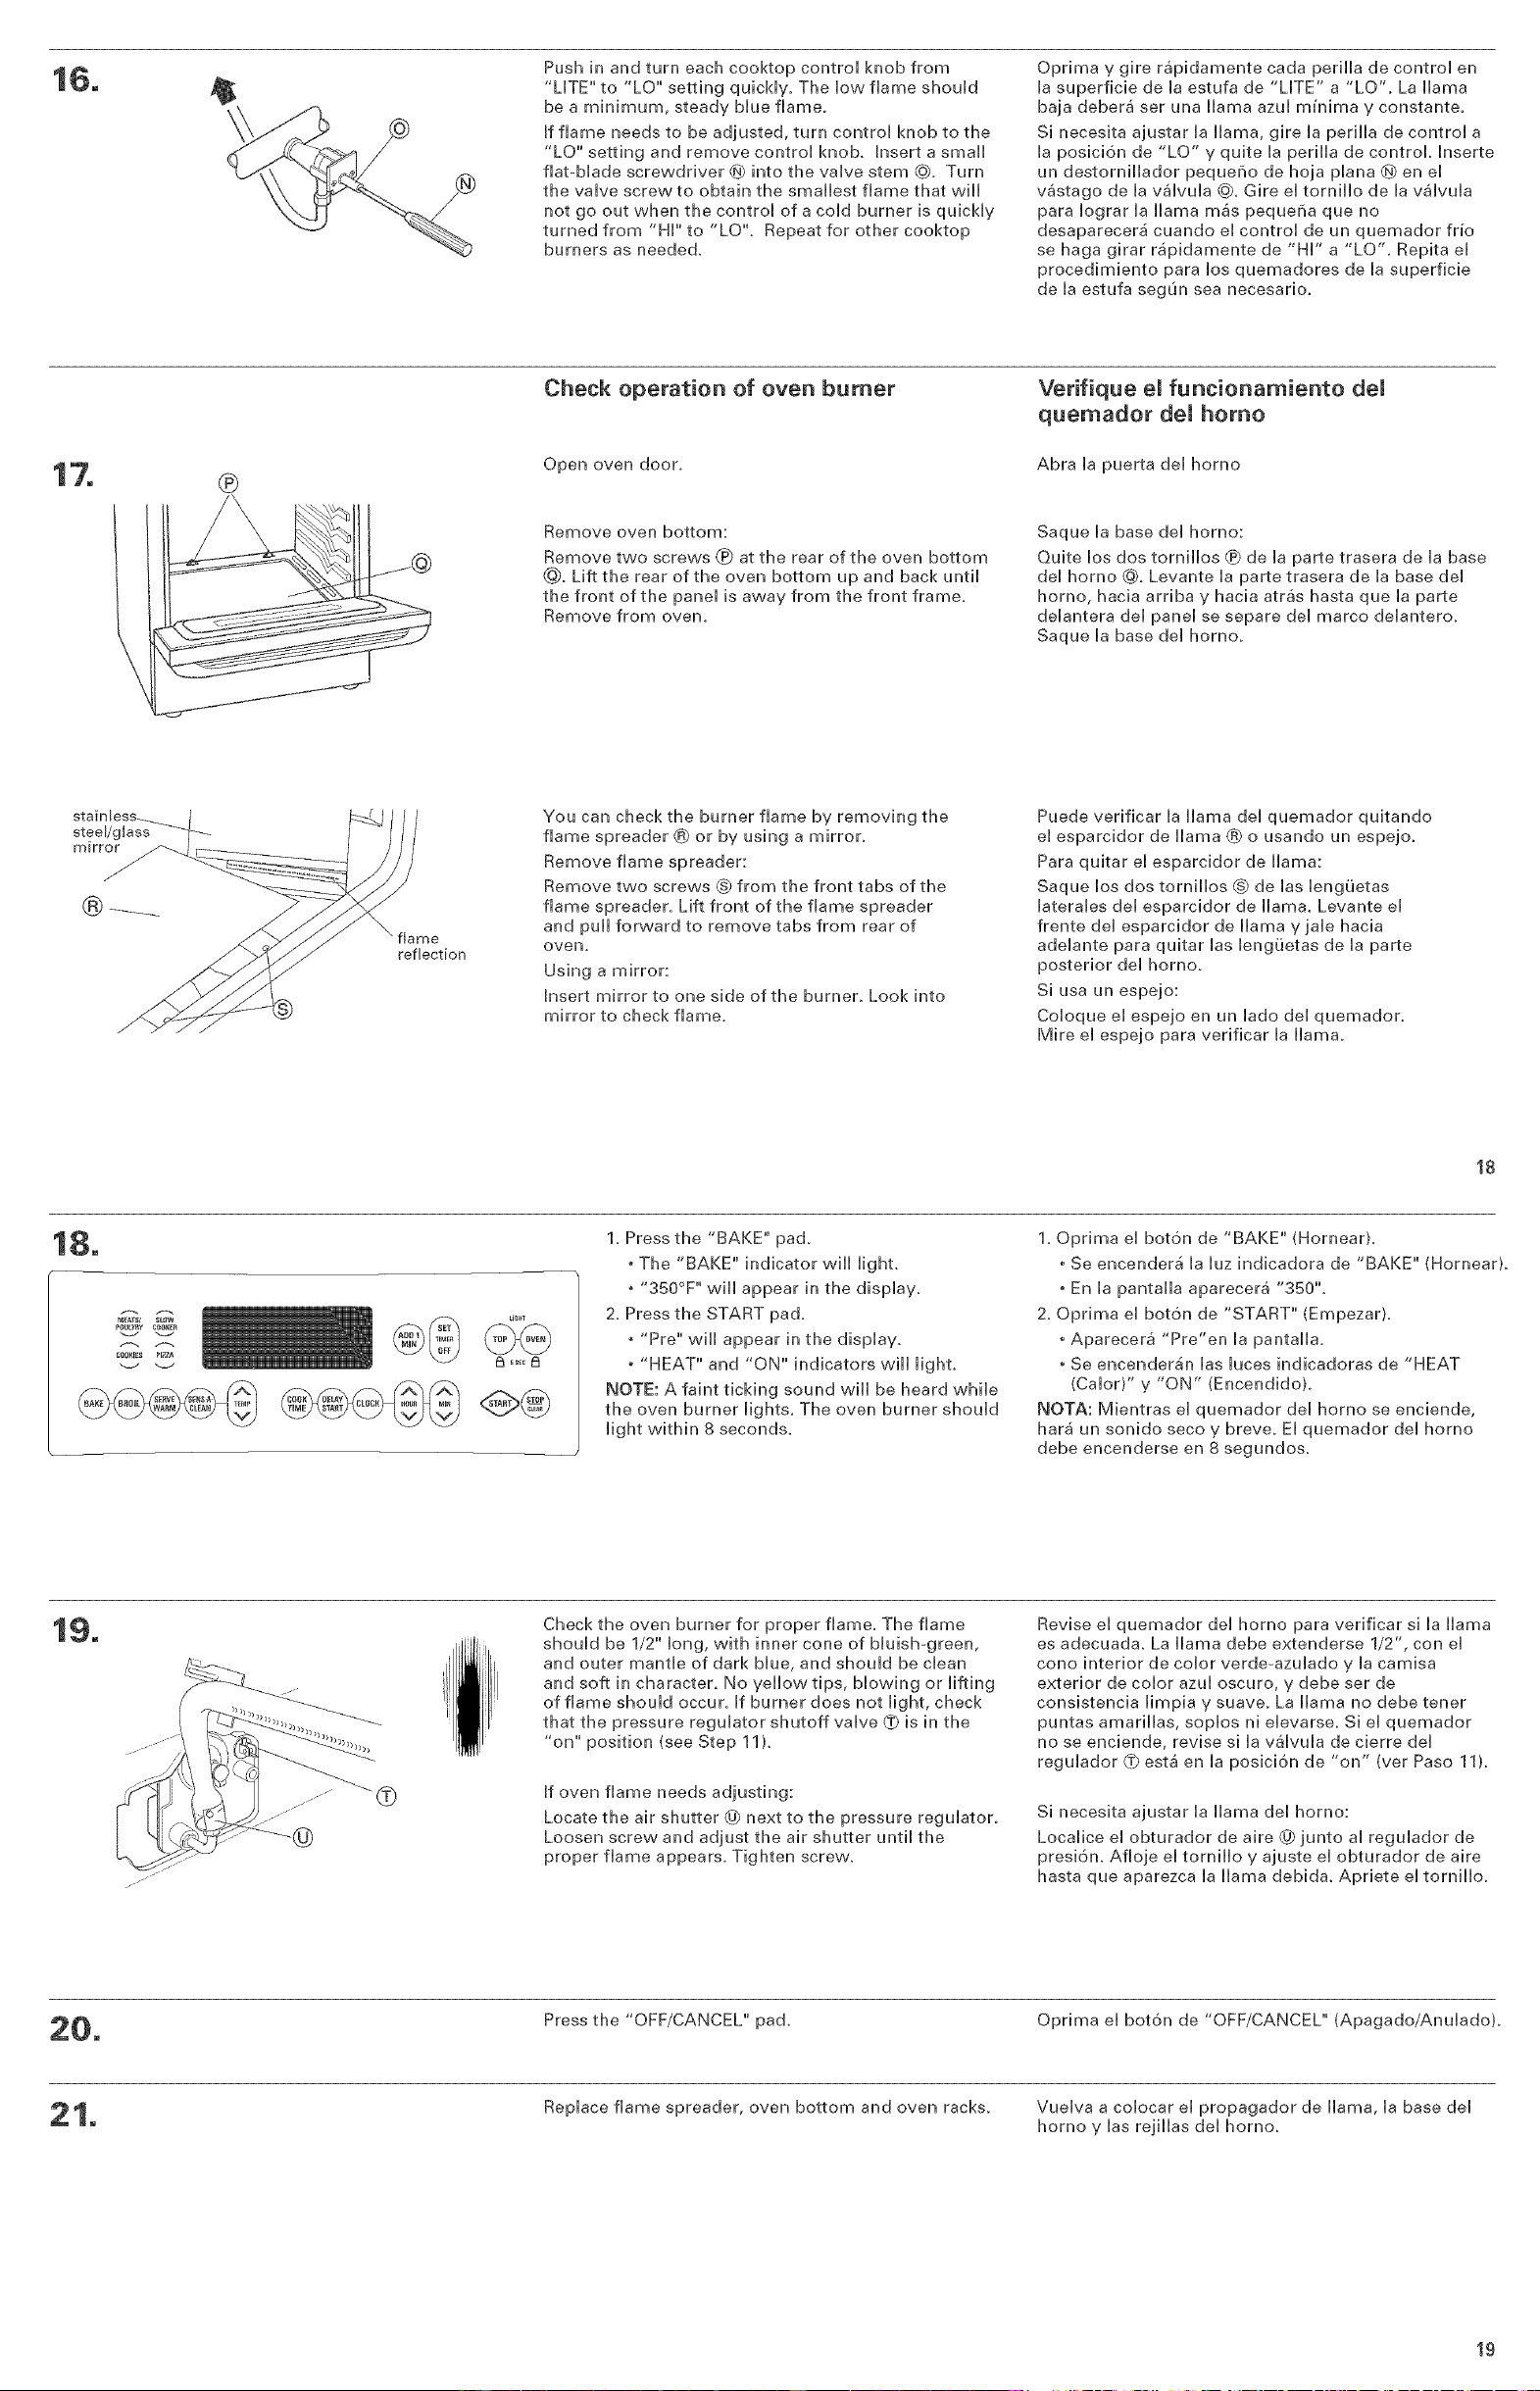
Push in and turn each cooktop control knob from
"LITE" to "LO" setting quickly. The low flame should
be a minimum, steady blue flame.
[f flame needs to be adjusted, turn control knob to the
"LO" setting and remove control knob. [nsertasmall
flat-blade screwdriver @}into the valve stem @. Turn
the valve screw to obtain the smallest flame that will
not go out when the control of a cold burner is quickly
turned from "Hi"" to "LO". Repeat for other cooktop
burners as needed.
Oprima y gire rapidamente cada perilla de control en
la superficie de la estufa de "LITE" a "LO'. La llama
baja deber5 ser una llama azul mu'nima y constante.
Si necesita ajustar la llama, gire la perilla de control a
la posici6n de "LO" y quite la perilla de control. [nserte
un destornillador peque_lo de hoja plana @ en el
vastago de la valvula @. Gire el tornillo de la valvula
para Iograr la llama m_s peque_a que no
desapareeera cuando el control de un quemador fr_o
se haga girar rapidamente de "Hi" a "LO'. Repita el
procedimiento para los quemadores de la superfieie
de la estufa segun sea neeesario.
17.
®
Check operation of oven burner
Open oven door.
Remove oven bottom:
Remove two screws _ at the rear of the oven bottom
@. Lift the rear of the oven bottom up and back until
the front of the panel is away from the front frame.
Remove from oven.
Verifique el funcionamiento de[
quemador de[ homo
Abra ia puerta del homo
Saque la base del homo:
Quite los dos tornillos ® de la parte trasera de la base
del homo @. Levante la parte trasera de la base del
horno, hacia arriba y hacia atras hasta que la parte
delantera del panel se separe del marco delantero.
Saque la base del homo.
steel/glass
mirror
flame
reflection
You can check the burner flame by removing the
flame spreader ® or by using a mirror.
Remove flame spreader:
Remove two screws (_ from the front tabs of the
flame spreader. Lift front of the flame spreader
and puii forward to remove tabs from rear of
oven.
Using a mirror:
insert mirror to one side of the burner. Look into
mirror to check flame.
Puede verificar la llama del quemador quitando
el esparcidor de llama ® o usando un espejo.
Para quitar el esparcidor de llama:
Saque los dos tornillos @ de las lengLietas
laterales del esparcidor de llama. Levante el
frente del esparcidor de llama yjale hacia
adelante para quitar las lengLietas de la parte
posterior del homo.
Si usa un espejo:
Coloque el espejo en un lado del quemador.
Mire el espejo para verifiear la llama.
18
18.
UC,uT
1. Press the "BAKE" pad.
, The "BAKE" indicator wiii light.
, "350°F" will appear in the display.
2. Press the START pad.
, "Pre" will appear in the display.
• "HEAT" and "ON" indicators wiii light.
NOTE: A faint ticking sound will be heard while
the oven burner lights. The oven burner should
light within 8 seconds.
1. Oprima el boton de "BAKE" (Hornear).
* Se encendera la luz indicadora de "BAKE" (Hornear).
- En la pantalla aparecera "350".
2. Oprima el boton de "START" (Empezar).
* Aparecer_ "Pre"en la pantalla.
* Se encenderan las luces indicadoras de "HEAT
(Calor)" y "ON" (Encendido).
NOTA: Mientras el quemador del homo se enciende,
hara un sonido seco y breve. El quemador del homo
debe encenderse en 8 segundos.
19.
j-
f/
@
Check the oven burner for proper flame. The flame
should be 1/2" long, with inner cone of bluish-green,
and outer mantle of dark blue, and should be clean
and soft in character. No yellow tips, blowing or lifting
of flame should occur, if burner does not light, check
that the pressure regulator shutoff valve _ is in the
"on" position (see Step 11 ).
If oven flame needs adjusting:
Locate the air shutter @ next to the pressure regulator.
Loosen screw and adjust the air shutter until the
proper flame appears. Tighten screw.
Revise el quemador del horno para verificar si la llama
es adecuada. La llama debe extenderse 1/2", con el
cono interior de color verde-azuiado y la camisa
exterior de color azui oscuro, y debe ser de
consistencia limpia y suave. La llama no debe tener
puntas amarillas, soplos ni elevarse. Si el quemador
no se enciende, revise si la vaivuia de eierre del
regulador (_ esta en la posici6n de "on" (ver Paso 11).
Si necesita ajustar la llama del horno:
Localice el obturador de aire @ junto al regulador de
presion. Afloje el tornillo y ajuste el obturador de aire
hasta que aparezea la llama debida. Apriete el tornillo.
20.
Press the "OFF/CANCEL" pad. Oprima el bot6n de "OFF/CANCEL" (Apagado/Anulado).
21.
Replace flame spreader, oven bottom and oven racks. Vuelva a colocar el propagador de llama, la base del
homo y las rejillas del homo.
19
Loading ...
Loading ...
Loading ...