Loading ...
Loading ...
Loading ...
19
Basting
pan
The location of the burner allows the placement
of the rotisserie basting pan (included) beneath
the food to collect juices and drippings for
basting and gravy. It also minimizes grease
drippings from accumulating on the heat
diffusers and in the grease tray.
To flavor the contents of the basting pan, you
can add herbs, onion, garlic or spices. Hams are
especially good with the addition of pineapple
slices and brown sugar to the basting pan.
To load
the spit
rod
1. To load the spit rod, slide one of the forks with
its prongs facing away from the flat end (right
side in illustration), onto the spit rod.
2. Push the pointed end of the spit rod through
the center of the food; then slide the second
fork, with the prongs toward the food, onto
the spit rod.
3. Center the food between the locating grooves
on the spit rod. Push the forks firmly together.
When cooking foods such as multiple chickens,
always place the thickest portion of the food
nearer the center of the spit rod.
4. Tighten the wing nuts with pliers. It may
be necessary to wrap the food with butcher’s
string to secure any loose portions. Never use
nylon or plastic string.
5. Once the food is secure, insert the pointed
end of the spit rod into the motor and lower
the flat end onto the rollers. Place the basting
pan beneath the food. It is normal for the spit
rod to flex when larger cuts of meat are being
cooked.
6. Attach the connecting cord to the receptacle
in the motor and to the receptacle in the left
front side of the grill.
7. Use the motor switch to turn the rotisserie
to High, Medium, Low or Off.
Locating grooves in the spit rod
Use the grooves in the spit rod as locating start
points for the forks. Center the forks and food
between them to make sure the food is
positioned in the front center of the rotisserie
burner.
30" and 42" models have one set of locating
grooves.
54" models have two sets of locating grooves.
To setup
the grill for
rotisserie
cooking
1. Open the hood.
2. Raise the warming shelf up and hook it in
the self-store position (see Warming Shelf
section).
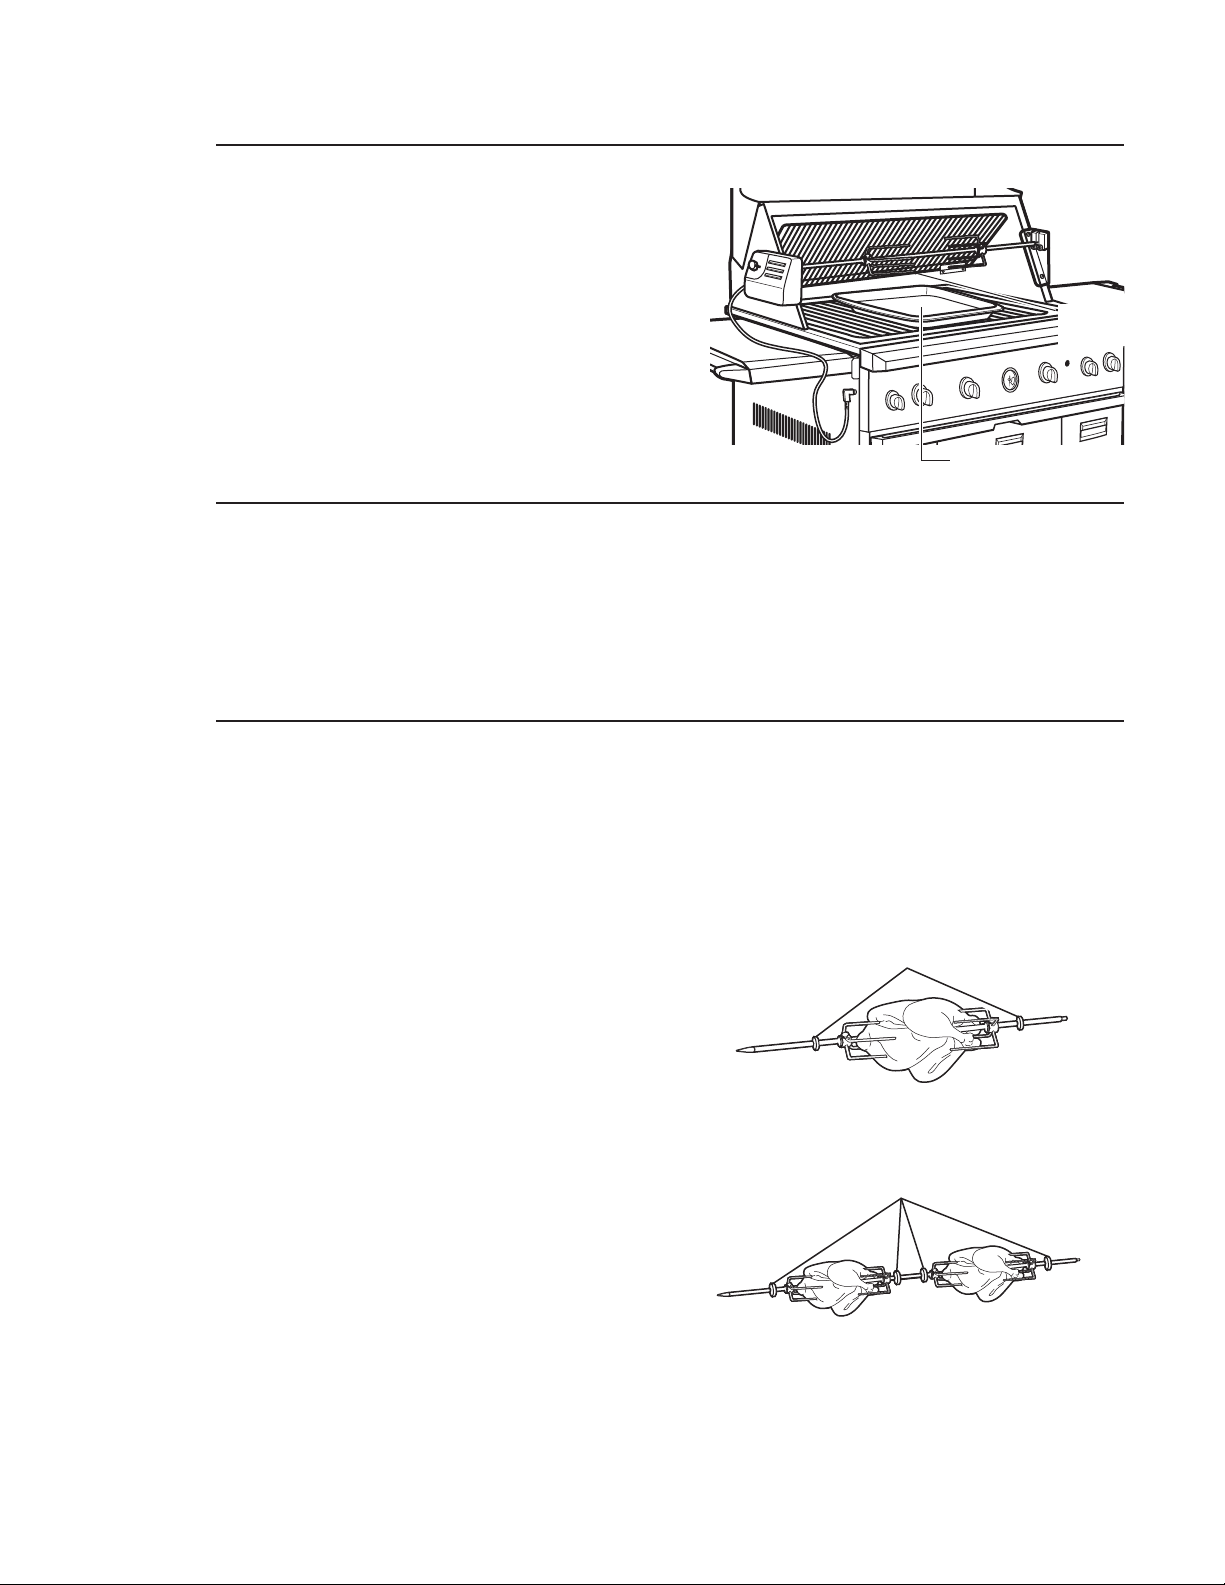
3. Place the basting pan on the grill grates.
4. Assemble the rotisserie motor and spit rod.
5. Use the ROTISSERIE controls only for rotisserie
cooking.
NOTE: When rotisserie cooking, use only the
rotisserie burner.
Basting pan
Locating grooves
Center food
over burner
Center food
over burner
Center food
over burner
Locating grooves
Rotisserie
burner
Loading ...
Loading ...
Loading ...