Loading ...
Loading ...
Loading ...
12
Before
lighting
the
outdoor
grill or
cooktop
WARNING: IMPORTANT!
Inspect the gas supply piping or hose prior
to turning the gas on. If there is evidence of
cuts, wear or abrasion, it must be replaced prior
to use. Any replacement pressure regulator
or hose assembly must be the type specified
by the manufacturer.
For LP use, the pressure regulator and hose
assembly supplied with the unit must be used.
This LP tank is equipped with overfill protection.
When you refill or trade in your tank, make sure
the one you receive also has overfill protection.
If the grill uses LP gas, connect the regulator
to the LP tank and check the hose and regulator
connections for leaks with a soap and water
solution before operating the grill.
Keep a spray bottle of soapy water near the gas
supply valve and check the connections for gas
leaks before each use.
Turn all knobs to OFF then turn on the gas
supply.
Do not use the grill if the odor of gas is
present.
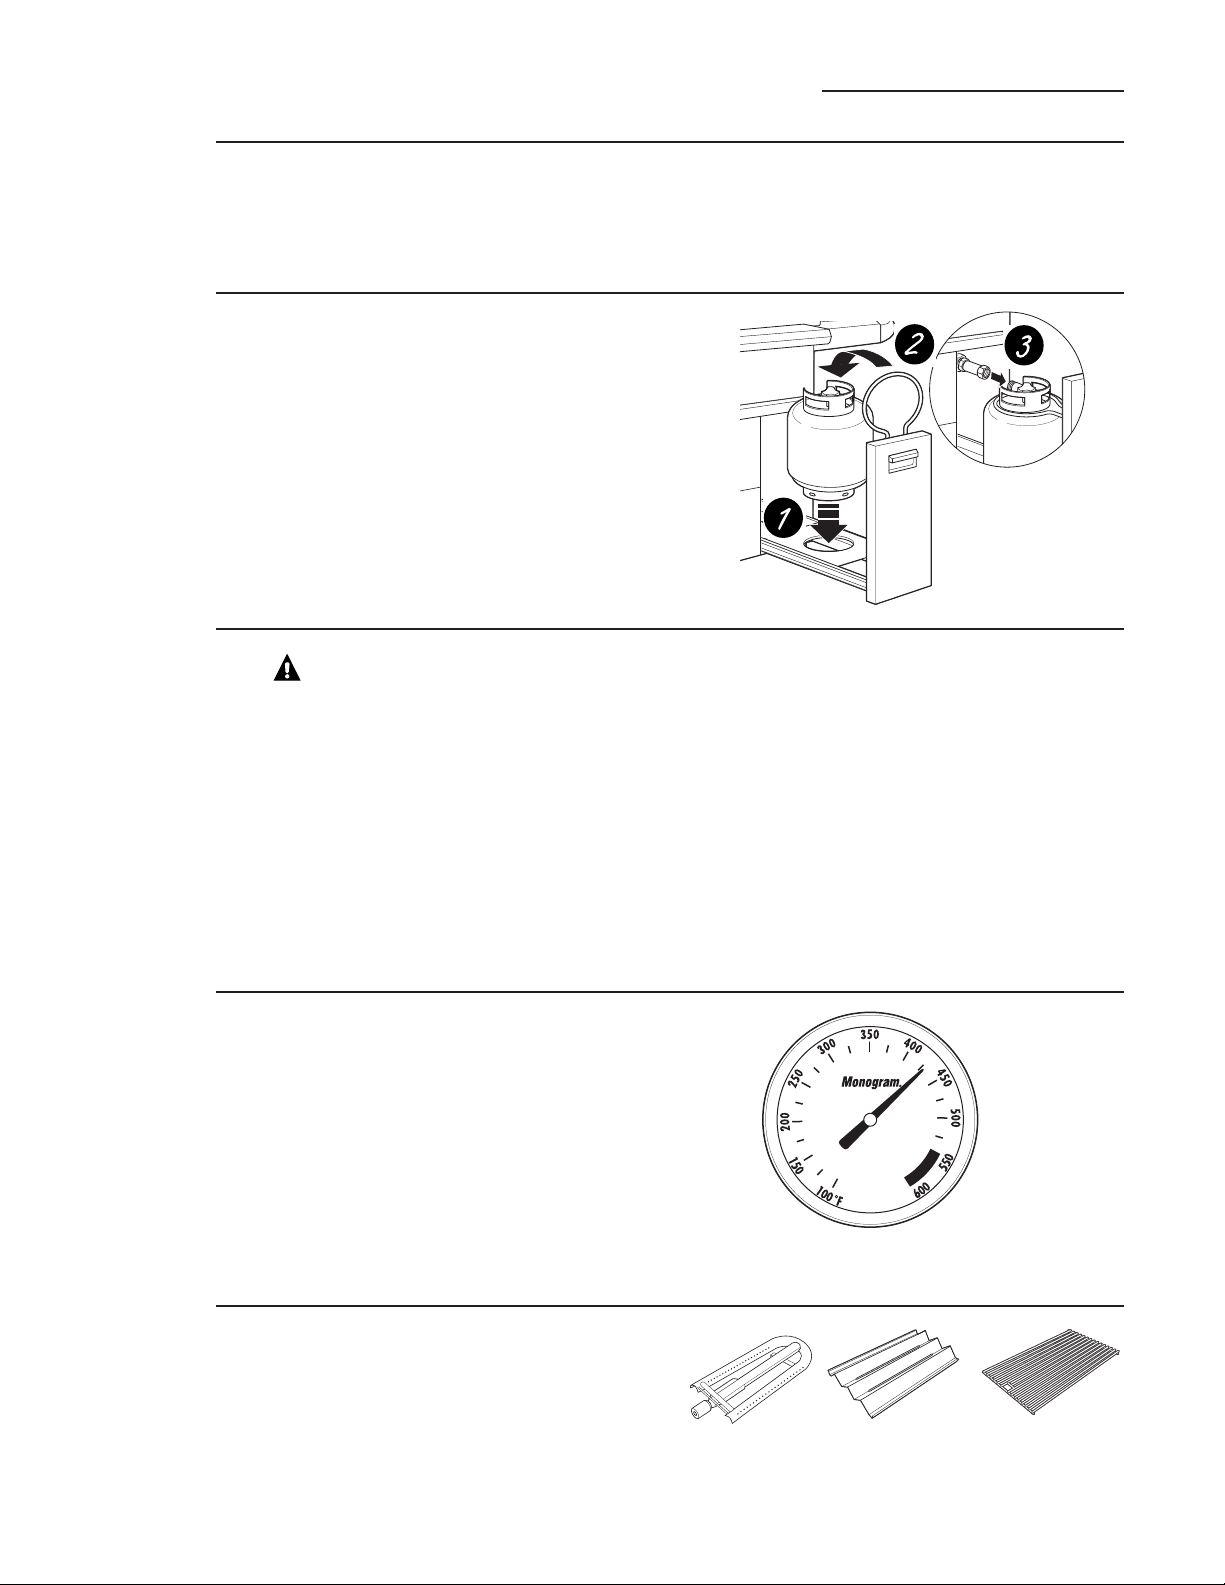
Main
grill
burners
The grill section consists of stainless steel grill
grates, stainless steel heat diffusers and
stainless steel main burners.
The grates provide the grilling surface.
The heat diffuser helps protect the main burner
ports from blockage and distributes heat.
Each main burner is rated at 25,000 BTUs.
The Grill
Professional Outdoor Grills & Cooktops
Grill grates
Heat diffuser
Main burner
Temperature
gauge
The temperature gauge is meant to be a general
indicator of surface temperatures with the hood
in the closed position. It is especially useful
during pre-heat when indicated temperatures
become stable (approximately 10–15 minutes
with all main burners on Hi).
NOTE: On models equipped with the Infrared
Sear Burner, the temperature gauge will not
respond when only that burner is turned on.
For the 54" grill model, the temperature gauge
will not respond if only the far left main burner
is turned on.
Temperature gauge
Tank drawer
with LP tank
retainer loop
(free-standing
models only)
To install the LP tank, fully extend the tank
drawer and lift the retainer loop. Place the tank
on the drawer bottom, inserting the loop on
the bottom of the tank through the hole in
the drawer bottom. Tilt the tank forward to lower
the retainer loop to engage the top ring on the
tank. Insert the coupler sleeve on the regulator
over the tank inlet; turn clockwise to tighten.
Do not overtighten the coupler (see Installation
Instructions). Open the tank valve when ready
to use the grill. Always close the tank valve
when cooking is complete.
Location
Allow 12" minimum clearance on both sides
and the back of the grill to adjacent vertical
combustible construction. See the Installation
Instructions for complete details.
Loading ...
Loading ...
Loading ...