Loading ...
Loading ...
Loading ...
Router Table Operation
INSTALLING THE ROUTER BIT (CUTTER)
ALWAYS MAKE SURE
THAT THE ROUTER IS TURNED OFF AND
THE POWER CORD IS UNPLUGGED BEFORE
MAKING ANY ADJUSTMENTS.
I
nstall the router bit according to the instructions
included with your router. Because of the large varia-
tion of router bits, certain router bits may not always
operate in the desired manner with this router table.
To ensure that the most popular bits will perform
satisfactorily, install the bit so that the router collet
engages 3/4″ of the router bit shank. If the shank
of the router bit bottoms out in the collet, back out
the router bit approximately 1/16″ to allow for
proper tightening.
NEVER INSTALL ROUTER BITS WITH LESS THAN
3/4″ OF SHANK ENGAGEMENT IN THE COLLET.
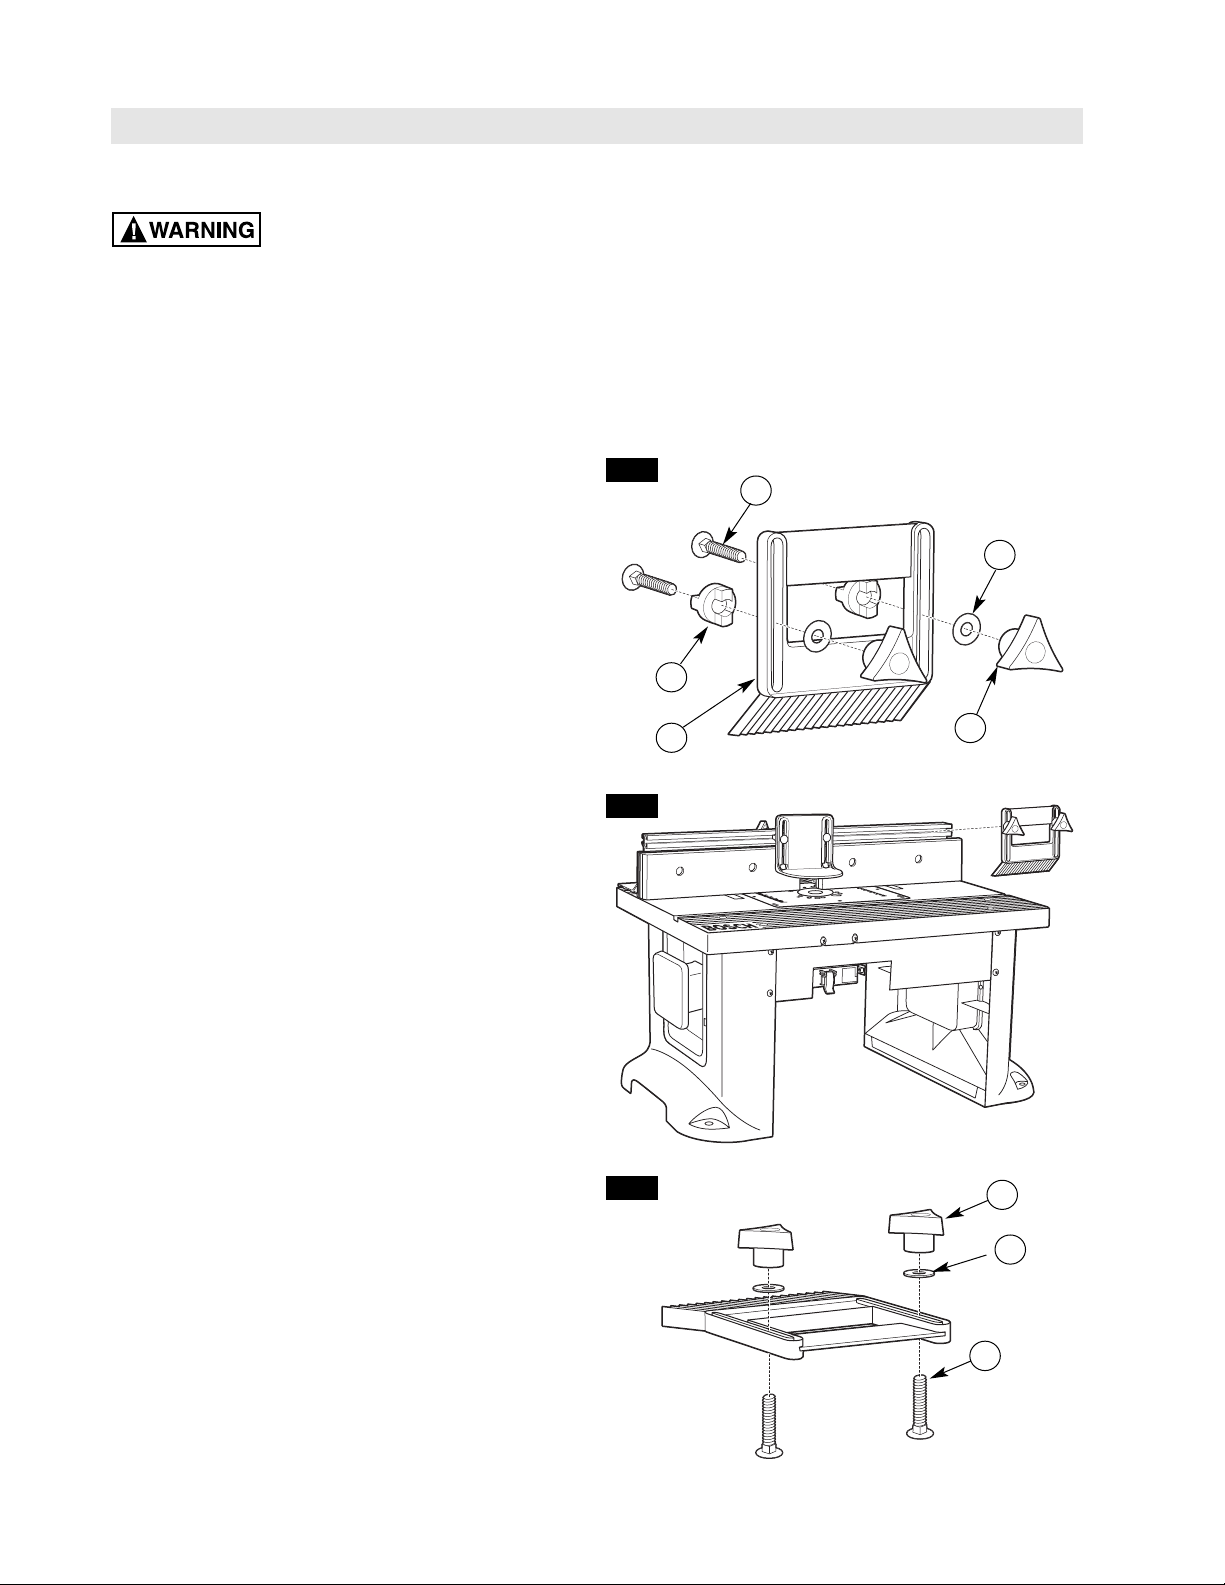
ASSEMBLING THE FEATHERBOARDS
(Figs. 18–20)
NOTE: The top/front side of each featherboard is
marked to indicate proper feed direction.
Fence Featherboard (Figs. 18 and 19)
1.Insert two 1/4-20 x 1
1
⁄2″ carriage bolts (31)
through the slotted holes in the featherboard (19).
See Fig. 18.
2.Slide a large washer (27) onto each carriage bolt and
thread a small clamping knob (17) three or four turns
onto each carriage bolt.
3.To install on the fence, slide a spacer (16) over the
head of each carriage bolt, aligning the tabs on the
spacer with the slot in the featherboard (Fig. 19).
Then slide the carriage bolt heads into the T-slot
on the top of the fence.
Tabletop Featherboard (Fig. 20)
1.Insert two 1/4-20 x 1
1
⁄2″ carriage bolts (31) through
the slotted holes in the featherboard (19).
2.Slide a large washer (27) onto each carriage bolt and
thread a small clamping knob (17) three or four turns
onto each carriage bolt.
3.To install the featherboard in the miter channel on
the tabletop, insert the heads of the carriage bolts
into the desired pair of keyhole slots on the tabletop
(located in the miter channel). Then tighten the
clamping knobs securely.
FIG. 18
FIG. 19
FIG. 20
31
16
19
17
17
31
27
24
27
Loading ...
Loading ...
Loading ...