Loading ...
Loading ...
Loading ...
10
Router Table Assembly
TOOLS REQUIRED (not included)
• Phillips screwdriver
• Small sized adjustable wrench
• Tape with adhesive backing (optional)
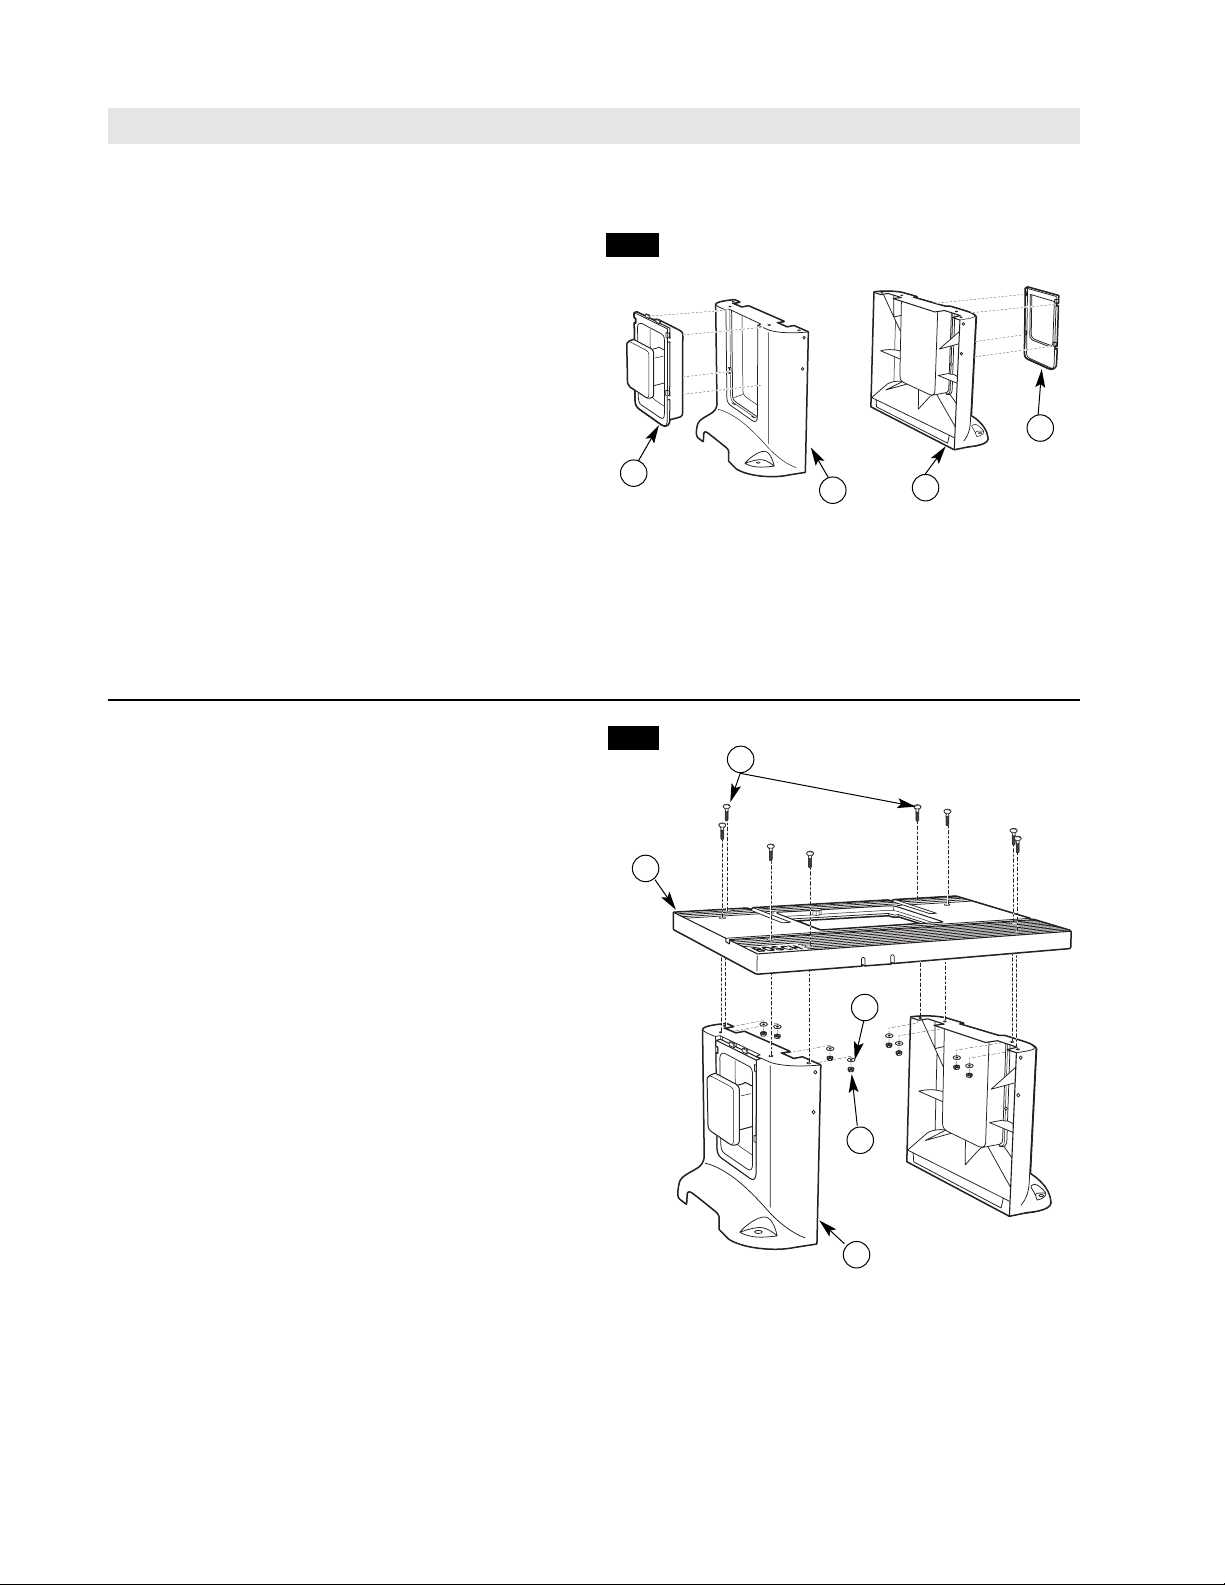
ROUTER TABLE LEGS (FIG. 2)
1. Insert eight 1/4-20 x 1
1
⁄2″ long carriage bolts (31)
through the router tabletop (1) as shown in Fig. 2.
2.Assemble the legs (6) to the router table as shown
in the figure.
3.Assemble a 9/32″ ID x 5/8 OD″ x 1/16″ thick
washer (27) and a 1/4-20 KEPS nut (26) onto
each of the bolts.
4.Securely tighten the fasteners.
NOTE: It may be easier to assemble the legs by
laying the router table on its front or back, or by using
adhesive tape over the carriage bolt heads to hold
them in place and turning the router table upside down.
FIG. 2
ASSEMBLING THE ROUTER TABLE
TABLE LEG INSERTS (FIG. 1)
The router table includes two table leg inserts:
• Leg storage panel (7) for convenient storage of acces-
sories
• Leg cord wrap panel (8)
The table leg inserts must be installed before attaching
the tabletop.
1.Place the table leg insert (7 or 8) into the opening in
the table leg (6) so that it is positioned at the very top
of the opening.
2.Press the insert in so that it is completely flush with
the leg.
3.Push the insert down as far as it will go to lock it
in place.
NOTE: The cord wrap panel has two tabs at the top
of the panel that lock under the table top. These tabs
help prevent the panel from coming unhooked when
wrapping or unwrapping the cord.
FIG. 1
8
31
6
6
7
27
26
6
1
Loading ...
Loading ...
Loading ...