Loading ...
Loading ...
Loading ...
32
GB
BDV-N9200W/BDV-N9200WL/BDV-N7200W/BDV-N7200WL/BDV-N5200W
4-485-800-17(1)
D:\NORM'S JOB\SONY HA\SO150030\BDV-N9200_7200_5200_E3200
(PMRF)\4485800171_GB (CEK)\050PLA.fm
masterpage: Left
2 Prepare for BD-LIVE (BD-LIVE
only).
• Connect the system to a network
(page 25).
• Set [BD Internet Connection] to
[Allow] (page 59).
3 Insert a BD-ROM with
BONUSVIEW/BD-LIVE.
The operation method differs
depending on the disc. Refer to the
operating instructions of the disc.
To delete data in the USB memory, select
[Delete BD Data] in [Video], and press
. All data stored in the buda folder will be
deleted.
You can enjoy Blu-ray 3D Discs with the
3D logo*.
*
1 Prepare for Blu-ray 3D Disc
playback.
• Connect the system to your
3D-compatible TV using a High
Speed HDMI cable (page 22).
• Set [3D Output Setting] and [TV
Screen Size Setting for 3D] in
[Screen Settings] (page 56).
2 Insert a Blu-ray 3D Disc.
The operation method differs
depending on the disc. Refer to the
operating instructions supplied with
the disc.
Refer also to the operating instructions of
your 3D-compatible TV.
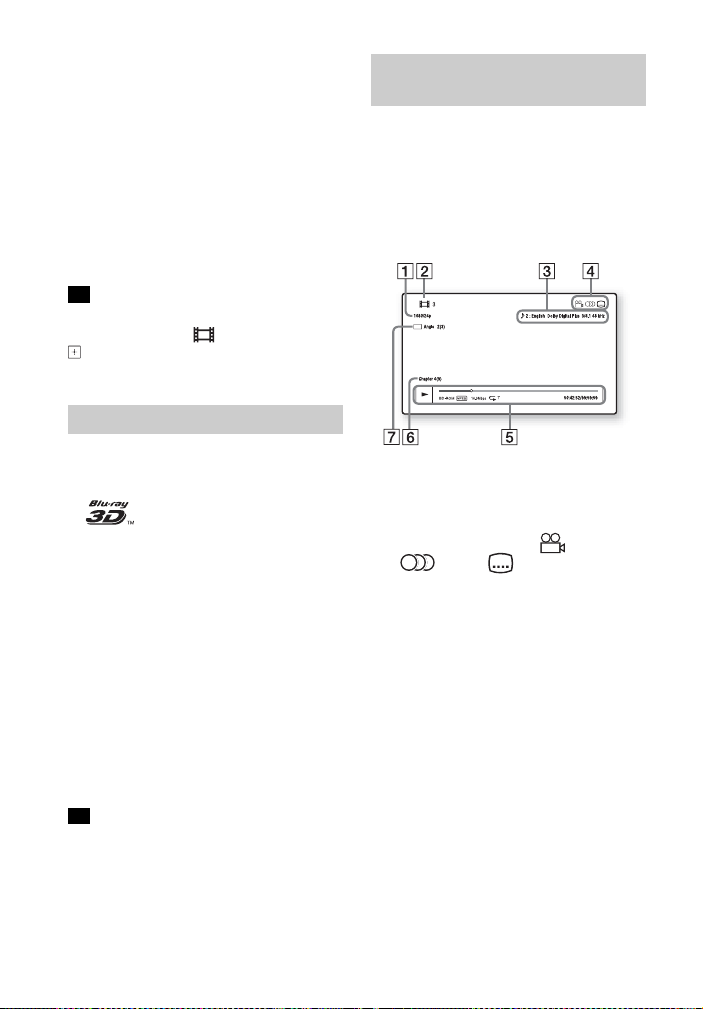
You can check the playback
information, etc., by pressing DISPLAY.
The displayed information differs
depending on the disc type and system
status.
Example: when playing a BD-ROM
A Output resolution/Video frequency
B Title number or name
C The currently selected audio setting
D Available functions ( angle,
audio, subtitle)
E Playback information
Displays play mode, playing status
bar, disc type, video codec, bit rate,
repeat type, elapsed time, total
playing time
F Chapter number
G The currently selected angle
Tip
Enjoying Blu-ray 3D
Tip
Displaying the playback
information
Loading ...
Loading ...
Loading ...