Loading ...
Loading ...
Loading ...
5. To put the retractor in the automatic locking mode, do the following:
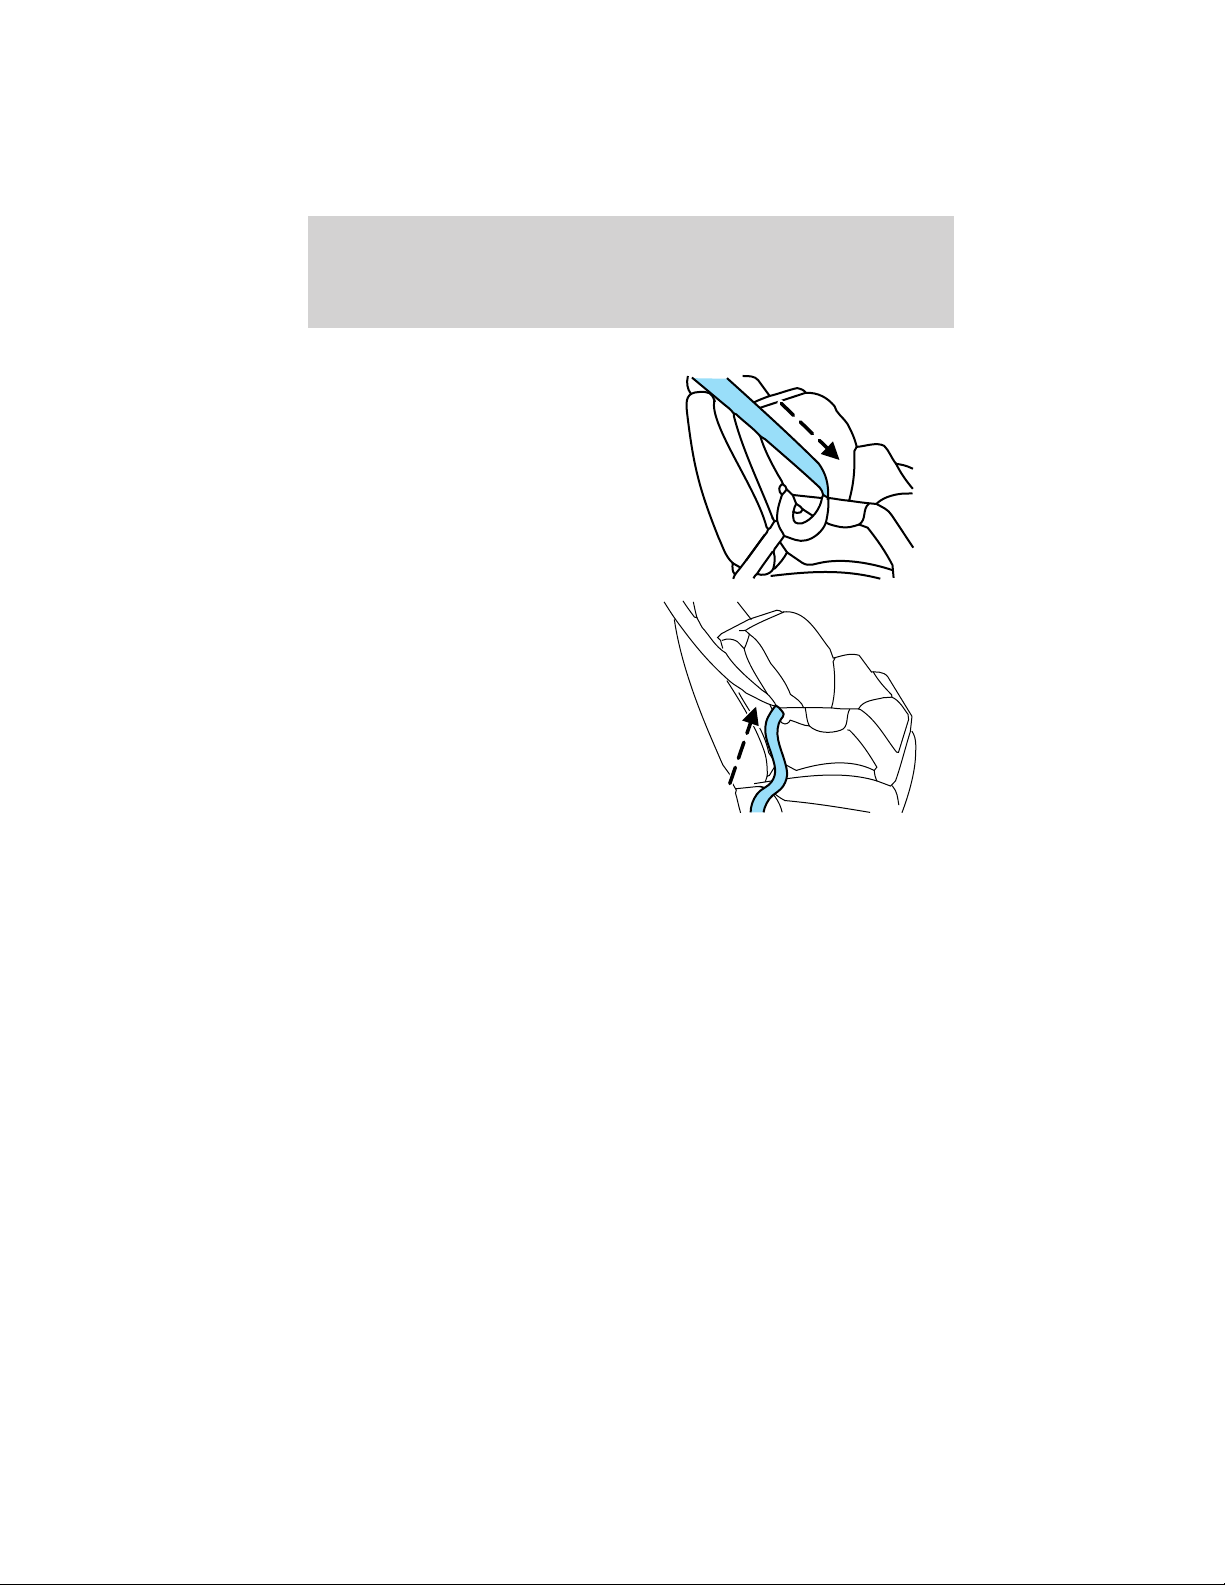
• Standard safety belt: grasp the
shoulder portion of the belt and
pull downward until all of the belt
is pulled out.
• Inflatable safety belt: grasp the
lap portion of the inflatable safety
belt and pull upward until all of
the belt is pulled out.
Note: Unlike the standard safety
belt, the inflatable safety belt’s
unique lap portion locks the child
seat for installation. The ability for
the shoulder portion of the belt to
move freely is normal, even after
the lap belt has been put into the
automatic locking mode.
6. Allow the belt to retract to remove slack. The belt will click as it
retracts to indicate it is in the automatic locking mode.
7. Try to pull the belt out of the retractor to make sure the retractor is
in the automatic locking mode (you should not be able to pull more belt
out). If the retractor is not locked, repeat Steps 5 and 6.
8. Remove remaining slack from the belt. Force the seat down with extra
weight, e.g., by pressing down or kneeling on the child restraint while
pulling up on the shoulder belt (for standard safety belt) or pulling down
on the lap belt (for inflatable safety belt) in order to force slack from the
belt. This is necessary to remove the remaining slack that will exist once
the additional weight of the child is added to the child restraint. It also
helps to achieve the proper snugness of the child seat to the vehicle.
Sometimes, a slight lean towards the buckle will additionally help to
remove remaining slack from the belt.
Seating and Safety Restraints
218
2011 Explorer (exp)
Owners Guide, 4th Printing
USA (fus)
Loading ...
Loading ...
Loading ...