Loading ...
Loading ...
Loading ...
English
65
123
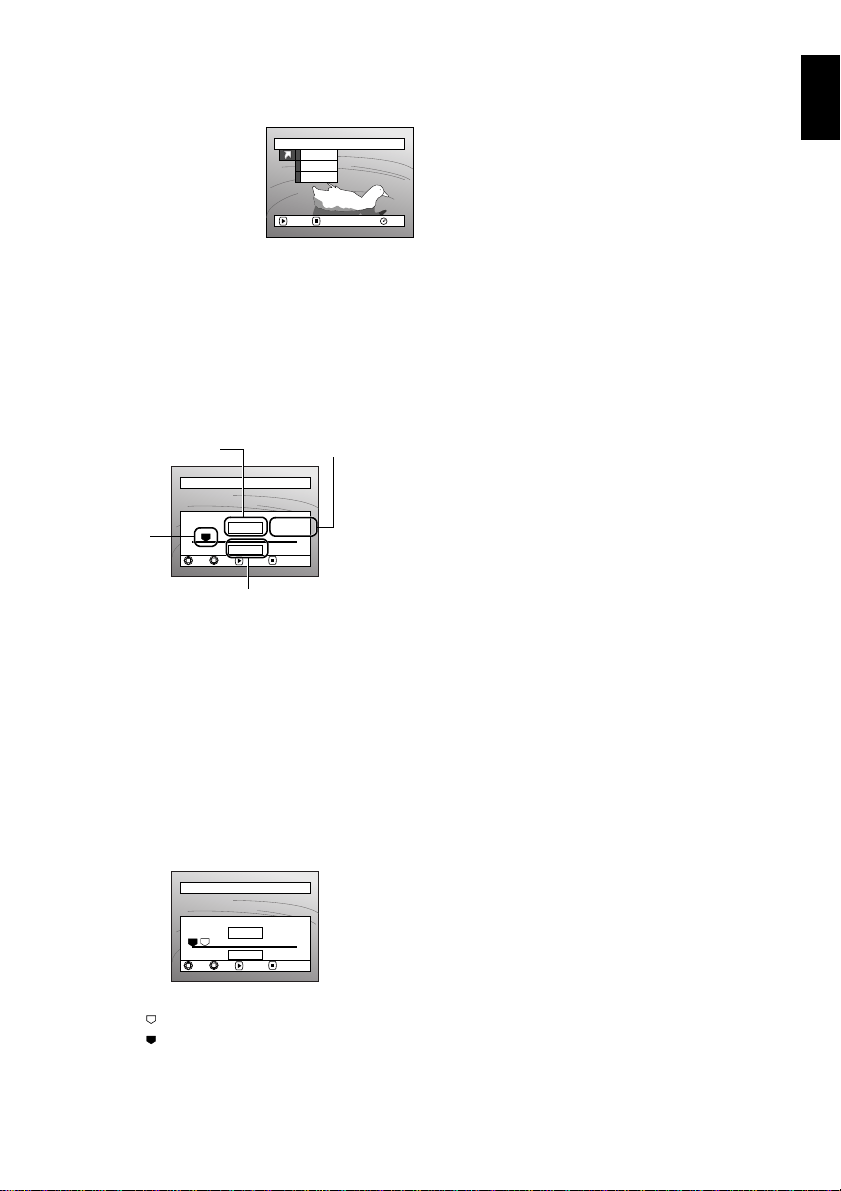
JUMPING TO SPECIFIED POINT (GO TO)
1Press the MENU button
during playback.
2Choose the option (point
you want to go to), and
then press the A
button.
Top :To go to the start, and enter playback
pause.
End : To go to the end of last scene, and enter
playback pause.
Specify :To go to a specified point and enter
playback pause. See the following for
details.
●Specifying the point to view
1Choose “Specify” in step 2 above, and then
press the A button.
The screen for specifying the point to go to will
appear.
2Use the joystick to select the desired time of
chosen point.
Tilt up : To select the start.
Tilt down : To select the end.
Tilt to left or right :
·Press once: To move the cursor in 10-
second units (1-still units
for card)
·Hold down: To move the cursor in 1-
minute units (10-still
units for card)
3Press the A button to enter the selection.
The DVD video camera/recorder will go to the
specified point and enter the playback pause
status.
Pressing A again will start playback.
To cancel the “Go To” procedure midway, press the
C button before going to the specified point.
Note:
• If multiple scenes are selected using the Disc Navigation
function or SELECT button, choosing “Top” will jump to
the beginning of selected scenes (P. 136).
• When multiple scenes are selected, the total time of
selected scenes will appear in the “total recording time”
display.
• With card, the number of stills will appear at the “TOP”,
“CURRENT”, “END” and “GO TO” indicators.
• The cursor may not move at same-pitch intervals.
Go To
RAM
ENTER RETURN
End
Speci fy
Top
Go to
TOP END
ENTER
CANCEL
GO TO
0:00:00 0:24:240:03:26
0:03:26
TOP ENDCURRENT
Position of currently
played back image
Total recording time of
all selected scenes
Cursor
Cursor position
Go to
TOP END
ENTER
CANCEL
TOP
GO TO
ENDCURRENT
0:00:00
0:00:00 0:24:240:03:26
(When the start of scene is selected)
Cursor at current image position.
Cursor at (GO TO) position.
Loading ...
Loading ...
Loading ...