Loading ...
Loading ...
Loading ...
20
GUIDE MENU: TIMER RECORD, COPY
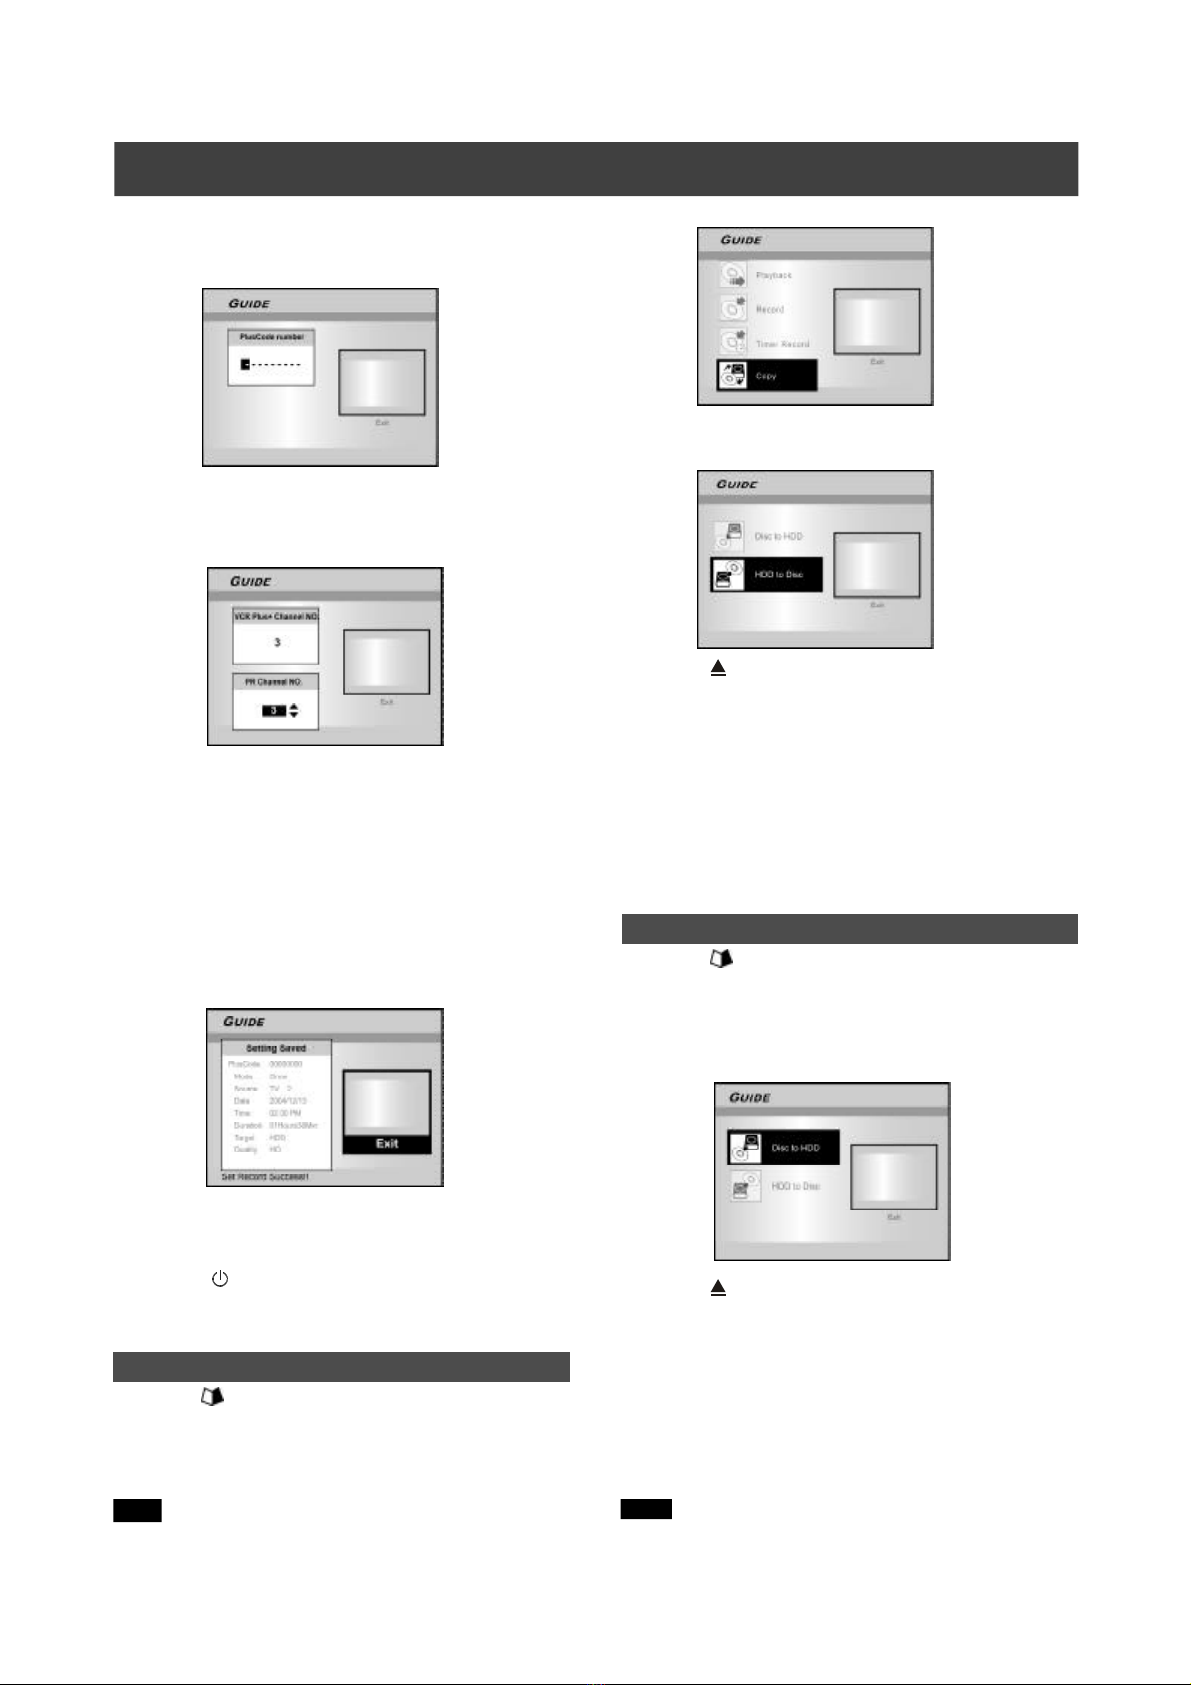
5. Use the numbered buttons to enter the PlusCode
number and then press [OK] .
6. After entering the PlusCode numbers, the “GCN”
and “Present channel” will be displayed. Press [OK]
to preset the “Channel.”
7. Press [p][q] to select “DVD” or “HDD” and then
press [OK] .
8. Press [p] [q] to select “Recording mode” and
then press [OK].
The “Just Fit” recording mode is only applicable when recording on
a DVD disc.
9. The “Timer Record information” will be displayed.
Press [OK] to confirm the settings.
10.Press [u] and [ OK] to exit the timer record
settings for VCR Plus+
®
.
11. Press [ STANDBY] to turn the recorder off
to activate Timer Record function.
3. Press [p] [q] to select “From HDD to DVD” and
press [OK].
4. Press [ OPEN/CLOSE] to open the disc tray and
insert a recordable DVD disc. Press the button
again to close the tray.
The disc preparation process will take place in the background.
This process only takes a few moments.
5. Press [p] [q][t] [u] to select the file to copy and
press [OK].
6. When complete, go to “EXIT” and press [OK].
Copy (From DVD to HDD )
1. Press [ GUIDE] to display the Guide menu.
2. Press [p] [q] to select “Copy” and press [OK].
3. Press [p] [q] to select “From DVD to HDD” and
press [OK].
4. Press [ OPEN/CLOSE] to open the disc tray and
insert the DVD disc. Press the button again to
close the tray.
5. Press [p] [q][t] [u] to select the file to copy and
press [OK].
6. When complete, go to “EXIT” and press [OK].
Note:
You can only copy picture files (in JPEG or BMP formats), audio
files (in MP3 format) and recorded video titles.
Copy (From HDD to DVD)
1. Press [ GUIDE] to display the Guide menu.
2. Press [p] [q] to select “Copy” and press
[OK].
Note:
You can only copy picture files (in JPEG or BMP formats), audio
files (in MP3 format) and recorded video titles.
Loading ...
Loading ...
Loading ...