
Safety Instructions
WARNING:
STRANGULATION HAZARD-Children have STRANGLED in cords . Keep this
cord out of the reach of children (more than 3 ft (1m) away).
NEVER PLACE THE CAMERA OR CORD IN OR NEAR CRIB OR PLAYPEN. Secure
the cord at least 3 ft away from crib or playpen.
01 02
CHOKING HAZARD-This product contains small parts which may cause choking.
SHOCK WARNING-To prevent electric shock, NEVER use the transmitter or receiver near water, including near a bathtub, sink,
laundry tub, wet basement, etc.
CAUTION-Only insert a battery pack of the same type. Risk of explosion if battery is replaced with an incorrect type.
Use only the DC adapters provided.
Adult assembly is required. Keep small parts away from children when you are assembling.
This product is not a toy. Do not allow children to play with it.
This product is NOT intended to replace proper adult supervision of children.
You MUST check your child's activity regularly, as this product will not alert parents to silent activities of a child.
Before using this product, read and follow all instructions and warnings contained in this booklet.
Do not allow water damage to the camera unit, monitor unit, power adapter, or charging cable which cause overheat of
the charging components.
(ŲŦŲƭƵơĞƵŦŲȆĐŃóśƭľŃƙėƖóƙƭǔĐľóƙķŃŦķĐóďśĞơƭŲĐľóƙķĞƭľĞėĞǍŃĐĞɔ¾ľis may result in overheat of the charging port.
Only use the charging cables provided in the box.
(ŲŦŲƭƵơĞƵŦŲȆĐŃóśƭľird party power adapters, especially high wattage adapters. This may result in overheat of the cable
and/or charging port. Only use the adapter provided in the box.
These devices, including Baby Camera and Baby Monitor, comply with P art 15 of the FCC rules. Operation is subject to
the following two conditions:
These devices may not cause harmful interference.
These devices must accept any interference received, including interference that may cause undesired operation.
Class B Digital Device. This equipment have been tested and found to comply with the limits for a Class B digital device
pursuant to Part 15 o f the FCC Rules. These limits are designed to provide reasonable protection against harmful
interference in a residential installation. This equipment generates, uses, and can radiate radio frequency energy and,
if not installed and used in accordance with the instructions, may cause harmful interference to radio communications.
However there is no guarantee that interference will not occur in a particular installation. If this equipment does cause
harmful interference to radio or television reception, which can be determined by turning the ĞƘƵŃƖŤĞŦƭŲȅóŦėon, the
user is encouraged to try to correct the interference by one or more of the following measures.
FCC Statements
Warn user. The Federal Communications Commission warns theƵơĞƙơƭľóƭĐľóŦķĞơŲƙŤŲėŃȊĐóƭŃŲŦơŲĶƭľĞƵŦŃt not expressly
approved by the party responsible for compliance could void the user’s authority to operate the equipment.
Reorient or relocate the receiving antenna.
Increase the distance between the equipment and receiver.
!ŲŦŦĞĐƭƭľĞĞƘƵŃƖŤĞŦƭŃŦƭŲóŦŲƵƭśĞƭŲŦóĐŃƙĐƵŃƭėŃȅĞƙent from that to which the receiver is connected.
Consult an experienced radio / TV technician for help.
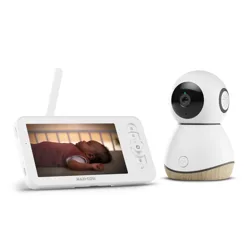
BME40P Baby Monitor
BME40P
User Manual
03
Product Overview
3
7
5
14
12
10
1
11
2
4
6
8
9
15 16
13
17
3
1
10
2
4
5
9
6
7
8
B
o
tt
om
1.
Me
n
u
2. PTZ(Default)/Volume & Brightness
3
. Volume -
/
Left Butto
n
4. Volume + / Right Butto
n
7. OK
/
Switch Camer
a
6
. Brightness - / Down Button
5. Brightness + / Up Button
9
. P
o
w
e
r B
u
tt
o
n
8. Ta
lk
Button
10. Micro
p
hone
11. V
olu
m
e
LED
12.
Sc
r
ee
n
1
3
. U
S
B-
C
P
o
rt
14. Spea
k
e
r
1
5
.
S
t
a
n
d
16.
A
ntenna
17. R
eset
1. Lig
h
t Sensor
3. Microp
h
one
2. L
e
n
s
4. S
p
eaker
5.
A
ntenna
7. U
S
B-C Por
t
8. P
o
w
e
r LE
D
9. WiFi ON
/
OFF Switc
h
6. Tem
p
erature Sensor
1
0
. P
a
ir B
u
tt
o
n
04 05
Input Voltage:
Operating Power:
LCD Display:
Power Adapter:
Charging Cable:
Full Charging Time:
Duration(Standby Mode):
Duration(Screen ON):
Monitor Dimensions (L x W x H):
5V
<1000mA
4.3"TFT
5V,1A
80 in
6 Hours
20 Hours
11 Hours
5.91x3.15x0.71 in
Monitor Unit
0806 07
Menu Options Overview (Lower Screen Bar)
Icon Description Option
Camera Options
Alarm Setting
Temperature Unit
VOX Sensitivity
Screen speaker out
Alarm Volume
Lullaby
Screen Brightness
Getting Started
NOTE: Only use the enclosed camera Power Adapter.
Menu Options
Status Indication Overview (Upper Screen Bar)
Icon Description Option
Camera Selected
Night Vision
Alarm Setting
Lullaby
Current Camera
Unit Temperature
Signal Strength Indicator
cam 1/cam 2/ cam 3/cam 4
scan 1/scan 2/scan 3/scan 4
Battery Power 5 levels
ɦŲŦɚŲȅɧ
ɦŲŦɚŲȅɧ
ɦŲŦɚŲȅɧ
ɦŲŦɚŲȅɧ
34-97 F / 1-36 C
5 levels
VOX Sensitivity
/
WiFi 5 levels
Charging and Powering in the Baby Monitor
Turn on the Camera Unit
Only use the USB-C adapter included in this package.
Use the provided USB-C adapter to connect the wall outlet with the
camera unit.Once the adapter is connected, the unit will turn on automatically
and the power LED will light up.
Placement of the Baby Monitor
This camera can be placed on a tabletop or on the wall. Place the baby
monitor in an airy place. Do not place on soft quilts or blankets or in the
corners of cupboards, shelves, etc.
Baby monitors and cameras with power cords should never be hung
on or near the crib as it can cause strangulation hazard. Power
cords should be kept no less than 3 ft away from the crib and the
baby's reach at all times.
Place the baby monitor away from heat sources such as radiators ,
chimneys, cookers and direct sunlight.
Place the camera unit away from TV sets, microwave oven and radios.
The intense radio signals generated by these elements could cause
noise or even deteriorate sounds and images which appear on the monitor.
If this occurs, move the camera to another location.
Place the camera within 15 feet of the area being monitored for best
picture result.
±ƖĞĐŃȊĐóƭŃŲŦơ
System General
Model Number:
RF Frequency:
Optional Camera Channels:
Operating Temperature Range:
Origin:
Wireless Communication:
TX-RX Transmission Range:
BME40P
2400 ~ 2483.5MHz
4
0°C - 50°C
Made in China
WiFi/FHSS
1200ft
Input Voltage:
Operating Power:
IR/Night Vision:
Picture Sensor:
Operating Temperature:
Power Adapter:
Charging Cable:
Exposure Control:
White Balance Control:
Vertical Turning Angle:
Horizontal Turning Angle:
Other Special Features:
Camera Dimensions (L x W x H):
5V
<800mA
YES
GC1084
0℃- 50℃
5V,1A
80 in
Auto
Auto
Tilt down 90°
Manual 330°
Built in Microphone/speaker
2.76x2.76x4.33in
Camera Unit
/ / /
/ / /
Turn on the Monitor Unit
We suggest to connect the monitor to the adapter plugged into the mains
whenever possible, in order to keep the battery charged.
Once monitor unit turned on, the power LED will light up and the image
will display on the LCD screen.
Press and hold the power button on the lower right of the keypad.
Only use the USB-C adapter included in this package.
The monitor unit is supplied with a built-in rechargeable Li-ion battery.
2
Overview
What's in the Box
1 x User Manual
1 set for BME40P
2 set for BME40P-2
1 set Power Adapter 1 set Power Adapter1 x Baby Camera
NOTE: Power adapter varies by region.
1 x Baby Monitor
01
02
02
03
04
05
06
06
07
09
09
09
10
11
17
18
18
18
18
Safety Instructions
Overview
What's in the Box
Product Overview
±ƖĞĐŃȊĐóƭŃŲŦơ
Menu Options
Getting Started
Charging and Powering the Baby Monitor
Placement of the Baby Monitor
Using the BME40P Baby Monitor
Work with Plug&Play Display
Registration (Pairing)
OSD Mode Operation
Menu Operation
Work with Smartphone
Customer Service
Warranty policy
Contact Us
Trouble Shooting
Table of Contents
BME40P TX: This equipment complies with FCC radiation exposure limits set forth for an uncontrolled environment. This
equipment should be installed and operated with minimum distance 20cm between the radiator & your body.
ǎóƙŦŃŦķƭľóƭďóƭƭĞƙŃĞơɦďóƭƭĞƙǔƖóĐŘŲƙďóƭƭĞƙŃĞơŃŦơƭóśśĞėɧơľóśśŦŲƭďĞĞǓƖŲơĞėƭŲĞǓĐĞơơŃǍĞľĞóƭơƵĐľóơơƵŦơľŃŦĞɏȊƙĞ
or the light.
1) Replacement of a battery with an incorrect type that can defeat a safeguard;
ȑɧ(ŃơƖŲơóśŲĶóďóƭƭĞƙǔŃŦƭŲȊƙĞŲƙóľŲƭŲǍĞŦɏŲƙŤĞĐľóŦŃĐóśśǔĐƙƵơľŃŦķŲƙĐƵƭƭŃŦķŲĶóďóƭƭĞƙǔɏƭľóƭĐóŦƙĞơƵśƭŃŦóŦĞǓƖśŲơŃŲŦə
3) Leaving a battery, in an extremely high temperature surrounding environmentthat can result in an explosion or the leakage of
ȋóŤŤóďśĞśŃƘƵŃėŲƙķóơə
ȓɧďóƭƭĞƙǔơƵďŕĞĐƭĞėƭŲĞǓƭƙĞŤĞśǔśŲǎóŃƙŲƙƖƙĞơơƵƙĞƭľóƭŤóǔƙĞơƵśƭŃŦóŦĞǓƖśŲơŃŲŦŲƙƭľĞśĞóŘóķĞŲĶȋóŤŤóďśĞśŃƘƵŃėŲƙķóơɔ
Battery Capacity: 3.7V 2500mAh 9.25Wh
Type: Li-ion Battery
Delete a camera
2h / 4h / 6h / OFF
ON / OFF
Add (Pair) a camera
View a camera
Scan all cameras
Camera speaker volume
6LP\NH
9:41
1
Press the MENU button and the menu bar will show.
Press the LEFT button or RIGHT button until the tempera-
ture icon is highlighted.
Press the UP button or Down button to select between ℃ or
℉ɏóŦėƖƙĞơơƭľĞhďƵƭƭŲŦƭŲĐŲŦȊƙŤɔ
Press the MENU button and the menu bar will show.
Press the LEFT button or RIGHT button until the warning
volume icon is highlighted.
Press the UP button or DOWN button to select ON / OFF.
18
Customer Service
Warranty policy
We guarantee 12 months warranty and professional after-sale service
within 24 hours.
Contact Us
UĶǔŲƵľóǍĞóŦǔƘƵĞơƭŃŲŦơɏƖśĞóơĞĶĞĞśĶƙĞĞƭŲĐŲŦƭóĐƭƵơǍŃóŲƵƙŲȆĐŃóś
email address:
Trouble Shooting
No reception on The
Monitor
Interference or Poor
Reception
Audio Feedback
(High Pitched Noise)
Frozen Picture on
Screen
Move the monitor close to the camera.
The camera or monitor may be placed too close to many metal
objects.
Other electronic devices may be interfering with the signal.
The battery power may be too low
The camera and monitor may be placed too closed.
The volume on the monitor may be set too high.
Repower the baby unit (plug out the adapter, then plug it into the
socket again).
Press the RESET key at the back of parent unit.
The power adapters may not be properly connected.
!ŲŦȊƙŤƭľóƭƭľĞĐóŤĞƙóóŦėŤŲŦŃƭŲƙóƙĞvɔ
Camera may be far away from the monitor.
Camera and monitor may not be properly paired; follow
Registration (Pairing) instructions.
13
Press the MENU button and the menu bar will show.
Press the LEFT button or RIGHT button until the cam
icon is highlighted and the camera add / camera delete /
camera view / camera scan / camera speaker out
menu will show.
Press the UP button or DOWN button to select the view
ŃĐŲŦɏóŦėƖƙĞơơƭľĞhďƵƭƭŲŦƭŲĐŲŦȊƙŤɔ
Please refer to the instructions for camera pairing on Page 9.
Camera Control
Add (Pair) a Camera
NOTE:
A cam channel needs to be deleted before pairing to a new
camera unit.
Delete a Camera
Press the MENU button and the menu bar will show.
Press the LEFT button or RIGHT button until the cam
icon is highlighted and the camera add / camera delete /
camera view / camera scan / camera speaker out
menu will show.
Press the UP button or DOWN button to select the delete
ŃĐŲŦɏóŦėƖƙĞơơƭľĞhďƵƭƭŲŦƭŲĐŲŦȊƙŤɔ
/ / / will show, press the UP button or
DOWN button to select the desired cam, and press the OK
button to delete that registration on your monitor unit.
1
2
3
4
View a Camera
1
2
3
is low sensitivity level.
is medium sensitivity level.
is high sensitivity level.
VOX Mode default:OFF
Press the MENU button and the menu will show.
Press the LEFT button or RIGHT button until the lullaby
icon is highlighted.
Press the UP button or DOWN button to select one of the 5
available lullabies, single or sequential playing , or stop playing
Press the MENU button to Exit.
Press the Volume&Brightness function key , and the
keypad indicator will be displayed on the screen.
Press the power button to get into the SLEEP MODE.
jŲŦķƖƙĞơơƭľĞƖŲǎĞƙďƵƭƭŲŦƭŲƭƵƙŦŲŦɚŲȅƭľĞơĐƙĞĞŦɔ
09 10 11
Using the BME40P Baby Monitor
Registration (Pairing)
Work with Plug&Play Display
The Camera Unit is pre-registered to your monitor unit. You do not
need to register it again unless the Camera Unit loses its pairing with
the monitor unit. To re-register your Camera Unit, or register a new
Camera Unit, follow the procedure below:
Press the MENU button of the monitor unit and the menu bar will
pop up.
Press the LEFT button or RIGHT button until icon is highlighted.
Press the UP button or DOWN button until icon is highlighted
and press the OK button.
Press the UP button or DOWN button to select the desired cam
and press the OK button to create the registration (pairing) QR
code.
Turn on the camera, slide the switch to the 'WIFI' position, press and
hold the PAIR button on the bottom of the device for 3 seconds.
¦śĞóơĞơĐóŦ¨©ĐŲėĞóŦėȊŦŃơľƭľĞƙĞķŃơƭƙóƭŃŲŦɦƖóŃƙŃŦķɧɔ
NOTE: If a particular Camera Unit was previously registered with
another monitor unit, registering with the current monitor unit will
overwrite the old registration on the camera Unit.
OSD (On Screen Display) Mode Operation
±ĐƙĞĞŦȅɚ¦ŲǎĞƙȅ
Press the Volume&Brightness function key , and the
keypad indicator will be displayed on the screen.
Volume Adjustment
Brightness Adjustment
Press the UP button to increase the brightness.
Press the DOWN button to decrease the brightness.
Press the Right button to increase the volume.
Press the Left button to decrease the volume.
12
Talk to Baby
To talk, press and hold the TALK button. Release the button when
youľóǍĞȊŦŃơľĞėtalking to and want to listen from the baby's room
again. Bear in mind that you will not be able to listen to your baby
while talking to the monitor. You will have to stop pressing this button
before listening to your baby. When you are using this function, the
talk icon will be displayed on the screen.
VOX Setting
NOTE:
1
2
3
This mode allows you to control the sound activation of your baby
monitor. If there is no sound around the camera within 5min, it will
stop the transmission. The monitor screen will turn ŲȅǎľĞŦƭľĞ camera
is not transmitting. When the camera detects the sound exceeding
the sensitivity level, it will start transmitting the signal to the monitor
and alert the user. To change the VOX level, please follow the instructions
below:
Press the MENU button and the menu will show.
Press the LEFT button or RIGHT button until the vox icon
is highlighted, then press the UP button or DOWN button to
ơĞśĞĐƭėĞơŃƙĞėśĞǍĞśɔ¦ƙĞơơƭľĞhďƵƭƭŲŦƭŲĐŲŦȊƙŤɔ
Press the MENU button to exit.
Menu Operation
2
3
4
NOTE:
Once the lullaby starts playing on, the lullaby icon will display
on the top of the screen.
Lullaby sequential playing function will play all the lullabies
each time.
1
Lullaby Setting
Alarm Setting
2
3
4
Press the MENU button and the menu bar will pop up.
Press the LEFT button or RIGHT button until the alarm
icon is highlighted.
Press the UP button or DOWN button to select the desired time
from 2h, 4h, 6h and OFF. (The default setting is OFF).
¦ƙĞơơƭľĞhďƵƭƭŲŦƭŲĐŲŦȊƙŤɔ
1
When using the night vision mode, only black and white images will be
displayed on the monitor. (When the camera is in night vision mode,
the night vision icon will be displayed on the top of the screen).
Infrared Night Vision (Automatic)
The infrared night vision function allows the camera to pick up images
of your baby or the monitored area in dark or low light conditions.
Press the MENU button and the menu bar will show.
Press the LEFT button or RIGHT button until the warning
speaker volume icon is highlighted.
Press the UP button or Down button to select the desired
volume level.
14 15 16 17
Work with Smartphone
Set Camera Speaker Out Volume
This setting applies to following features on camera side:
Two way talk, lullaby, sound indications for camera status.
Press the MENU button and the menu bar will show.
Press the LEFT button or RIGHT button until the cam
icon is highlighted and the camera add / camera delete /
camera view / camera scan / camera speaker out
menu will show.
1
2
NOTE:
When in the scan mode, the monitor unit will stop scanning and
alert you if one of the camera unit is out of range or is not powered on.
Scan Camera
This function automatically cycles through your paired camera channels
to display each for 30 seconds. This function is only applicable if you
have more than 1 camera unit.
Press the MENU button and the menu bar will show.
Press the LEFT button or RIGHT button until the cam
icon is highlighted and the camera add / camera delete /
camera view / camera scan / camera speaker out
menu will show.
Press the UP button or DOWN button to select the scan
ŃĐŲŦɏóŦėƖƙĞơơƭľĞhďƵƭƭŲŦƭŲĐŲŦȊƙŤɔ
¾ľĞơĐƙĞĞŦǎŃśśėŃơƖśóǔƭľĞǍŃėĞŲĶƙŲŤėŃȅĞƙĞŦƭƖóired cameras in a
loop of , changing every 30 seconds.
1
2
3
4
/ / / will show, press the UP button or
DOWN button to select the desired camera unit to view.
4
Press the UP button or DOWN button to select the volume
ơĞƭƭŃŦķŃĐŲŦɏóŦėƖƙĞơơƭľĞhďƵƭƭŲŦƭŲĐŲŦȊƙŤɔ
Volume high / Medium / Low will show, press the up
button or DOWN button to select the desired level, and press the
hďƵƭƭŲŦƭŲĐŲŦȊƙŤɔ
3
4
Warning Volume Setting
1
2
3
Temperature Unit Setting
This setting turns on/ŲȅƭľĞóƵėŃŲɘďĞĞƖɘơŲƵŦėfrom the monitor
unit to alert you when the unit is low on battery or out of range.
1
2
3
Press the MENU button and the menu bar will show.
Press the LEFT button or RIGHT button until the warning
brightness icon is highlighted.
Press the UP button or Down button to select the desired
brightness level.
1
2
3
LCD Screen Brightness Setting
1
2
3
LCD Screen Speaker Volume Setting
3. Ready to begin
Now start your journey with
Simyke camera!
1.Download & Register
Download the App and follow
the onscreen instructions to
complete your initial registration
9:41
/RJLQ
&UHDWH$FFRXQW
%\FOLFNLQJŊ/RJLQŊRUʼn&UHDWH$FFRXQWŊ\RX
DJUHHGZLWKRXU7HUPVRI6HUYLFHDQG3ULYDF\3ROLF\
2.Pair Device
Tap ‘Pair Device’ to pair your
phone with Simyke baby
monitor
9:41
3DLU'HYLFH
:HOFRPHWRVLP\NH
)DPLO\)ULHQGV
6LP\NH6WRUH
1HZ6LP\NHGHYLFHRZQHU
,QYLWDWLRQWRDFFHVVGHYLFH
3XUFKDVHODWHVW6LP\NHSURGXFWV
/ / /
Optimal QR code scanning distance 6 in
6 in
0\%DE\
2QOLQH
6KDUH
9:41
1
2
3
4
5
6
Download App