User Manual
20250408.31
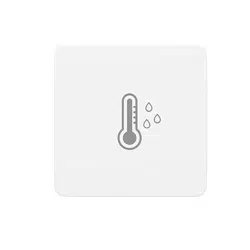
Smart Soil Moisture Sensor

Contents
Introduction
What's in the Box
Specifications
LED Status
Setup
Installation
Setup with Third Reality Hub and SKILL
Setup with Smart Bridge MZ1
Setup with Compatible Third-Party Zigbee Hubs
Pairing with SmartThings
Pairing with Hubitat
Pairing with Home Assistant
FCC Regulatory Conformance
RF Exposure
Limited Warranty
01
01
02
02
03
03
05
07
09
10
12
15
20
21
21
Introduction
Smart Soil Moisture Sensor is able to detect the environmental condi-
tions of the soil in real time and transmit the data to your smart system
through wireless communication capabilities.
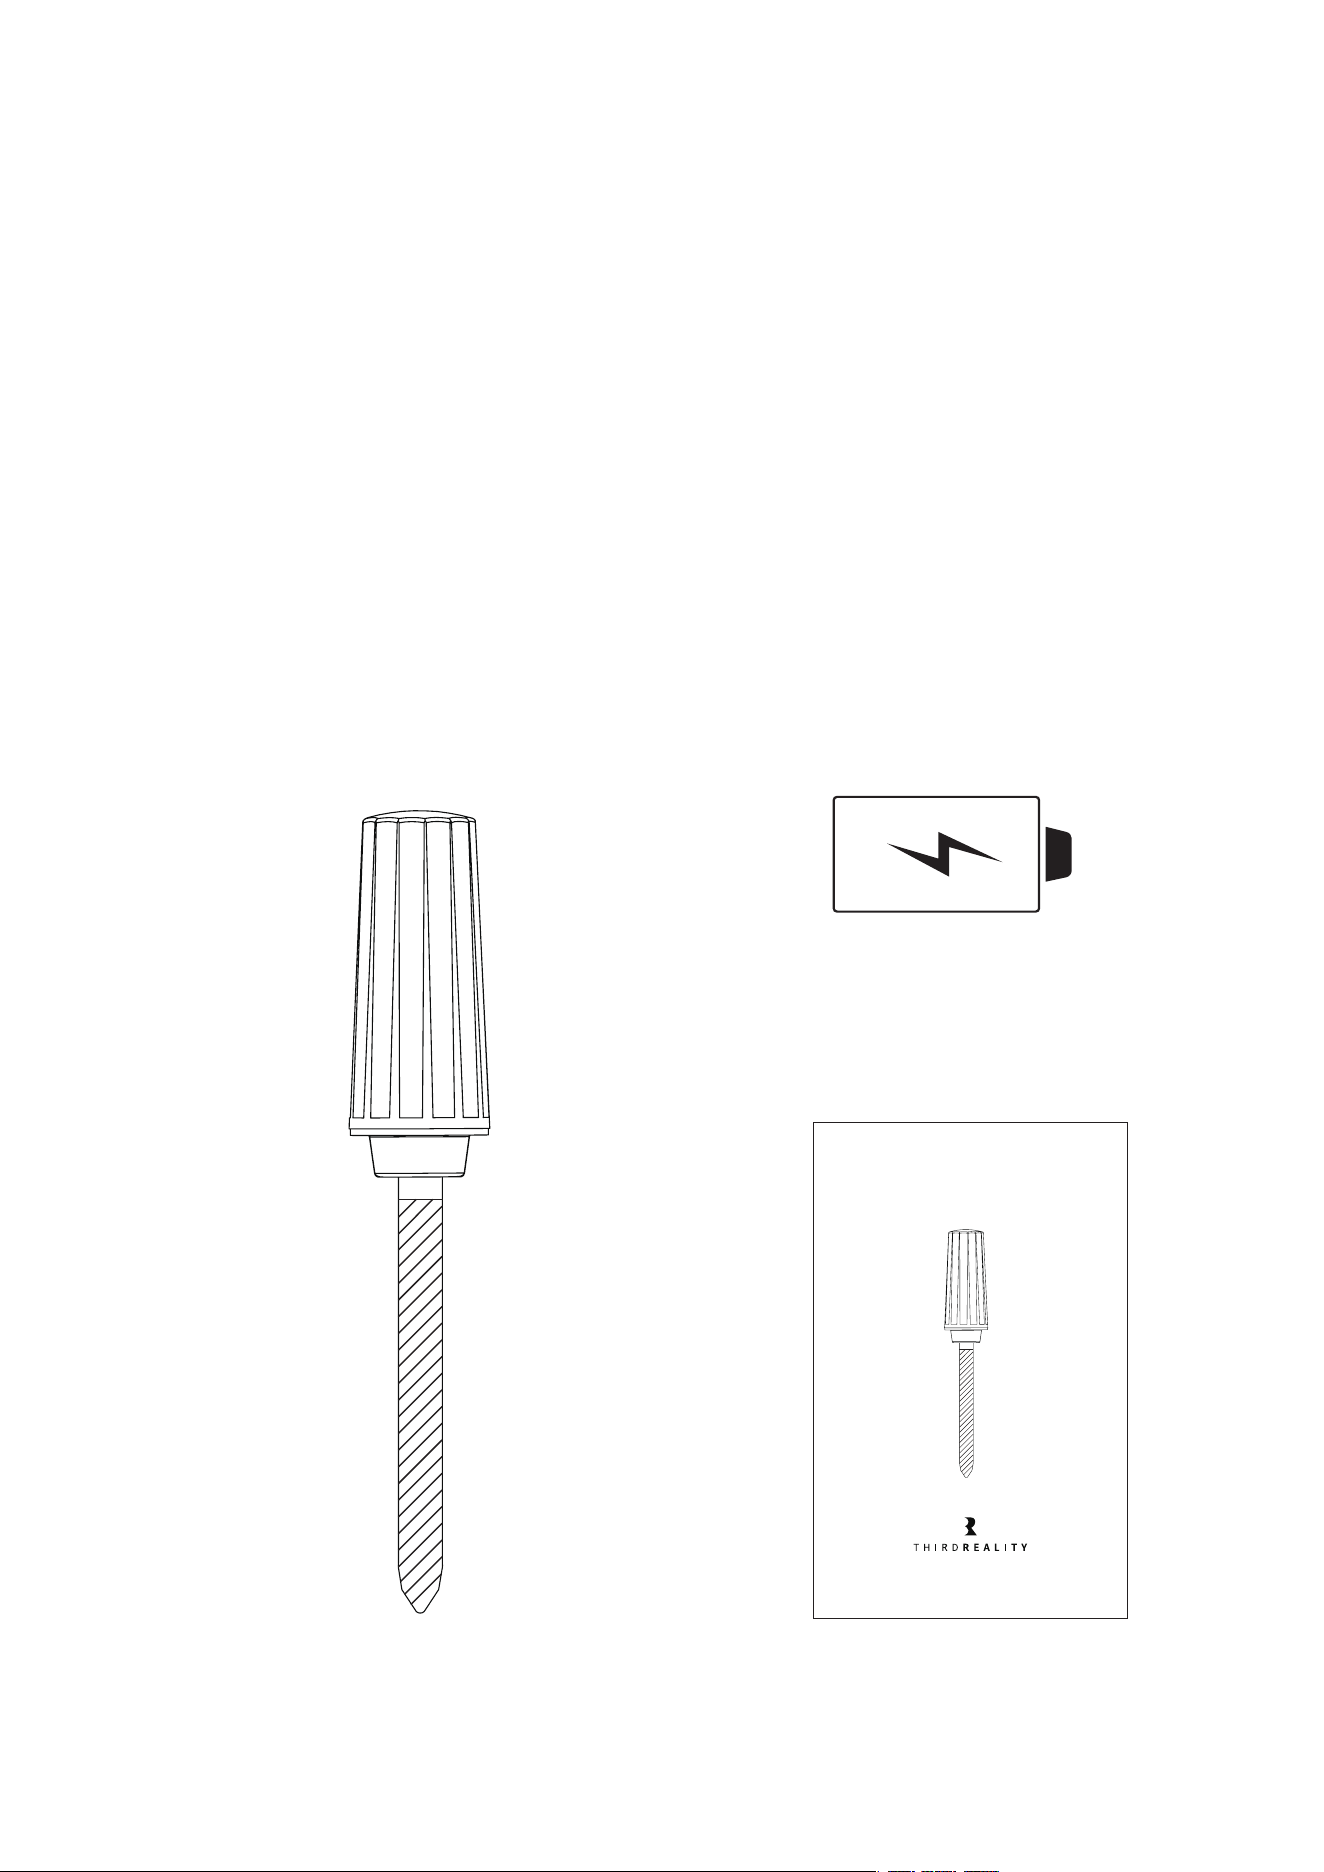
What's in the Box
01
Smart Soil Moisture Sensor Quick Start Guide
AA Battery
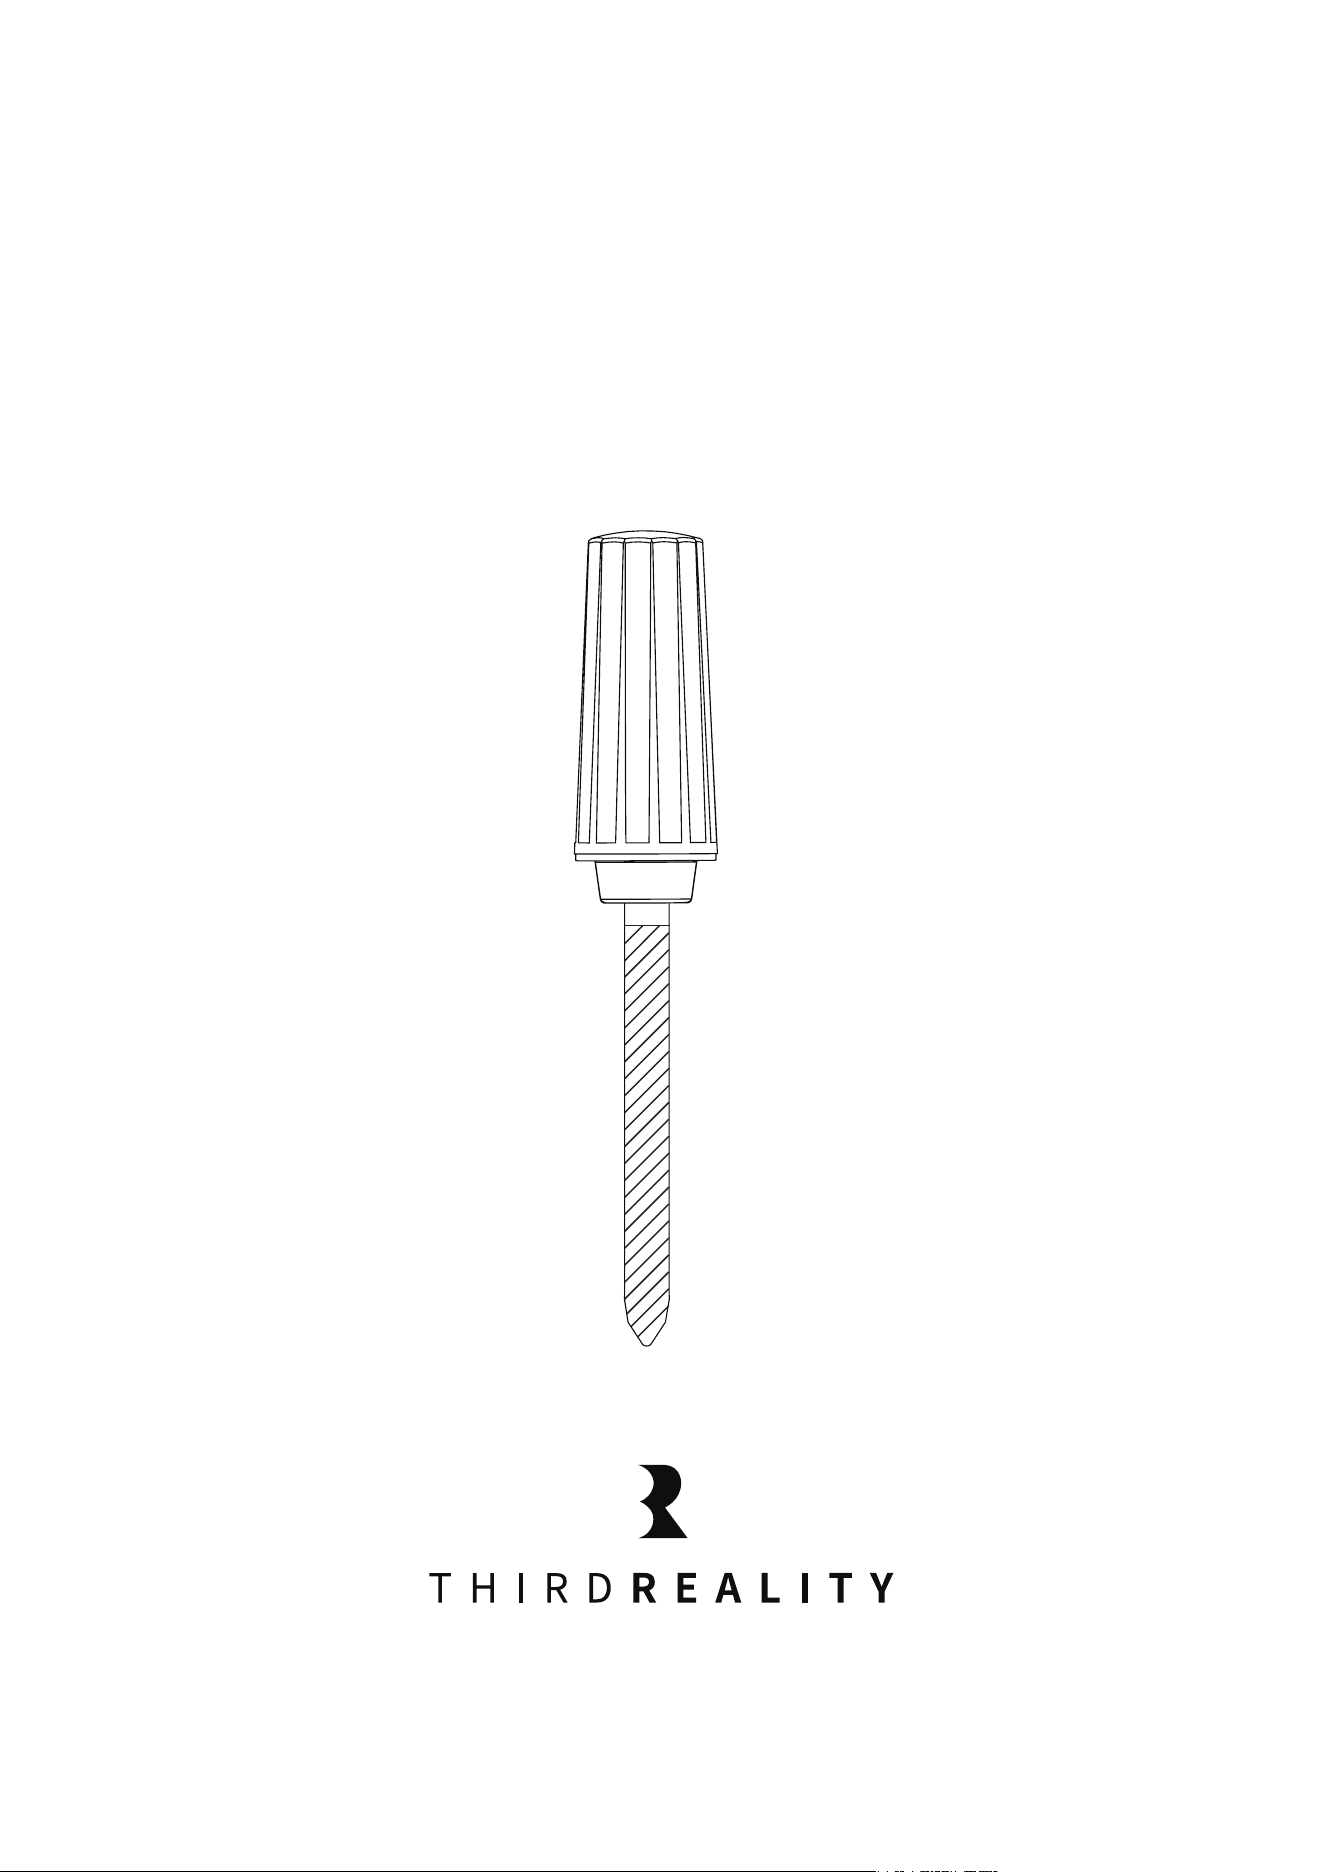
Smart Soil Moisture Sensor
Quick Start Guide

02
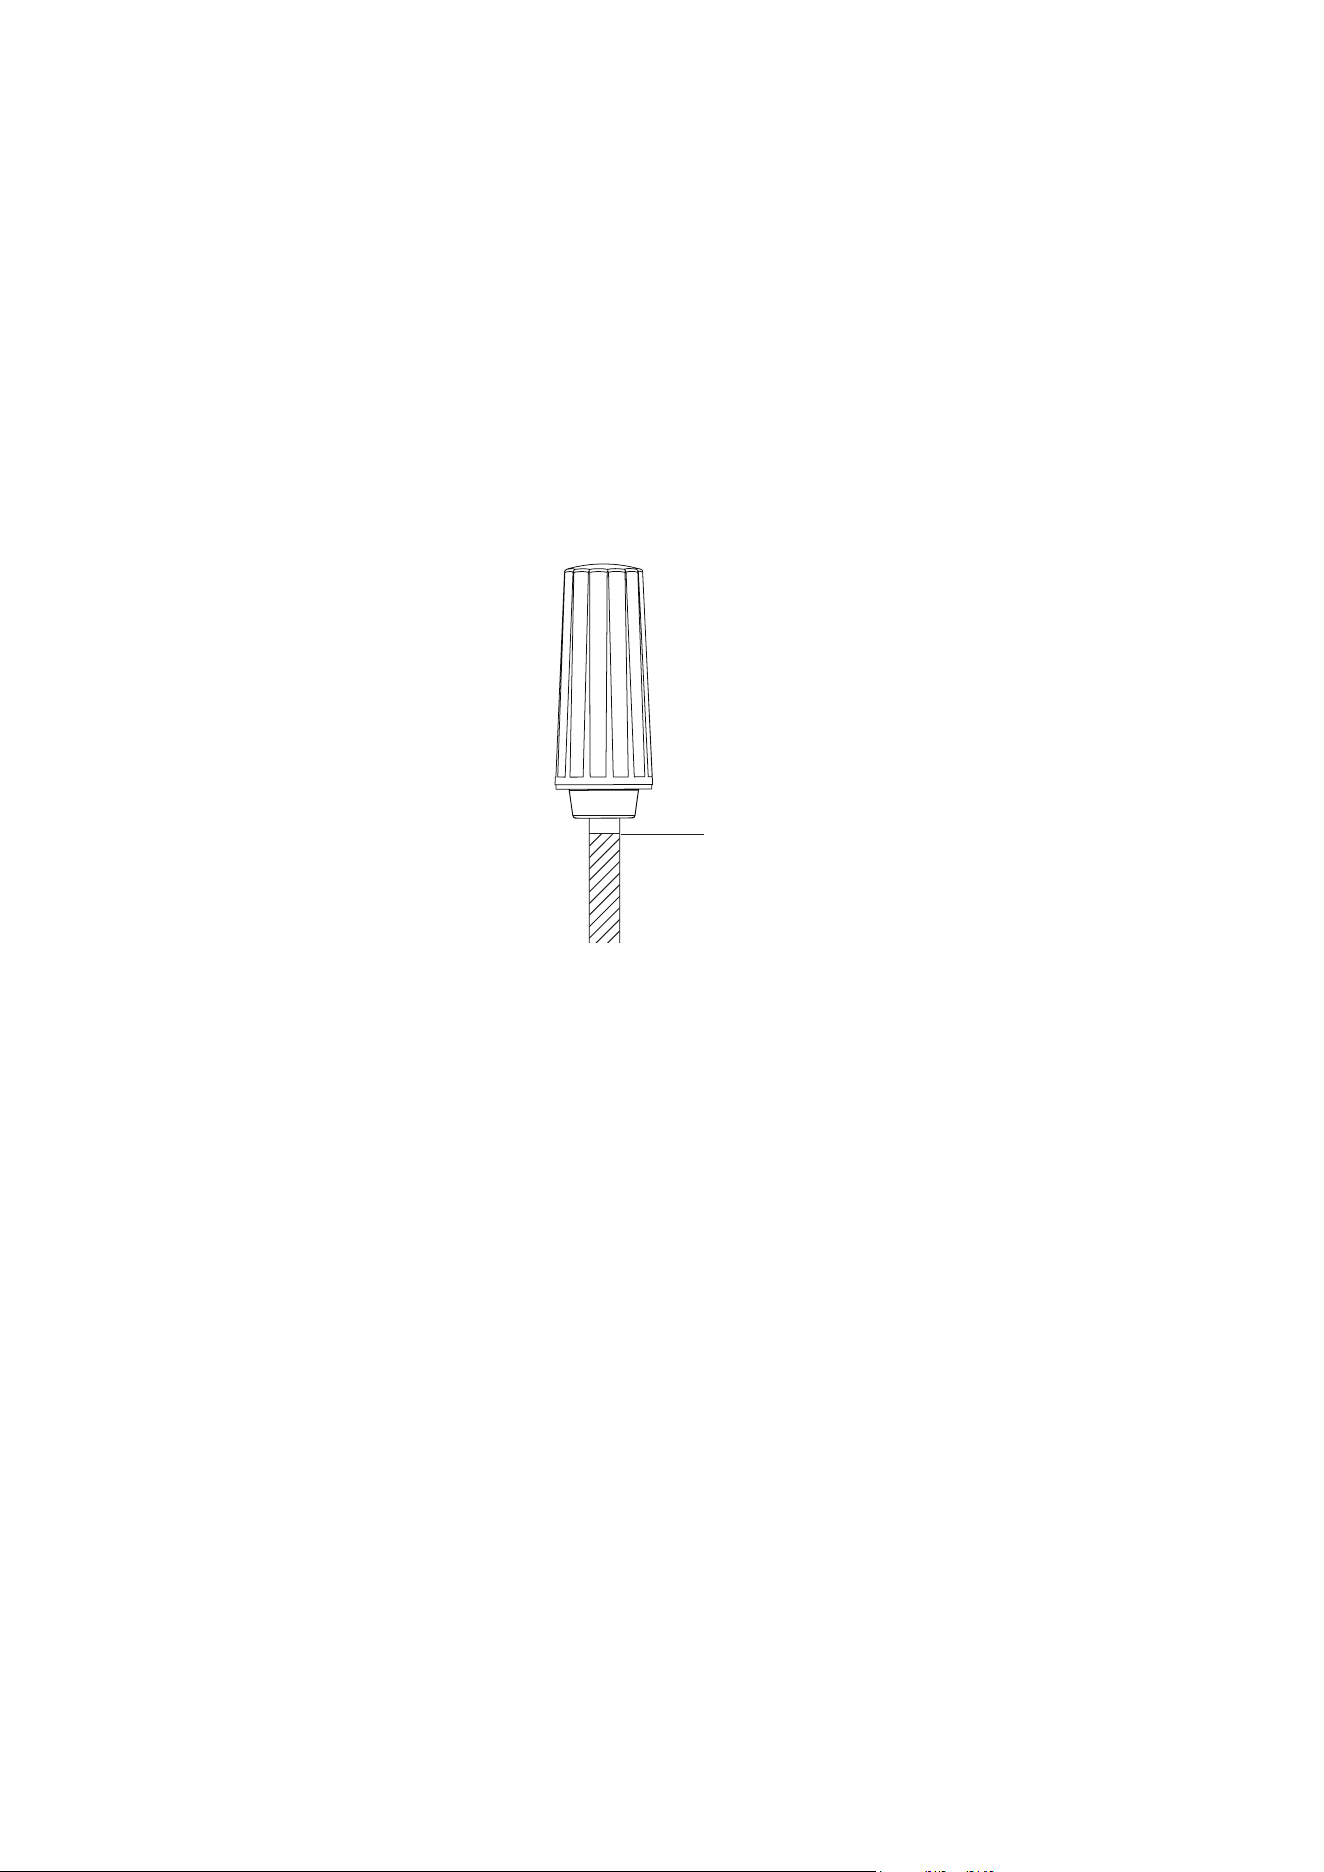
Specifications
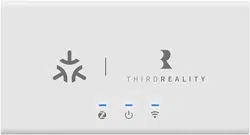
LED Status
LED Status
Blue blinking
Red slow blinking
Red double blinking
Description
Pairing mode
Offline
Low battery
LED Indicator
Name
Model
Operating Voltage
Battery Type
Wireless Connectivity
Working condition
Temperature Range
Temperature Accuracy
Humidity Range
Humidity Accuracy
Frequency
Max Transmission Power
Smart Soil Moisture Sensor
3RSM0147Z
DC 1.5V
1 x AA Alkaline Battery (included)
Zigbee 3.0
-10℃~50℃(14℉~122℉)
RH 0~100%
-10℃~50℃(14℉~122℉)
±1.5℃
0~100%
±3%
2.4 GHz
10 dBm

Set up your smart soil moisture sensor.
When inserting the sensor into the soil to be measured, align the sensor’s
marking line with the soil surface to ensure measurement accuracy.
Create an automation or water the plant manually based on your observa-
tion of specific plant and soil situation, to start irrigation of certain period
of time when soil moisture falls below certain value.
Note: Check multiple moisture values during certain period of time before
and after irrigation, to ensure accurate soil moisture data when creating
irrigation automation.
Open the battery cover. Remove the battery insulation tab and
install the battery.
Press and hold the reset button for 5 seconds until the LED light
turns red, release the reset button and the LED starts blue blinking,
indicating it enters Zigbee pairing mode.
Follow the instructions of your smart home hub /smart speaker
with built-in Zigbee hub to pair the sensor in the corresponding
app.
Setup
How to Use
1.
2.
3.
03
OPEN
When installing the sensor, make sure the marked best line is flush
with the soil surface.
Friction can damage the sensor and affect its accuracy. It is not
recommended to insert the sensor directly into hard soil, which
may damage the sensor.
Designed to measure soil moisture ONLY.
04
Recommend: Use a suitable tool to dig a small hole in the soil and then
insert the sensor.
Installation
*
*
*
Best Line

05
The Third Reality Hub (sold separately) allows you to control your device
remotely via the Third Reality App, making it a great option for smart
home beginners or those without a system from major providers. Addi-
tionally, the Third Reality Cloud supports SKILL integration with Google
Home or Amazon Alexa, enabling you to connect your device to these
platforms. However, due to the potential for slow and unreliable
Cloud-to-Cloud connections, we recommend using the Bridge solution if
Google Home or Alexa is your primary smart home platform.
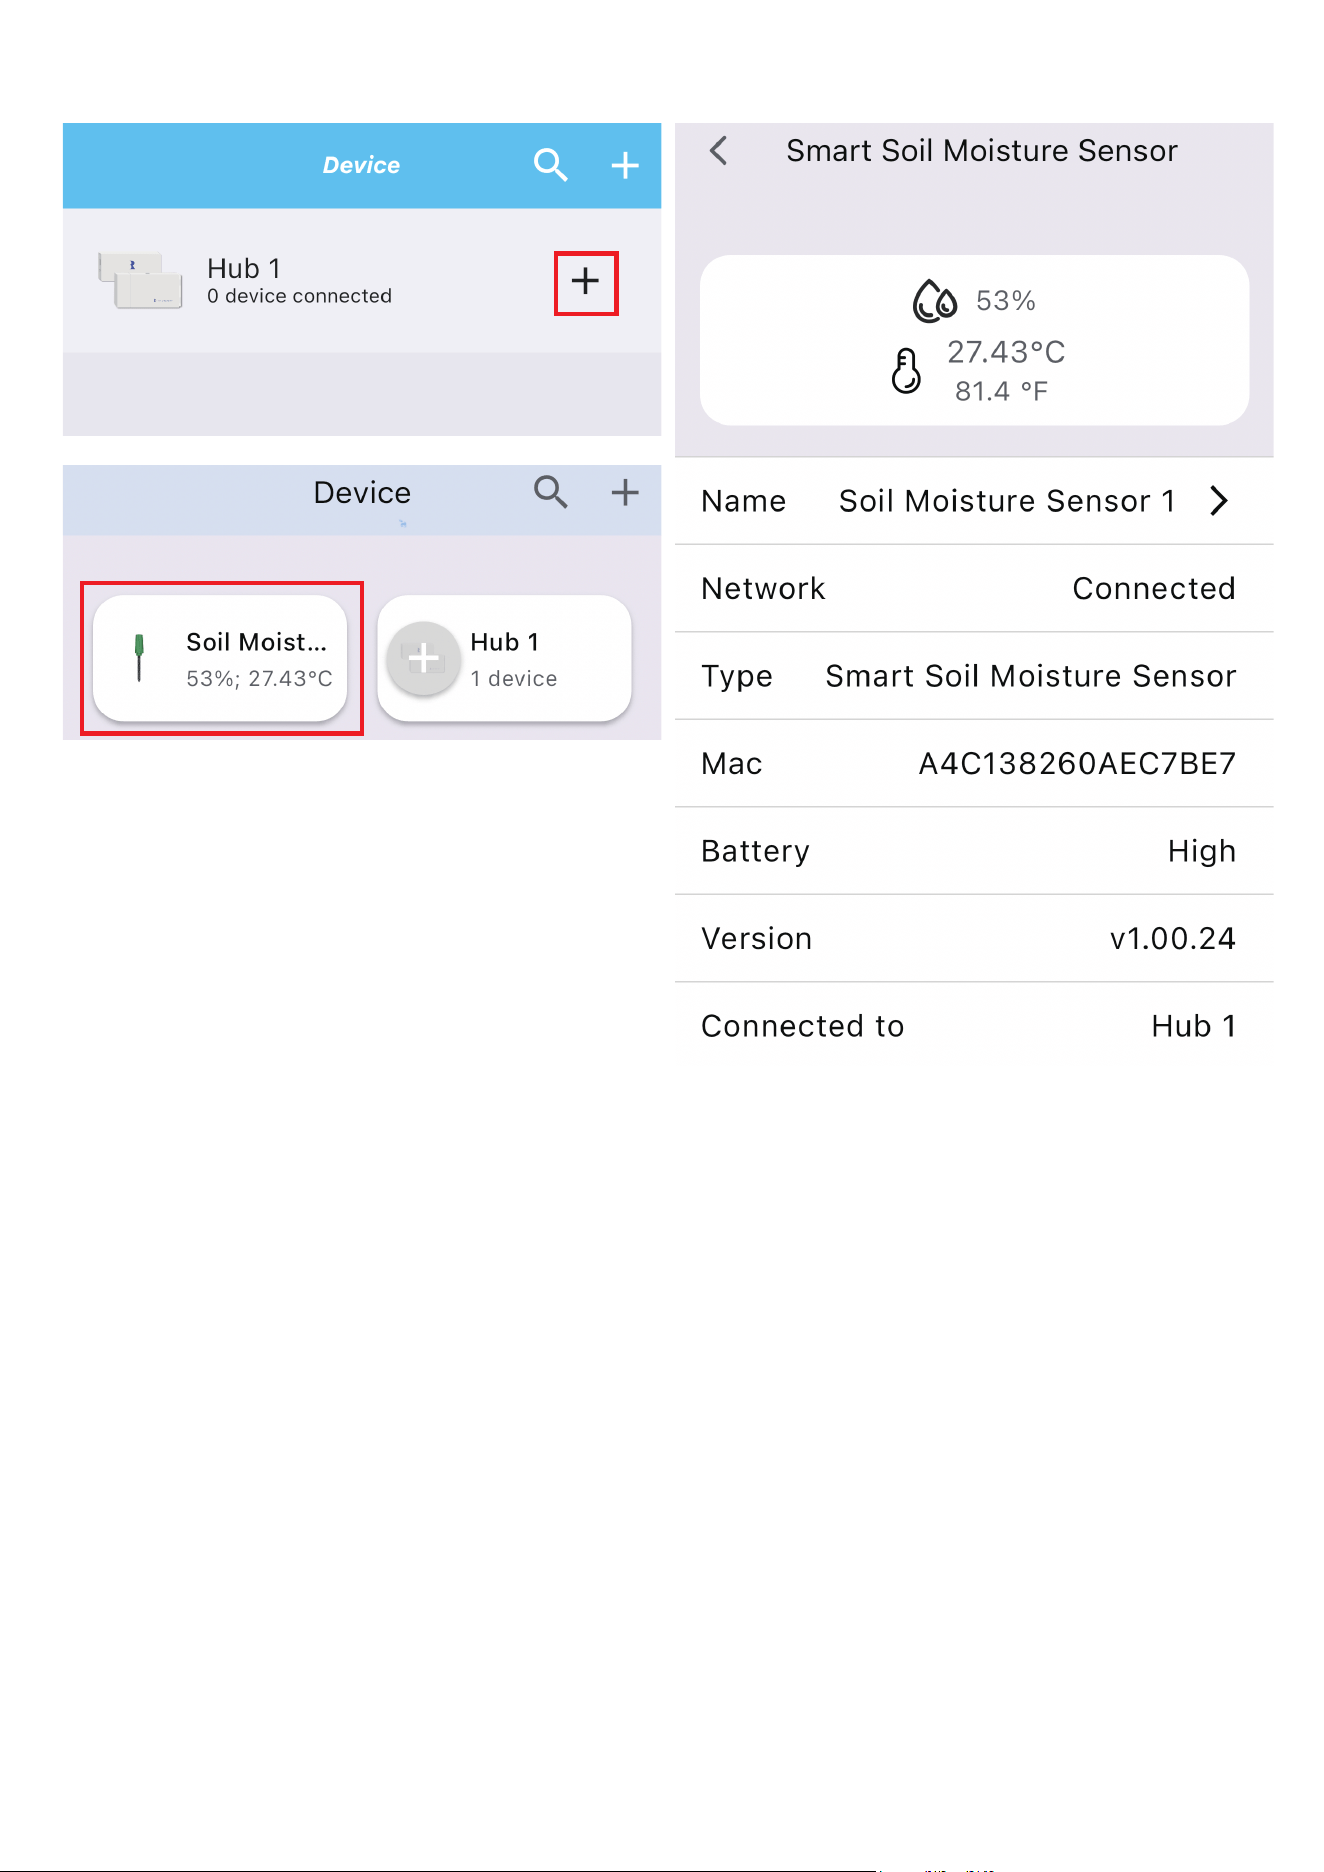
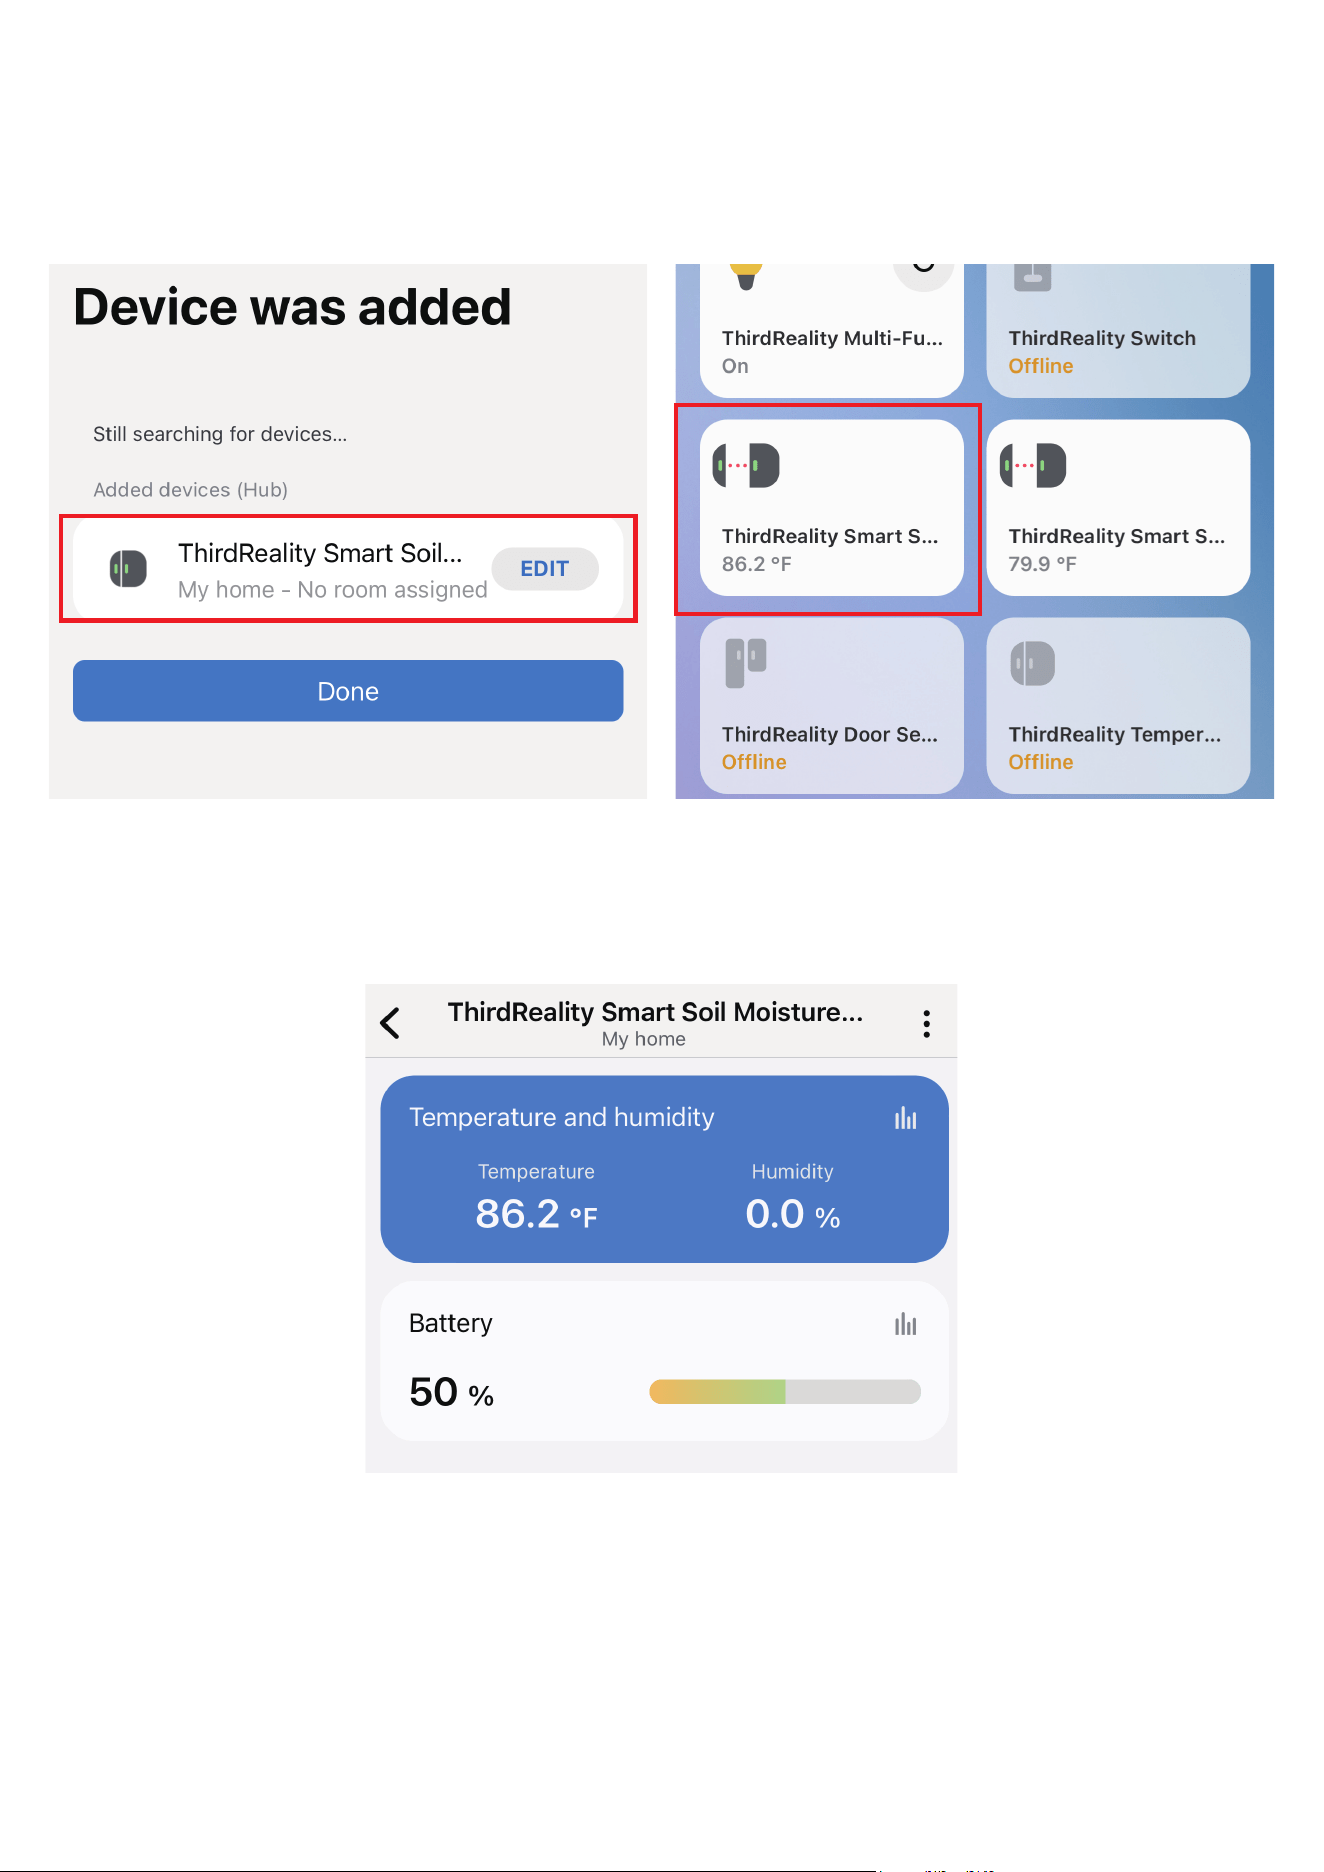
Ensure your hub is properly set up with Third Reality App.
Open the battery cover, install the battery, press and hold the reset
button for 5 seconds and release the hold; The blue blinking LED
light indicates the sensor enters Zigbee pairing mode.
Open the Third Reality App, press the “+” icon next to the hub, and
select “Quick Pair.”
The sensor will pair with your hub and appear in the Third Reality
App.
Optionally, you can enable the Third Reality SKILL in either the
Alexa or Google Home app to enable Cloud-to-Cloud communica-
tion.
1.
2.
3.
4.
5.
Setup with Third Reality Hub and SKILL
06

07
The Smart Bridge (sold separately) enables your Zigbee device to become
Matter-compatible, allowing seamless integration with major Matter eco-
systems like Apple Home, Google Home, Amazon Alexa, Samsung Smart-
Things, and Home Assistant. By setting up your Zigbee smart soil mois-
ture sensor with the Smart Bridge, it transforms into a Matter compatible
smart color bulb, enabling local control through Matter. Third Reality also
offers the 3R-Installer App, which lets you configure Zigbee smart soil
moisture sensor attributes such as default-on behavior and perform firm-
ware updates.
1.
2.
3.
4.
5.
Setup with Smart Bridge MZ1
Ensure your bridge is already set up within your smart home
system.
Open the battery cover, install the battery, press and hold the reset
button for 5 seconds and release the hold; The blue blinking LED
light indicates the sensor enters Zigbee pairing mode.
Press the pinhole button on the bridge to activate Zigbee pairing
mode. The Zigbee blue LED should start blinking.
The sensor will pair with the bridge, and a new device will appear
in your smart home app, such as Google Home or Alexa.
Optionally, you can install the 3R-Installer App and use the
multi-admin feature in your smart home app to share permissions
with the 3R-Installer App.

Set up your smart soil moisture sensor.
When inserting the sensor into the soil to be measured, align the sensor’s
marking line with the soil surface to ensure measurement accuracy.
Create an automation or water the plant manually based on your observa-
tion of specific plant and soil situation, to start irrigation of certain period
of time when soil moisture falls below certain value.
Note: Check multiple moisture values during certain period of time before
and after irrigation, to ensure accurate soil moisture data when creating
irrigation automation.
08

09
Third Reality supports integration with various open Zigbee platforms,
including Amazon Echo with built-in Zigbee, Samsung SmartThings,
Home Assistant (with ZHA or Z2M), Homey and Hubitat. If you own any of
these devices, you can pair the smart soil moisture sensor directly with-
out the need for an additional bridge or hub.
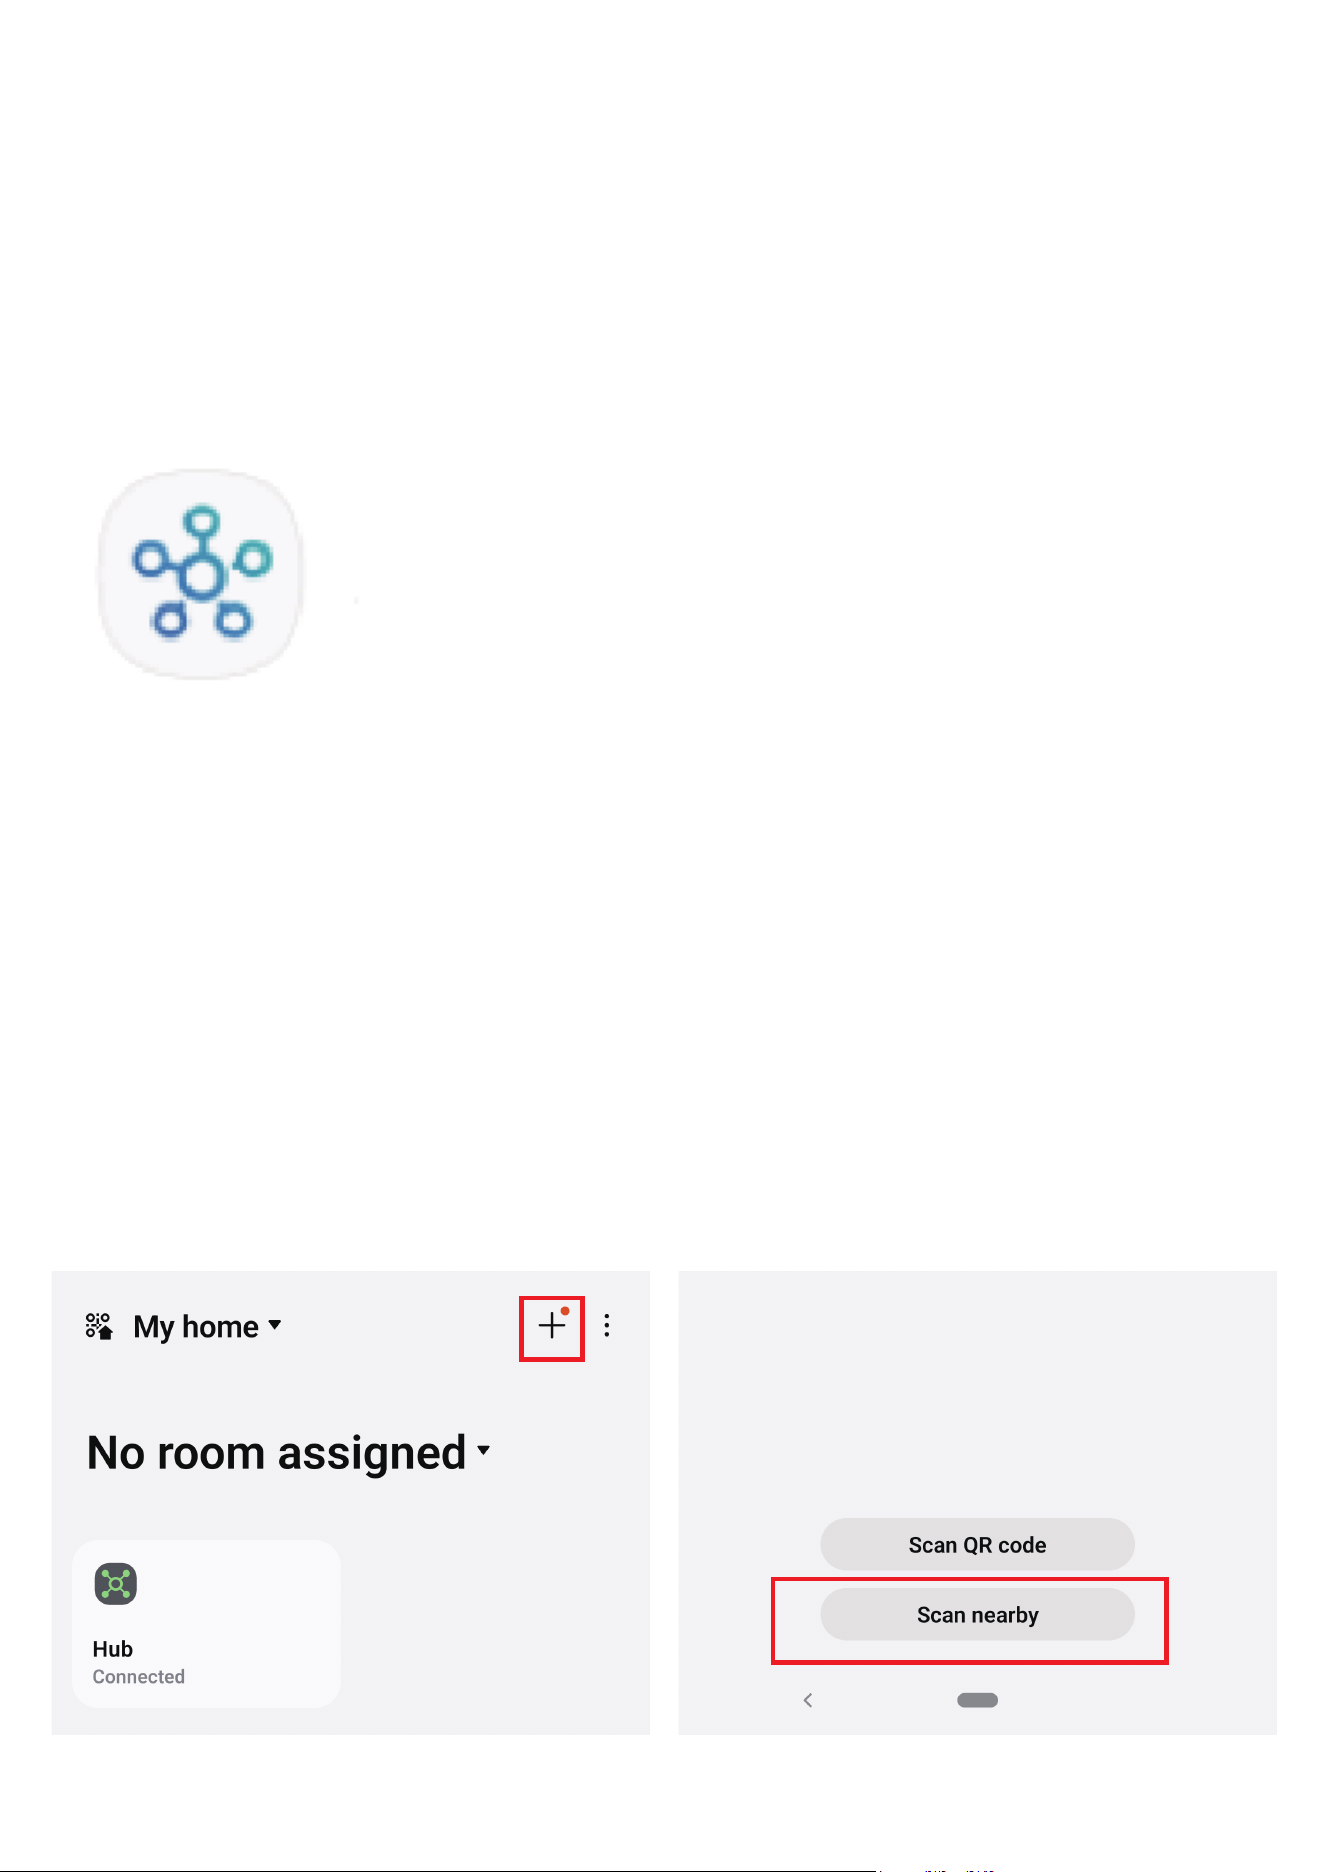
Ensure your Zigbee Hub is already set up within your smart home
system.
Open the battery cover, install the battery, press and hold the reset
button for 5 seconds and release the hold; The blue blinking LED
light indicates the sensor enters Zigbee pairing mode.
Open your smart home app and follow the on-screen instructions
to begin the Zigbee pairing process.
The sensor will flash and then turn warm white, indicating it has
successfully paired with the Zigbee hub.
You can now use your smart home app to turn the sensor on/off.
1.
2.
3.
4.
5.
Setup with Compatible Third-Party
Zigbee Hubs
App: SmartThings App
Devices: SmartThings Hub 2nd Gen(2015) and 3rd Gen(2018), Aeotec
Smart Home Hub.
Before pairing, check for updates to make sure the SmartThings
Hub firmware is up to date.
1.
Open the battery cover and install the batteries, press and hold the
reset button for 5 seconds and release the hold; The LED light turns
blue blinking, indicating it enters pairing mode.
Open your SmartThings App, tap “+” on the up right corner to ”Add
device” and then tap “Scan nearby”.
2.
3.
Pairing with SmartThings
Pairing steps:
10
Create routines to control connected devices.5.
The sensor will be added to your SmartThings hub in a few sec-
onds.
4.
11

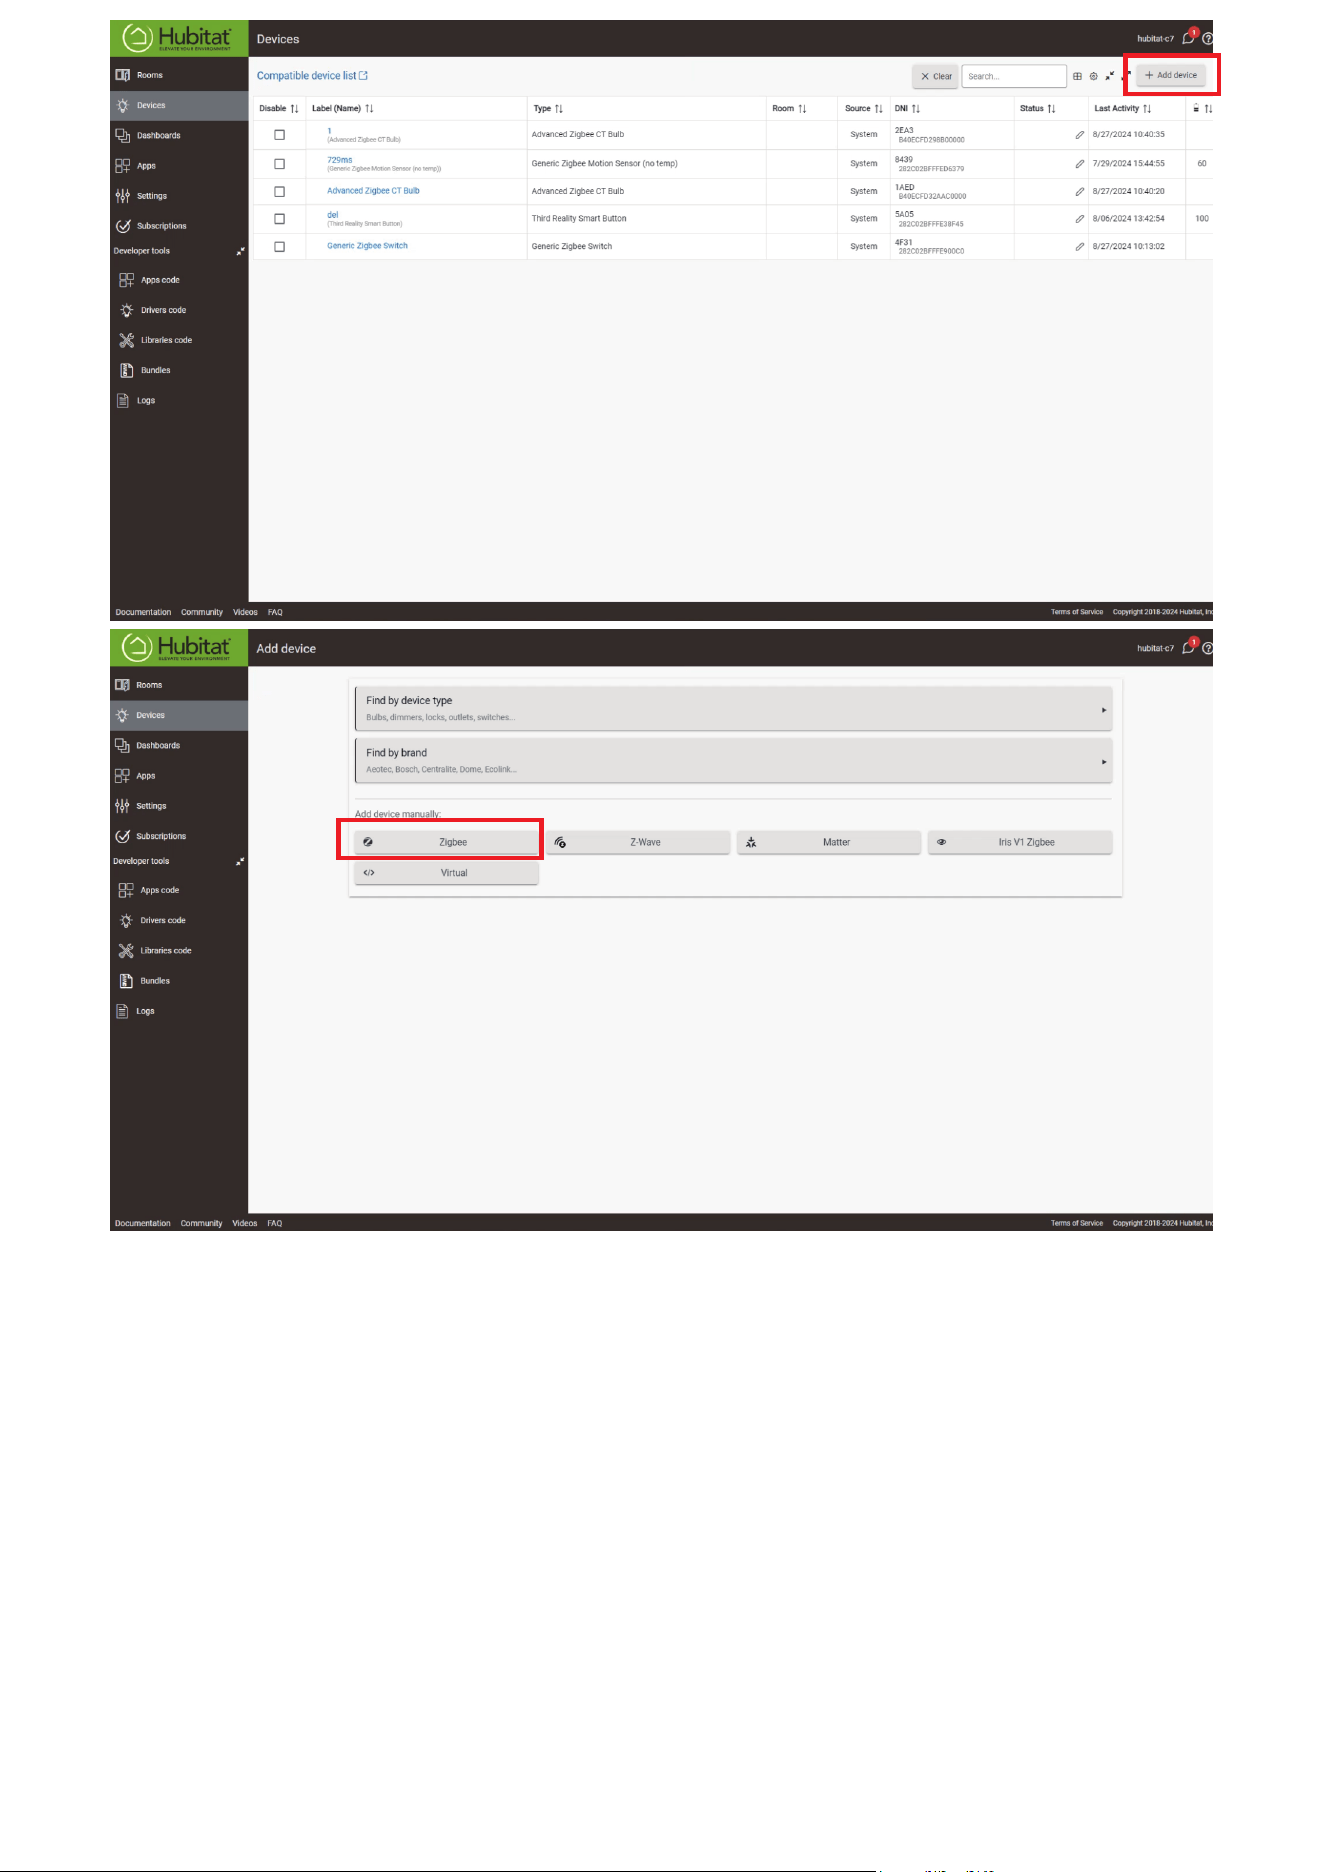
Website: http://find.hubitat.com/
Open the battery cover and install the batteries, press and hold the
reset button for 5 seconds and release the hold; The LED light turns
blue blinking, indicating it enters pairing mode.
Visit your Hubitat Elevation hub device page from your web brows-
er, select the Devices menu item from the sidebar, then select Dis-
cover Devices in the upper right.
Click Start Zigbee Pairing button after you select a Zigbee device
type, the Start Zigbee Pairing button will put the hub in Zigbee
pairing mode for 60 seconds.
Pairing is completed.
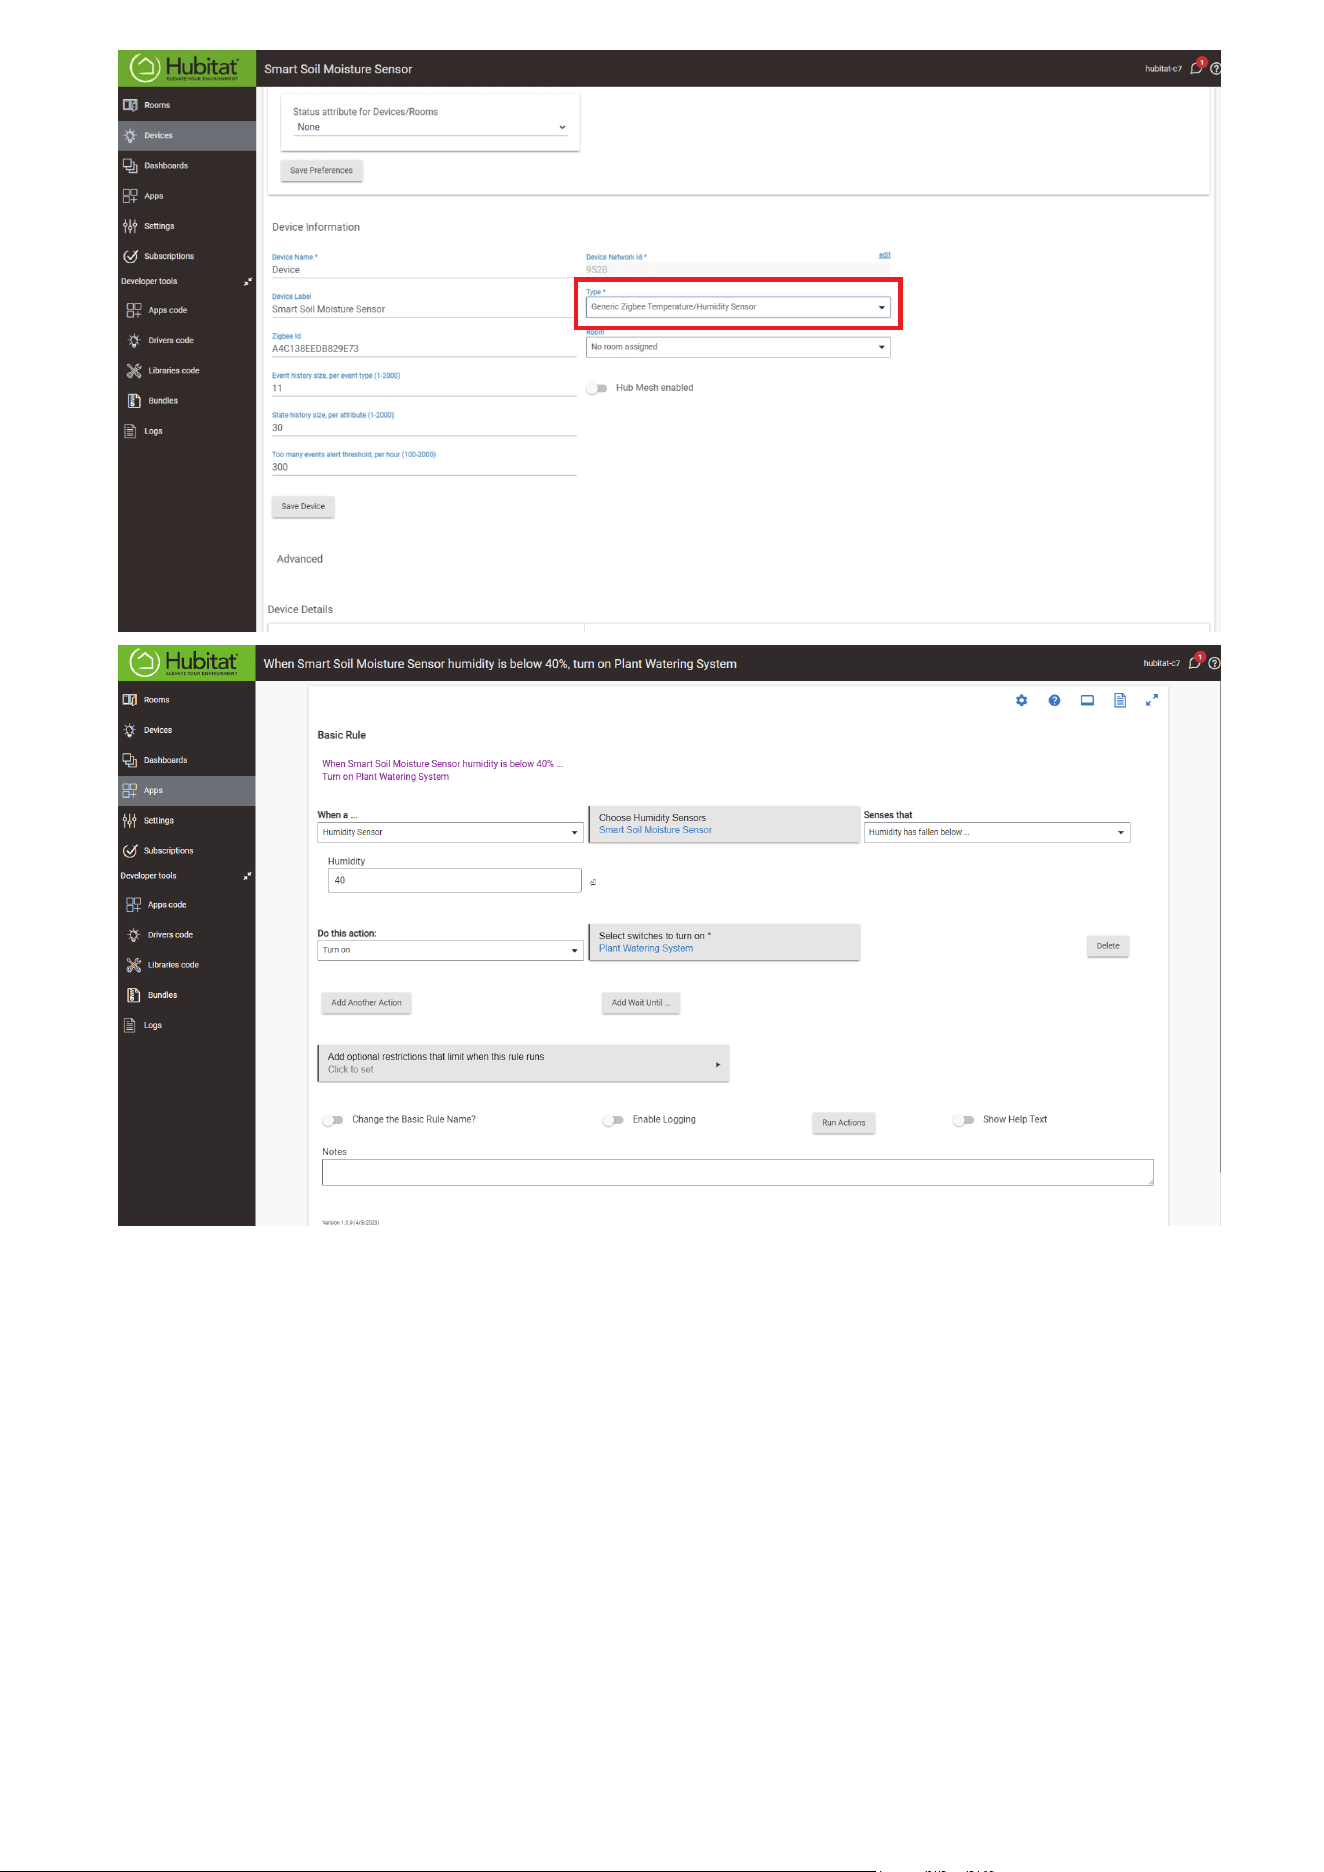
Set device type to generic Zigbee Temperature/Humidity sensor,
Save Device.
Tap Apps, and Create New Basic Rules, select Humidity Sensor -
smart soil moisture sensor, turn on your plant watering system
when humidity changes.
1.
2.
3.
4.
5.
6.
Pairing with Hubitat
Pairing steps:
12
13
14

Device: Zigbee dongle
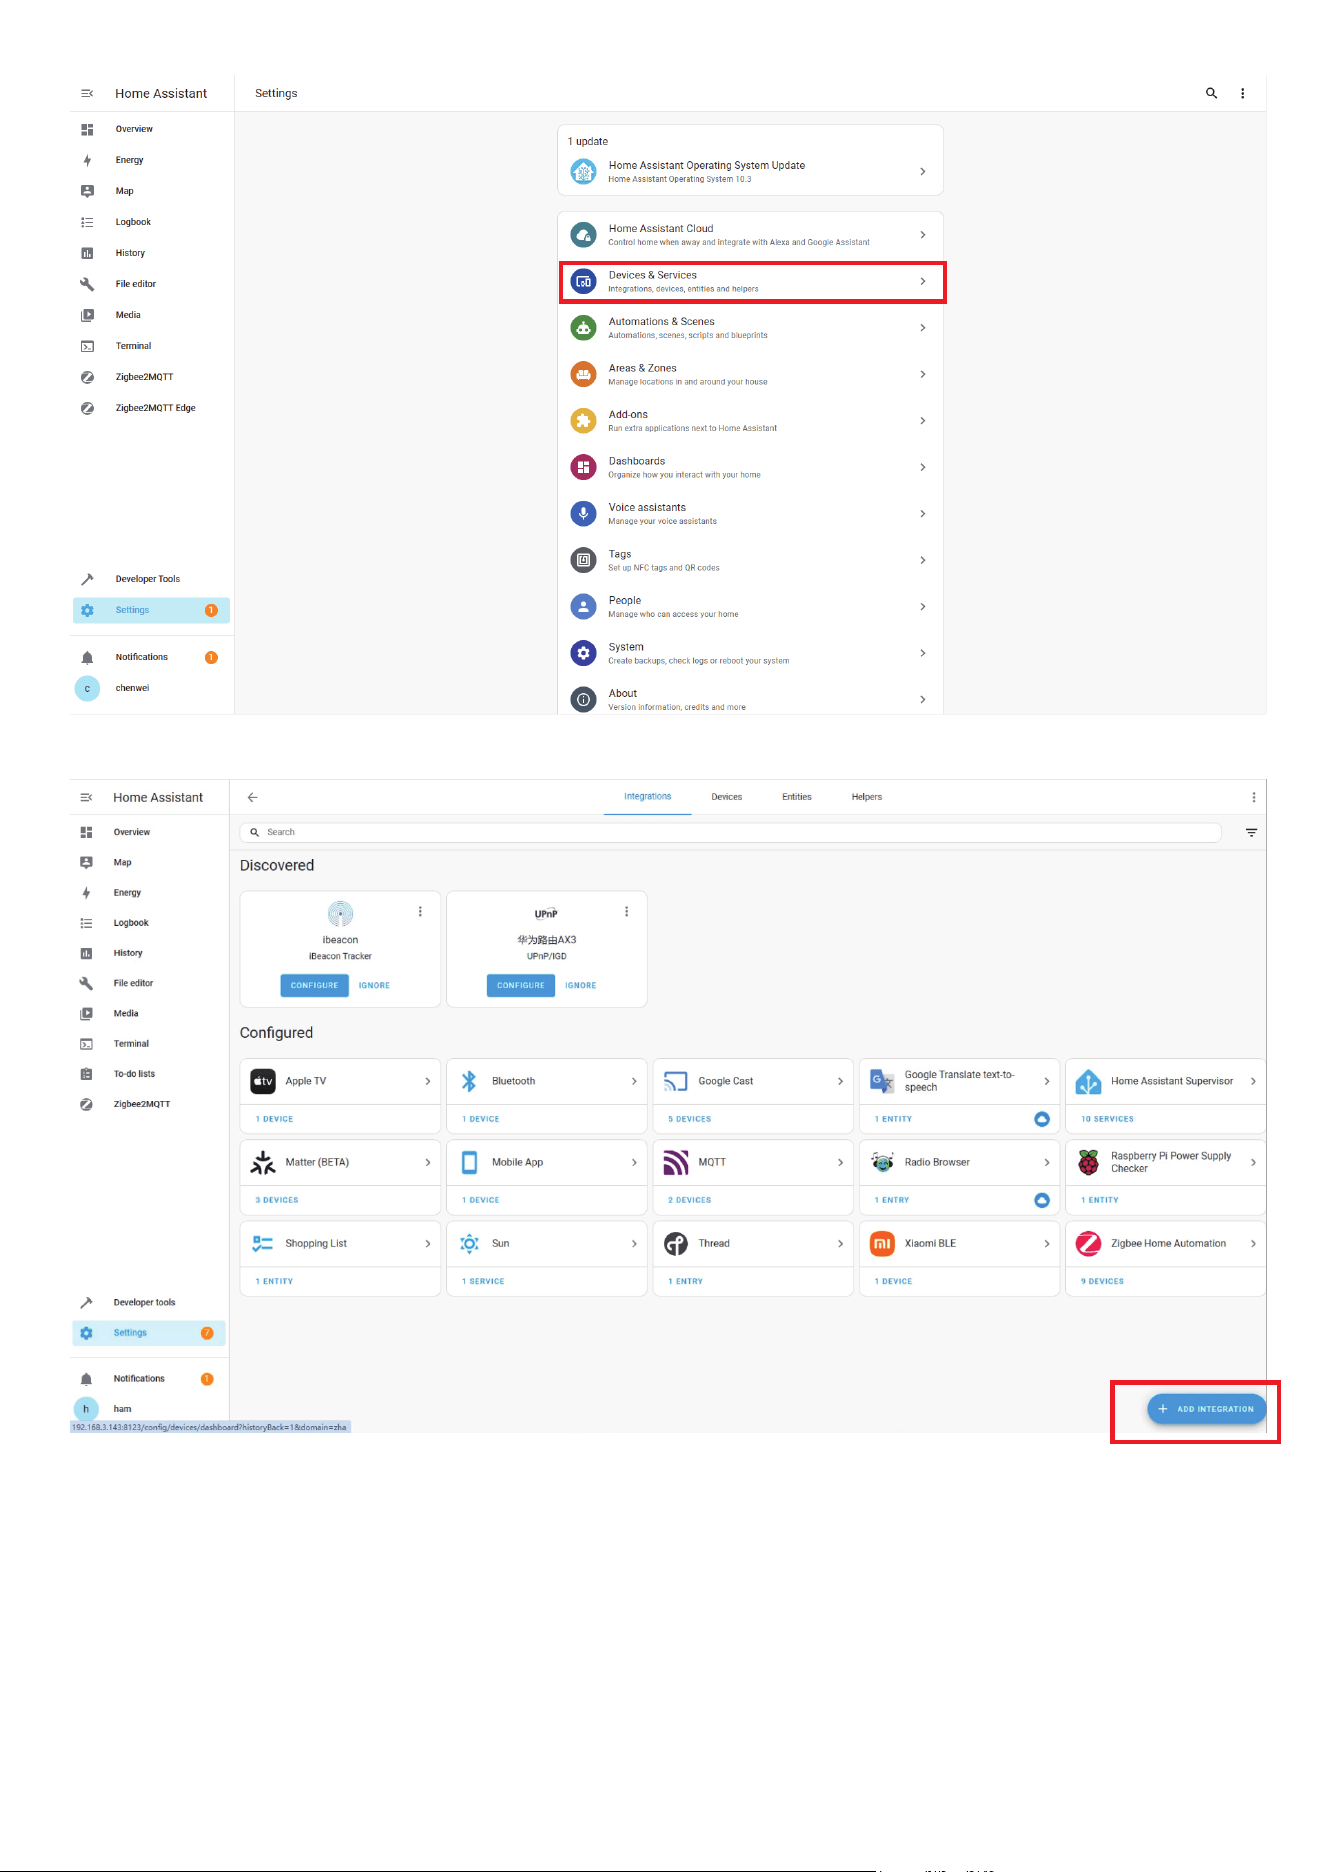
Open the battery cover and install the batteries, press and hold the
reset button for 5 seconds and release the hold; The LED light turns
blue blinking, indicating it enters pairing mode.
In Zigbee Home Automation, go to “Configuration” page, click “in-
tegration”.
Then click the “Devices” on the Zigbee item, the click “Add Devic-
e s ”.
Pairing completed.
Back to “Devices” page to find the sensor added.
Click to enter in the control interface to set the sensor.
Click “+” belongs to Automation and add trigger and actions.
1.
2.
3.
4.
5.
6.
7.
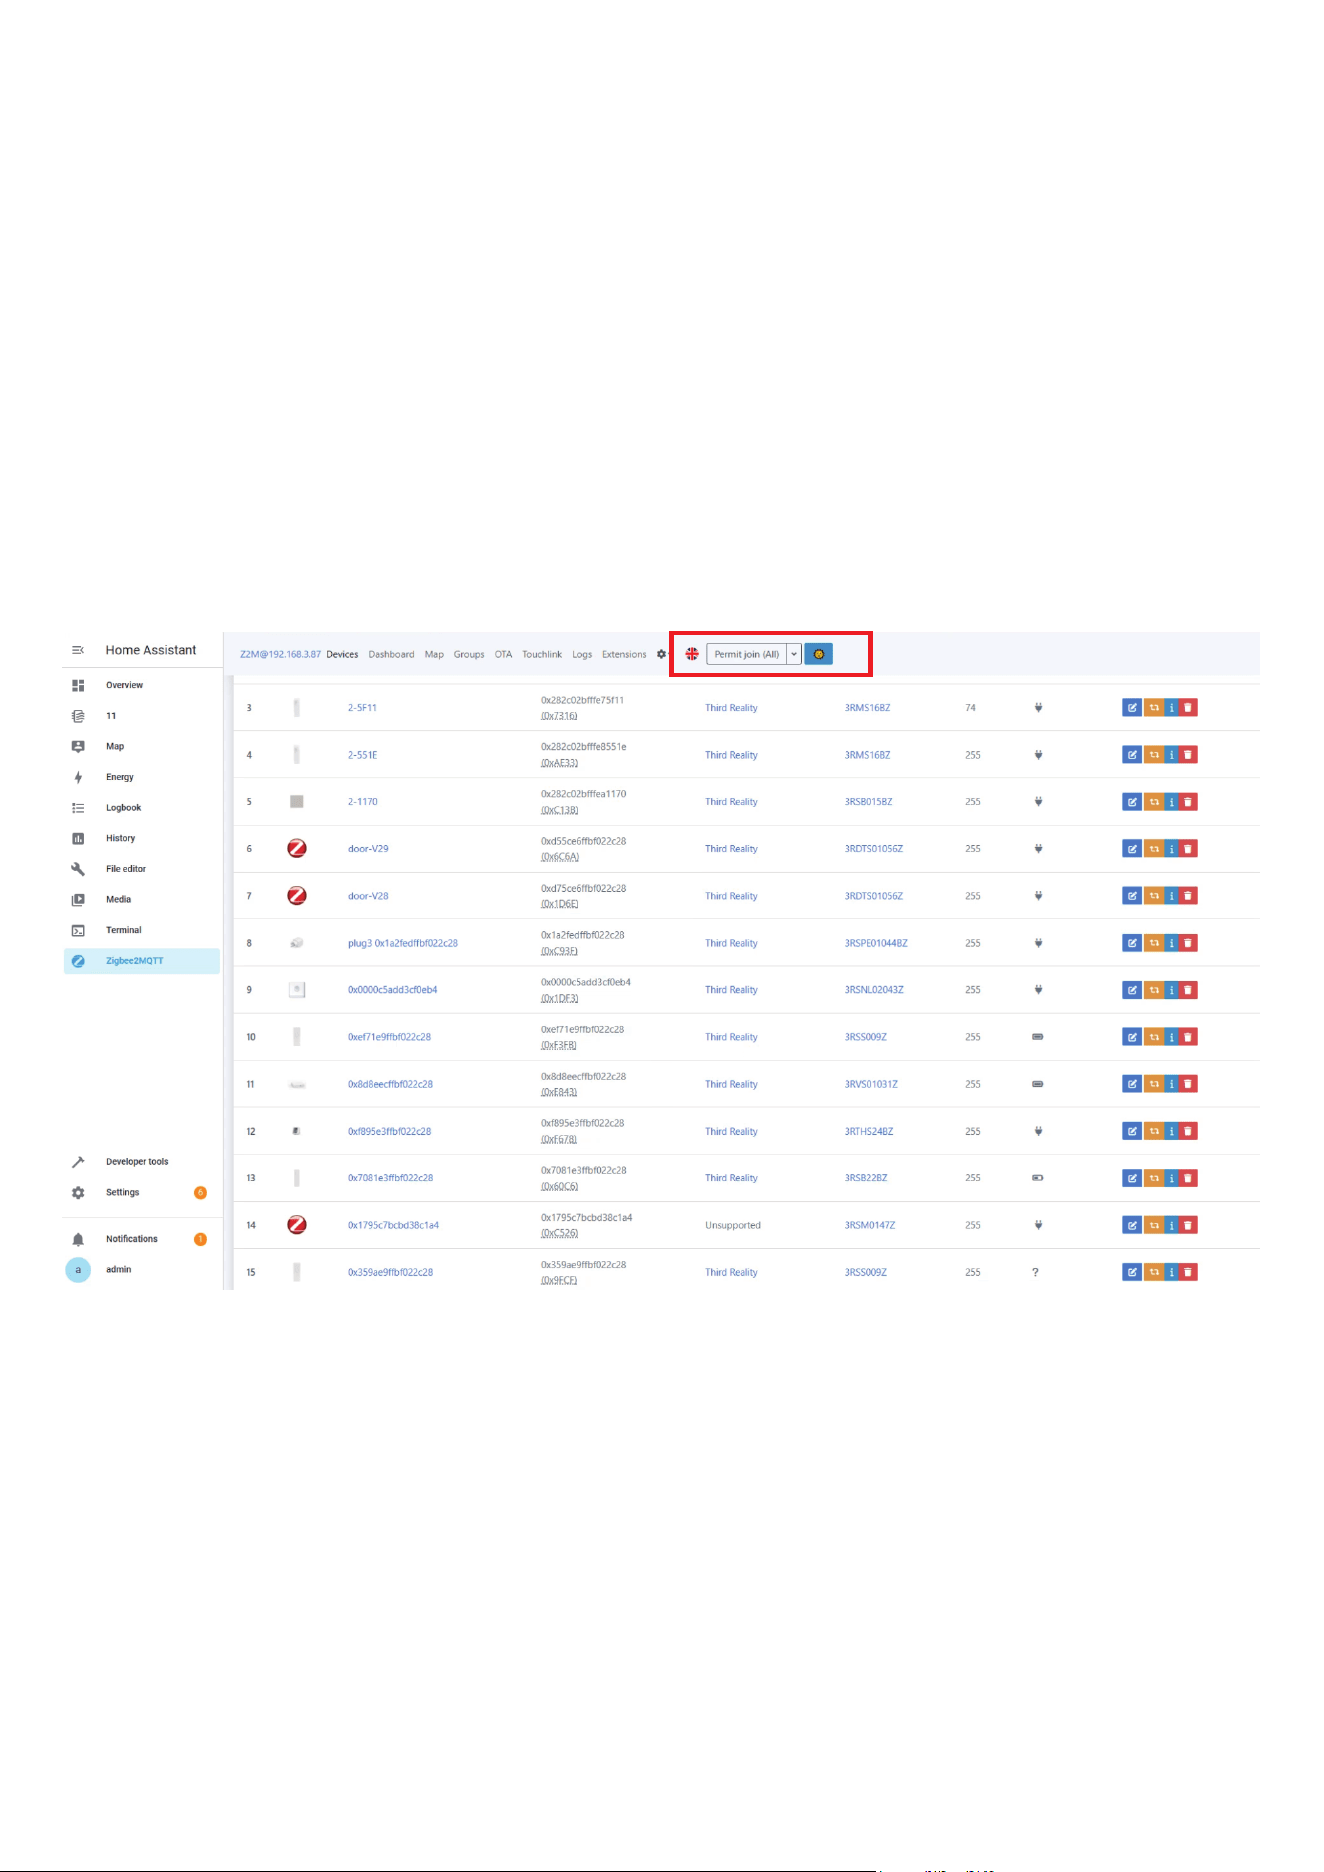
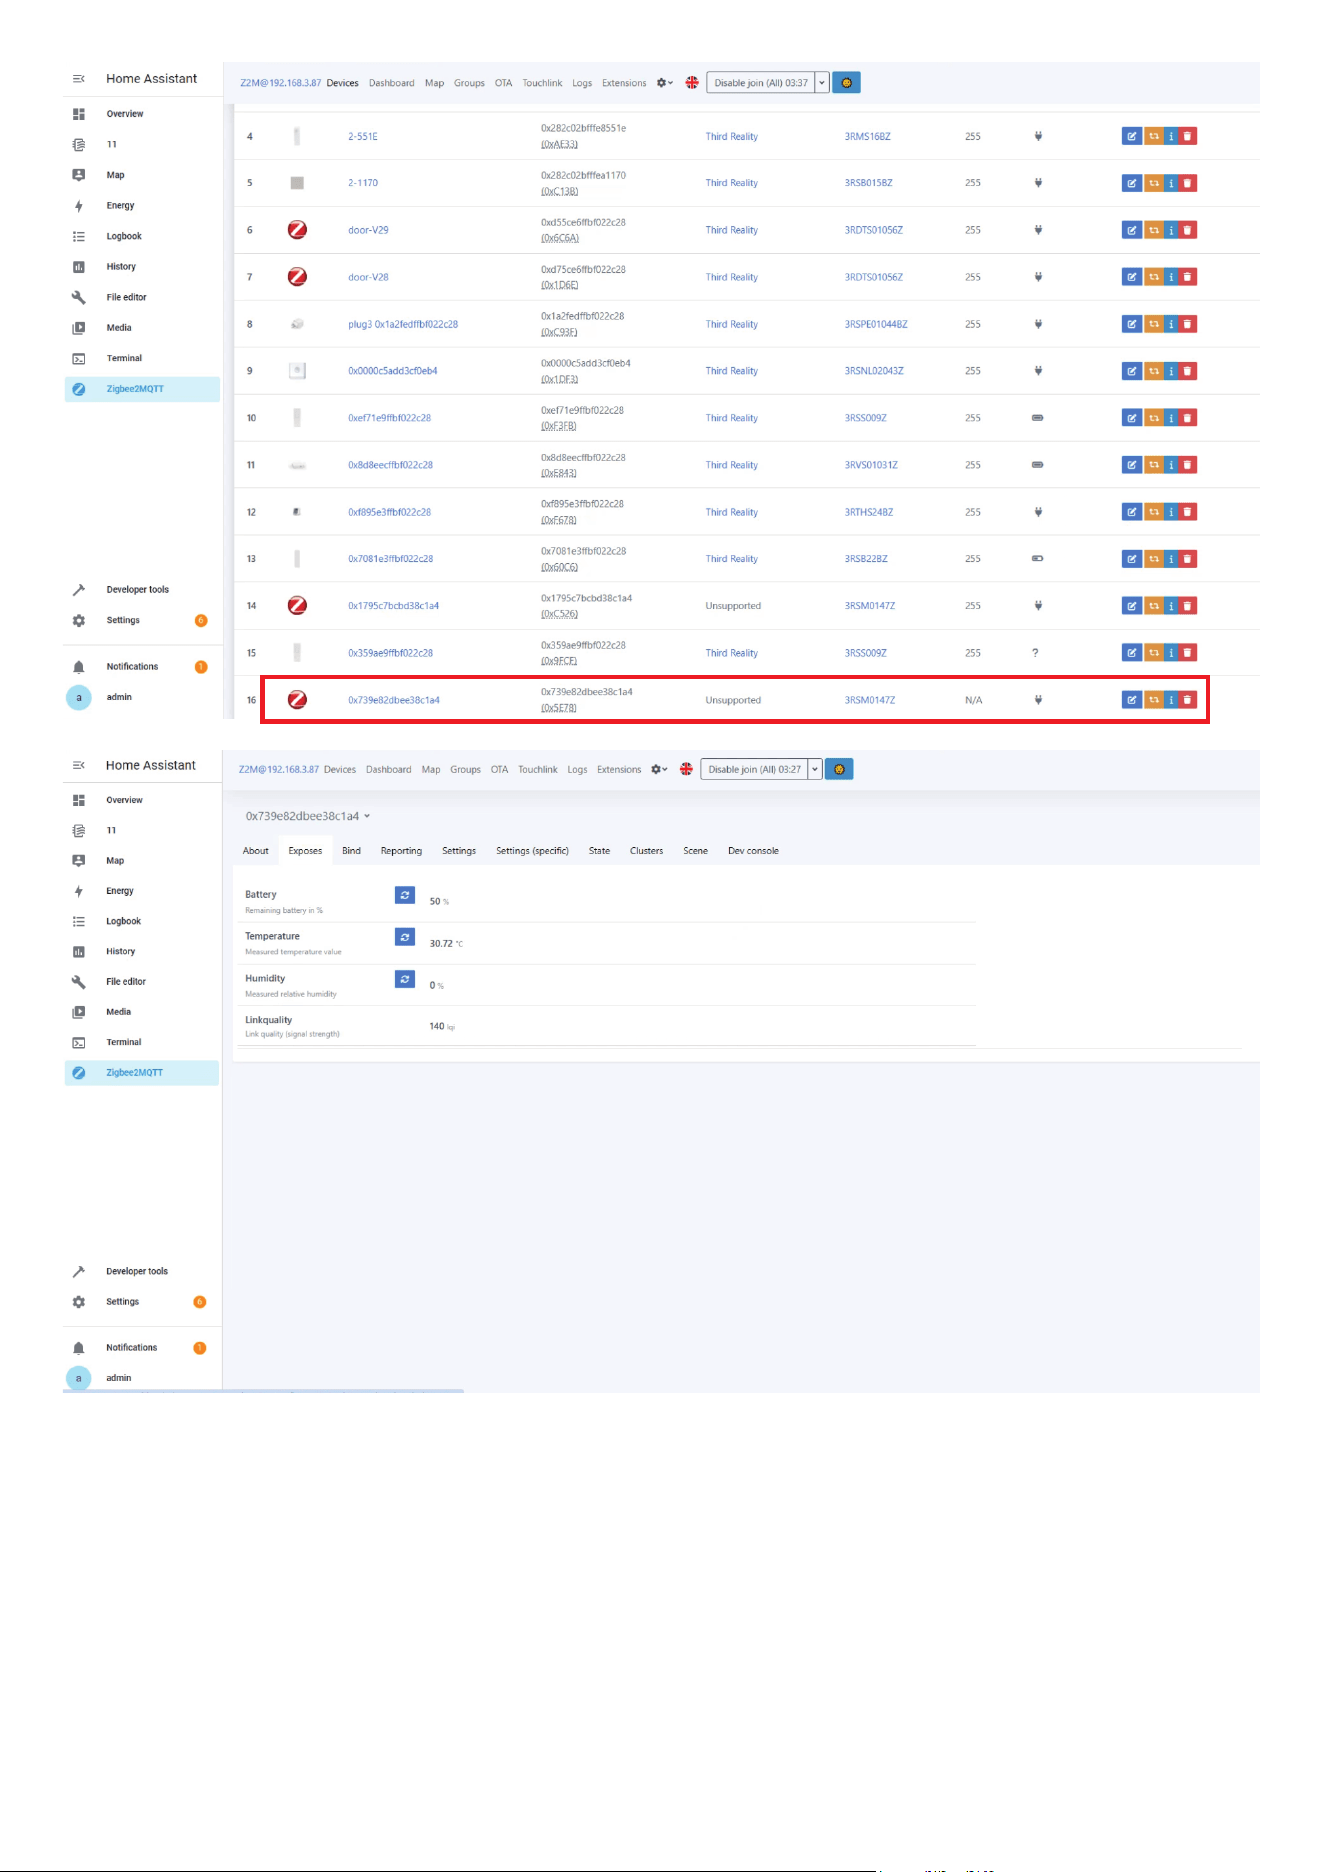
Pairing with Home Assistant
Zigbee Home Automation
15
16

17
Open the battery cover and install the batteries, press and hold the
reset button for 5 seconds and release the hold; The LED light turns
blue blinking, indicating it enters pairing mode.
Permit join to start Zigbee pairing in Zigbee2MQTT.
Pairing completed, the sensor will be displayed in the device list
Go to Settings page, create automation.
1.
2.
3.
Zigbee2MQTT
18
19

FCC Regulatory Conformance
This device complies with part 15 of the FCC rules. Operation is subject
to the following two conditions: (1) this device may not cause harmful
interference, and (2) this device must accept any interference received,
including interference that may cause undesired operation.
Changes or modifications not expressly approved by the party responsi-
ble for compliance could void the user’s authority to operate the equip-
ment.
NOTE: This equipment has been tested and found to comply with the
limits for a Class B digital device, pursuant to part 15 of the FCC Rules.
These limits are designed to provide reasonable protection against
harmful interference in a residential installation.
This equipment generates uses and can radiate radio frequency energy
and, if not installed and used in accordance with the instructions, may
cause harmful interference to radio communications. However, there is
no guarantee that interference will not occur in a particular installation.
If this equipment does cause harmful interference to radio or television
reception, which can be determined by turning the equipment off and
on, the user is encouraged to try to correct the interference by one or
more of the following measures:
20

RF Exposure
Limited Warranty
‐Reorient or relocate the receiving antenna.
‐Increase the separation between the equipment and receiver.
‐Connect the equipment into an outlet on a circuit different from that
to which the receiver is connected.
‐Consult the dealer or an experienced radio/TV technician for help im-
portant announcement.
NOTE: The manufacturer is not responsible for any radio or TV interfer-
ence caused by unauthorized modifications to this equipment. Such
modifications could void the user’s authority to operate the equipment.
This equipment complies with FCC radiation exposure limits set forth for
an uncontrolled environment.
This equipment should be installed and operated with minimum dis-
tance 20cm between the radiator and your body.
This transmitter must not be co-located or operating in conjunction with
any other antenna or transmitter.
For limited warranty, please visit https://3reality.com/faq-help-center/.
For customer support, please contact us at info@3reality.com or visit
www.3reality com.
For question on other platforms, visit for corresponding platform’s ap-
plication/support platforms.
21