Smart Plug Gen2
User Manual
20260324-v1.01.01

Features
Model Number 3RSP03028BZ
Electrical Characteristics 100~120V AC,15A max,50/60Hz
Working Temperature -10℃~40℃
Operating Humidity 5%~90% RH(Non-condensing)
Connectivity Zigbee 3.0
App Support IOS/Android
Real-time Energy Monitoring: Monitor current con-
sumption of your plug-in devices, effectively save
energy and reduce waste. This function supported by
Home Assistant, SmartThings, Hubitat and THIRDRE-
ALITY smart hub Gen2.
Compatible with Zigbee devices from Amazon Echo/
SmartThings/Home Assistant/Hubitat/Third Reality
etc.
Act as a Zigbee repeater, increasing the range of your
Zigbee mesh network.
Customize On/Off state when power is restored.
1.
2.
3.
4.
Specifications
01
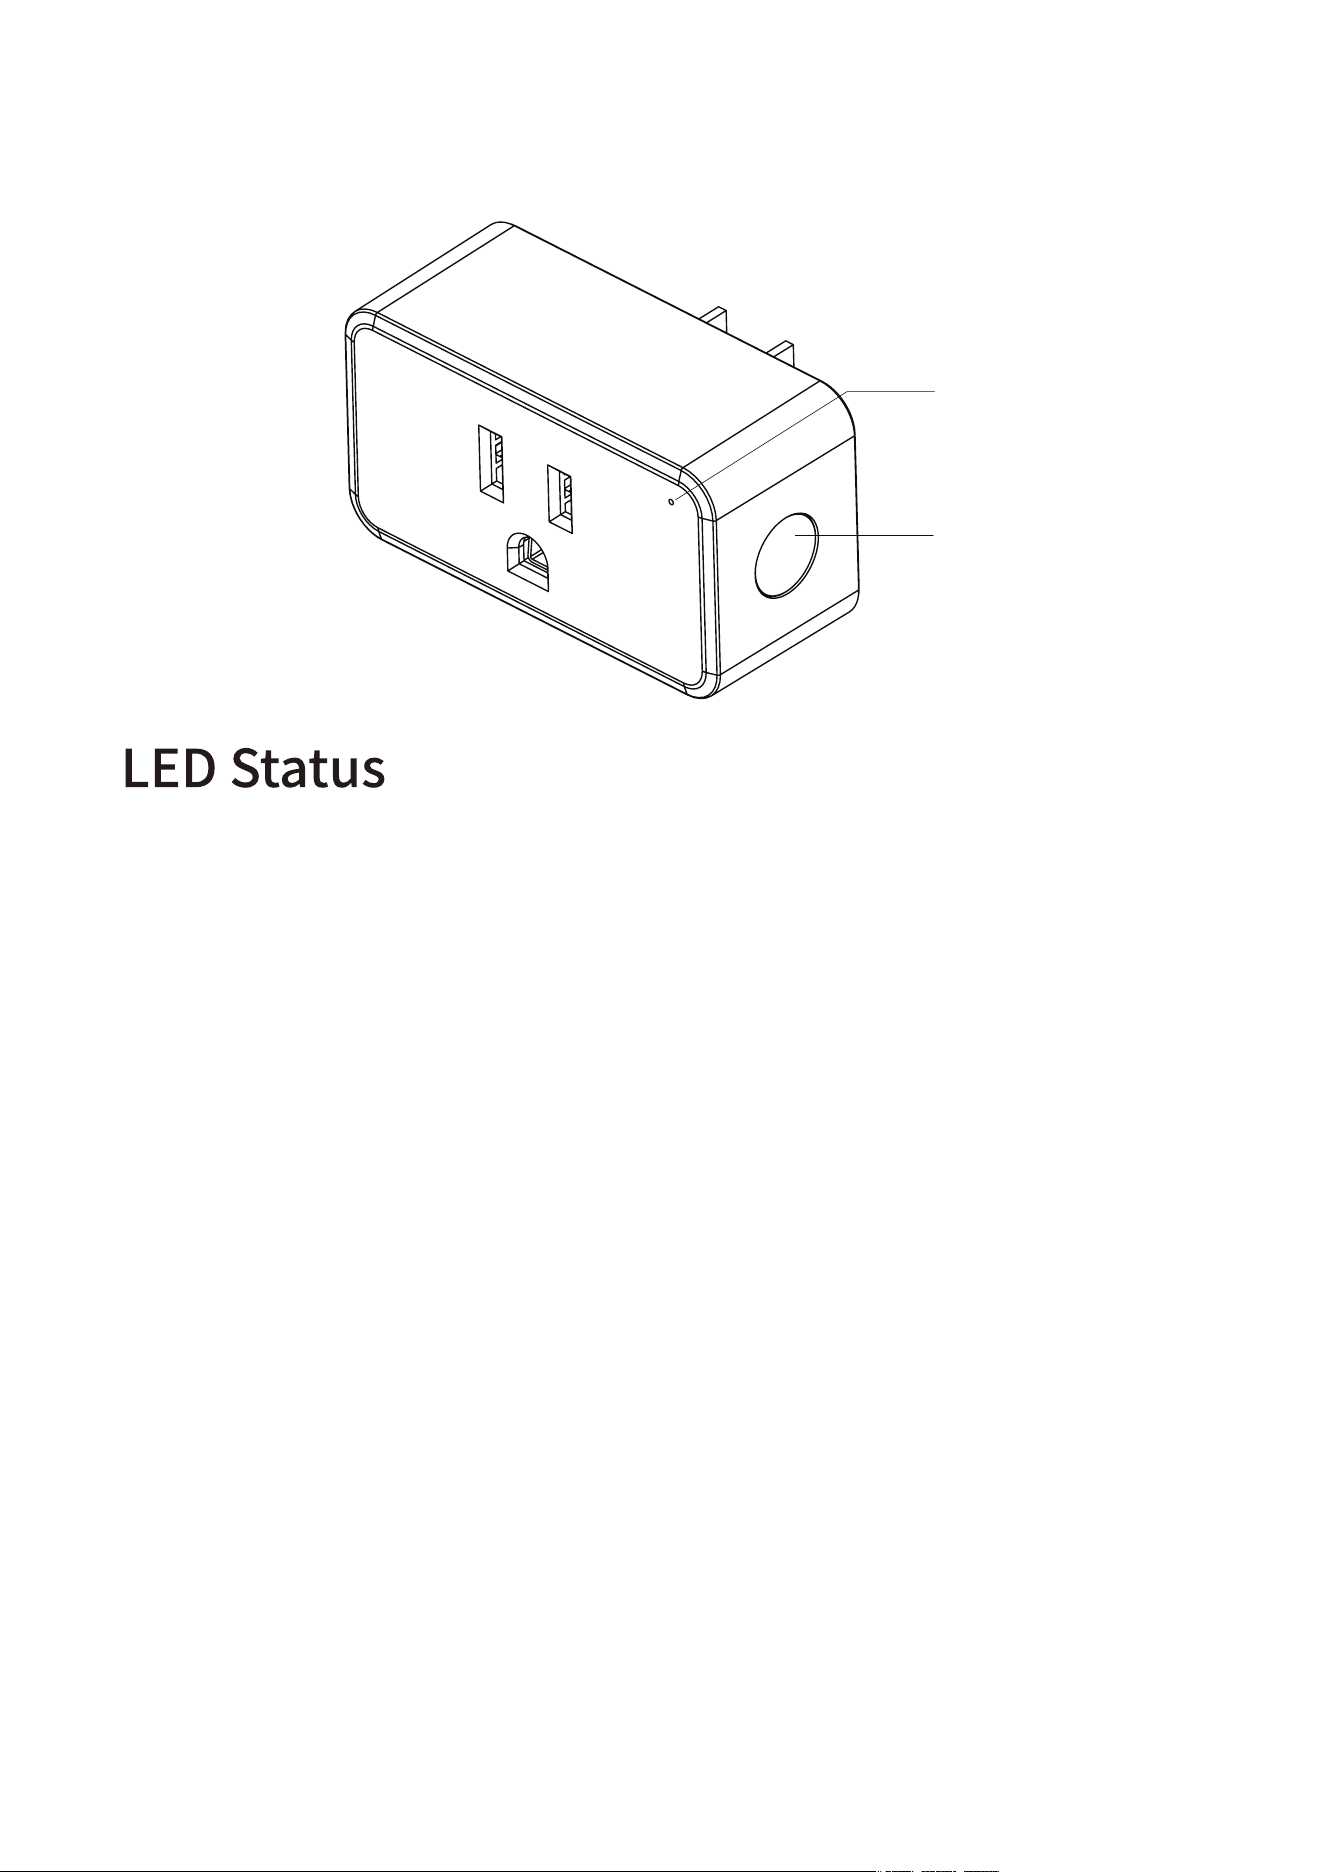
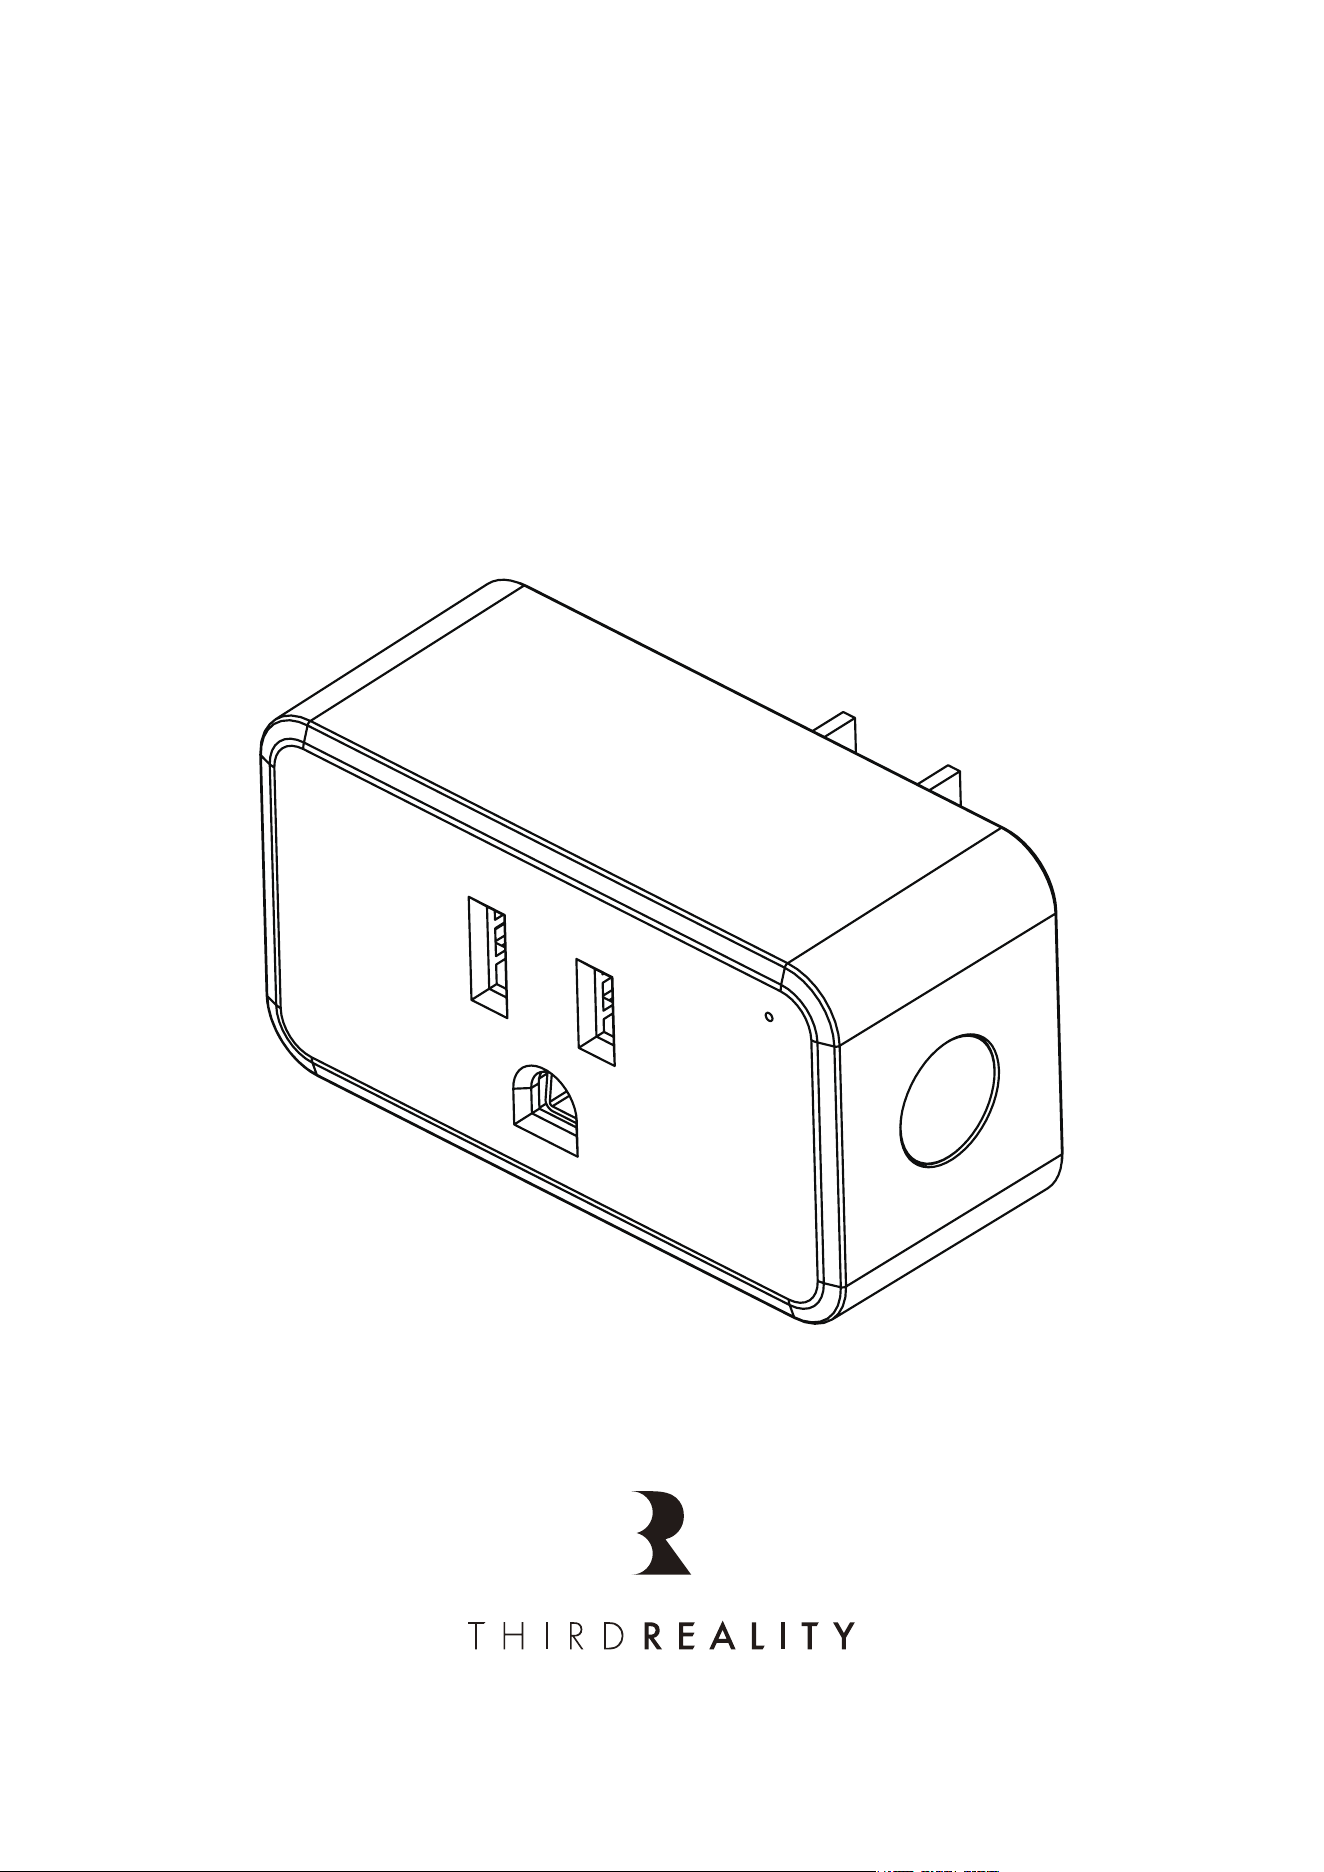
Setting up your Smart Plug Gen2
Factory Reset
LED Indicator
On/Off Button
Pairing: LED light flashes in red.
Pairing Completed: LED light is out.
Power ON: LED light is ON in red.
Power OFF: LED light is OFF.
After your Smart Plug is powered on, press and hold the
On/Off button for more than 10 seconds until the LED light
flashes in red indicating that your Smart Plug is in pairing
mode.
02

Compatible devices: Echo 4th Gen, Echo Plus 1st Gen/2nd
Gen, Echo Show 10 2nd Gen, Echo Show 10 3rd Gen, Echo
Studio. Eero 6, Eero 6 Pro, SmartThings 2015/2018, Hubitat
Elevation, Home Assistant (ZHA/Zigbee2MQTT), Third Re-
ality Hub.
Pairing with compatible Echo Speakers or
other Zigbee devices
Update your hub firmware and phone app to the latest
version before pairing, set up your Zigbee Hub by fol-
lowing its user manual.
Insert the Smart Plug into an outlet, it will enter pairing
mode automatically.
Follow the instructions in the corresponding phone
app to complete the setup. For compatible Echo Devic-
es, you can also can say "Alexa, discover devices" , then
Echo will find it automatically.
1.
2.
3.
03

Pairing with SmartThings
Compatible Devices: SmartThings Hub 2015&2018,Aeotec
Smart Home Hub
App: SmartThings App
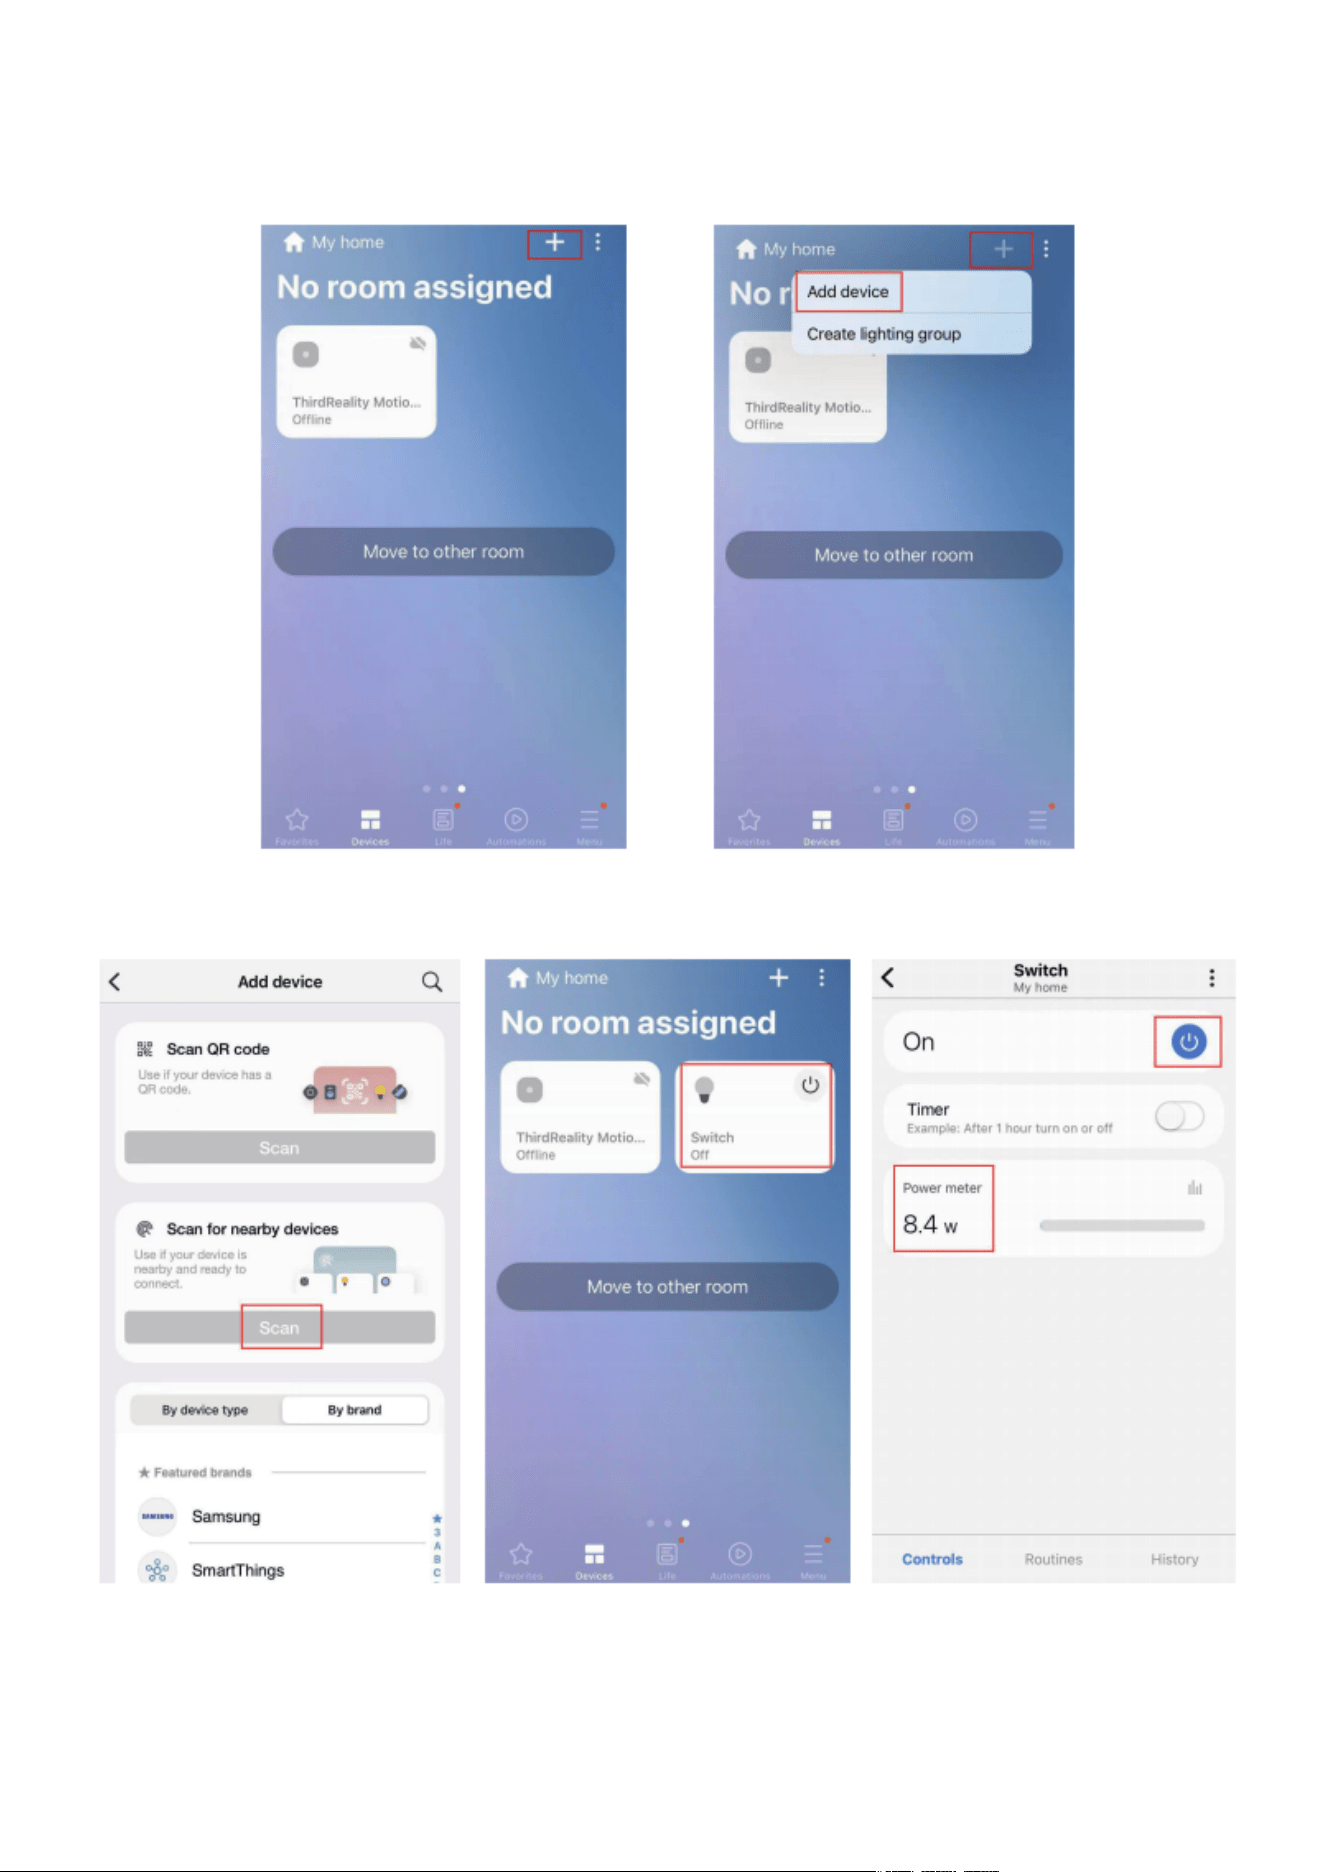
Check your SmartThings Hub for firmware updates
before pairing the Smart Plug Gen2 with it.
Plug the Smart Plug Gen2 into a socket near the hub,
the LED indicator flashes rapidly in red, indicating it is
in pairing mode. It exits pairing mode within 3 minutes
if not successfully paired. To put it into pairing mode
again, press the side button for 10 seconds until the
LED indicator flashes rapidly in red.
Tap "+" in the upper right in your SmartThings app,
then tap "Scan for nearby devices", the Smart Plug
Gen2 will be paired within seconds. You can see power
meter in the device page.
1.
2.
3.
04
05

Pairing with Amazon Echo
Compatible Devices: Echo 4th Gen, Echo Plus 1st Gen/2nd
Gen, Echo Studio.
App: Amazon Alexa App
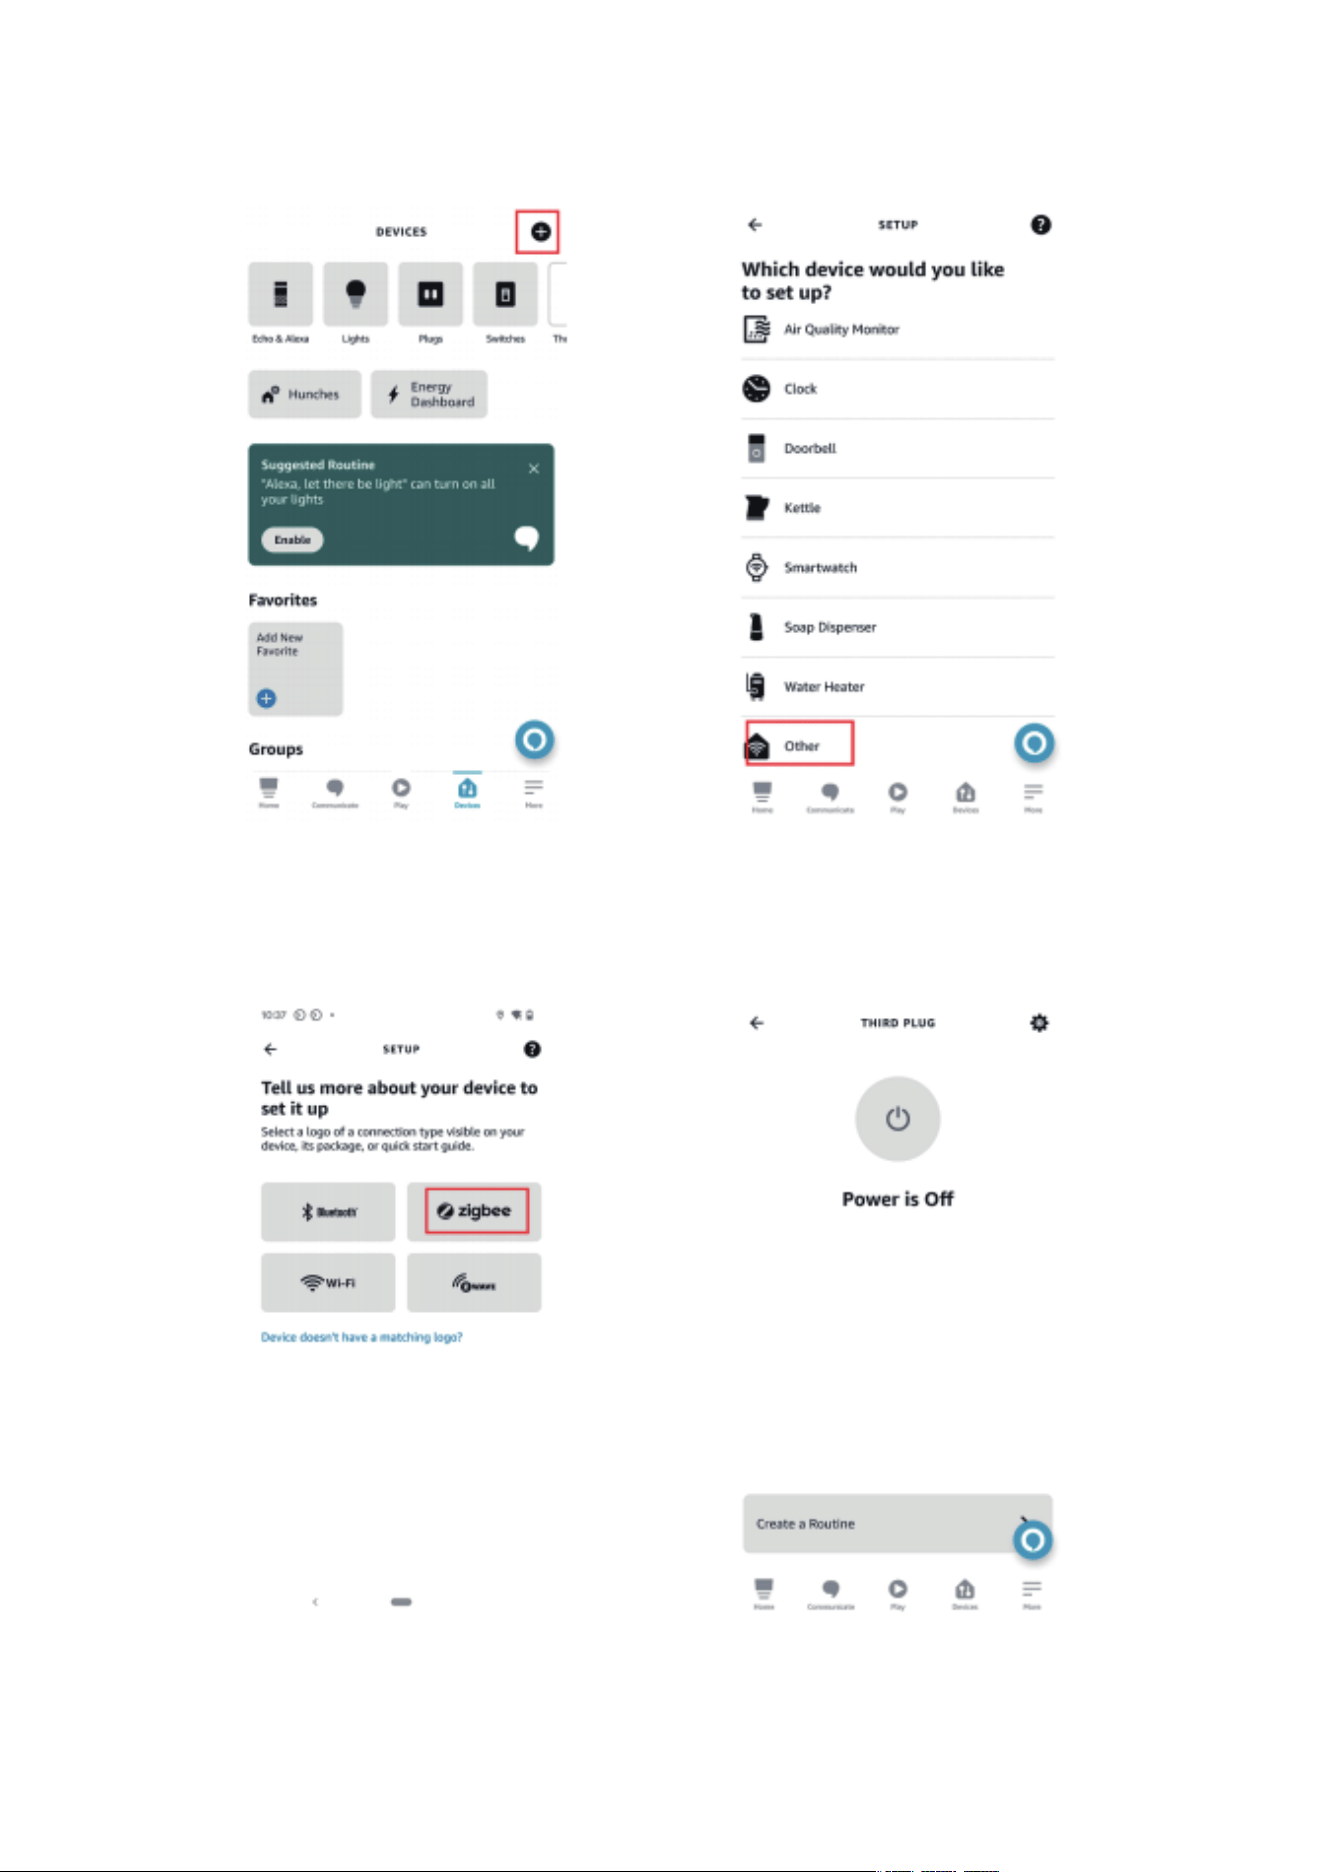
Check your Echo speaker for firmware updates before
pairing.
Plug the Smart Plug Gen2 into a power outlet near the
Echo speaker, the LED indicator of the plug flashes rap-
idly in red, indicating it is in pairing mode. It exits pair-
ing mode within 3 minutes if not successfully paired.
To put it into pairing mode again, press the side button
for 10 seconds until the LED indicator flashes rapidly in
red.
Tap "+" in the upper right in your Alexa app to "Add
Device", scroll down to choose "Other", then choose
Zigbee connection to add device, or simply ask Alexa
to discover devices, the Smart Plug Gen2 will be paired
within seconds.
1.
2.
3.
06
07

Pairing with Third Reality
Zigbee Hub: Smart Plug Gen2
App: Third Reality App
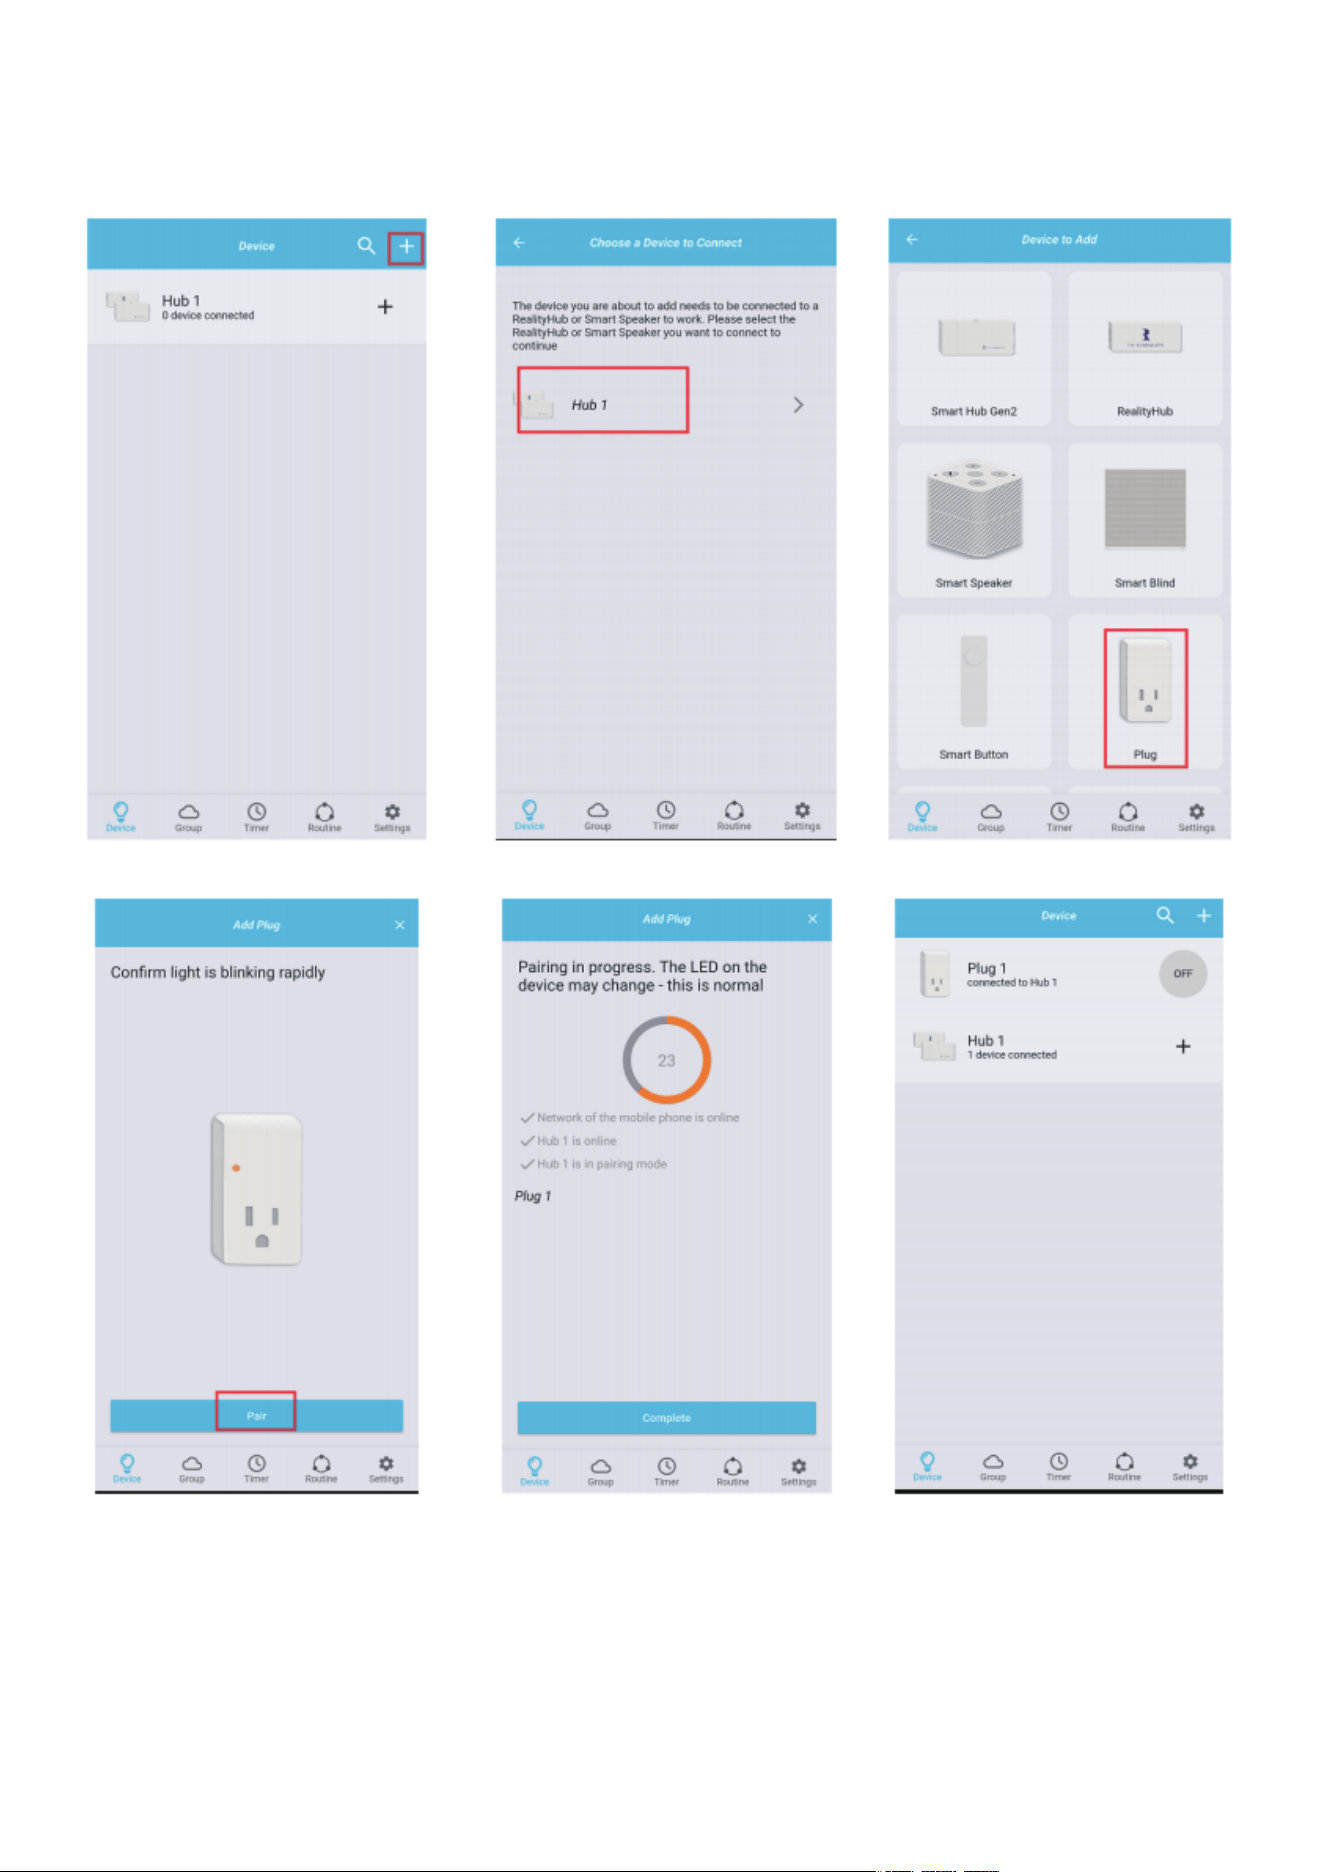
Check your Smart Hub Gen2, Smart Plug Gen2, and
Third Reality app for updates to make sure all latest
versions before pairing.
Plug the Smart Plug Gen2 into a socket near the hub,
the LED indicator flashes rapidly in red, indicating it is
in pairing mode. It will quit pairing mode within 3 min-
utes if not successfully paired. To put it into pairing
mode again, press the side button for 10 seconds until
the LED indicator flashes rapidly in red.
Tap "+" in the up right in Third Reality app, tap the Plug
icon, choose the hub, then tap "Pair" to add plug, the
Smart Plug Gen2 will be paired within seconds. You
can see power meter and total consumption in device
page, and customize "Default Safety Setting" after
power outage.
1.
2.
3.
08
09
Pairing with Hubitat
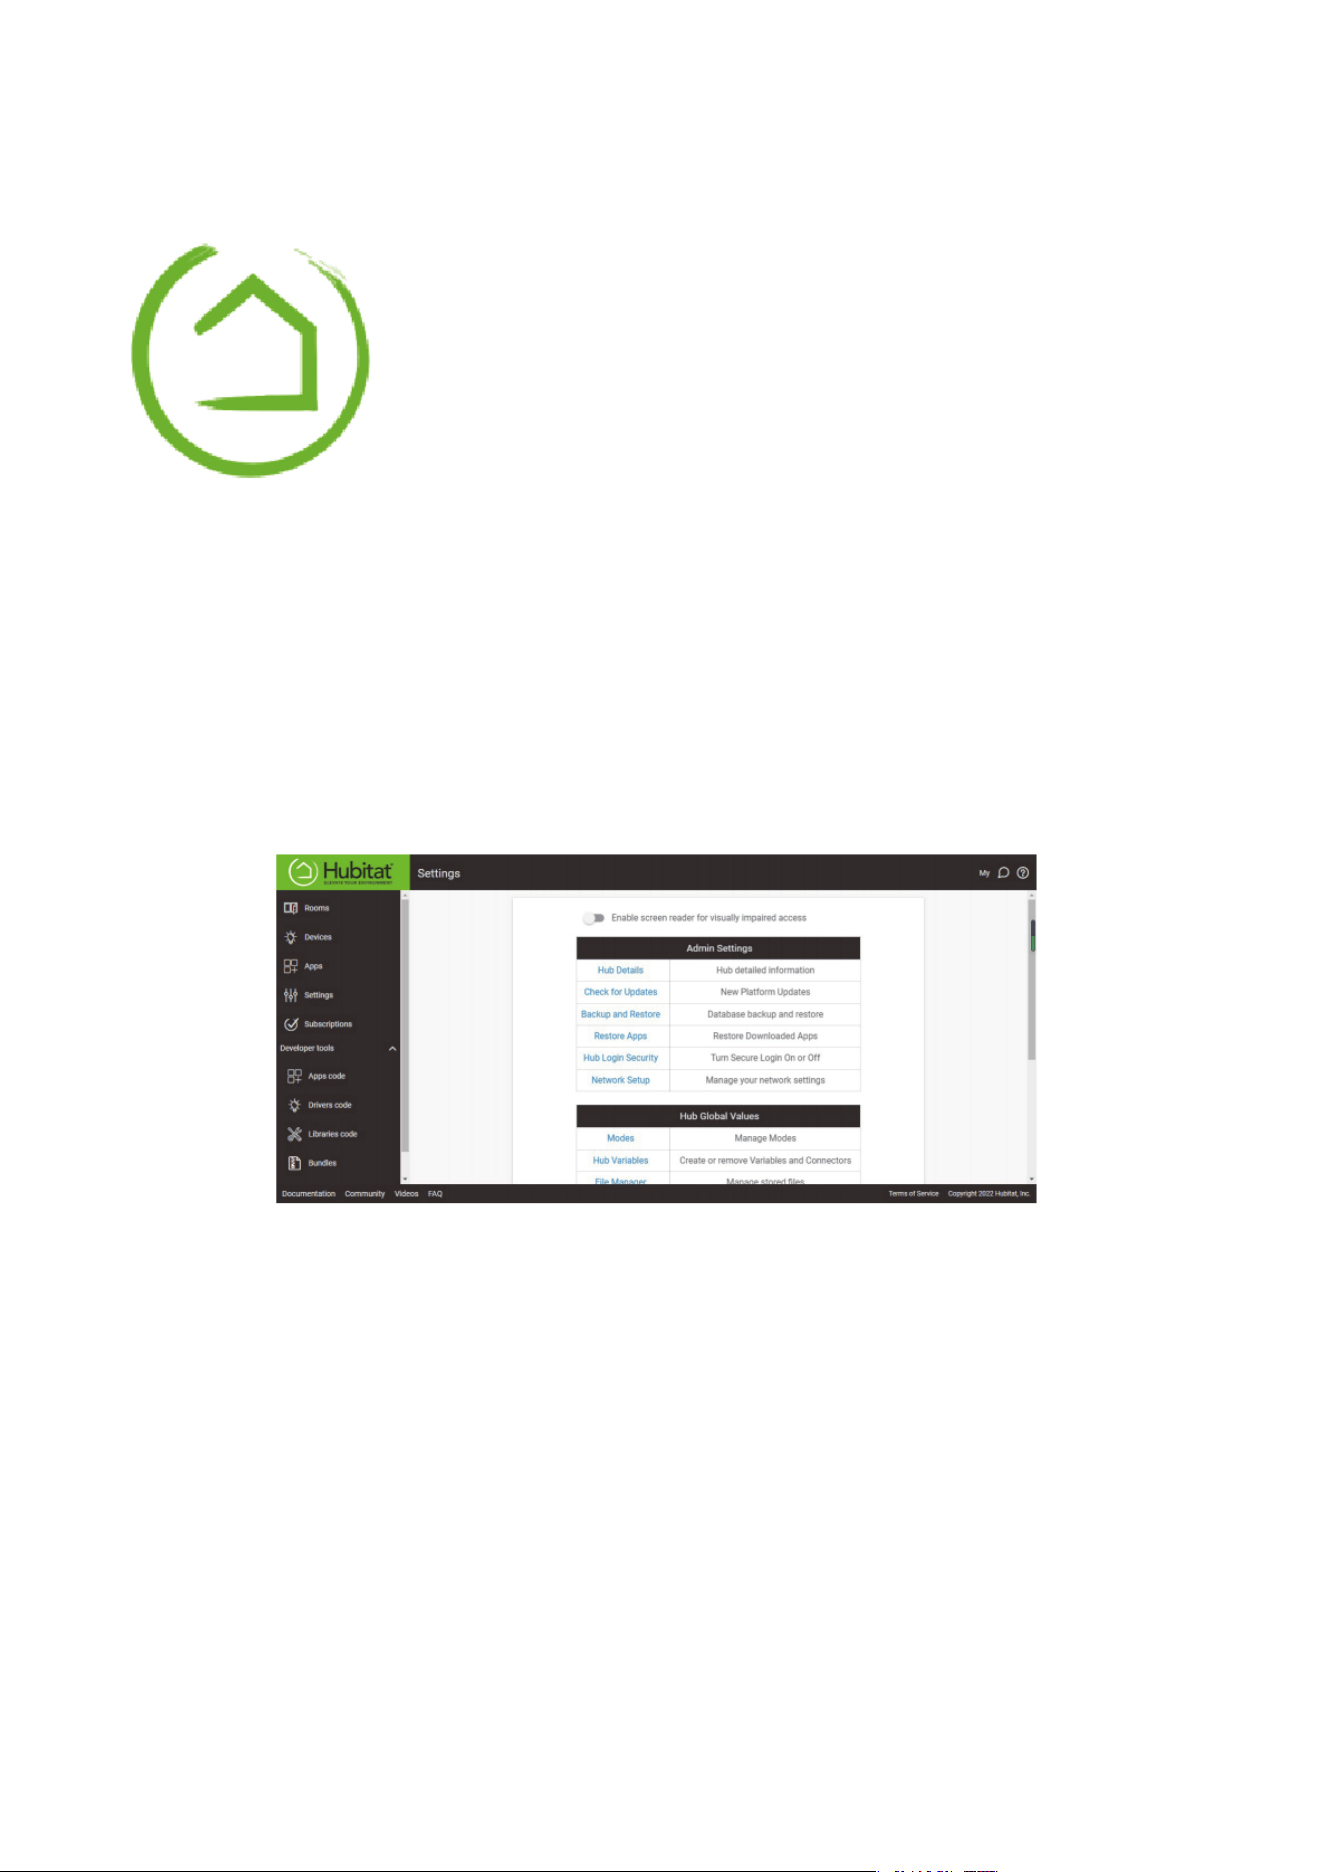
Before pairing the Smart Plug Gen2 with Hubitat Eleva-
tion, check for firmware update in your Hubitat set-
tings page.
1.
Plug the Smart Plug Gen2 into a socket near the hub,
the LED indicator flashes rapidly in red, indicating it is
in pairing mode. It exits pairing mode within 3 minutes
if not successfully paired. To put it into pairing mode
again, press the side button for 10 seconds until the
LED indicator flashes rapidly in red.
2.
Website: http://find.hubitat.com/
10
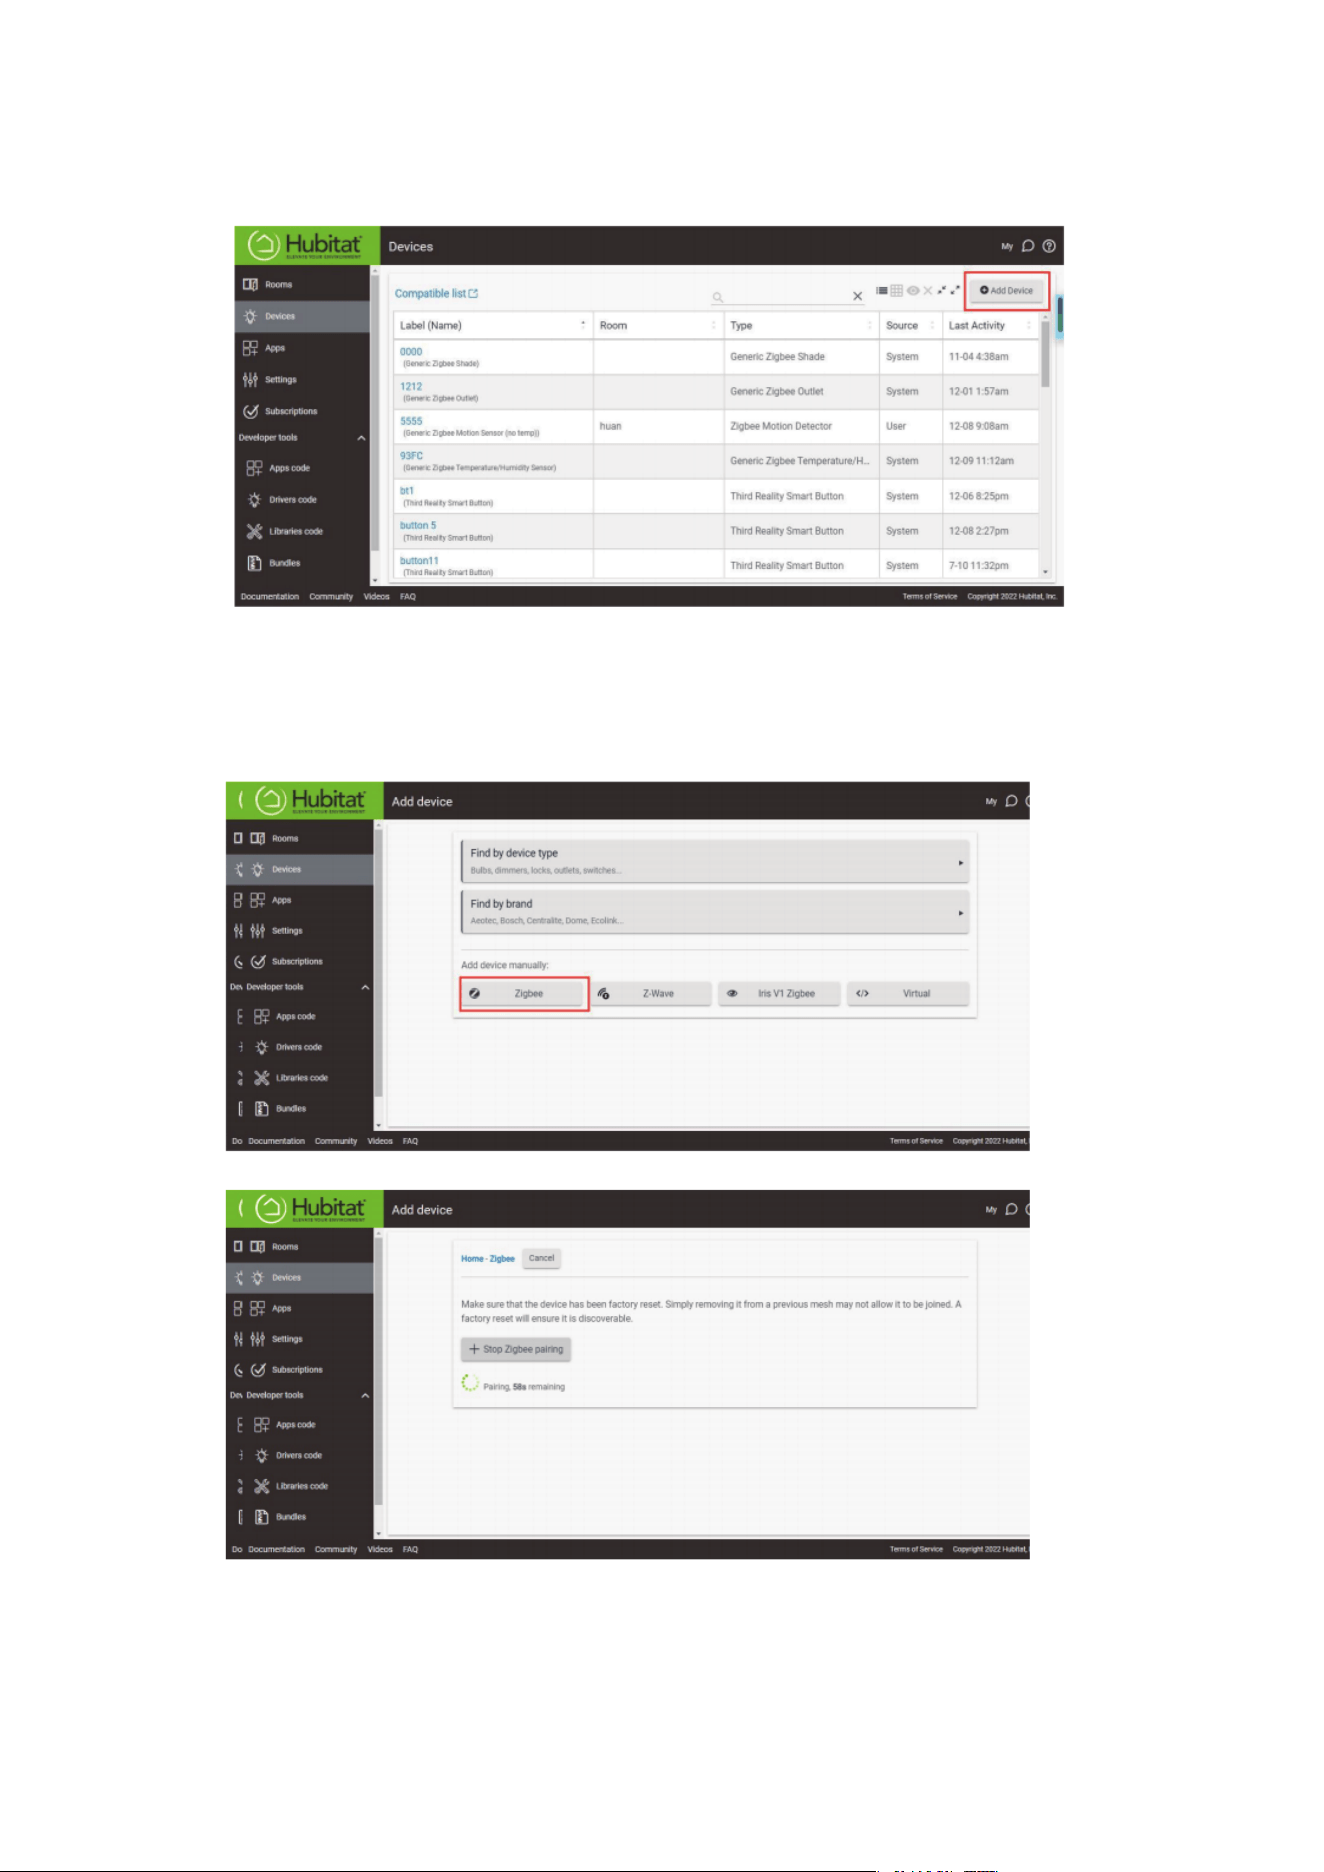
Tap Device tab to add device.3.
Choose Zigbee to add device manually.4.
11
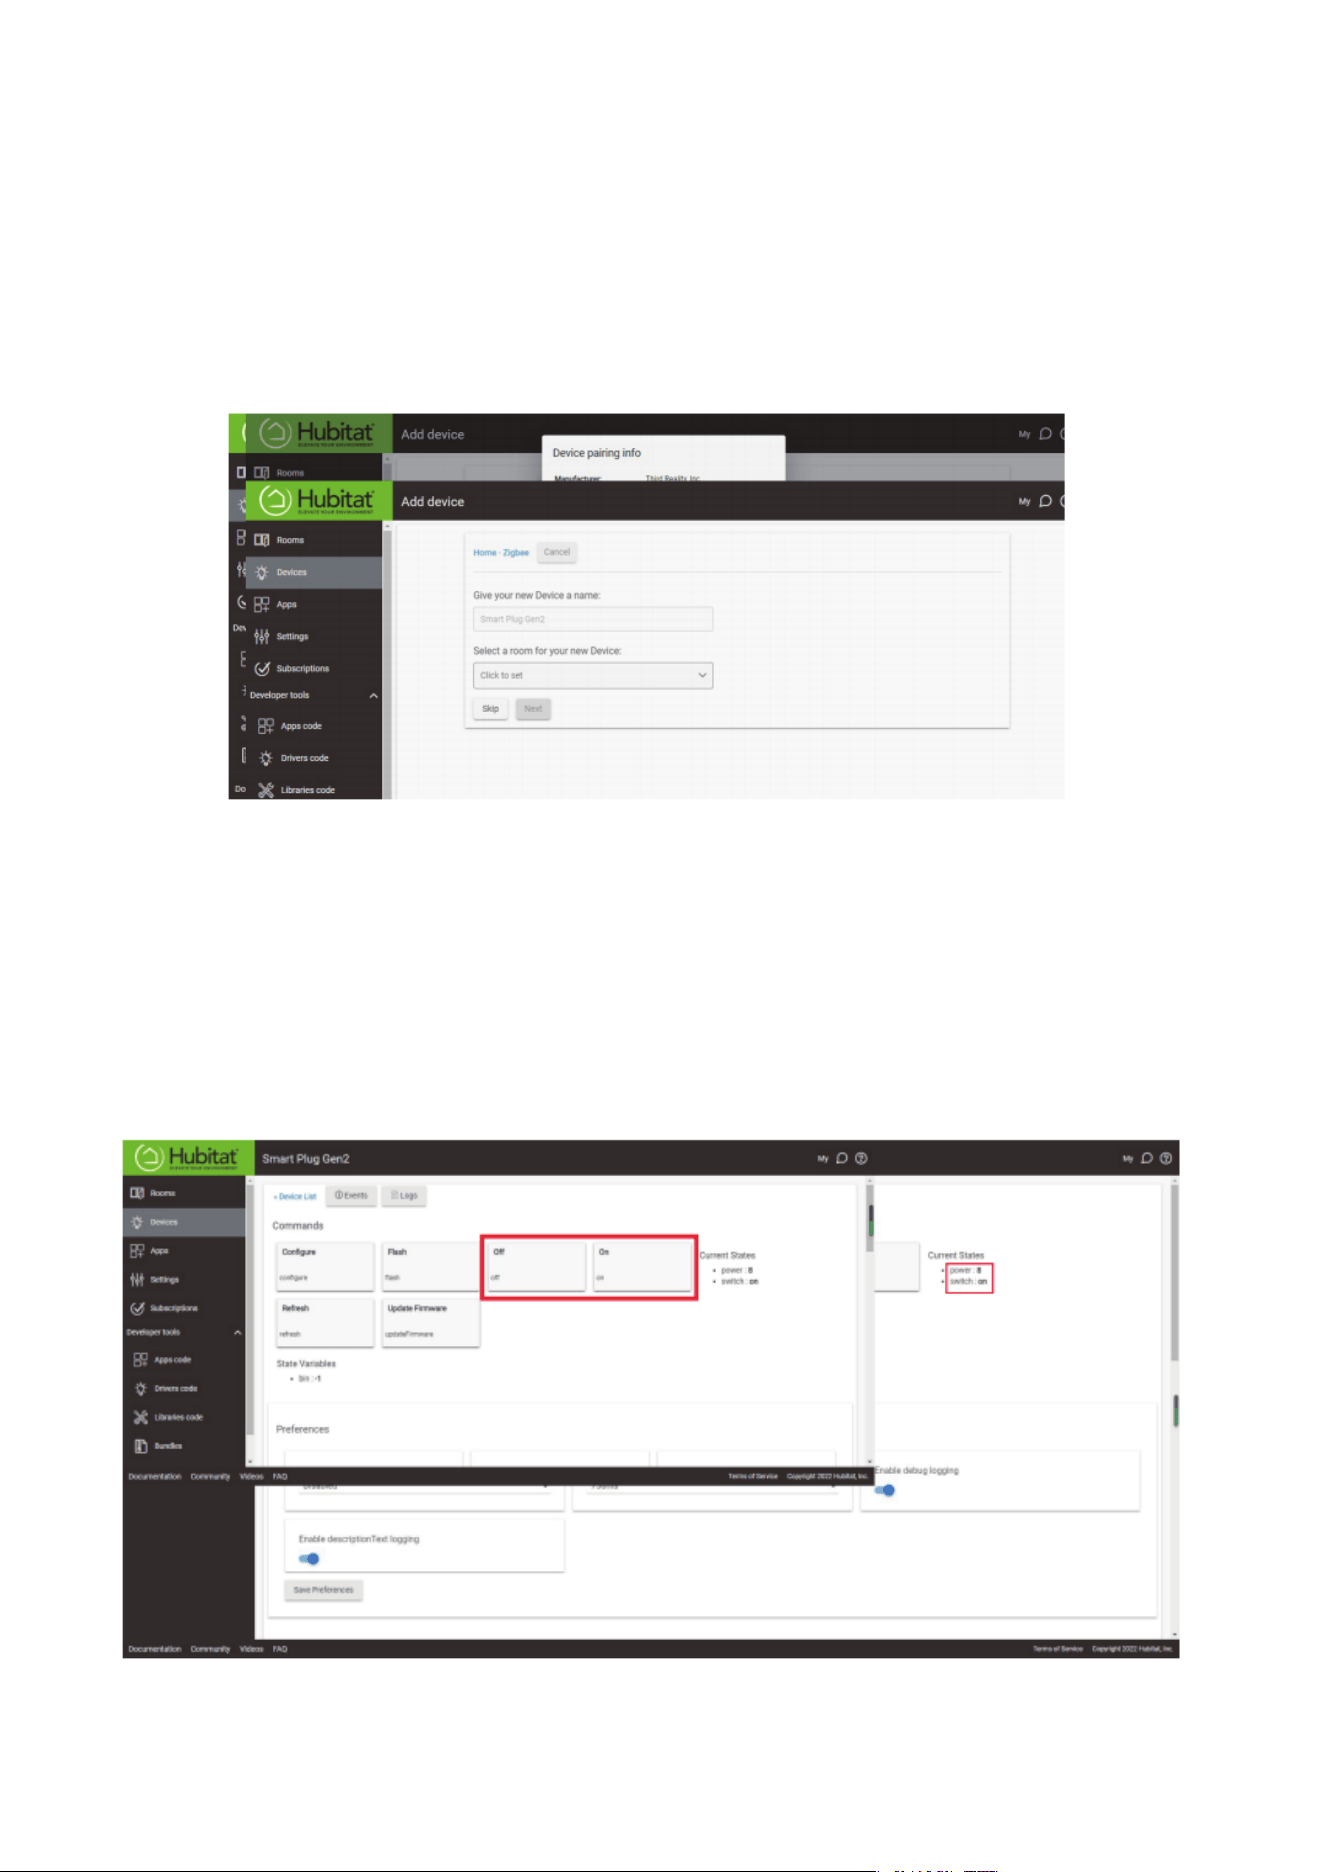
The Smart Plug Gen2 will be paired within seconds,
then you can rename it and edit its location.
5.
12
Now you can turn on/off the Smart Plug Gen2 and
monitor the power meter from the device page.
6.
Pairing with HA
Via ZHA
Plug the Smart Plug Gen2 into a socket near the hub,
the LED indicator flashes rapidly in red, indicating it is
in pairing mode. It exits pairing mode within 3 minutes
if not successfully paired. To put it into pairing mode
again, press the side button for 10 seconds until the
LED indicator flashes rapidly in red.
1.
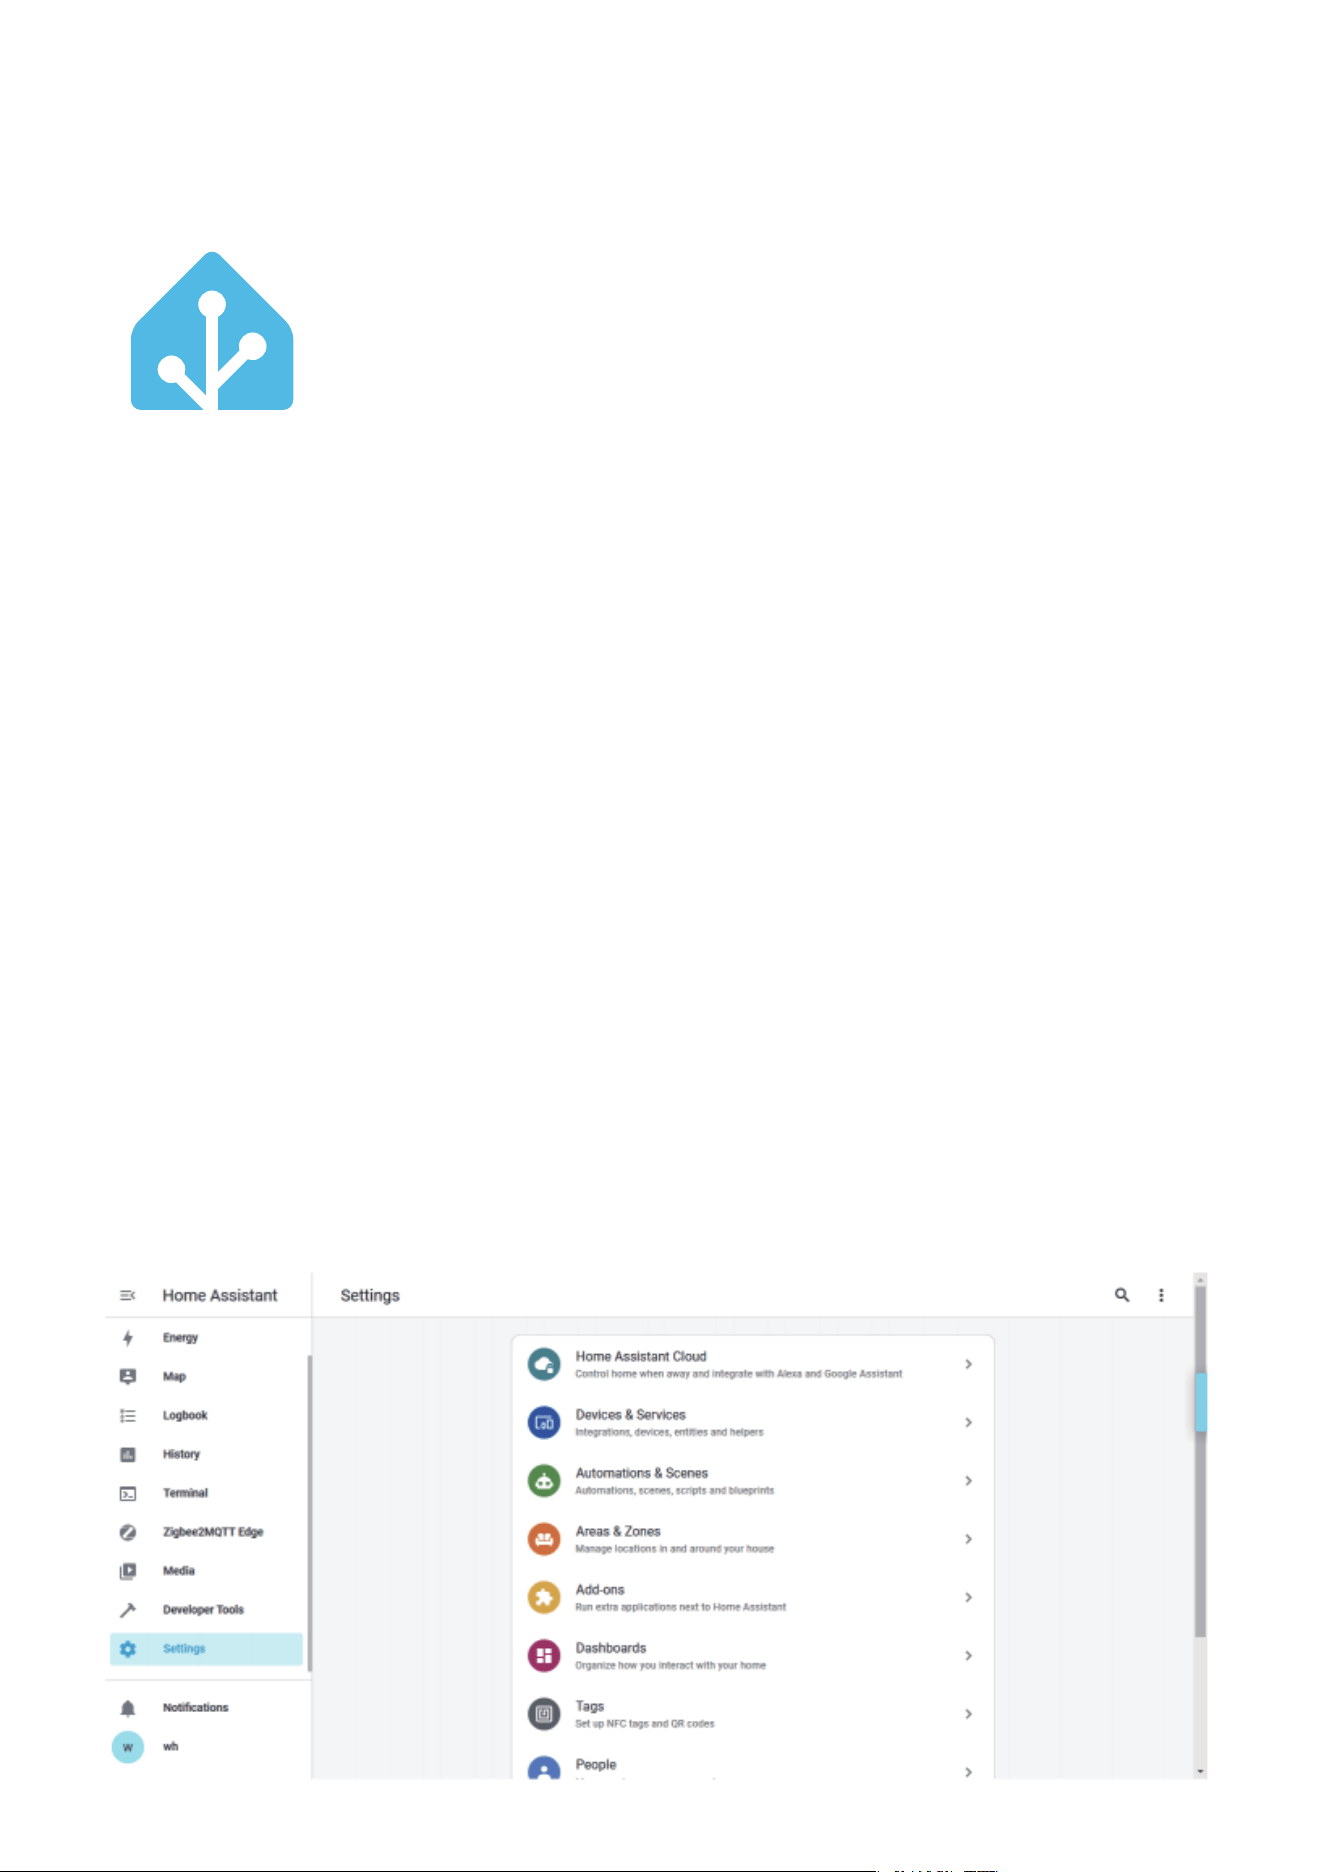
Make sure Home Assistant Integration Zigbee Home
Automation Setup is ready, then go to "settings" page,
Click "Devices & Services".
2.
13
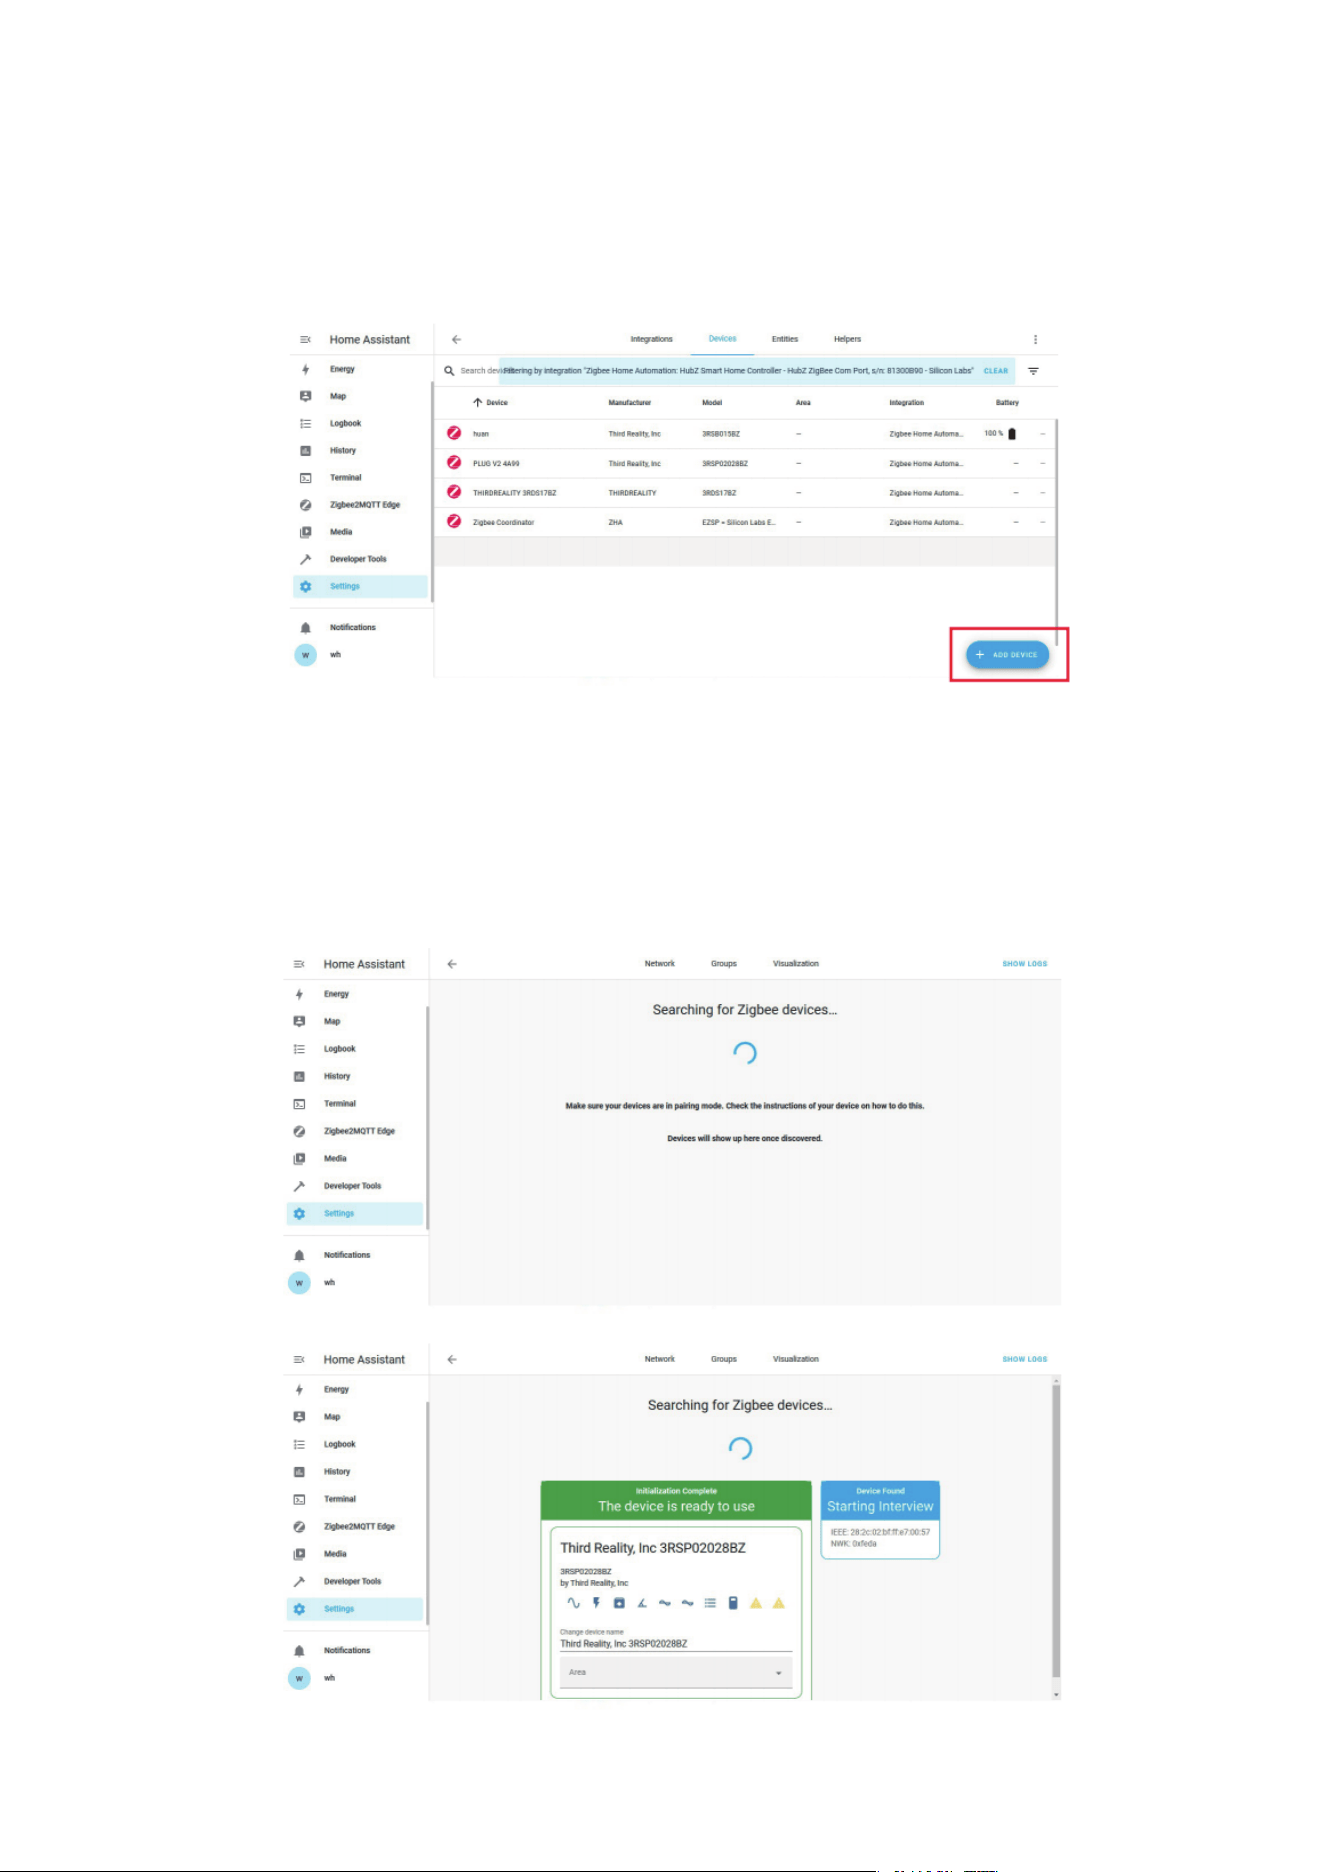
Then click the "Devices" on the Zigbee item, then click
"Add Devices".
3.
After the pairing is completed succssfully, it will show
up in the page.
4.
14
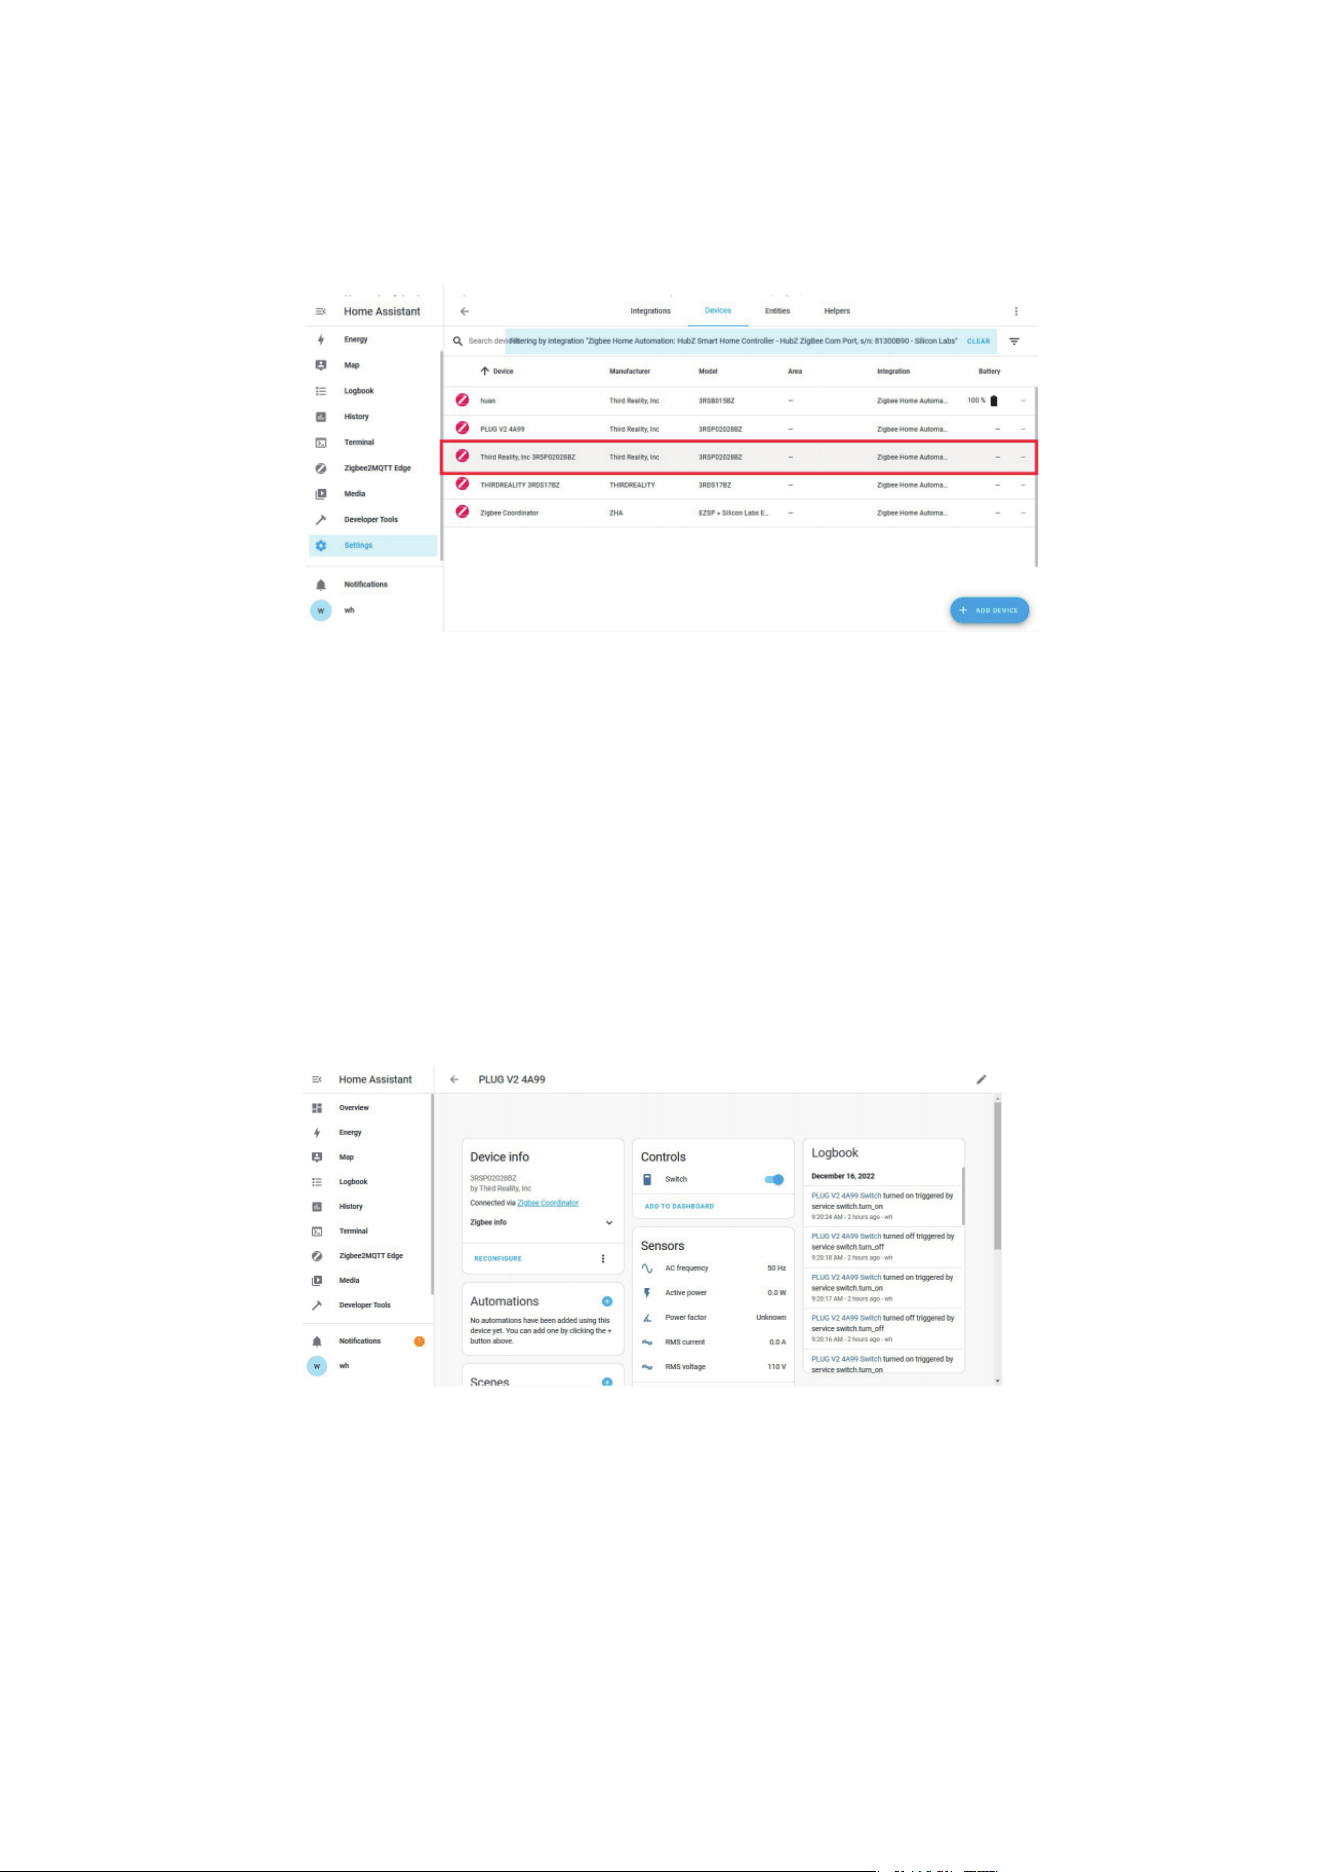
Back to "Devices", then you can find the smart Plug
Gen2 added.
5.
Click to enter in the control interface to set the Smart
Plug Gen2, you can monitor the active power and
preset on/off satates after power outage in the devces
page.
6.
15
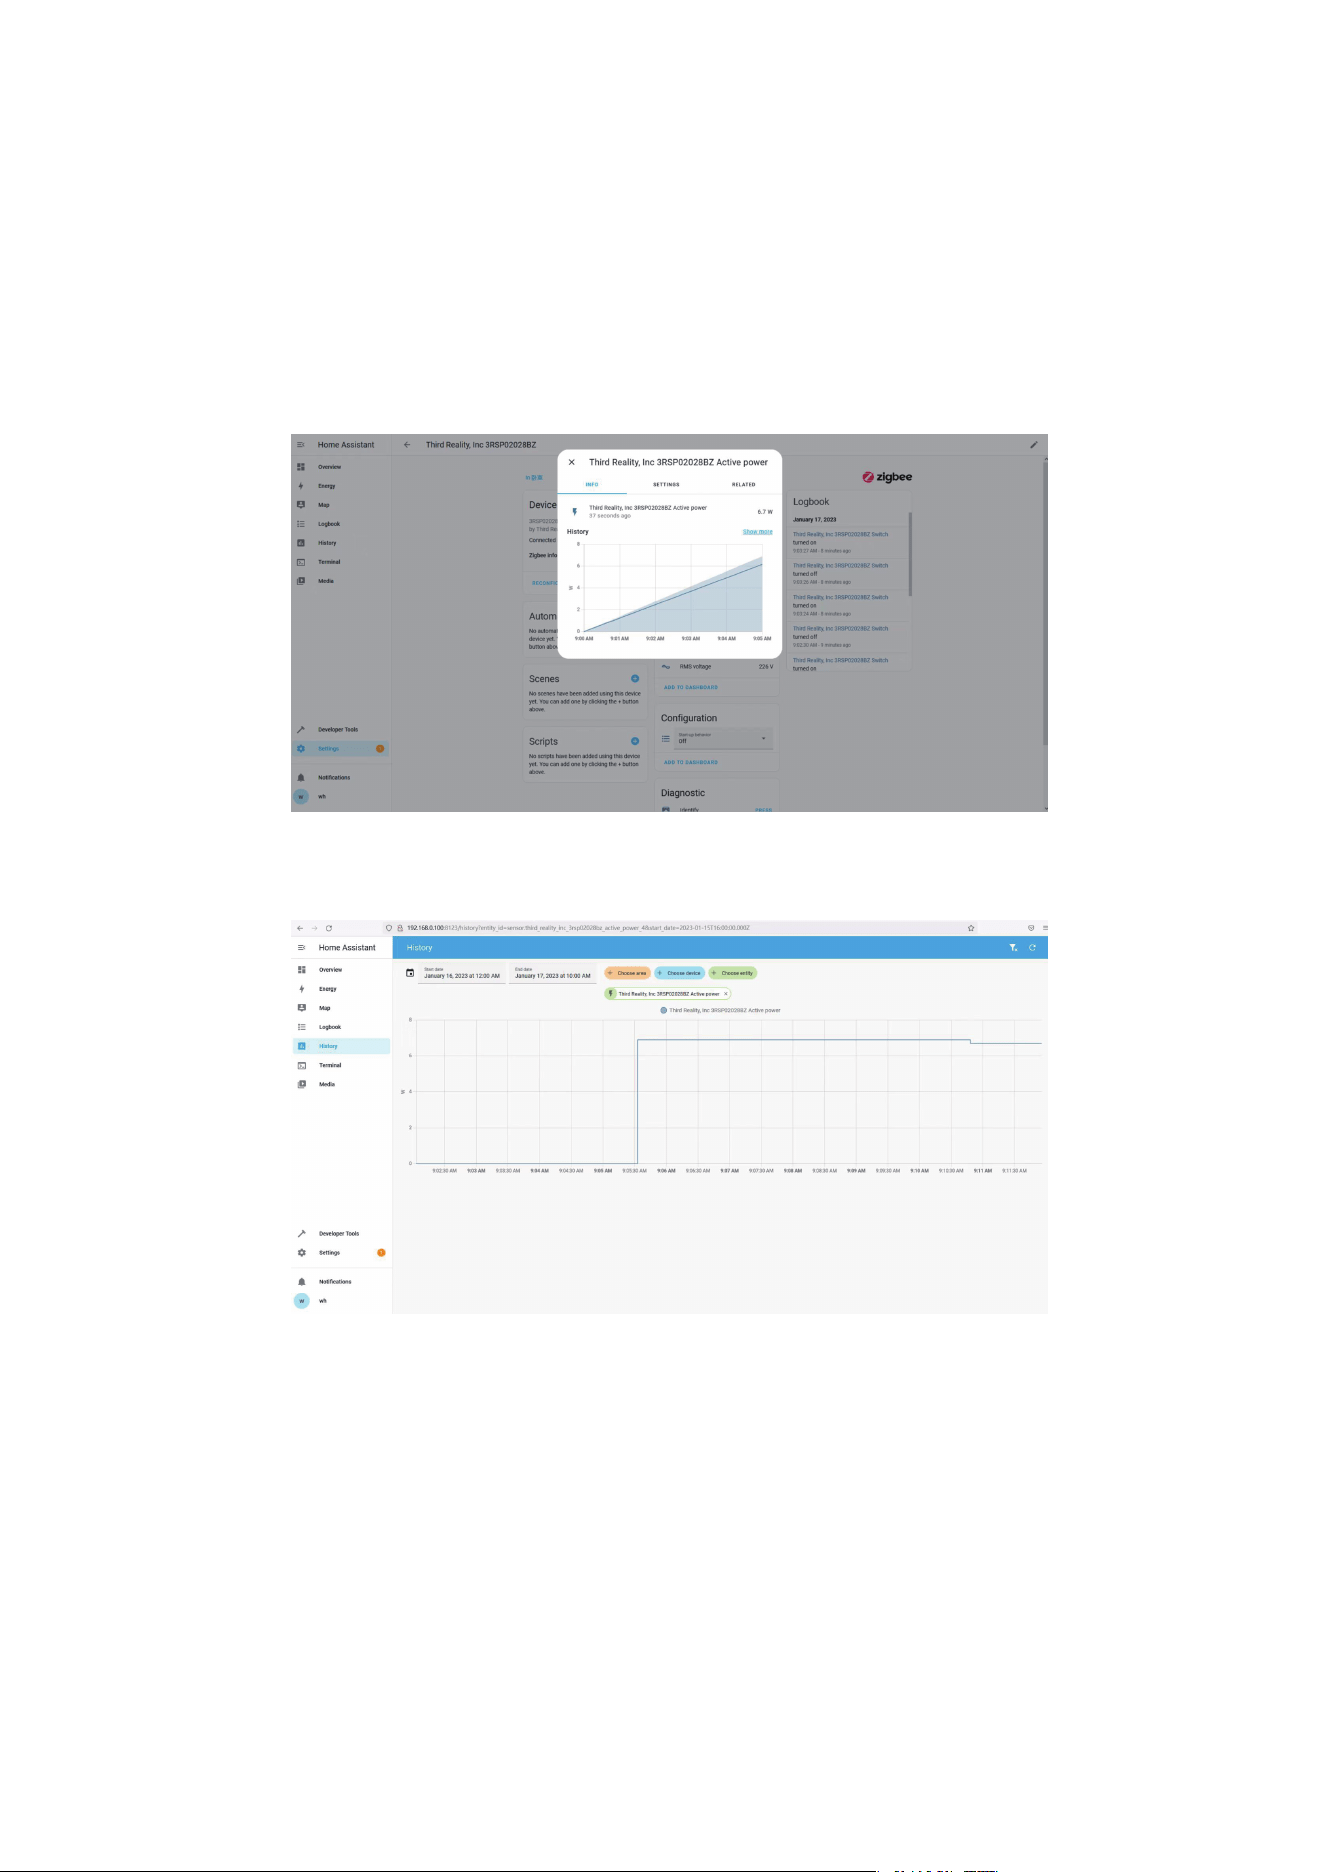
You can monitor real time and history active power
data in detailed page.
7.
16
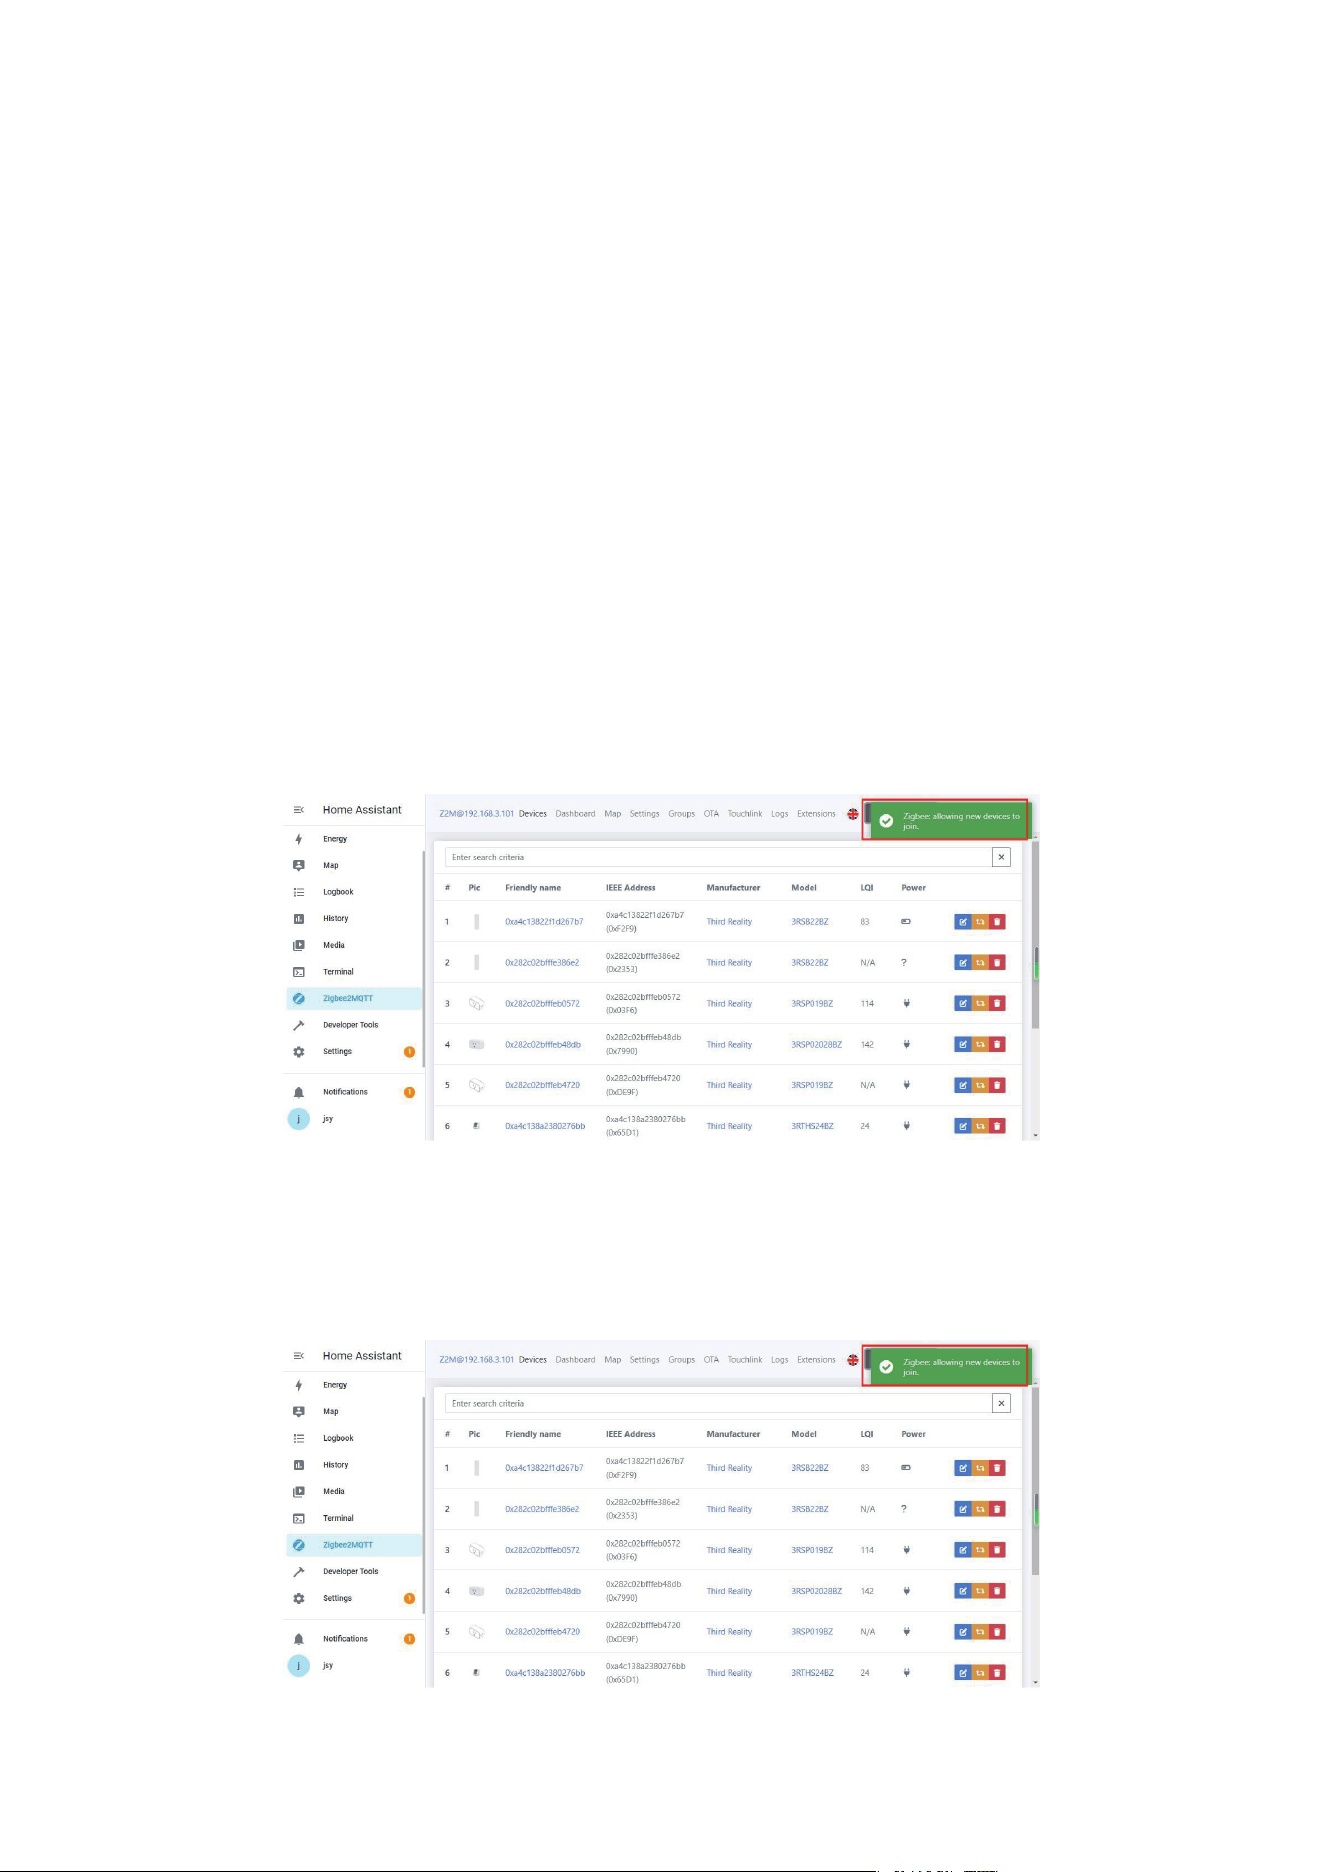
Via Zigbee2MQTT
Plug the Smart Plug Gen2 into a socket near the hub,
the LED indicator flashes rapidly in red, indicating it is
in pairing mode. It exits pairing mode within 3 minutes
if not successfully paired. To put it into pairing mode
again, press the side button for 10 seconds until the
LED indicator flashes rapidly in red.
1.
Click "Permit Join" in Zigbee2MQTT to add device.2.
Smart Plug Gen2 has been added successfully.3.
17
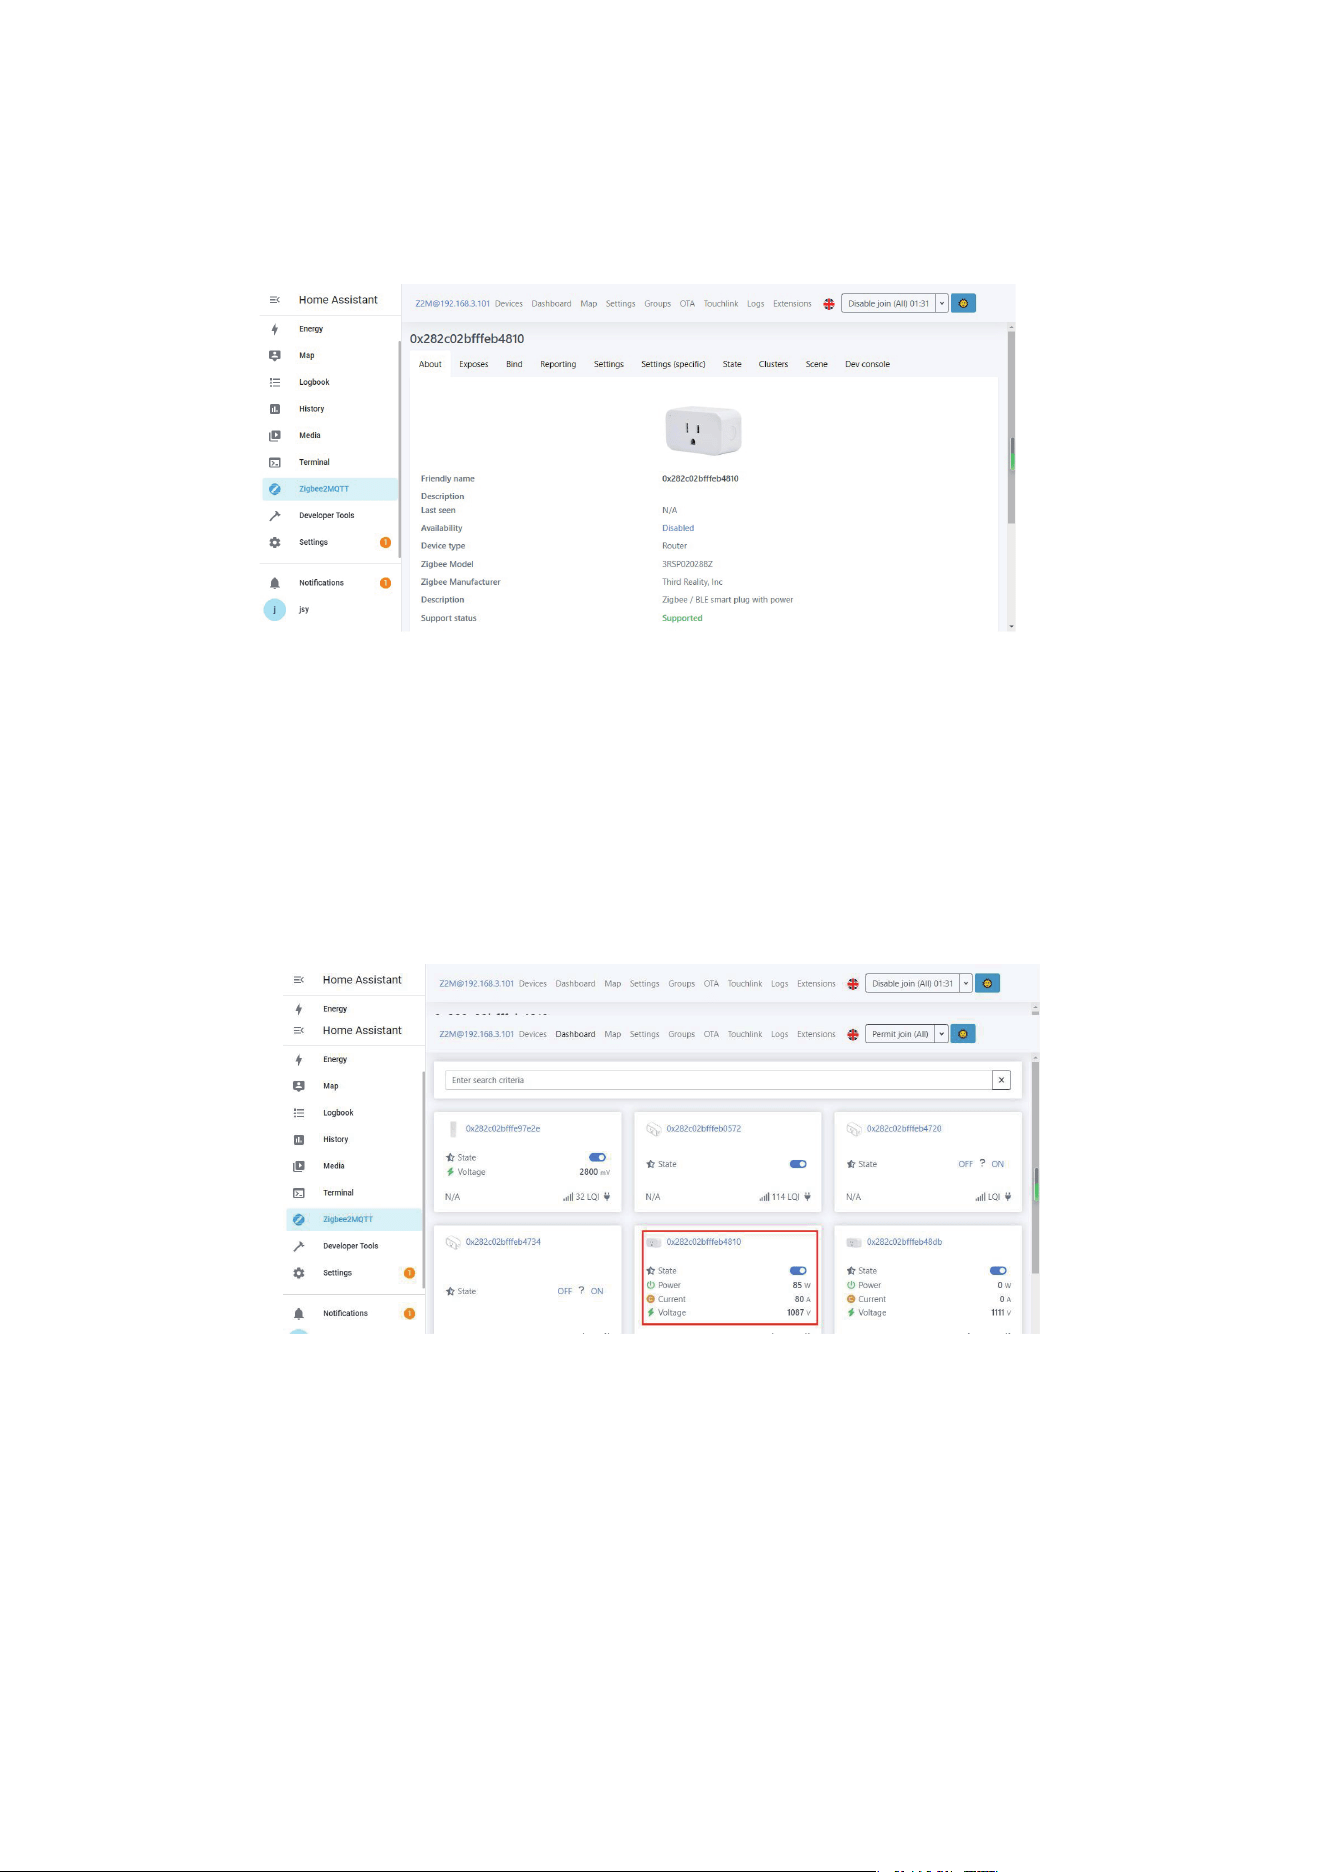
Click the device name to see detailed device informa-
tion.
4.
You can monitor on/off states and current/voltage of
the Smart Plug Gen2 in Dashboard.
5.
18
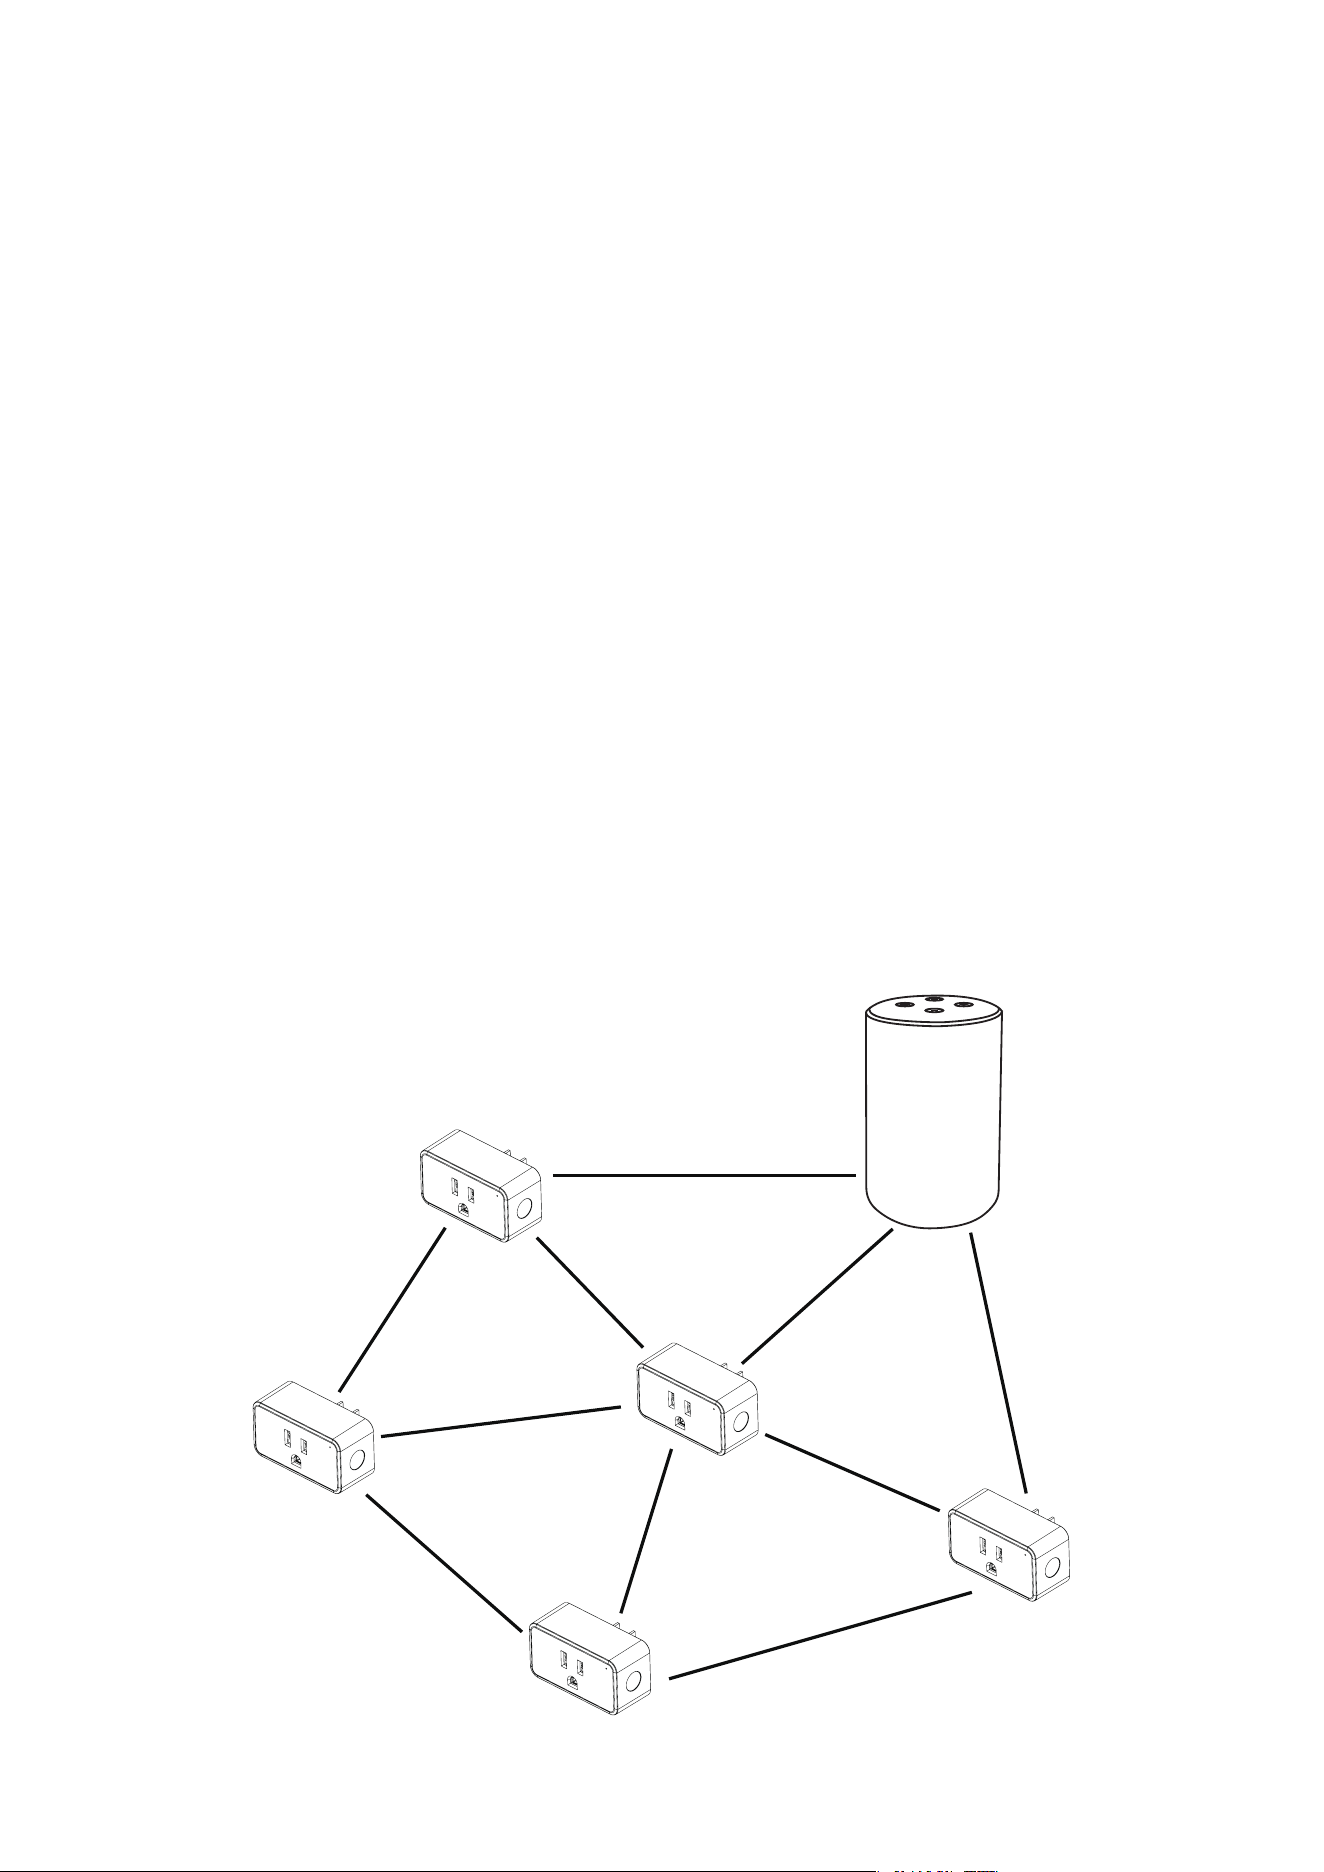
Mesh Network Setup
If you want to have multiple plugs set up for different
rooms, especially rooms out of the range of the Echo De-
vices Zigbee signal range, you can utilize Mesh Network
setup to extend the range.
First, set up the smart plugs close to the Echo Device.
Unplug the plug and move it further away from the
Echo Device. And make sure it’s within Zigbee range of
another active plug, which is connected on the net-
work as a node. This will form a Zigbee Mesh Network.
Each connected plug will connect with other plugs
(nodes) within the range.
1.
2.
19

Control the Smart Plug via voice command, say "
Alexa, turn on/off First Plug ".
Schedules or timers to turn the Smart Plug ON/OFF au-
tomatically.
Create routines to enjoy your smart life, say " Alexa,
good morning " to turn on the coffee maker, etc.
Remotely control the Smart Plug from your phone
even if you are not at home.
Use the plugs as extenders, they can help Echo Devices
or the Zigbee Hubs to connect with the plugs that are
further away from your Echo.
1.
2.
3.
4.
5.
Using your Smart Plug Gen2
20

Factory reset the Smart Plug Gen2
Power on the Smart Plug, and then press and hold the
button for more than 10 seconds until the LED light
flashes in red.
Fail to pair with Echo
Make sure your Echo Speaker is compatible with Smart
Plug (See the Compatible Devices List) and the Smart
Plug is in the right mode.
1.
2.
Trouble Shooting
Please ensure your Echo Devices are set up before
adding the Smart Plugs.
Reboot the Echo Speaker or Zigbee Hub by unplug-
ging the power and plugging it back in, then try to
pair the Smart Plug with it again.
Factory reset the Echo speaker (Press and hold the
Action Button for 25 seconds. The light ring will
pulse orange, then turn off. Wait for the light ring to
turn back on and turn blue. The light ring then
turns orange again and the device enters the setup
mode), then try to pair the Smart Plug with it
again.
21

Smart Plug is not responding 3.
Move Smart Plugs Gen2
If you want to move the paired plug from one echo to
another, make sure you remove the plug from the
Alexa app and wait 30 minutes to allow cloud synchro-
nization before repairing with different Echo Device.
4.
Why does my Smart Plug Gen2 show electricity
usage even when nothing is plugged into it?
Even when nothing is plugged in, the Smart Plug itself
uses a tiny bit of electricity—less than 1 watt—just for
being turned on. We show this small amount on the
display to make sure you're fully aware of any power it
uses.
5.
Turn on/off the Smart Plug twice in the Alexa app
to sync the plug.
If not connected, please reboot the Echo Speaker
and factory reset the Smart Plug, then pair the
Smart Plug with the Echo Speaker.
If still not working, please try to deregister the Echo
Speaker and register back in, then try to pair the
Smart Plug with it.
22

This device complies with Part 15 of the FCC Rules. Opera-
tion is subject to the following two conditions:
(1) This device may not cause harmful interference.
(2) This device must accept any interference received, in-
cluding interference that may cause undesired operation.
NOTE: This equipment has been tested and found to
comply with the limits for a Class B digital device, pursuant
to part 15 of the FCC Rules. These limits are designed to
provide reasonable protection against harmful interfer-
ence in a residential installation.
NOTE: This equipment generates uses and can radiate
radio frequency energy and, if not installed and used in ac-
cordance with the instructions, may cause harmful inter-
ference to radio communications. However, there is no
guarantee that interference will not occur in a particular in-
stallation. If this equipment does cause harmful interfer-
ence to radio or television reception, which can be deter-
mined by turning the equipment off and on, the user is en-
couraged to try to correct the interference by one or more
of the following measures:
FCC regulatory conformance
23

-Reorient or relocate the receiving antenna.
-Increase the separation between the equipment and re-
ceiver.
-Connect the equipment into an outlet on a circuit differ-
ent from that to which the receiver is connected.
-Consult the dealer or an experienced radio/TV technician
for help.
NOTE: The manufacturer is not responsible for any radio or
TV interference caused by unauthorized modifications to
this equipment. Such modifications could void the user’s
authority to operate the equipment.
This equipment complies with FCC radiation exposure
limits set forth for an uncontrolled environment.
This transmitter must not be co-located or operating in
conjunction with any other antenna or transmitter.
RF Exposure
Limited Warranty
24
For limited warranty, please visit
https://thirdreality.com/faq-help-center/.
For customer support, please contact us at info@3reality.com or
visit www.thirdreality com.
For question on other platforms, visit for corresponding platform’s
application/support platforms.