
User Manual
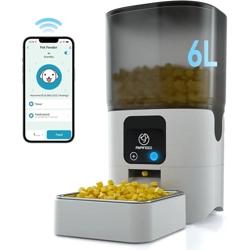
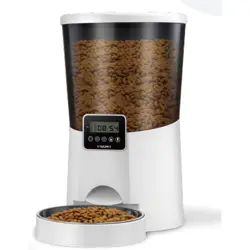
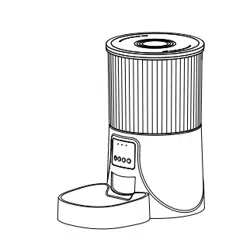
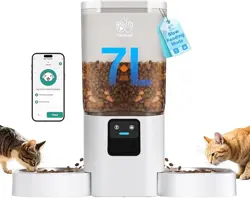
Smart Pet Feeder with Two Bowls(2.4G/5G WiFi)
Model:ACF190W
If the product is upgraded in the following please
refer to the actual product in hand.
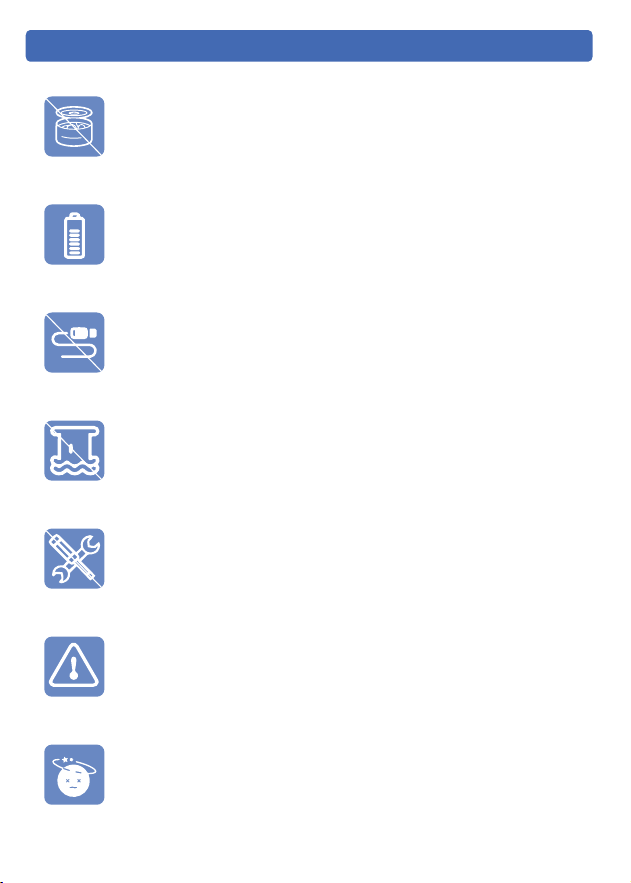
Please do not use wet, canned or moist food.
This product uses 3× D Cell Batteries as a backup power supply.
Please use double power supply to ensure the normal use of
the product.
Examine the feeder after installation. Do not plug in if there is
water on the power cable or plug.
Do not immerse the base part in water at any time as it may
damage electronic components.
Do not disassemble the feeder other than asinstructed in this
user manual.
Only use accessories recommended or sold by the manufacturer.
The use of accessories not recom-mended or sold by the
manufacturer may cause an unsafe condition.
Dispose of all packaging materials properly. Some items may
be packed in plastic bags, these bags could cause suffocation.
- 01 -
Safety Instructions
1-Year Warranty
24/7 Online Support
For guidance on product use and warranty extension, please contact our
brand after-sales staff via email:
【support@frienhund.com】
lf any questions related to orders, please contact the seller through the
shopping platform.
Any questions about the use of the product, you can contact our brand
after-sales staff.We will solve your problem until it is resolved.
- 02 -
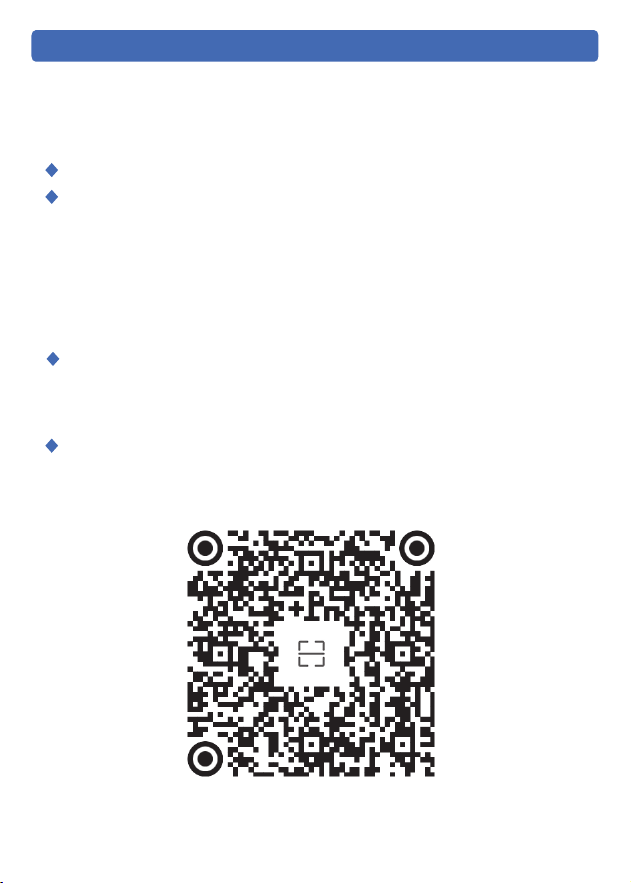
Scan the code to view Installation Video, Wi-Fi Connection Tutorials,
App Feature Descriptions.
Warranty
Monday-Friday:
Tel: 1-877-631-3655, (PST 8:00 am-5:00pm)
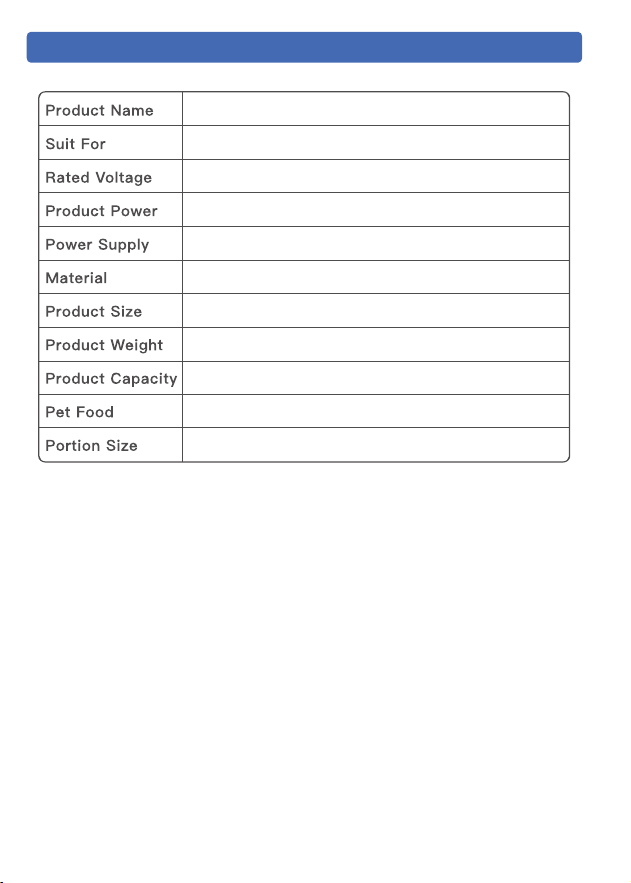
Cat, Dog, Rabbit, Small Pets,Multiple Pets
Smart Pet Feeder with Two Bowls(ACF190W)
5V 1A
5W
Power Adapter and 3× D Cell Batteries
ECO-Friendly ABS
180*470*400mm/7*18.5*15.75in
1.86kg/4.1lb
7L
Dry Food
10~15g(0.02~0.03
lb)
- 03 -
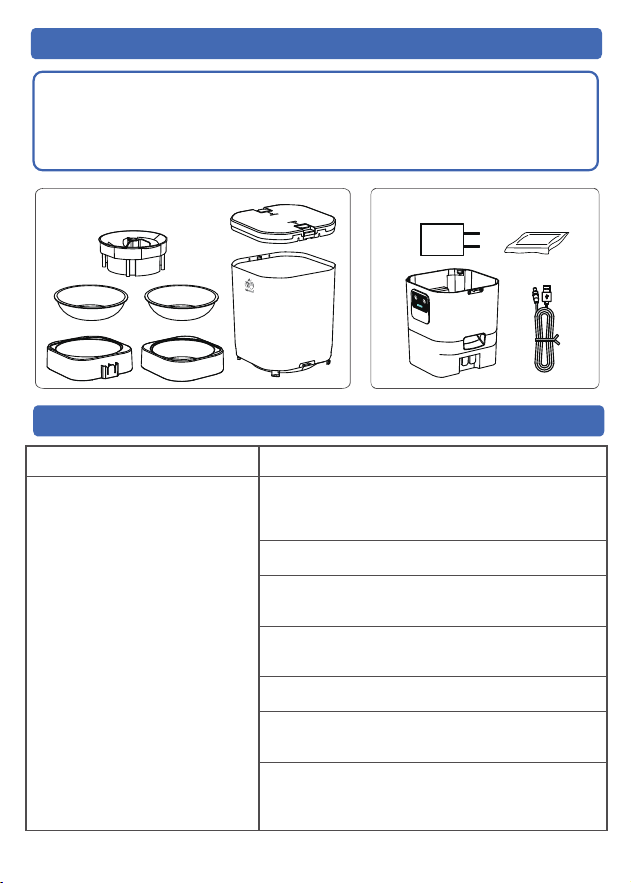
Product Specifications
- 04 -
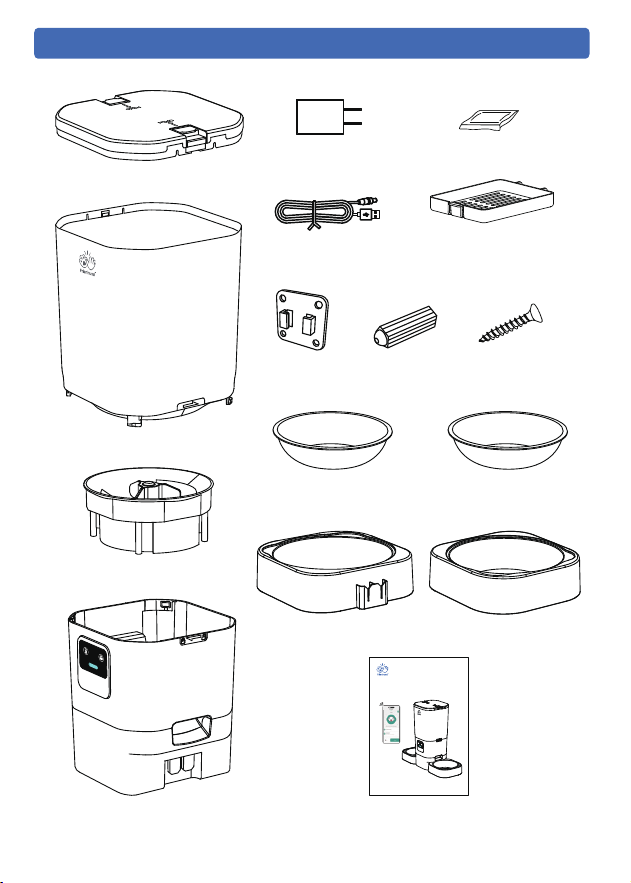
User Manual*1
USB Cable*1
Meal Splitter*1
Power
Adapter*1
Stainless Steel
Feeding Bowl*2
Desiccant*1
Desiccant
Compartment*1
Lid*1
Food Tank*1
Feeder Base*1
Bowl Tray*2
ABS Wall
Hook*1
Anchors*4
Screws*4
Packing List
User Manual
Smart Pet Feeder with Two Bowls(2.4G/5G WiFi)
Model:ACF190W
If the product is upgraded in the following please
refer to the actual product in hand.
- 05 -
1
2
3
4
5
6
7
8
9
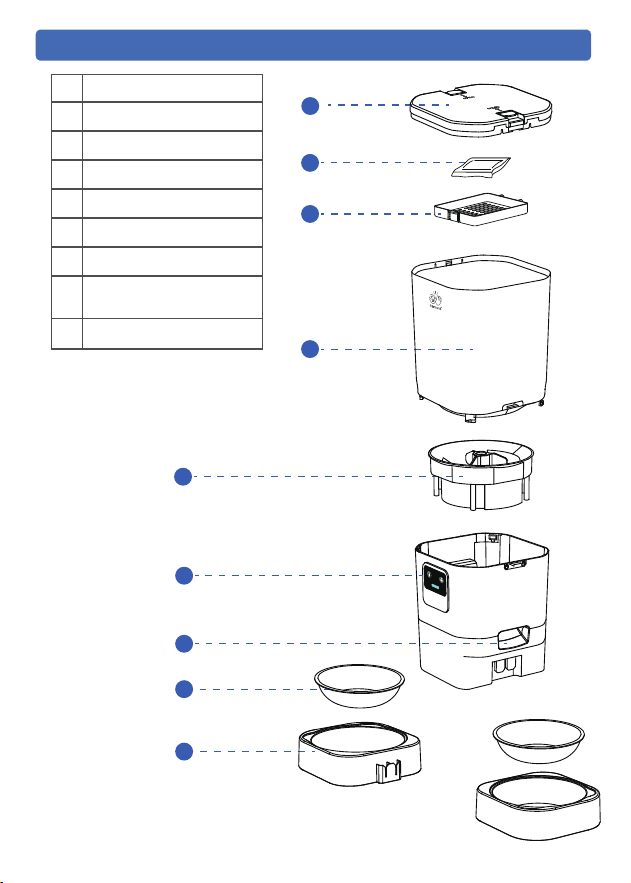
Lid
Desiccant
Desiccant Compartment
Food Tank
Meal Splitter
Control Panel
Food Outlet
Stainless Steel
Feeding Bowls
Bowl Trays
1
2
3
4
5
6
7
9
8
Product Overview
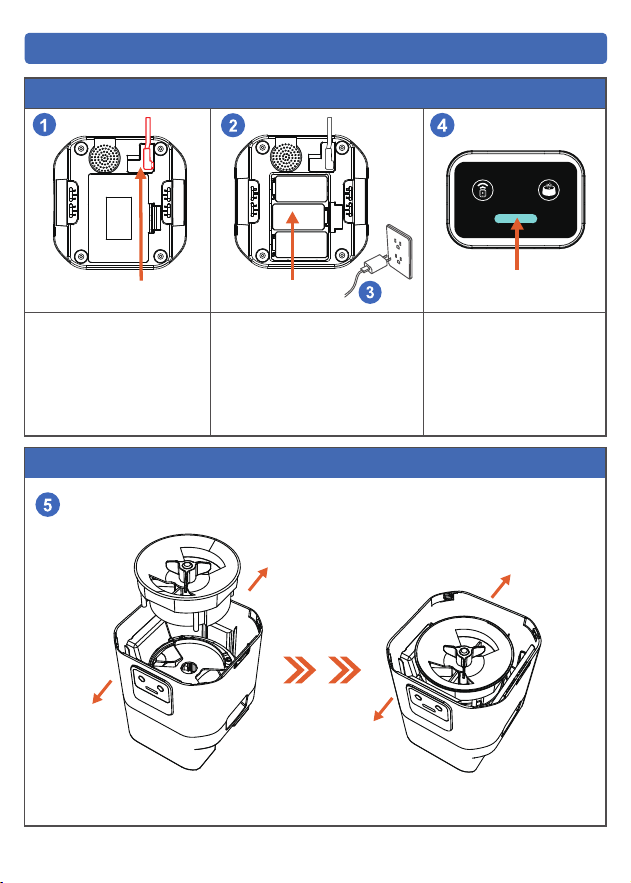
Step2 Meal Splitter Installation
- 06 -
Assembled Products
Step 1 Connecting Power
Indicator
Power Cable
Plug the 5V power
adapter into the bottom
of the feeder.
Install 3× D Cell Batteries in
the bottom of the feeder in
case of power outages in the
home.
Plug in the home power
supply.
When the indicator is
blinking blue, it means
waiting for network
connection.
Battery
●
●
●
●
BACK
BACK
FRONT
FRONT
- 07 -
Step 4 Feeder Base Installation
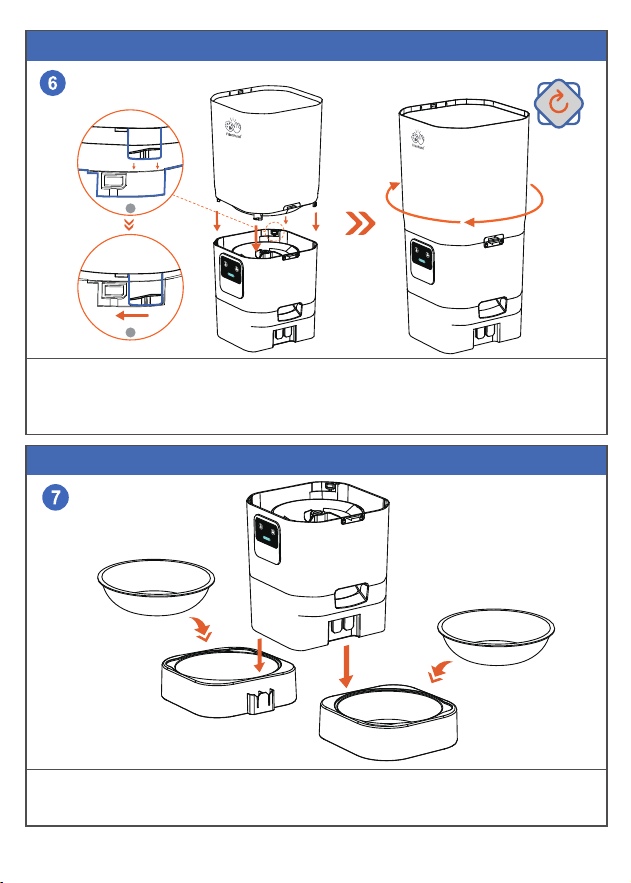
Step 3 Food Tank Installation
Place the stainless steel bowl into the bowl tray.
Insert the bowl tray into the feeder base.
Install as shown.
The opening in the bottom of the food tank should match the opening in the base of
the feeder, then turn clockwise to lock.
1
2
●
●
●
●
- 08 -
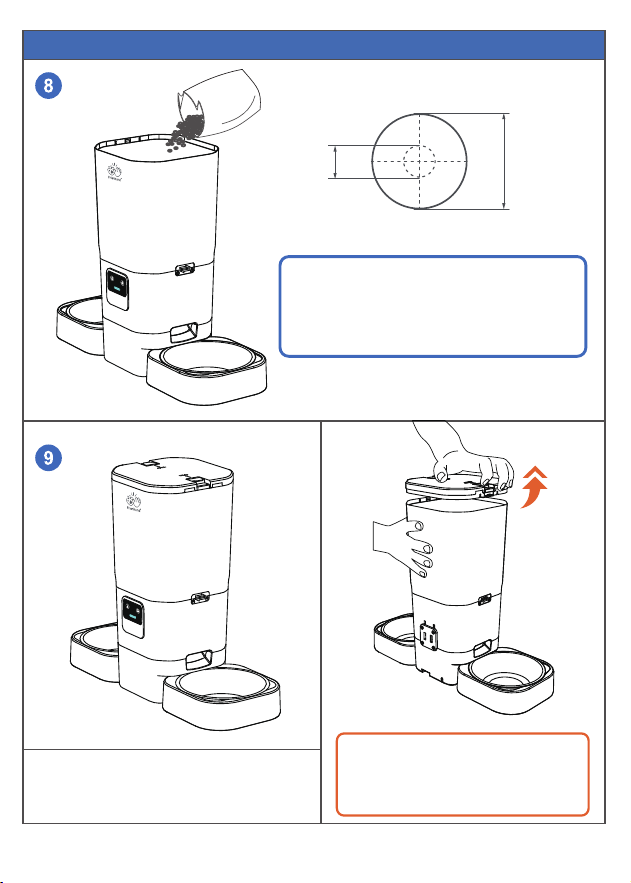
Step 5 Add Food
Close the lid
Tips:
Please refer to the picture to open the
feeder lid.
▲Note:
1. Please pour in dry food, not wet food or
canned food.
2. Recommended food size: 5-15mm
(0.19-0.59in)
!
5mm 15mm
●
- 09-
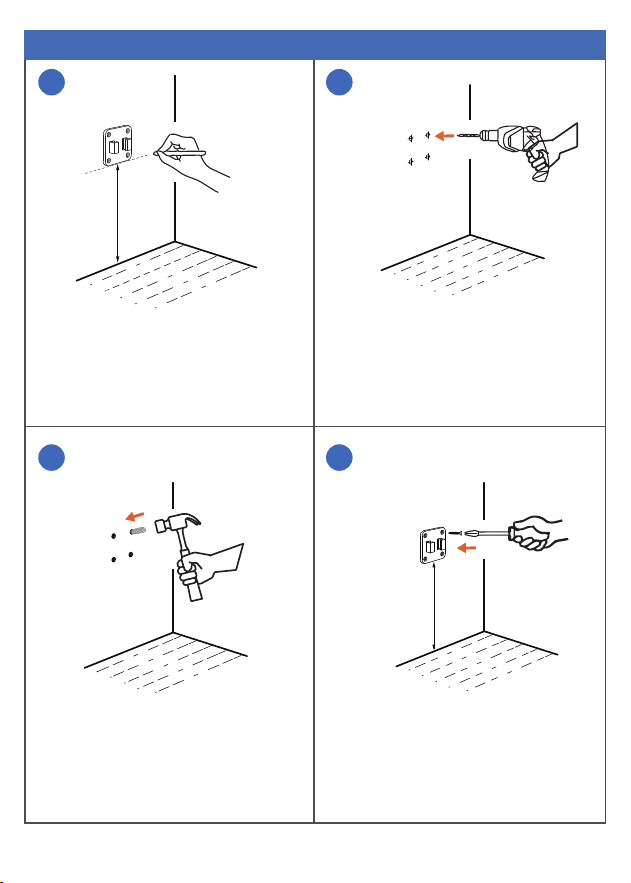
Place the wall hook on the wall and
mark the holes using a pen.
Note: The wall hook must be kept
8-9.5cm (3.15-3.75in) away from the
floor.
Use a hammer to tap the plastic wall
anchors plug into the hole ,flush with
the wall.
Tighten screws to secure wall hook.
Use an impact drill to drill the holes
1 2
3
4
Step 6 Wall Hook Installation
8-9.5cm
8-9.5cm
Note:Use a 1/4 ″(6mm) diameter drill bit.
●
●
● ●
- 10 -
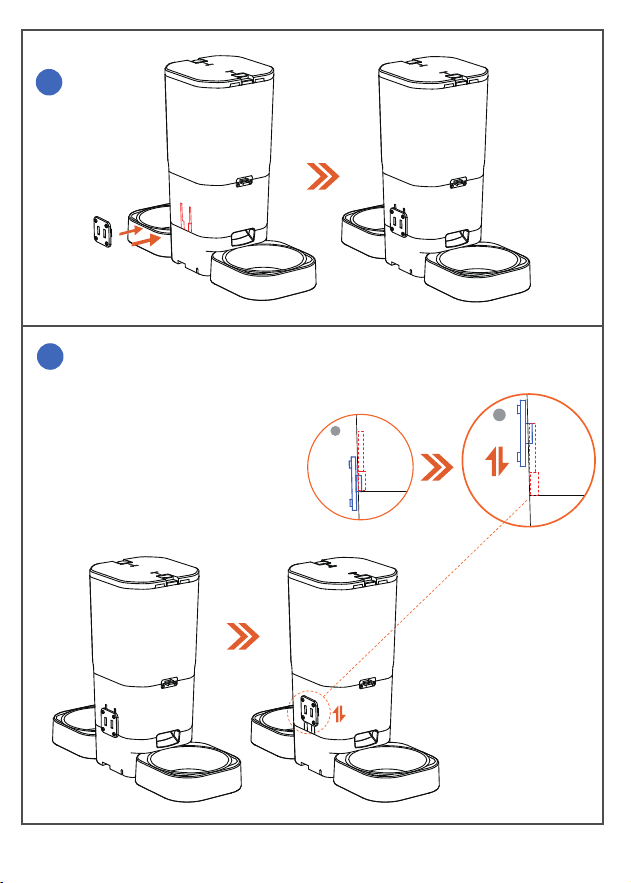
Align the holes on the back of the feeder
with the hooks on the wall hook and
slide down.
Installation completed.
5
6
1
2
●
●
- 11 -
Battery power is only for emergency use in case of power failure,
please ensure dual power supply for normal use.
Make sure the feeder and home WiFi are connected, the distance
between the two should not be too far apart. Within 6m(19.7ft),
depending on router coverage area.
Note:
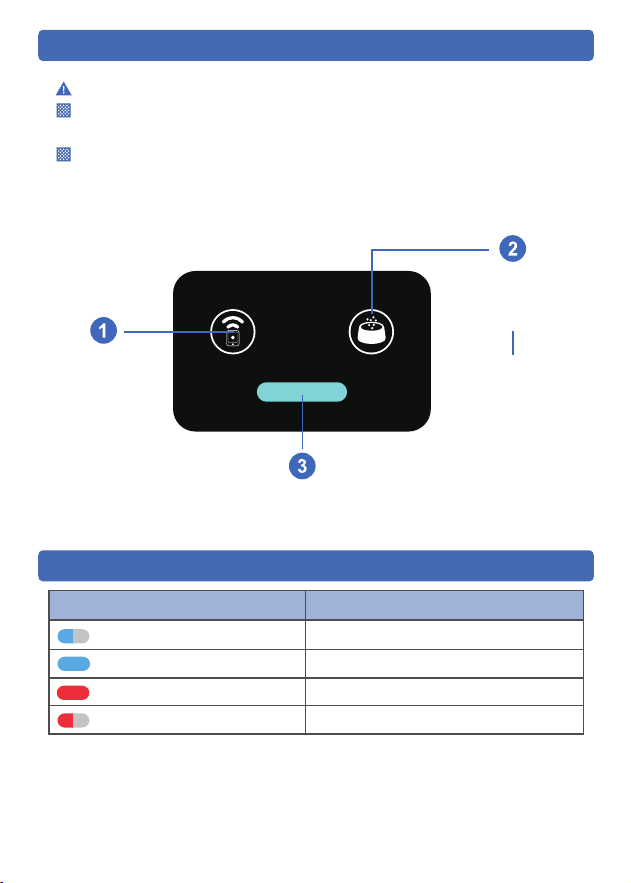
Buttons Explained
Blue Light Flashing
Blue Light Always On
Red Light Always On
Waiting for WiFi Connection
WiFi Connected
Enough Battery (Battery Powered Only)
Red Light Flashing
StatusColor of Light
Low Battery (Battery Powered Only)
Indicator Light Description
Indicator Light
Short Press
For manual feeding,
and one press put
out one portion of food.
Long Press
For manual feeding,
Long press to keep food
coming out.
Long press to
reset the Wi-Fi
- 12 -
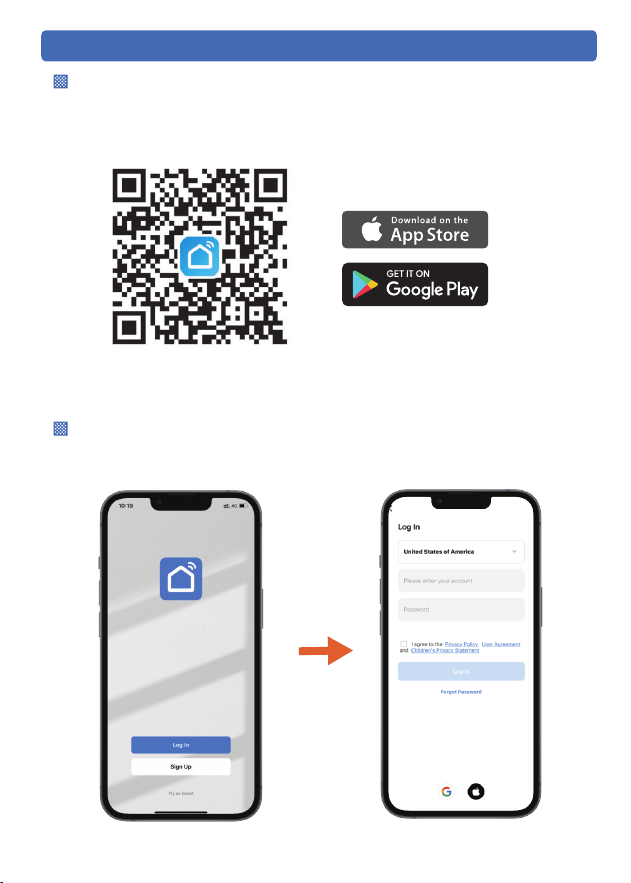
Smart Life
Install the APP and Log In
After opening the app, if you don't have an account, please register one.
If you have already, please log in directly.
Scan the QR code or search in your device's app store to download and
install the Smart Life app.
Sign up and log in
App Installation
- 13 -
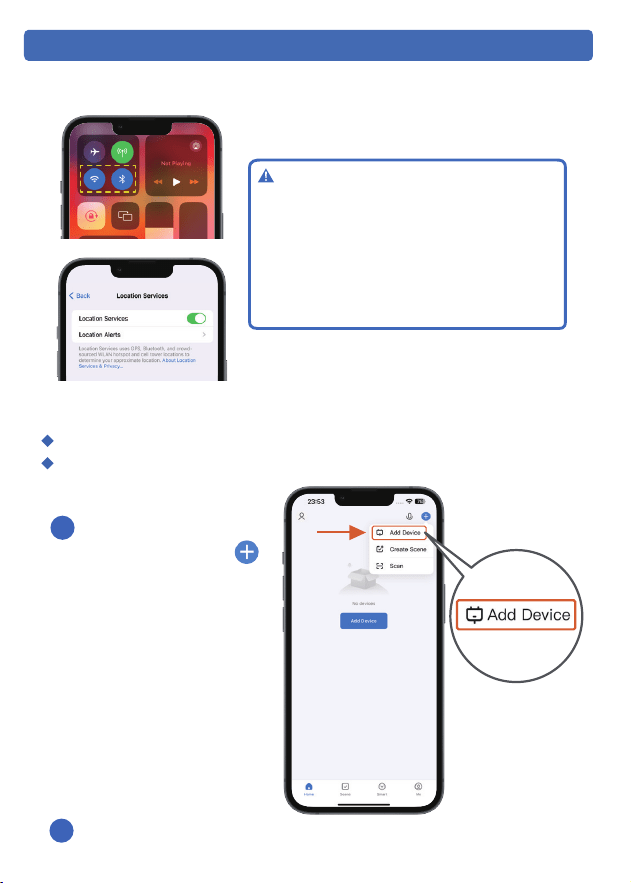
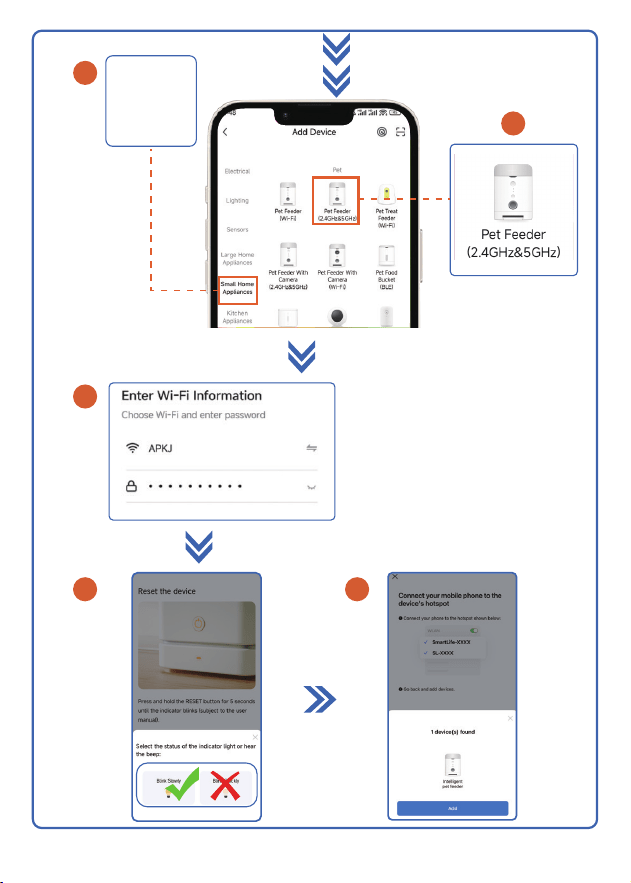
Add Feeder to APP
Step 1:Turn on phone permissions.
Step 2:The feeder is ready to connect to the network
Turn on the power to the feeder.
Make sure the indicator light on the feeder is flashing blue.
Please follow the app prompts to operate.
1
2
Please open the Smart
Life APP → Tap the [ ]
in the upper right corner
to add the device.
1. Before adding the device to the APP,
please make sure the indicator light on
the feeder is blinking blue, as well as the
Bluetooth, WLAN, and GPS in your phone
are on.
2. Network connection is only possible
when plugged in.
Note:
- 14 -
3
1
2
1
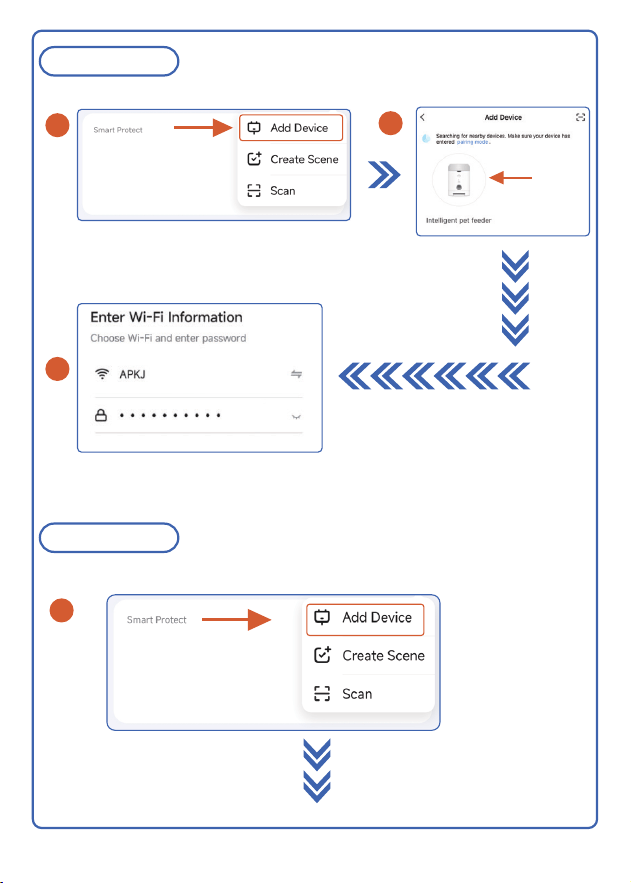
Method 2
Wi-Fi Mode Connection
Method 1
Bluetooth Connection
Click
- 15 -
6
4
5
Small Home
Appliances
3
2
- 16 -
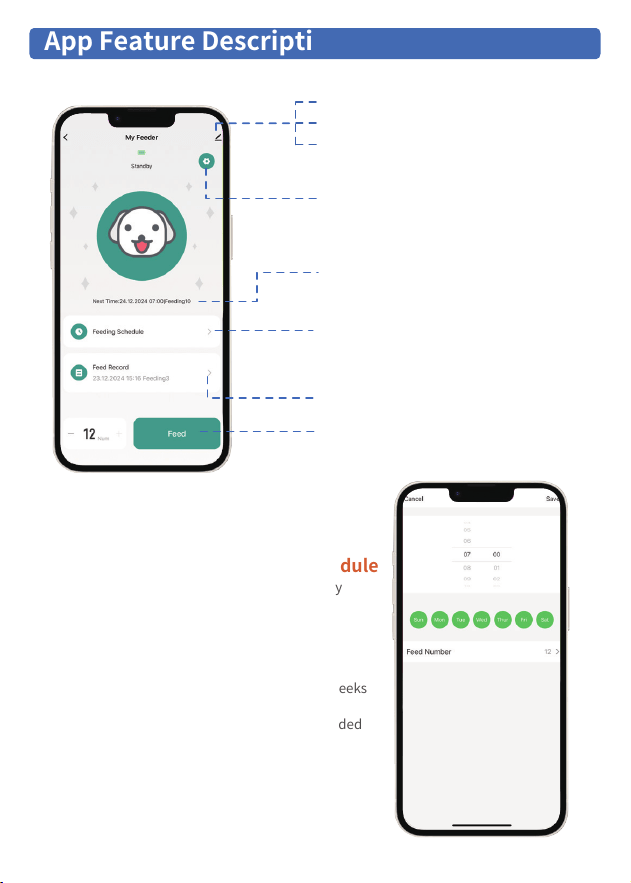
Feeding Settings: You can continuously set a daily
feeding schedule for your pet.
The pet feeder will operate for no more than 4 weeks
on battery power alone.
To ensure continuous operation, it is recommended
to use a dual power supply.
Setting Up A Regular Feeding Schedule
Note:
Share Device
Tap-to-Run and Automation
Third-party Control(Support Alexa)
1.Settings:
App Feature Descriptions
4.Feeding Schedule:
Daily feeding schedule can be set up for
up to 30 meals.
(When setting, be sure to select the date)
3.Feeding Reminders:
The next feeding schedule.
2.Slow Feed:
When the Slow Feed function is turned on,
1 portion of food will be dispensed every
1 minute interval. (The Slow Feed function
is only active in the feeding schedule)
6.Manual Feeding:
Up to 12 portion per click
5.Feed Record:
Feeding history can be viewed
- 17 -
We recommend to clean the feeder regularly for the health of your pet.
The washable parts of the feeder are as follows: lid,food tank, meal splitter,
stainless steel feeding bowls, bowl trays.
Disassemble for Cleaning
FAQ
FAQ
Can't connect the feeder
to WiFi
Problem Solution
3)The WiFi network may be unstable; please attempt
to connect multiple times.
4)It is advisable to connect the device near the
router (ideally within 3 meters).
5) Consider switching to a 2.4G network connection.
6) Troubleshoot the router to see if it is working
properly (try rebooting the router)
1) Make sure Bluetooth, WLAN and GPS are turned
on on your phone when connecting. (Can be turned
off after successful connection)
2)Try connecting with other connections method.
7) Contact us through the contact form above and
we will address your questions until they are
resolved.
Do Not Wash
Washable Parts

- 18 -
The WiFi connection goes
off line frequently
1) Make sure the feeder has a good signal within
the WiFi coverage area.
2) Check that the power cord is stably connected.
FAQ
THANK YOU FOR TRUSTING AND CHOOSING Frienhund
If there is anything you would like to say to us
www.frienhund.comEmail: [email protected]
Tel: (1) 877-631-3655 (From Monday to Friday: 8 a.m.-5 p.m.)(PST)
Model : ACF190W
Manufacturer :
ShenZhen Aochen Technology Co., Ltd
Address :
Made in China
IC ID :
306, Zhida Industrial Park2, No. 4, Longping West Road,
Shengping Community, Longcheng Street, Longgang District,
Shenzhen, China
Email :
29365-S15
FCC ID :
2A4UI-ACF100W
Smart Pet Feeder with Two Bowls